
Leaderboard


.thumb.jpg.d17ff607fc7e89ed057e63fcb6f2a888.jpg)

Popular Content
Showing content with the highest reputation on 10/12/18 in all areas
-
Hi Everyone. Just taken some pic`s of my latest effort: Academy`s 1/48 F-4C Phantom kit, masquerading as a F-4D of the 432nd TFW whilst based at Udorn Thai AFB during the late 60`s early 70`s I originally intended to do it as a `D` with smart bombs and but then found out the subject I had markings for never carried them and was in fact....... .....for `Trapper` which had some fame as being the last MiG killer of the `Rolling Thunder` campaign in 1968.. After some deliberation I decided to give it an assymetrical bomb load which seems to have been fairly common at the time...... ....of 2 x CBU`s, 3 x Daisy Cutters and 6 x General Purpose bombs. Mostly from the box with just seat belts and rear view mirrors added, the `D` IR seeker was in the kit as was the ALQ-119 Jammer pod Hope you enjoy , thanks for looking, Cheers Russ35 points
-
One of the great things about Britmodeller is learning from and being inspired by other modellers’ work. Some time ago @Turbofan posted a wonderful BOAC Super VC-10 in RFI and that was the push I needed to do one of my own, despite knowing I could never match Ian’s standards! My model was actually completed several months ago but I didn’t post it at the time because I wasn’t happy with some aspects, particularly the finishing. Unlike Ian who sensibly painted his cheatlines and fin, I used Two Six Decals. The cheatlines proved to be thick and intransigent and the less said about the fin decals the better. In fairness to Ray these problems are not typical. It was an old sheet which had been in my stash for some time and I see he is now using BOA for his printing so hopefully more recent issues will be better. I was also unhappy with the over-scale pitots and some of the other smaller details so I didn’t really feel the model was up to RFI standards. In the early summer my wife decided we were going to redecorate our shared office-cum-hobbies-room which meant a massive (and much-needed) clear-out during which I found the remains of an old Two Six Models photo-etch fret intended for the Airfix VC10. There were a couple of pitots and some other small parts left. That prompted me to revisit G-ASGD and after a bit of smartening up here she finally is. The kit is, of course, by Roden. As I’ve mentioned, decals are by Two Six. I supplemented them with Authentic Airliners BAC1-11 cabin windows, another idea pinched from Turbofan, and BM member @Malair provided the excellent windscreen decal - thanks Martijn! Although finishing was a bit of an issue, building the kit itself was easy and straightforward. I have a second one laid aside for conversion to a Standard, again borrowing ideas from other Britmodellers. No timescale for that just now but hopefully it will appear in the next couple of years. Thanks for looking and as always constructive criticism is welcome. Dave G34 points
-
For a long time i have avoided Airfix kits, only building the odd one of there older ones. But i have ben gathering a collection of their new tooled kits ove rthe last couple of years and finally got round to building one. The Phantom was a really nice kit, there were a couple of fit issues which i think were self inflicted. The only really down side with the kit was the decals, mainly the stencils. The 250+ took me 6 days to apply. I added an Eduard Big Ed set, resin wheels and metal pitot tube. The tractor is from F4 models and the base from Coastal kits. Its not completly finished as i am awating the release of some RN deck figures including a tractor driver, from Air Graphics.27 points
-
This was my build for the Gumman GB and I used Airfix's relatively new tool 1/72 kit. It was a nice kit to build and I made it as the aircraft of Capt. Marion E. Carl, VMF-223, United States Marine Corps, Henderson Field, Guadalcanal, September 1942. I had originally thought of doing the model with it's wings folded but decided I'd prefer to display it in flight over water. I haven't modelled water before and I have an idea for a project next year which may include scenic water - so I took the opportunity to try out some ideas. I think it worked okay. I didn't have time to motorise this aircraft like I have done with some others so instead I used PE PropBlurs. Kit: 1/72 Airfix - A02070 Extras: PropBlurs Paints: Revell and Humbrol Acrylics all applied by brush Base: MDF and filler. Clear perspex rod. The WIP can be found here. Now some photos which include the base: Thank you to everyone who commented and offered support or advice in my build thread and thank you to @TEMPESTMK5 for hosting the GB. Kind regards, Stix21 points
-
My first helicopter, I did a lot of mistakes, but at the end i’m satisfied also because the kit is not the easiest on the market (thank to S&M for giving us a kit of this interesting subject) I used some etched, built new landing gear with Albion alloy tubes, open 2 doors and folded rotor blades Colours are from Gunze Sorry for the low quality of the photos21 points
-
Well, I didn't get the wing tips on, but I succeeded in just about everything else. I switched over to the proper radio altimeter aerials, added the deck landing alignment sight, dropped in the control column, attached the arresting hook, and loaded up four 60 lb. rockets. Oh, I popped in the tail pipe when no one was looking (keep it clean fellas): I think all that's left are the wing tips, and the sliding canopy. Perhaps an ejection handle or two for the bang seat... Cheers, Bill20 points
-
Here is my 213 Squadron Vampire based at RAF Deversoir, Egypt, in the early 50s. The kit turned out to be more difficult than I anticipated. It has few parts but on cleaning up and washing the components, I had to deal with a number of poorly formed areas and some air bubbles. I had one particular area on the port side under the cockpit which "delaminated" as I cleaned it. Eventually, I sanded way back to good solid resin and had to fill and reshape/re-engrave the whole area. I also had problems with the starboard boom which was bent and twisted - I spent a good hour with a bowl of hot water getting it straightened out. I have had few issues with other Alley Cat kits/conversions in the past. The kit was finished pretty much OOB once the parts were tidied up. Fit was difficult around the nose section. The only additions were pitot tubes/aerial from metal tubes and replacing the woeful white metal balance weights under the tail with scratch build items (Extruded styrene aerofoil plus milliput) Paints were Tamiya XF-83 for the Medium Sea Grey and a mix by eye based on XF-65 Field Grey for the Light Slate Grey. Underside was Xtracrylics PRU Blue. The decals were excellent. Cheers Malcolm19 points
-
A model I´ve been wanting to build for quite some time, Yeager´s last Mustang. This was my second Mustang, but my first one painted in an overall natural metal finish. It´s the Italeri rebox of the Hasegawa 1:48 P-51D. The model was first coated with white, and then the metallic colour was brushpainted over it, so it could have a nice grip on the surface. Many thanks to @stevehnz, @Giorgio N and Scott van Aken from Modeling Madness for their help regarding the Repliscale decals. They were an absolute joy to work with, being thin but not fragile, and sticking permanently once I pressed firmly over them with a kitchen roll. The only exception were the checkerboards, which were too big and had to be painted. I also had to add a spreader sprue just in front of the cockpit, otherwise there would be a gap between the wings and the fuselage.17 points
-
I seem to be on a theme of RAF jets lately and I've had this one in the stash for a couple of years so finally got round to building it. To be honest, it isn't one og my best builds - I think I've got the dark grey too dark. Its also a very old kit and it shows in the fit. I used the Eduard PE set for the GR1 and replaced the ejector seat with a resin Martin Baker Mk 9 from PJ Productions. The decals were from the Model Alliance Jaguar GR3 RAF Special Schemes 2005 Part 1.17 points
-
The Airco DH11, designed by the legendary Geoffrey de Havilland, was designed as a day bomber to replace the DH10 Amiens. Powered by a pair of ABC Dragonfly engines, the sole example H5891 first flew in January 1919. Although aerodynamically clean (for the period) and offering an excellent field of fire for the mud-upper gunner, some handling problems were encountered and the Dragonfly engines proved to be unreliable and underpowered. The fate of the Oxford was sealed, however, by timing: the end of the First World War had effectively removed the imperative to produce new day bomber types, leading to the cancellation of the planned second and third prototypes, and the DH11's demise. I started this model some time ago before putting it in a box 'to finish later'. When that later duly arrived, I decided to finish it alongside my Handley Page Hyderabad scratchbuild shown in the WiP section. It is mostly of plastic card construction, being a fairly simple box-section fuselage, but I used some bombs from the spares box (plus filler!) to form the basis of the Dragonfly engines: The finished article was hand-painted, though I admit the finish is a bit ropey, and the props were carved from cocktail sticks. Decals for the serial were found by scouring the depths of my spares folder, while the roundels came from the Miniscale MS-006 sheet. Rigging was a chore, and my first attempt in this scale and using this technique, which was to superglue individual lengths of straightened dental repair wire in the same way as stretched sprue would be used. Here goes: ...and one more for luck: Thanks for making it this far! Jon16 points
-
Long time wish come true: a 1/32 Dutch F-86K, 702 Squadron, sixties.15 points
-
Hello everyone I will welcome you with the b-2 bomber model. A gluing, or rather a sculpturing, took me half a year. At the time when I stuck it, it was the only 1/72 scale model on the market. Tests are not impressive with quality, it is a model from the "gniot" series. The patches date 1991, convex lines, wyppaczane items, there are many shrinkage pits, you need to improve a lot and even more earn. I collected probably the majority of photos, videos and reports from the model building available on the Internet. Unfortunately, very few photos of B-2 details are still available today. For the construction I used Eduard's plaques and airesa armchairs, the only elements available on the market for this model, and still are not perfect. Cockpit, bomb chamber, chassis recesses, engines, leaning rudders and many other things done from scratch, engraved lines. I have not used so much putty in my life, even on Mach 2 models. Model painted mr. Color C (FS36118), H. The presentation of this copy (21066) took place on November 22, 1988 at the Palmdale Air Force Base, California. The first flight took place on July 17, 1989 from the Palmdale base to the Edwards base. greetings ,,,,,12 points
-
I was wanting to try some 3D weathering and opted to try Vallejo's Chipping Medium as the method. The subject is a 1/48 scale 1967 tool P47 Razorback from Revell. Although, this build was really just something of a 'test-bed' for my weathering self-tuition. I liked the end result and thought I'd share it with the forum.11 points
-
Thanks Chris, there's been a few contributions to the swear box recently but they're not looking too bad now. The soldering is pretty much complete now so the next step is adding the detail in plastic11 points
-
Hello Everybody, one day I saw a picture of probably the most beautiful plane in the history of aviation - XB-70 Valkyrie. It was "in flight" with wings folded: That moment I decide I must build one in exactly same position - in flight with wings-fold. So here it is: At the beginnig I planned clean plane as for experimental one then I saw picutres that showed it used to be really tired at a time: So this is my final build. The kit is infamous 1/72 Italeri kit (ERTL one before). This is truly a horrible kit, with few really huge parts extremely difficult to snap together, lots of sanding etc... So it was like 2 months battle, few times I nearly gave up but finally we have a draw: The kit is reallllllly big - here with 48 Spit: Here with other 72ers (Revells Transal and Blohm&Voss): And here with my 48ers - it is really dominating the whole pack:10 points
-
My eighth Meteor build since I restarted modelling in January is a conversion: the MPM F.8 combined with the Alley Cat resin conversion for a U.16 or U.21. This has been my first resin conversion and was most impressed with the quality of Alley Cat's product. When it came to the decals, they were superb, very detailed, thin but not fragile and adhered well. This is a comparatively simple conversion, requiring replacement of the nose and wingtips, neither a 'biggie'. I went for a model of WK800, now in the Old Sarum collection and famously long-lived as the last U.16 to fly. I could';t resist adding the lumps and bumps applied to the airframe in 1988 for the Radar Vector Miss Distance Indicator Trials. I think the domes are slightly overscale but I wasn't going to argue. The paint job was pretty straightforward except for the demarcation between the two colours ahead of the cockpit. I think the yellow goes too low and the shape of the taper there won't clinch me the IPMS Nationals. One thing I have omitted (yet) are a set of metal tubes to form the jet pipes. Here we go: Kind regards, Neil10 points
-
This is my second yearbook and what a year it has been. I've shrunk my efforts to 1/72 or 1/76 this year and worked towards a mad idea that @Lawzer put into my head for a Pontoon Bridge diorama. Anyway - here we go - it's a bit of a 'journey'... Firefly WIP - https://www.britmodeller.com/forums/index.php?/topic/235029754-help-me-build-a-sherman-completed/ Firefly RFI - https://www.britmodeller.com/forums/index.php?/topic/235032590-hey-you-helped-me-build-a-sherman-firefly/ Loyd & Gun WIP - https://www.britmodeller.com/forums/index.php?/topic/235031294-british-6pdr-anti-tank-gun-and-loyd-carrier-completed/ Loyd & Gun RFI - https://www.britmodeller.com/forums/index.php?/topic/235032589-anti-tank-gun-with-crew-and-carrier/ Cromwells WIP - https://www.britmodeller.com/forums/index.php?/topic/235032983-oliver’s-army…-a-trio-of-cromwell-ivs-completed/ Cromwells RFI - https://www.britmodeller.com/forums/index.php?/topic/235037834-armoured-recce-squadron-cromwells-on-the-prowl/ Jeeps WIP - https://www.britmodeller.com/forums/index.php?/topic/235037473-airfix-vs-italeri-jeeps-completed/ Jeeps RFI - https://www.britmodeller.com/forums/index.php?/topic/235038978-various-jeeps-of-the-11th-armoured-division/ Carriers WIP - https://www.britmodeller.com/forums/index.php?/topic/235036099-carry-on-bully-completed/ Carriers RFI - https://www.britmodeller.com/forums/index.php?/topic/235037820-universal-carriers-of-the-black-bull/ Church WIP - https://www.britmodeller.com/forums/index.php?/topic/235038732-hooo-village-church-completed/ Church RFI - https://www.britmodeller.com/forums/index.php?/topic/235043161-airfix-village-church/ Windmill WIP - https://www.britmodeller.com/forums/index.php?/topic/235038735-hooo-windmill-completed/ Windmill RFI - https://www.britmodeller.com/forums/index.php?/topic/235043170-airfix-windmill/ ...this was the only departure from 'small scale' and was actually an old 1/24 that was only fit for the bin - so I turned it into a 'sculpture'... Spitfire WIP - https://www.britmodeller.com/forums/index.php?/topic/235039978-airfix-bronze-spitfire-completed/ K2 & K6 WIP - https://www.britmodeller.com/forums/index.php?/topic/235038737-176-raf-emergency-set-completed/ K2 RFI - https://www.britmodeller.com/forums/index.php?/topic/235043194-british-k2-ambulances-11th-armoured-division/ K6 RFI - https://www.britmodeller.com/forums/index.php?/topic/235043195-british-k6-lorries-11th-armoured-division/ Command Tank WIP - https://www.britmodeller.com/forums/index.php?/topic/235043409-176-sherman-mki-tank-completed/ Command Tank RFI - https://www.britmodeller.com/forums/index.php?/topic/235044498-sherman-command-tank/ Pontoon WIP - https://www.britmodeller.com/forums/index.php?/topic/235038729-172-pontoon-bridge-completed/ Pontoon RFI - https://www.britmodeller.com/forums/index.php?/topic/235043184-airfix-pontoon-bridge/ So there you go - I hope you found something to like - I certainly had a lot of fun along the way. Merry Christmas - to one & all - Steve9 points
-
Greetings all, It's been a long time I posted in RFI, but here for your delectation is Special Hobby's tremendous Tempest V, the original HiTech boxing augmented with their resin Napier Sabre, which truly deserves the accolade 'a model in itself'. I think it might actually have more pieces than the airframe. WIP is here; and without further ado, the pictures. Next year's project is also 1/32, features several Merlin engines and is over a metre wide. Hurry up, postie! Mike9 points
-
OK, Korean war aircraft fans- check out these color photos! Very nice 8th FBG and 51st FIW photos, too. Some very nice modeling possibilities in this bunch. I hope you enjoy them. Mike http://www.axis-and-allies-paintworks.com/e107_plugins/forum/forum_viewtopic.php?3549 points
-
Bob, Ben, Kirk - serious Trekkies required! I have to say the opening shots from the original movie - you know, where the rebel ship is being chased and then the Destroyer FILLS THE SCREEN - is still one of my favourite opening sequences. You know, this bit: Ah, Austin Reed, sadly missed. The only shop where a Gentleman could obtain suitable garb on a sensible budget. I remember the assistant there suggesting I buy larger waisted trouser and braces (suspenders for our US friends) "to allow for a good lunch". One reason for the diet is to ensure I don't need a new wardrobe. Horrible thought. Thanks hendie Eat a star ship? I AM ON A DIET, for goodness sake. How many 'Syns' is one of them then? As for not de-railing the thread… oh hardy har har! Carry on though, it's more fun than the flipping intakes. Ah, but are they? Not the Lorne ones... I'm getting a grip on this: In one of my "Oh, get on with it for goodness sake" moods I've shaped the lights and stuck in the first bit of strip for the vent thingy: I've also squidged some filler inside the intake joins that will need sanding when dry. Looks 'orrible, but I'm hoping that, as it's one of perdu's kits, all the mess will turn, magically, into a perfect representation of a Nimrod's intake area. Don't hold your breath…9 points
-
Hello Here is my last build with this 1/72 Airfix North American B-25C from 83rd Bomb Squadron / 12th Bomber Group U.S. Army Air Force in 1942 somewhere in the North African desert area. Decals came from Xtradecal. Soon to be published in Tamiya Magazine French Edition. Patrick9 points
-
Hi, A small blast from the past. The model represents JB-2 Loon, #902 belonging to the newly formed USAF, Alamogordo proving grounds (later Holloman AFB), New Mexico ca. 1948. The launcher with RATO bottles, front propeller, finer surface details and engine pipe plus its front support were scratch built. The wing was also repositioned - moved to the rear a little bit. It was my first approach to the glossy white paint (Gunze Sangyo C series) and it is a bit overdone. The panel lines (in fact welds) on the engine were drawn with very sharp pencil on matt Olive Drab paint and then the whole thing was weathered with artistic oils. First, a photo of the original airframe: Source: The Internet A few shots from production hall... ... and the final result: Enjoy! Marek8 points
-
Hi all Finalized another Italian fighter. Saeta from Hobby Boss, with some corrections- added instruments in cockpit (again not visible), scratch build of cooler under the nose and gear covers which are missing in this mold, guns made from hyper-hypodermic needles, wheel bay holloved with dremell ad added some details, and at the end i use little reworked propeller from revell Saeta as this is decal version for some rare Mc200 with spinner. Colors Italeri, camouflage done with Gunze marker (thanks you Fuad for the idea), wash artistic oils......and and the end pictures. I hope you will like them. Best regards And family picture:8 points
-
Hi, everybody! It's my next model.8 points
-
Hallo again The EF-111 is the 1/48 kit from HB. I used the etched parts from Eduard and I think this was all. The a/c is for me interesting in the navigation aids, as terrain following and stellar navigation. The kit is not so difficult; the aerodynamic of the open wing was for me the most exiting feature. Happy modelling7 points
-
7 points
-
Thanks Tony, see below for the fix Oramask really is top stuff, glad it suites you properly too Here's WE progress report: paint lift off fixed and all masked for the insignias and blue-white-red stripes I first airbrushed a coat of Mission Models Insignia White, slightly thinned with water (80% paint, 20% water, roughly) Then masked for the blue I then airbrushed Lifecolor Mat French Blue, thinned with IPA Some paint leaks, as you can see, and some rough edges on the tail fin Here's another good thing about Mission Model paints: I touched up the paint leaks with undiluted paint by brush, and it self levels beautifully. Virtually impossible to see the fixing I decided I'll take care of the rough edges once I'm done with the red parts. For the moment it's all been Future coated and curing Comments welcome, as ever Ciao7 points
-
Hiya fellas! I've gotten a new phone now, replacing my old Samsung Note 8 with Google's new Pixel 3XL -- that probably means little to most, but the Pixel's camera is supposedly the best available on a cell phone, and as I use mine for work quite a bit (and get to go to Las Vegas at the end of January to cover our Midyear Meeting, which should be nice, as it will be warm, which it definitely isn't here) I made the switch. It's pretty impressive -- a lot of what it can do is not because of the camera itself, but because of the awesome power of Google's photo processing algorithms under the hood. My home is a challenging environment for taking photos, because Mrs P's eyes are sensitive to light (a real problem, because I have zero night vision and struggle to see anything in low light conditions) and the things I mostly photograph, my children, are incredibly erratic in their movements. The camera did a good job of catching Grant doing his favourite thing: consuming: We also went to a mall today with the children (Mrs P's idea: an hour at the mall with two toddlers is equal to twenty years in prison in terms of how the passage of time affects one), and Winnie discovered the Lego store. It's a dangerous place to walk into with a credit card, let me tell you. Mercifully we left without the $800, 15 kilogram Millennium Falcon kit. Anyway, tonight I masked the white ID markings on the 109E and sprayed Colourcoats RLM65 over, and it went on exceptionally nicely.7 points
-
She's the clipped wing version, intended to outperform those pesky Fw 190s in low level combat. Cheers, Bill7 points
-
Here's my latest auto build. Aoshima's nice little Huracan in pearl white. No real problems as the fit is generally good. The only tricky area is the back bumper assembly which needs a bit of care to fit.6 points
-
Yea I know it seem's my mush is forever in the RFI section looking back to January all in all it's been a quiet year finishing wise, mind Ten build's in the Matchbox GB did kinda plastic me out,that said an almost exclusive move to 1/48 aircraft slowed thing's down,anyway here we go starting February............................... Frog Beaufighter, Tamiya Sherman for the STGB. Revell 1/144 Seahawk. Revell Ford Torino.I think you may know who's. Tamiya's Walker Buldog 1/35. Tamiya Churchill 1/35. Tamiya Meteor and Spitfire Vb for the RAF 100 GB. Airfix Sea Hurricane I/48. Pegasus Hobbies Hurricane 1/48. Airfix new tool Hienkel 111 1/72. Vista 1/72 Fulmar. Hasegawa 1/48 Hurricane. Hobbyboss 1/48 Thunderbolt. Airfix 1/72 Me110 Airfix P-40 112 Sqn,RAF. Hasegawa Hurricane MKii 1/48. Italeri F100D sabre and Hobbyboss F86 Sabre for the NATO v Warpac GB. Strip and re-paint of Airfix's Hurricane after a poor first build of the kit a few year's ago. Tamiya Spitfire and 109 for a BoB tribute. And the latest two for the Grumman GB,Eduard Hellcat and Tamiya Wildcat Revell/Special Hobby Spitfire Vc. That's it folk's,thank's for the support and comment's over the last year and all the best for next,I should get the Grumman panther and the Centurion done this week and the 1/32 Revell Mustang and Trumpeter P-40 are really close to completion so maybe a few more will make the year end date.6 points
-
Hi, Within the STGB devoted to B-17, after pernission from other colluegues I constructed a passanger modification of B-17, the Boeing 307 in his appareance as C-75, after beeing impossed to Army. The construction thread is here You may found there some challenges and problems which one can meet on construcing this model. BYT - this is a kit made by Russian Maquette company in which a late war or post war variant of Model 307/C-75 is presented. In fact this is a ex-Frog B-17E with new fuselage and few more new parts. The Boeing Model 307 was produced in short series of 10 machines for PAN-Am and TWA companies. One machine was bought by Howard Hughes. The five TWA machines were impssed to army keeping their individual names from times of being in TWA, they werenames of Indian tribes: Apache, Cheeroke, Comanche, Navajo and Zuni . The machines were few times strongly modified, so I did it in configuration of 1941-43 (markings for 1942). She has different tailplane than in box and oil coolers as well as air intaked above engines comparing to late war variant from box. The "307"s as C-75 played the role of VIP transport mainly. I did "Navajo" (c/n 2001, 42-88627). From Feb 1942 she was ued on route: Washington DC to Cairo via Natal (Brasil). Later the Noth Atlantic route to Englan. The VIPs transported were people like Eisenhower, Clark, Vandenberg, Towers.... Machine was returned to TWA in July 1944 The names of Indian tribes were inharited from TWA. Here she is: Comments welcome Regards J-W ,6 points
-
Airfix P51D new tool kit built OOB to go with my previous P51 build - Drop tanks in this kit do not have the characteristic seam line so the were made from 0.3mm Plastruct square rod. - One tank corrected so both have the filling point on the left. - 0.3mm round rod used as the actuator in the radiator cooling duct. - Tamiya tape harness. - Arial in the kit was so badly moulded it was replace with one made with plastic strip. - Upper engine access panel centre line was scribed with its screws marked in. - Painted in Humbrol enamel with the paint numbers given by the kit except Alclad 106 White aluminium used for the NMF with the shade altered on some panels by mixing it with gloss black enamel. - Flap retraction areas were finished using chrome baremetal foil. - Underwing lights made by adding a little CA into the recess allowing it to set in a concave shape. aluminium foil was then glued into the recess and finished with blob of appropriate Tamiya clear colour. - Decals applied with MicroSol & MicroSet. - Flory Black & grime Washes. - Model was given a coat of Humbrol Gloss Cote prior to decals, washes and oil dot weathering then matted with Humbrol Matt Cote. - Jeep is from the Academy P51 kit enjoy Thanks for looking.6 points
-
Hello, dear friends and colleagues! Let me present my yet another model Blackburn Shark Mk.II by Eastern Express. This kit is the repack of the "old school" Frog model. The kit offers wide choice of varieties – with floats, on wheeled chassis, with folded wing or in-flight configuration – and leaves you rather pleasantly impressed. For its time the model seems quite respectable and can be transformed into a perfect replica if you give it a certain effort. As far as I know, this model of Shark aircraft hasn’t got any alternatives nowadays. The main drawbacks are the following: horrible engine which you must change undoubtedly, empty cockpit (though this feature is characteristic for all models of that time) and wrong number of ribs on the wings which can be seen while imitating the sagging of canvas. I managed to deal with the first two problems but the last one was resolved only partially – I didn’t have neither energy nor desire to remake the whole wing. The model has been made out of the box and materials at hand such as plastic sheets, wire of different gauge, fishing line, cotton buds tubes, hand-made sprues. From aftermarket I used only the Вrengun sight for the tail gun. The model was totally rejointed, riveted, remade the engine, added a cockpit interior, detailed the wings and fuselage. Cross-bracings and aerials are made of fishing line, guns – of wire and a drawn cotton buds tube, navigation lights – of drawn colourful party picks. All in all, the building produced positive impression and turned out to be useful experience for me. Colouring – enamel and acrylic paints Revell, Humbrol and Tamiya, lacquers Tamiya. I tried to highlight the sagging of canvas with paints and some graphite chips, so part of ribs and primary wing structures are merely hand-drawn. Accentuation of jointing – Tamiya panel line wash, oil paints. Toning – oil and water-color pencils. So, nothing out of the ordinary. Decals from the kit turned out to be of very high quality in spite of their age. I liked working with them, they are thin, very good to attach and don’t flake while masking. The result is the torpedo bomber 820 Naval Squadron K8471/652 from HMS Courageous air group as in 1937. Pleasant viewing! Thanks for watching!5 points
-
Didn't realize quite what a fruitful year it had been, until I started to gather it all together. A few 'gems'; much that is slothfully-mediocre; and a few real howlers. But great fun, all. (And the stash would be getting smaller and smaller...if I didn't keep adding back to it, at the 'other' end!) Season's greetings, and enjoy! 'Round the far turn...and headed for home. And into the home stretch.... Hope 2018 wasn't bad, and that 2019 is even better!5 points
-
Italeri 1/72 Waco CG-4A Hadrian Glider (118) Tamiya 1/35 German 2nd Lieutenant (n/k) Matchbox 1/72 BAC Lightning T55 (PK-126) Parkside Dundas OO Rudd Ballast Wagon (PC70) Revell 1/25 '69 Corvette Coupe (07192) Italeri 1/72 Douglas RB-66-B Destroyer (149) Airfix 1/76 Crusader II (02310) Airfix 54mm British Grenadier 1776 (01556-1) Airfix 54mm Coldstream Guard 1815 (01551-6) Airfix 54mm 42nd Highlander (Black Watch) 1815 (01552-9) Airfix 54mm French Grenadier (01553-2) Airfix 54mm French Line Infantryman 1815 (01557-4) Pioneer 2 1/72 Horten Ho-229A-1 (4005) Airfix 1/600 Deutschland (04211 conversion) Airfix 1/600 Graf Spee (04211) Airfix 1/32 Triumph TR4a (02419) Zvezda 1/35 6pdr Anti-Tank Gun (35018) Tamiya 1/35 British Universal Carrier Mk.II (35249) Esci 1/35 British Camp Rest Area (5012) MiniArt 1/35 British Tank Crew (35078) MiniArt 1/35 British Armoured Car Crew (35068) El Ferdan diorama Airfix 1/72 Hannover CLIIIA (01050) Trumpeter 1/72 BAC Lightning F.6 (01654) Airfix 1/72 Bristol Bulldog (61055) converted to TM Airfix 1/72 Bristol F.2B Fighter (61005-0) Airfix 1/72 de Havilland Tiger Moth (01015) Hasegawa 1/72 Armoured Car Daimler Mk.II (31124) HäT 1/32 Württemberg Infantry (Command) (9307) Otaki 1/600 Yamato (OT1- 28-1000) Airfix 1/32(?) Maudsley Paddle Steamer Engine (A08870) Novo 1/72 Fairey Delta Research Aircraft F.D.2 (F333) Revell 1/72 Handley Page Victor (04326) converted from K2 to B2 using Freightdog resin Airfix 1/72 Handley Page O/400 (9 06007) Airfix 54mm French Grenadier 1815 (01553) as a French Pioneer of the 94th Regiment of Line Infantry, 1807. Airfix 1/48 Battle Of Britain - Ready For Battle (A50172) Airfix 1/72 Henschel Hs123A-1 (02051) Polar Lights 1/32 1966 Batmobile (821) Airfix 1/12 Lifeguard Trumpeter (02506-9) Esci 1/72 7th (Queen's Own) Light Dragoons (Hussars) (230) Italeri 1/72 Napoleonic Wars Accessories (6017) Airfix 1/72 BAC TSR.2 (07004) HäT 1/72 French Light Infantry (8042) Two sets of A Call To Arms 1/72 French Infantry 1815 (Set 58) Airfix 1/72 English Electric Lightning F.2A (A04054) Airfix HO/OO Waterloo French Infantry (01744) Waterloo1815 1/72 French Line Voltigeurs at Waterloo (AP062) Frog 1/72 Republic P-47D Thunderbolt (F232) Academy 1/72 Republic P-47D Thunderbolt 'Razorback' (2175) Italeri 1/72 French Infantry (6066) Airfix 1/72 BAe Harrier GR.7A/GR9A (A04050) Airfix 1/76 WW1 French Infantry (A01728) Airfix 1/72 North American P-51D Mustang (A55107) HäT 1/72 Napoleonic French Fusiliers (8041) Waterloo1815 1/72 French Line Infantry Fusiliers Marching (AP061) Two sets of these Italeri 1/72 British & Prussian Allied General Staff (6065) Airfix 1/144 de Havilland Comet 4b (A04176) Italeri 1/72 French Line Infantry 'Les Blues' (6002) Esci 1/72 'Scots Greys' British Cavalry (217) Italeri 1/72 Napoleonic Scots Greys (6001) Esci 1/72 Napoleonic French Guard Infantry (214) Dapol 00 2-6-0 Mogul (C59) Italeri 1/72 British Infantry 1815 (6095) Revell 1/72 Napoleonic British Line Infantry (02571) Odemars 1/72 Wellington's Staff (PF-14) Emhar 1/72 British Infantry Peninsular War 1807-14 (7214) HäT 1/72 Prussian Infantry Command (8255) Revell 1/72 Prussian Infantry (02580) HäT 1/72 Prussian Reserve Infantry (8052) HäT 1/72 Prussian Jäger and Volunteer Jäger (8053) Esci 1/72 Napoleonic French Guard Infantry (214) Academy 1/72 Consolidated B-24H Liberator (2163 conversion) HäT 1/72 French Middle Guard: Fusilier Grenadiers (8167) Airfix HO/00 Waterloo British Infantry (01745) Airfix 1/72 Lockheed-Republic F-800 Shooting Streak (02043 conversion) Airfix 1/72 Lockheed-Republic F-804 Thunder Streak (03022 conversion)5 points
-
Hallo again The Mitsubishi F-1 in 1/48 from Hasegawa was the basic for this model. The model is equipped with training weapons. The colorful air-ship rocket is the eye catcher. Since much of the F-1 fleet is stationed in the very north at Hokkaido, the surrounding is very different from central Japan. Here we are at the same northern position as Vladivostok i.e. Sapporo. The northern part is very close to Sakhalin and the eastern part faces the Kuril Islands. This F-1 are always in close contact with the Russian air force. Happy modelling5 points
-
Funnily enough, Mrs Martian said something very similar about me only the other day! Martian 👽5 points
-
Highly disappointed you failed to uniformly spread a black wash in each panel like and then failed to spray a lighter tone of the camo paint in the center of each panel. You've completely missed the patchwork quilt look required of today's modeling and rendered a faithfully realistically weathered war machine. Please go back and study on how to obtain the patchwork quilt look so your effort will reflect today's aesthetic. Thanks. 😁5 points
-
All Legos are for me, really.5 points
-
I think this is what I wanted to achieve - some discolourations and tonal variations of the Olive Drab (XF-62 used). Now, will come detail painting, adding some straps on the tools and ammo boxes, clear coat and decals. And then... all the fun with bringing it back to life.5 points
-
Thank you Giorgio - you can see the finished result with the base below. Hi Glynn and thank you - you are too kind. And that's great news about you taking part in the Pz.IV STGB. I have added you the the participants list here. Thank you very much Patrice. Thank you very much Craig - you are most kind. Well I have now managed to get the Wildcat finished. First off the filler 'sea' on the base was painted and then given a couple of coats of Pledge: Then I got the Perspex clear rod bent to shape, fitted in the base and Wildcat and this was the result: More photos can be found here. The Gallery photos can be found here. Thank you to everyone who took the time to comment in this thread offering support and advice and to @TEMPESTMK5 for hosting this excellent GB. Kind regards, Stix5 points
-
Yes indeed, and if I had bothered to look at the cutaway drawing that I have of the Attacker, they are clearly designated as such. They are also one of those nit-picky things I mentioned in the last post. I just plain don't like what I've done with these. If we look closely at one of the photos from the Attacker walkaround here on Britmodeller, we can see that there are two posts, not one, and that they are black. In some period photos, they look like they might even be unpainted. I have to say that I don't know - although many aerials that I've seen have stenciling nearby stating "do not paint." So I shouldn't have painted them Sky! I went back to my Magic Box of Misfit Photoetch Frets, and found some goodies that look to be dead-ringers for these babies. They look to be the correct size as well. These are a bit thicker since it's actually two pieces folded on top of each other. I've popped off the other ones and will replace with these. I've also made a new arresting hook which is perhaps not completely authentic but it seems to match the size and shape of the bay I built for the hook to retract into. Looking at my photos, it seems the hook doesn't retract completely and a good portion of the hook itself remains in the air stream. Airwaves provide a PE piece for the deck landing alignment sight, which is the tall post on top of the nose. Due to its precarious perch, it's best to leave this for the end of the build. Maybe I'll get those wing tips on yet today... Cheers, Bill5 points
-
Some more progress. I made some 5-spoke wheel hubs with Milliput using an Oyumaru mould from the old Airfix Blenheim hubs. Looks a bit rough close to but a lick of paint should help: And some Vickers K guns from card, rod and stretched sprue/runner. I need two. Given that I have to add the turret before closing the fuselage, cleaning up, and re-doing the wing fillet, I’m not betting against some fine language later in the build! Thanks for looking, Adrian5 points
-
CF-116s of 434 Sq RCAF (in 1983, Air Command of the Canadian Forces?) at Red Flag exercise, Nellis AFB, January 1983. 116717 116727 116742 116743 116744 116748 116751 Thanks for looking, Sven4 points
-
Done! My 3rd 109G and definitely not my last one! I really enjoy these kits. And I really enjoy SBS decals, they work great. This is Eduard's 1/48 109G-6 Late boxing built OOB with SBS decals. Paint are Vallejo Model air for the camo and a variety of Tamiya and Vallejo paints for all the rest. MT505 of PLeLv 41 Based out of Luonetjärvi around summer 1950 Photo cred goes to Jason Brewer of Brewer Models! Thanks! Thanks for looking!4 points
-
Eduard's great MIG-21 kit all build OOB. Thanks Jason Brewer for the pictures! Thank you for checking out my build. Thanks!4 points
-
Just leaving sausage hell/heaven I debussed in Brum city centre to be nasally assaulted by sausage central Forgot the German Market was still on 😀 I didnt indulge but i did get my phonephixed4 points
-
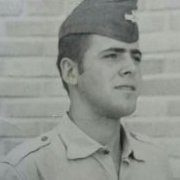
Here youre both of them...former foes, now friends...Can't help but see how much my grandad looked liked Galland...!!!!4 points
-
Good evening, Thanks so much to you for all the kind words Mates Few progress on the Red Roaring Beauty! Riveting the bathtub and the bulkhead is now done. The wooden shifter knob is clear coated and test fitting is mandatory for the engine/cockpit/body subassembly. Nothing more for today. More soon Pascal4 points


.thumb.jpg.0bc57cb4bb3dec8e063e1951db6690c2.jpg)


This leaderboard is set to London/GMT+01:00