
Leaderboard


Popular Content
Showing content with the highest reputation on 19/11/18 in Posts
-
Hi all, This is the first build that I've posted on these forums. It took nearly two years to complete; I only know this because of the dates I posted questions here regarding the Stirling generally and this kit specifically, all of which were very patiently and completely answered. I obtained much of my inspiration in completing this model from the others that were posted here, specifically general merchett's who utilized the same markings. Just don't compare his outstanding build to mine! That being said, although there are a number of things that I wish in hindsight I had done differently or improved upon, all-in-all I'm happy with how mine turned out, especially that it's actually finished! Thanks for looking, and any comments or constructive criticism is much appreciated. Cheers, Mark38 points
-
Good day, dear colleagues, I present to you my next work. Models were made simultaneously. Tropical is made from the Airfix kit, and in winter camouflage from the Russian Zvezda. Both sets used etched parts from Eduard, resin chairs of Quickbust, dashboards from YMA and decals from Eagle decals.31 points
-
Hi Folks, Something I have been working on over this past year. After reading 'A Midhurst Flying Field' by local author Tania Pons I was inspired to build Walrus MkII, W3085. She lived at RNAS Cowdray Park just outside of Midhurst in West Sussex. The airfield was used as a storage facility for many FAA types including Albacore, Swordfish, Walrus. Other aircraft including Proctors, Sharks, and Ansons came through here too. John Moffat of Bismarck fame operated out of here and flew many an Air Cadet around the local airfield in Swordfish or Proctors. Over this coming year I am building some of these types to be displayed at our local museum So the kit is the Airfix with Eduard belts and exterior set, resin wheels and Ez-line/Bobs buckles for the rigging. Painted with Hataka top surfaces and Lifecolor RAAF sky blue undersides. She has an engine in sky. This was discussed in another thread: https://www.britmodeller.com/forums/index.php?/topic/235043918-some-colour-questions-of-walrus-w3085/ Inside the aircraft I used some wooden decals for the Nav table. On top of them sits a chart of the Sakishima Gunto and 'Flight Deck' magazine Jan 1945 edition for a little light reading for the crew. https://flic.kr/p/2cUHFFu Here she is on the IWM site with the BPF: Note the RAAF roundels which have been converted to a quasi-BPF roundel. I opted for this on the fuselage but a more standard BPF roundel on the top wing. So W3085 has an interesting history. She was built as a MkII and so has a wooden hull (all rivets sanded off) and flew with the RAAF after leaving Midhurst. Whilst in Australia, W3085 had the water rudder fitted which MkII's did not normally have from the factory. She went on to join the BPF in 1945 and was flown by a RAAF Flt. Lt named Bruce Ada who carried out operations from HMS Victorious. An extract from his logbook can be found here: https://www.tapatalk.com/groups/airfixtributeforum/supermarine-walrus-w3085-darby-hms-victorious-t22562.html An article from the BBC on his story can be found here: https://www.bbc.co.uk/history/ww2peopleswar/stories/54/a6132854.shtml Sadly W3085 was destroyed by Naval gunfire after suffering an engine failure and left to a watery grave. Many thanks to those who contributed to this being built especially @iang and @Magpie22 who provided me with the servicing documents from Darby's time in Australia. Cheers Nick29 points
-
Hi guys, this was a reasonably expeditious build for me of one of my favourite WWII era aircraft. I wanted to do an 85 Sqn version but just haven't come across any photos (if any exist) as they only had them for a month or so and used them on three occasions. So, I went for the box decals of this Defiant which is quite well known; N3328 of 151 Sqn, RAF Wittering. Sadly the aircraft was destroyed in a hailstorm along with it's pilot Sgt JL Coulter in Oct 1942. Several pilots flew this aircraft and had claims in it including Sgt Bodien and Ft. Lt Edmiston. Painted in Xtracrylix with some medium grey added for interest. Resin wheels, Brass barrels and a Yahu instrument panel.21 points
-
Hello Dear Friends, here is my last construction In 2013 Venezuelan F-16 completed 30 Years of operation in the FAV (Venezuelan Air Force), and for its commemoration, the 30th Anniversary insignia of the Dragons Fighter Group was placed on the rudder of F-16A serial No.1041. Although currently, Venezuelan F-16s are still active, it is unknown how many of them are still operational, due to the seizure of spare parts made by the US Government. The base model used to build the F-16 A No.1041, is the F-16DJ / DG of the USAF, from Kinetic, scale 1/48, which I transformed to F-16A, using some parts (pilot cockpit and the vertical stabilizer) of the F-16A A / B of Kinetic.. Also, I use "after marketing" parts: the wheels are from Eduard, the nozzle is from a F-16B Hasegawa. Many pieces were made at home (scratch build), such as the antenna of the nose, lights, internal parts in the wheel bays and others. The armament: MK-82 bombs are from the Hasegawa armament set, the Python 4 are from Paragon resin. Most all decals were made at home, including the 30th Anniversary insignia presented in the rudder. The paintings used are acrylics from Model Master (Testor). Thank You, RSK4821 points
-
May i present my latest completion. It is an 1/72 Airfix Draken, bought for about 6Euro with no decals or instructions. Sourced decals online. At alst it is done, probably a bit rough around the edges, but I built it oob or packet. All comments welcome DSCF9460 by john dann, on Flickr DSCF9459 by john dann, on Flickr DSCF9458 by john dann, on Flickr DSCF9456 by john dann, on Flickr DSCF9453 by john dann, on Flickr18 points
-
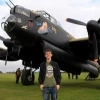
For a change, something without a jet drive. The model and more precisely the plane is very unusual for me because my passion is modern aviation. Avro Lancaster B Mk.I 300 Sqd. RAF The model is an old and good Tamiya model made straight from the box. Techmod decals.18 points
-
Morning all, I've finished one! This is the Sword Spitfire XIV in 1/72. It took longer than I would have liked but came out OK in the end. The only modifications were to take the tail off and add about 1mm in length at the fuselage/tail join (not sure it was worth it to be honest), and tinker with the rear cockpit section to place the line between the glazing and the fuselage at the correct height (the kit has it too low). I also added the separation hooks for the slipper tank, and nabbed some spare exhausts from an old Special Hobby kit - the Sword ones are a bit messy. The main colours are Xtracrylix, with masking using the blu-tack sausages method. Fiddly but works well. The decals are a mixture of the kit's (roundels and stencils) and Xtradecals. In researching the subject I found the instructions by Aviaology for their 1/48 decals very useful, in that they have a photo which highlights the faded original serial number and the small repainted one at the base of the fin. So I replicated that with decals from the spares box. The model represents the 402 (Canadian) Squadron aircraft flown by Flt Lt Brian MacConnell in March 1945. I quite like the late 2nd TAF scheme with type C1 roundels all round, overpainted Sky fuselage band and black spinner. Anyway, some pictures: Justin17 points
-
Hi everyone! I finished ths Henschel Hs-129 This is the Italeri 1/72 kit OOB except for the Eduard PE cockpit (which is completely hidden). I used Gunze Mr. Hobby paints and the swastikas came from an Extradecal sheet (the kit has none). Hope you like it! Marco16 points
-
1/72 Trumpeter North American RA-5C - Vigilante, RVAH-13. USS Enterprise 1972. Task Force 77. With the increasing U.S. military involvement in Vietnam after 1964, RVAH-13 was added to the mix of RVAH squadrons participating in combat operations in Southeast Asia. In conducting pre- and post-strike reconnaissance, the RA-5C would incur the highest loss rate of any U.S. Navy combat aircraft during the Vietnam War, and RVAH-13's experience would more than reflect this. On 28 December 1972, during Operation Linebacker II, RA-5C BuNo 156633 was lost in combat when it was shot down by a Vietnam People's Air Force MiG-21. The pilot, LCDR Al Agnew, successfully ejected, was captured by the North Vietnamese as a POW and repatriated to the United States on 29 March 1973. The RAN, LT Mike Haifley was listed as MIA until his remains were returned to the United States in August 1985. Here is my 1/72 Trumpeter RA-5C using Print Scale decals. The only thing I've added is the prominent brake lines on the landing gear. A very nice kit, overdone rivet and panel lines for some but I dont mind them. A slight wash really springs this to life for me. Airbrushed using Vallejo Model Air, Flory Dark and Grime Wash and sealed using Xtracrylix Satin Varnish. A massive and impressive looking aircraft, very pleased that I have added one to the collection. Phil. Thanks for looking. Phil16 points
-
This is my recently completed 1/72 Hasegawa Spitfire Mk VIII. I added a Eduard Zoom set in the cockpit little of which you can see. Exhaust are from Quickboost. Markings are from DK decals and depict a aircraft from 452 Sqn RAAF, Morotai 1944. The model was painted with MRP paints.15 points
-
I've read and seen so many horror stories about Eastern Express kits and the irregularities in their moulding processes, so that when I bought this kit a few years back, I was prepared for the worst and assumed my kit's box contents were not going to turn out to be one of the lucky kits that had no fit or moulding issues. EE did not disappoint, the kit fuselage halves were different lengths by 2-3mm and the rear bulkhead section was narrower that the width of the forward fuselage that it joined to - many pieces were different thickness plastic amongst many other issues too many to list. Needless to say, I worked around the problems and have ended up with this having discarded to EE KLM decals in favour for 26 Decals American Airlines. Nothing special but enjoyable to build despite the assembly irritations Limited by poor light and the choice of background colour to use here when photographing, I have been left with some pretty gloomy looking pictures Thanks for dropping in for a butchers... John14 points
-
Poor lighting and a limited choice of background colour has left this build looking like a flight on a dark and gloomy overcast rainy day. This is the Zvezda -9 kit with 26 Decals and some top-up details from a F-Decal detail set. Nothing amazing but great fun to build with Zvezda's superb part fitting. Other than the change in decal livery, this was built straight from the both with no 3rd party resin / correction parts used. Thanks for dropping in for a look around John12 points
-
Poor lighting and a limited choice of background colour has left this build looking like a flight on a gloomy overcast rainy day. This is the Revell -8 kit with 26 Decals. Nothing amazing but great fun to build with Zvezda's superb part fitting. No 3rd party resin / correction parts used. The World's Favourite Airline Thanks for dropping in for a look around John12 points
-
I pre-ordered this and have been waiting for the right time, having perfected my white painting technique on my Shackleton and Valiant I gave my Victor a go as part of the 1960's Warsaw Pact vs Nato Group Build. Built OOB apart from the decals which came from Xtra Decal as I wanted my Victor not to be a Blue Steel version, to retain the clean lines of the Victor. Enjoy:11 points
-
Hello chaps I finished this one last week for the recent NATO/Warsaw Pact 60's GB so thought i'd post it up here. It's Hasegawa's 1/48 scale F-104J kit built as a G model from 350 squadron Belgian Air Force based at Beauvechain in 1964. An Eduard etch set was used in the Cockpit and also Eduard resin C2 bang seat. Daco products replacement wings and tail plane. The ladder is also from the same improvement set. The missiles on the wing tips are from a Hasegawa weapons set. Decals from Armycast and stencils a mixture of the kits and other leftovers. NMF paints are from the AK Xtreme metal range and other colours from Gunze and Xtracrylics. Wash from Flory models. Master pitot. Cant think of anything else! The original. Questions and comments welcome. If you haven't already done so head over to the GB area and check out the gallery. There's plenty of cold war heavy metal 1960's style! Thanks for looking, James11 points
-
This is the 500th model I have completed since I restarted the hobby in 1985. It falls neatly into one of my favorite categories: counterfactual aircraft. Though the aircraft was partially assembled at the end of WW2, it never flew. But I'm not doctrinaire - unless it comes to building only in 1:72 scale! - when it comes to aircraft types. This is a beautiful kit, which goes together well with little putty. The decals were not satisfactory though. It was as though there was insufficient adhesive on the decal. It actually would not conform to the curves on the twin booms. Presumably it was a one-off issue; I've never had the problem with Meng decals. So off they came, to be replaced by some markings from an elderly Aeromaster sheet from two decades ago. They were end-of-war suicide bombers, so I thought the squadron markings would be appropriate. I'm fairly happy with this one. It has not escaped my notice that the two best models I've produced in 2018 were both from Meng. Next up comes the F-106. At 62, I don't imagine I have another 500 in me, but I'll keep producing until I no longer can. This is completed aircraft #500 (17 aircraft, 1 ordnance, 5 vehicles for the year 2018), finished in November of 2018.10 points
-
Hi. He 51 C, Legion Condor 3/J88, Adolf Galland, Calamocha, Spain, spring 1938. Classic Airframes 1/4810 points
-
Another finish from my Therapy Build Thread, 11th one for the year! Sweet little Airfix new tool, WIP here. Some fit issues but easily overcome, painted with Halfords Peugeot Cherry Red/Mr Leveling thinner. Kit decals behaved beautifully with solid whites, tail flashes a bit thick and with a made up colour that may or may not be Humbrol 25, not any version of BS110 roundel blue. Nose light was Eduard landing light with 10 sec uv glue/resin built up, then added a 0.3mmtube/0.1mm rod pitot to test my sanity (failed). If you've got one or more in the stash, get one out for a fun quick build, its tiny cute little plane as shown with the brute of an F-15C for comparison. Now take cover, this fella is comin' in low....9 points
-
Thanks Hendie and BW - you jokers! Sorry John. I know what you mean though - I used to hate the job using my B&D 'Garden Vac'. That broke and I invested in a Bosch ALS 2500 which this de-boxing video describes as "A Lazy Man's Dream" - perfect for me then! Blow all the leaves into a pile(s), swap the tool from blow to suck (takes a while, including fitting the bag) and you're done in minutes. Chops up the leaves too. Nice Thanks Ben - I hope the reservoir fills up soon Typo. Doh! I really should check my posts Darker blue and fluffy? Flickr First time I've used the thick paint coat and sponge technique: Now to remove the control columns… more thick connectors: Soon nano-sawed off, cleaned up and painted. They'll be on here when dry: Some progress, at last.9 points
-
How about a couple more pictures? First, to prove I wasn't fibbing about the gunsight, here it is with its reflector glass mounted on the shelf below the windscreen: When I cut out the tiny reflector glass from the film, I left the black border, as it makes it much easier to see that something is there. I added some spare blobs of plastic to represent the air intakes on the top of the fuselage. I wonder if these were cooling intakes for something? My cutaway drawing doesn't show them. As you can see, the starboard wing has successfully negotiated a trip to the maintenance shop below deck. A much better outcome than pushing her over the side! And you can see that the wingtips have disappeared. While I was waiting for some putty to dry, I painted the sliding portion of the canopy with a coat or two of my favourite colour - Extra Dark Sea Grey. You may recall that the canopy included with this kit was the one for the prototype and early production models, but I decided to fake the production framework just by masking. I like it. My cutaway drawing doesn't show a rear view mirror in the cockpit, but I suspect there was one. I'll look through the Bartles book again and see if he mentions one. That's it for now - I have to go and work on the engine for the big Spitfire. I can hear that Merlin growl already. Cheers, Bill9 points
-
3DBlitz kit of the Pilatus PC-21 in the new colour scheme of the Empire Test Pilots School (ETPS) based at Boscombe Down. The kit is very nicely engineered and fits together well with only a bit of filler needed. It's finished with homemade decals and Xtracolour Oxford Blue and Signal Red over Halfords Appliance White. Scratchbuilt pitot with yaw/pitch vanes Thanks for looking. Steve8 points
-
It’s been a busy few days but I have managed a little bench time. Here goes then. Everything got a well earned pre shade. nice! Them using the Tamiya wild cat as colour reference I mixed XF-19 and XF2 2:1 for the undersides. I’m happy with that 😌, now masking time. Just to build up some Mojo (tm) I painted and glued the engine. Rrrright then where did I put that masking tape and sponge? 😃 Oh and the cowl went on too. The internal wing parts got masked, a right pain. Then painted green Tamiya XF-71 Then mmoorree mmassskkiinngg. nearly ready for the blue! 😎 and there it had to be left until next I manage to grab a few golden moments. Thanks for tagging along with the cat. She appreciates it. all the best and Happy Modelling. Johnny.8 points
-
I was with No.1 (F) Sqn from 1972 until 1982 except for a couple of years on the turn of the 80's. I can't remember now off the top of my head (1976) the exact date of this Sqn detachment. Anyway, we did a weeks detachment to Dijon Longvic, taking 4 Harrier GR's and one T bird to be hosted by the Guynemer wing who were equipped with Mirage III.E's. and whose engineering hangar we shared. We had an enjoyable stay and visited the usual cultural spots such as the vineyards. It was traditional for us to Zap the aircraft of our hosts and I had somehow become the unofficial Sqn artist. I had previously put the 1.(F) Sqn badge on such as Fiat G.91's and included large Clockwork Keys made from cardboard tubes sticking out of the G.91's cartridge starter hatches. I also painted the large 1 Sqn badge which might even still be found on the dispersal wall at our gunnery station, Decimomannu in Sardinia. The emblem of the French wing was the Hispano Stork which had been adopted by the great WW.1 French Ace Georges Guynemer (over 50 kills) until his own death near Langemark in Belgium in 1917. This was still carried on the fins of the Escadron 1/2 III E's. The Stork has several versions but E 1/2 version is depicted in flight with it's wings beating down. I had previously sketched a droopy winged, smiley mouthed, cartoon Harrier called' Happy Harrier' with which I had embellished the letters home, to my children. This seemed an ideal match to do a "Fly united" version onto the Stork. I hinted at this to the French mechanics who quickly supplied the paint. The deed was quickly carried out, just in time for the official photograph to be taken of a Harrier flanked by two Mirages. It caused great amusement amongst the rank and file of the two air forces. As we were leaving the next day, that night our hosts threw a very boozy party for us at the Mess, where we were billeted outside the main camp. The next morning, and somewhat worse for wear we boarded the military bus to take us to the flight line, in preparation to our leaving Dijon. Instead of entering the camp and turning right down to the hangars, we proceeded straight into the admin area of the camp. as we came abreast of the Parade square, someone remarked "what is the Hawker Siddeley demonstrator doing here". What we were looking at was our T bird which had been painted in a coat of white emulsion and on the front fuselage and wings, red had been mixed into it to produce a pale Pink. The drop tanks were White with Red spirals and the nose tipped with Red and Red 'eyelashes' were put around the 1 Sqn 'Winged One' diamond badge on the nose. It was an utter mess. Departure time loomed and our Hercules was inbound and we just had no time to clean it. Our young jockeys all vied for the job of flying it back. It was a miserable grey morning and as the T bird taxied out onto the runway flanked by two pairs of GR's it stood out like a sore thumb. After take off they formed up in Vic and did a low flypast over the base with everybody out to watch. It actually looked amazing. We duly boarded our Herk and arrived back at Wittering some hours later. Un be known to us when the Harriers arrived back at base, our colleagues had purchased French Bread batons, and putting their berets on backward, they formed a Guard of honour as the flight did a flypast. That's when the merde really hit the fan. The Station Commander arrived to welcome the aircrew home and on seeing the T bird he marched straight back to his car, leaving only the instruction "no one will leave this station until that aircraft is returned to Royal Air Force service". When we arrived back we found all the aircrew regardless of rank, armed with scrubbing brushes and buckets of Teepol (a detergent), trying to remove the paint. They actually got most of it off. Everyone took it in good spirits except for one S/Leader. "Nothing to do wiv me guv.." The T bird did have to go for a re-paint. I happened to meet the French officer who led the revenge party some years later at a model show at le Bourget and he too was in the model industry.. Small world. So chapter and verse as promised. John8 points
-
Cheers Stix, thanks! I did have a very good WE, although with very little time for modelling. Most of said time went into preparing all the bits for priming; I slightly improved the main gear struts (adding holes and brake lines) other bits In fact, a lot of time went into removing seam lines from the payload. Still the canopy to sort, then I'm ready for primer Comments welcome Ciao8 points
-
Pardon me whilst I stuff a lunchtime sandwich down my gullet at work and spray crumbs at you over the keyboard.... Will do Bill and thanks. I won't say that things are taking me towards the 'sunlit uplands' - which always seem to remain at the same finite distance anyway - but there is much satisfaction and personal growth to be had in current undertakings. Now, if I could only find some way to get brass to be part of the process.... A modelling nation at ease with itself then.... Installments there will be CC, though not of the regularity and depth I would wish. How's yer Christmas shopping going? 😉 I must have been absent that day and missed it Pete. 👨⚖️ Just let me hide the advocat and twiglets first. I know you lot.... Oh I say that's just brutal Crisp - I must respectfully demur! Having mis-spent part of my student days in Glasgow in the 80s (weirdly squatting part of the time in a professional golfer's flat with a Tartan-themed bar - I kid you not) I can confirm that after a night on the 'heavy', only Irnbru laced with brandy & black pepper was able to return me to the living the next morning. That and haggis fried up with a slice of fruit cake... One endeavours to provide satisfaction sir. Delighted you think so Terry - as a Babe in Steamland I'm still scratching around for references, though yet to find anything remotely resembling plans. By coincidence I was having lunch over in Howth yesterday with an aunt of mine who has custody of TBMB ('the big metal box') full of family photographs. She's reckons there are photos of Driver Edwards and his other engines in there somewhere so must have a rummage next time I'm back in Blighty. Pay no heed to the doubters CC, it is a refreshingly sweet elixir, not unlike drinking a sunset. Much obliged for those pearls Chris! The SR D1 looks most pukka over at the Finecast site, though pricewise I may have a prolonged internal debate... That's why you see cars driving around here with 'N' plates on them Pete. English people readily fall for the lie that it is to indicate 'novice' drivers who have reacently passed their test but are still on probation, when in fact it stands for 'Not Goat', thus avoiding what had once been a huge goat/car recognition issue. They breed 'em tough in Lincs.... What's wrong with Brasso I ask you? Filtered through a slice of white bread it complements a burnt sausage wonderfully. I wasn't ware that young Steve was one for drinking from rusty tins tbh Keith. The Uk Brass Manufacturer's Guild had better up output, I'm bring an artic.... This of course was why the Soviet lunar program utlimately foundered on the rock of cosmonaut constipation. Well spoken sir. Defend the Cumbernauld Decoction to the last breath. 💪8 points
-
Finished one! First one in nearly a year. Build thread: Finished article. I tried some new (to me) painting and weathering techniques. Mostly happy with them - some improvements needed, but hey isn't that the way? I think if every model I built was perfect in my eyes (actually none of them are), I'd get bored. Still - quite happy. Need to work on my photography too. I think I'm going to ditch my rubbish light tent and just get a roll of white paper. Kit is Airfix 1:48 Lightning F6 Decals are mostly Airfix, from two different F6 kits because one of them was old and breaking up. Paints are Gunze Mr Color, clear coat is Mr Paint clear gloss. Cockpit is just the kit, supplemented with masking tape belts. Metals are Alclad II - nose ring is the Alclad chrome Weathering effects are AK interactive enamels, with the darker stuff being AK "smoke" pigment drawn across with a brush moistened in mineral spirits. Thanks for looking.8 points
-
Revell 72nd scale MiG-21 F-13 East German Air Force Not my most enjoyable kit but finished and in the cabinet with all its minor faults.7 points
-
Cheers Bill! I don't know the answer to that question and I must admit this surely must rank as one of the most nostalgic of early war RAF aircraft, due to the huge sacrifice of their crews rather than the success of the aircraft. Having said that, I do hope a 1:72 offering is not "just around the corner" - purely for selfish reasons! Thanks! I'm looking forward to seeing that Dennis! Tonight's efforts centred around the gun cone. I decided to try plunge moulding, but instead of the paintbrush handle I sanded a buck out of a piece of balsa. This is what I ended up with. The buck CA'd onto a toothpick, and a hole drilled and opened out with a round file to just a little bigger than the buck, hopefully enough to allow for the thickness of the plastic sheet. I used .010" sheet and the first effort gave me this That looked pretty hopeful so I trimmed it out and ended up with a traffic cone! A little more trimming and sanding, and it seems to fit pretty well! I think I can live with that! A little more refinement, and some detailing and it should be ok. My other efforts focused on the interior, specifically the radios. For some reason I had neglected to add anything, so a piece of plastic rod painted black, and some spare PE from the cockpit set gave me a little "interest" to add. I have no idea what the PE is supposed to represent in the Hurricane cockpit, certainly not radios, but at least it looks better than nothing! Next up we'll see if that gun cone works, and can be trimmed well enough.... Thanks for looking in! Ian7 points
-
Hello Britmodellers! This is my Dassault Rafale B Catwoman in scale 1:72. I started in January 2015 and finished it in November. I changed a lot and so i spent 140 hrs on that build. The decals were bad, so i airbrushed nearly everything except sweet Hally and the typo on the tanks. Cheers, Tom6 points
-
Stumbled upon this while looking for RAF Ventura information for another topic; beats me why this came up, except maybe because one of the aircraft pictured was a Ventura! Search engines are really unpredictable sometimes. It has always fascinated me how the only genuine Me-262b night fighter ended up in South Africa! I hope many of you will enjoy looking at these photos. Mike http://silverhawkauthor.com/warplanes-of-the-second-world-war-preserved-in-south-africa_467.html6 points
-
You're very welcome Keith. Different sponges give different 'textures' of course, and you have to make sure the paint doesn't 'self level' afterwards - not a problem with Humbrol acrylic! Thanks Roger Nice one Bjorn - she's a beauty It's occurred to me that my lack of mojo may not be too much of a problem as I'll have to wait for the bomb bay and windscreen. Relax then. I have applied the i/p decal: Still wet. I had trimmed the transfer a bit but if I was doing it again I'd go around the edges with a blade. It's a tight fit. Crew are progressing too: Big decision next - what colour to do their hair. Oh, and making some earphones. Maybe.6 points
-
Been there. Done that. It is a true struggle - but it is really worth it! It is a huge bird, and a real showstopper! I am following this with great interest - some day I will build another one. I think...6 points
-
Hanriot HD 1 7501 Unit Unknown Italian Service, 1918 This was a late entry for the Eleventh Hour GB which ended on Saturday, I didn't finish it for the deadline, but managed to complete it a few days later. I chose this version of the kit markings because I thought that it would make an interesting challenge in trying to achieve some tonal difference between the fabric and metal areas of the aircraft, and you can't beat having a green dragon painted down the side. by John L, on Flickr by John L, on Flickr by John L, on Flickr by John L, on Flickr by John L, on Flickr by John L, on Flickr by John L, on Flickr6 points
-
This is Eduard's little Spitfire XVI. I built this a few weeks ago as a break from the more involved long-term builds I've been wrapped up in. The kit is easy to build, fits great, and features fantastic detail. I built mine in the markings of a 601 squadron participant in the 1949 Cooper Race. Paints are Mr. Color acrylic lacquers thinned with Mr. Leveling Thinner. A very cursory weathering with oils. The whole project took about 2 weeks. \ And I had not realized that I did this, but the squadron is the same as that of the Special Hobby Vampire, I built earlier this year.6 points
-
Belated update #3 Apologies for the massive time lapse between GB build updates. Work has been a little hectic (probably can’t say the words I’d like to use!) and family life has been extremely busy - two combinations that would put a severe dent in anyone’s modelling. Anyway, I’ve been slowly working away on one of my P-40’s but didn’t think it was too much to report on. Everyone’s surperb builds and progress has perked me up a bit so I’ll show you what I’ve got. Here’s some build photos and I’ll take a few more when the sun rises again tomorrow morning. My ‘44 days’ P-40 is now painted in its main colours (OD and NG) and is almost ready for a clear coat. Still some details to paint but this one should make it into the GB Gallery. Cheers and happy Pacific theatre modelling. Dave6 points
-
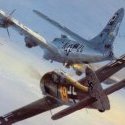
Nice image of operational Hornets with Mk56??? Type air dropped sea mine (Practise ordnance denoted by white and red for easy recovery on the sea floor) image from www.aircraftslides.com6 points
-
Hi mates, I've been working on the engine as my next stage, or mini-project, and I've encountered something I didn't expect. First, I knew that Tamiya did not provide valve covers with the "Rolls Royce" name on them. Accordingly, since I would like this on the model, I bought the replacement valve covers from Barracuda when I went on my big honking Spitfire buying spree. But the Barracuda resin parts are too short! It's only a bit over 1 mm, which doesn't sound like a lot but it works out to 1.25 scale inches and it's quite noticeable. Plus, if you look closely enough, you can see that the Rolls Royce logo is not aligned with the valve cover, it's tipped a bit. No need to despair, as it turns out that Eduard provide this nameplate in photoetch in their exterior detail set and I have that ready to go. When I bought the Barracuda resin covers, I didn't know that Ed gave you the nameplate, otherwise I probably wouldn't have bought the resin. Got to pay more attention up front I guess, but I'm still a bit disappointed in Barracuda. They are normally very reliable - I'll send them a note and see if I can get a replacement for a future project. Wait, did he say a future project? Another 1:32 Spitfire perhaps or some other Merlin powered master of the sky? Methinks the man is mad! Cheers, Bill PS. Photos of engine stuff coming up!6 points
-
Declaring completion. And a passing spyplane shot.6 points
-
Recieved this a few days ago: Having dreamt of a modern 1/72 Viggen since I started building again ten years ago, I started building immediately. The breakdown of parts is almost identical to the 1/48 Viggen by Tarangus/Special Hobby. And details are similar, it feels like a shrinked 1/48 model in many ways - which means great detailing! Panel lines are crisp and fine, the RAT generator is included and almost all errors from the first 1/48 edition are corrected. Fit is good so far except for some difficulties with the JA insert part just behind the RAT: One of few remaining errors is the out-of-the-blue "intake" on the exhaust cone, which however is easily removed.5 points
-
Percival Proctor Mk.III (72014) 1:72 Dora Wings The Proctor was developed by Percival from their Vega Gull in response to an Air Ministry Specification for a radio trainer and communications aircraft. Percival made the fuselage 6 inches longer and incorporated larger rear windows. Modifications also had to be made to the seats in order that parachutes could be worn. The prototype first flew in October 1939 and was put into production fairly quickly. Over 1000 aircraft were built, the original 222 by Proctors, with the remainder by F Hill & Sons of Manchester. The original marks of Proctor (I through III) were very much of the Gull design, later ones were enlarged, but the larger aircraft suffered in terms of performance. After the war the aircraft were dispersed to various operators. The fleet was grounded in the 1960s due to concerns about the glued joints in the airframe; though some have been rebuilt with modern glues. They still make good light aircraft and inherited the Gulls folding wing which can make storage easier. The Kit Dora Wings is a new company to us, and have kindly agreed to send samples for review. Information and help was gratefully received in the production of this kit from John Adams formally of Aeroclub models which can only be a good thing. It is also this reviewers opinion that Percival Aircraft made some of the best looking Civil Aircraft in the UK, so these new kits are more than welcome. Initially Dora Wings have given us The Vega Gull and followed this up with the Proctor as Percival did. Now the Mk.III is with us. The kit arrives on three sprues of nice hard plastic, detail is good raised and recessed where necessary. The ribbing on the wings is nicely restrained. There is a clear sprue, a sheet of PE and a set of masks (not shown). In other boxings the instrument panel markings were on a film sheet, they are now on the decal sheet. Construction is fairly simple just like the real aircraft. The tail wheel is the first part to be made up and then put to one side. We then move to the cockpit. The instrument panel is made form a plastic part with the film and PE making the front of the panel. This is then added into the coaming. Just to go off on a tangent the wings then put together, these are of convention left/right & upper/lower construction. Separate flaps are included as are landing lights for both wings. Now that the wings are done we can move back to the main cabin, Controls and seats are put in place, followed by the front firewall and instrument panel we put to one side earlier. The fuselage can then be closed up, and the canopy added. At the rear the rudder is added along with the tailplanes, and at the front the engine front and propeller. The wings can then be added along with the main landing gear. Markings The decals are from Decograph and look good with no registration issues, there are five decal options provided; LZ766 RAF as seen at Duxford 2017. 605 Royal Danish Air Force, Karup Airfield, 1946/47 Z7237 RAF, 1942 (its worth noting that these markings seem post war not WWII) RAF Serial HM300 but USAAF Markings 1945. W-1 1315 Communications Flight Royal Netherlands Air Force, 1947. Conclusion It is high time that we had some modern toolings of British aircraft from this period. Very Highly recommended. Review sample courtesy of5 points
-
Well I have difficulty finding Cravats! Thank you all for your kind words Somewhat embarrassingly I actually just stumbled on this thread. I have always worn cravats from when I had my very first open car. I still drive one today. I was probably influenced by the film The Fast Lady which was also the name of my first car a pre-war nineteen canteen open two seater Morris. The Tiger Moth drawings in the conversation was not for Dora wings by the way, which is what I wanted to say. My, work in progress, Wapiti / Wallace drawings, were on view on Dora Wings stand on the Sunday. To produce these I had incredible private access to some fascinating stuff, but it was all delayed by my illness and it's treatment over the last 12 months. I was originally doing the research for my self, but my technology is now dead as there has been no spares backup or help anywhere in the world for about 15 years. so 75 seemed a good time to retire, before our late autumn bombshell last year. I'm now helping small enthusiastic companies with research. Serendipity, is looking into the bowels of a very large full stillage bin and seeing a complete Wapiti aileron spar and the illusive perforated hinge mount staring you in the face! John5 points
-
Agreed! There are some of us particularly talented at that sort of thing! Come on Fritag you evil child you can't hide forever. Martian 👽5 points
-
Ready for inspection is my Ki-61 Hien Tony. I received this kit as a birthday present and was looking forward to attempting the infamous camo pattern. Although relatively simple the kit is an old tool, therefore there was a lot of flash and mole hills for rivet detail. Once built, I tackled the camo pattern free hand and was pleased with the way the Vallejo green sat on the silver. I have fashioned a stand for the aircraft (details of this are in my WIP thread). All in all it has been a nice challenging build, and I'm more than happy with the result. Thanks for looking.5 points
-
That is very kind Thom! I'd bought the Eduard harness set before I knew I was going to have Ginger in place, but still wanted to use at least some of it! Added the linkage I had seen in various source pics... I had already filed off the moulded in harness, glued these on top...I'll certainly add some wash etc to these, as they are far to clean and flat! With that - I glued the two halves together... I can still reach what I need to reach at final touch-up stage. Fitting the fuselage to the wings required some....thinning! Lots of lumpy, thick tooling here from this old kit... Lots of rigging to help parts line up and set where I wanted them to! Gluing in spacers to hold the wing skins together... But starting to look like a plane now... Let the filling, sanding and cursing begin. Although I had fitted the undercarriage, the plane will be 'flying' - so don't need this... I decided to cut the undercarriage out, so I could fix the wheel covers neatly, and glue the wheels in evenly, without being tied to the lazily moulded undercarriage struts etc. I also added the walls to the wheel bays... Not going to add huge detail, but did add some mesh to these visible rads... Now it is the new-skill-to-learn of re-scribing panel lines! ...and lots of sanding. Added a missing strut, then covered Ginger. ...so I could get some filler-primer on. and then start filling, sanding and re-scribing all over again!5 points
-
Deleted5 points
-
I started a series of Italian planes. The first one is over. Macchi MC.205 Veltro, Italeri model, all of you familiar. Here's a picture. Enjoy.5 points
-
nice plunging Ian. I've no idea what a 'gun cone' looks like, but stick a flake in that and you're off to the races.5 points
-
Come on Airfix! You know what we want!5 points
-
Well, you learn something new every day don't you. I've been modeling for a couple of years now and I never realized that white paint was noisier to spray than other colors.5 points


This leaderboard is set to London/GMT+01:00