Leaderboard
Popular Content
Showing content with the highest reputation on 18/11/18 in all areas
-
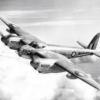
For a change, something without a jet drive. The model and more precisely the plane is very unusual for me because my passion is modern aviation. Avro Lancaster B Mk.I 300 Sqd. RAF The model is an old and good Tamiya model made straight from the box. Techmod decals.34 points
-
Dear fellow Britmodellers, this is my 1/72 Sword Fiat G.55 of 2. Gruppo, 1. Squadriglia, flown by Ten. Drago at Cascina Vaga airfield, in May 1944. Built for the "Italian design special display" at the upcoming IPMS GoModelling show (March 9-10, 2019). I added photo-etch seatbelts from MPM and resin upgrades from AP Modely. Painted with Gunze/Mr.Hobby acrylics, representing the so-called "experimental splinter scheme". All photographs by Wolfgang Rabel. The round squadron batch on the nose has wrong color, it is too light. It should actually be dark green. Thank you very much for your interest in this topic. Best greetings from Vienna!33 points
-
My latest build is Zvezda's La-5. Its a pretty good kid, but was a little tricky to build. The figure was stolen from the much nicer Zvezda Yak-3. I tried out some new techniques in painting and weathering. Base paints are Mr. Color, with mottling achieved by means of a black base coat, and white squiggles painted under the camouflage coats. Additional weathering included oil dot filters, sprays of unthinned tamiya paint to simulate mud. I will be posting a full build review at Scale Modeling Haven Blog within a few days. Additional pictures will be there as well.19 points
-
When Bra.Z models released the conversion kit for the A340-5/600 I picked up one of the first ones from Ivo at Telford. I can't remember when it was but it must have been 10 years ago. I already had the Revell A340 kit which is needed for some of the parts so I set to work straight away as I'd wanted an A340-500 or 600 for ages and didn't fancy having to do all the conversion work myself. As many of you will know this conversion kit is a challenge but will, with some effort, eventually produce an impressive model. But if I had known that Authentic Airliners would release one I would definitely have waited and saved myself a lot of work and ended up with a more accurate and detailed model. During the build I replaced the fuselage roof with some ABS tube I found on ebay, ditched the resin wings and reworked the Revell wings myself, and used the Bra.Z replacement nose as I don't like the Revell kit nose. So from the original conversion kit all I've used is the wingbox and lower fuselage, rear fuselage and vertical stabilizer and the engines. The horizontal stabilizers I also adapted from the Revell kit parts. The nose wheels are 767 main wheels as I felt the Revell A340 nose wheels are too small. My problems didn't end with the build, painting has been problematic with the white crazing and having to be removed. The same thing happened to a lesser extent with the second application and also on my recent Qantas 747-200. I think this was due to either not shaking the can enough, painting in the cold or laying on to many thick coats too quickly. Possibly a combination of all three! I used Halfords Appliance White and Racking Grey. The purple colour on the rear fuselage looks quite blue in the photos but is a better colour in real life but it is a very difficult colour to pin down. I have not painted the metallic purple Thai initially used but the non metallic colour they changed to later. I made up the colour from Tamiya X16 Purple and X3 Royal Blue. In retrospect I should have used less blue I think. The decals are the 26 sheet for the A330 and A340-5/600 which worked well but were a little brittle. Cockpit and cabin windows and door details are from Authentic Airliners Decals and other details were designed and printed by myself. In much the same way I prefer the 777-200 to the -300 I also favour the A340-500 over the -600. The proportions are more pleasing to my eye. As I've recently built an Emirates 777 I decided to put this in Thai Airways livery, my other choice would have been Singapore Airlines but that'll have to wait for my next 777-200. Anyway here are the pics, hope you like it! I think I could do with a darker wash on the fans to highlight the blades a little more. Thanks for looking, all comments and criticisms gratefully received. Cheers, Ian18 points
-
Ready for inspection is my Ki-61 Hien Tony. I received this kit as a birthday present and was looking forward to attempting the infamous camo pattern. Although relatively simple the kit is an old tool, therefore there was a lot of flash and mole hills for rivet detail. Once built, I tackled the camo pattern free hand and was pleased with the way the Vallejo green sat on the silver. I have fashioned a stand for the aircraft (details of this are in my WIP thread). All in all it has been a nice challenging build, and I'm more than happy with the result. Thanks for looking.18 points
-
Well I’ve not posted in ages. Been busy, been sick and nearly died at one point, got disheartened by Photobucket shafting my posts however it seems it’s back so using this to try it out. Here is my almost finished Dakota a lovely kit but it did fight me a little and I had started it in 2013! , at the end of the build I made a mistake and grabbed dark sea grey not varnish... oh the music that come out my mouth! , luckily I decanted the Tamiya spray and airbrushed the green and brush painted the stripes. lovley kit ... got there in the end ! Tamiya AS series USAF olive drab and neutral grey where used for this with revel coal black for the tyres or tar black can’t remember now. Xtradecals used throughout. Cheers Rob16 points
-
Here is a kit I built in the summer of 1994 for my dad. It's the Airfix 1:144 Handley Page H.P. 42W G-AAXC "Heracles" of Imperial Airways. It's an unusual subject for me since I don't normally build civilian aircraft and I'm not that interested in the inter-war period (although there are exceptions!). I built this under a deadline and completed it in just over a week with limited resources (I was at my dad's in Colombia) so it turned out to be an interesting experience. Fit of parts wasn't good and some gaps had to be filled. The kit was completely brush-painted except for the varnish which was an artist fixing spray. These are the only photos I have and they were taken by my brother back then. Miguel14 points
-
Hello all, After my bit of silliness with the Mustang, I'm back to a serious build again. I was recently asked if I would build a replica of the two seat Spitfire T.9 named Elizabeth, which can often be seen in the summer months fulfilling peoples' bucket list ambitions by getting them in the air in a Spit, flying from Headcorn or Sywell. Here she is, photographed by the talented Ian Amis: Ultimately this model will end up in the hands of Keith Perkins, the owner of Elizabeth, so I'd better make a good job of it! I used the AZ Models T.8/9 kit in 1/72, which is pretty much the only game in town for two seaters unless you have the 1/48 Brigade Models conversion set (I have 🙂) or are willing to do a LOT of scratchbuilding in 1/32 and convert a single seater yourself (I did 🙂). It's a short run kit with all the shortcomings that that implies - dubious fit, no locating pins or tabs and numerous moulding flaws such as an ejector post mark right on the fuselage behind the rear canopy. The boxing I had also only came with Dutch or Irish markings, so I had to buy an aftermarket set of decals for a Mk.IX Spitfire to get the right stencils and roundels for an RAF machine. Typically, the day after I'd bought these, AZ brought out a new boxing of the kit, with markings for several of the currently airworthy warbirds! At Telford, I also bought a set of resin wheels of the three spoke variety, as most modern warbirds use these post war wheels these days...not Elizabeth though, oh no! She's still wearing her four spokers, which are provided in the kit anyway. Should have checked, really... Also, having checked my decal stash, none of the RAF fonts used for squadron codes matched the decidedly non standard font used on Elizabeth, so working from photos, a friend of mine was good enough to use his profile cutter to custom cut some masks for the RB*E for me - thanks Nige! The canopies on this kit are pretty thick and there is no option for posing them open, so although there is a fair bit of detail in the cockpit virtually none of it will be visible after the lids go on. I kept the interior detailing basic, using the kit decals for the instrument panels, and confining the painting to some black details and a dark wash, although I did add some seatbelts from masking tape: The airframe goes together pretty quickly, but as the kit this was based on was a clipped wing Spit, the kit's wingtips have to be carefully removed and the elliptical wingtips glued on. As mentioned before, this short run kit has no tabs or pins, and the wingtips are a straight butt joint onto the wing. There's hardly any land for them to attach to, and as a result this will be a weak point on the model. I'll have to inform the owner not to pick it up by the wingtip, or he'll be looking at a pile of wreckage with a chagrined expression on his face - not for the first time either! The most laborious bit of the build is the filling and sanding specified in the instructions...the cartridge ejection chutes under the wings have to be filled and sanded flush without losing the surrounding detail, the cannon and machine gun ports have to be filled (I used plastic rod glued into the holes and sanded flush) the two halves of the carburettor air intake scoop are a terrible fit needing putty right down the middle, the rear glazed portion of the front canopy isn't deep enough, so I had to build up the fuselage it attaches to with plastic strip, and the rear windscreen stands so wildly proud of the fuselage it almost seems to be a different scale! The rear canopy is a pretty abysmal fit all round really, and a lot of scraping down, carving to fit and puttying was used to get it anywhere near fitting. Still, mustn't grumble... 😉 Once the inevitable rounds of putty-sand-repeat had been dealt with, a primer coat was used to detect any further surface blemishes - and there were a few! Then it was time for a bit of head scratching - Elizabeth proudly bears her name in curly cursive script on the side of the port cowling, in white - trying to do white decals is the bane of a modeller's life, as you can't print white on a printer. I considered using white decal film, but experiences with this in the past have showed that the stuff is so thick it'd look like the name had been riveted onto the airframe attached to a steel plate! My solution was to take a photograph of the name, reduce it to the right size by trial and error, and then print it on clear decal film. The appropriate spot on the model could then be painted white, the decal attached to allow the white to show through as the lettering, and then the non white bits touched up with the right camo colour. Sounds complicated, but it worked ok. I also did the same for the squadron crest and the two kill markings below the windscreen: You can also see in the above photo the masks on the fuselage sides - I painted the area Sky for the theatre band and the letters, applied the masks, and then applied the camo on top. Again, the camo had to be patterned as best I could from reference photos, as no two modern restorations are the same, and differ from standard wartime plans. I was trying to get the demarcations to pass over the canopies in the right places, through the squadron codes in the right places, and so on. Easier said than done, but the little details matter. All in all, when the masking came off, I was satisfied enough, with just one or two areas needing touch ups: Then, just as the last touch ups had been done to my satisfaction, the wingtip fell off. It was bound to happen sooner or later, and it did. Ooh, such expletives. It's a good job I live alone, as the the sort of language emanating from my workroom would frighten children and animals, tarnish silver and bruise fruit. ^+^£%$%* butt joints! One invisible repair and respray later, and the airframe was ready for a gloss coat ready for decals. That's how it stands at the moment, all shiny: More when it happens, Dean14 points
-
I pre-ordered this and have been waiting for the right time, having perfected my white painting technique on my Shackleton and Valiant I gave my Victor a go as part of the 1960's Warsaw Pact vs Nato Group Build. Built OOB apart from the decals which came from Xtra Decal as I wanted my Victor not to be a Blue Steel version, to retain the clean lines of the Victor. Enjoy:13 points
-
Hallo again This is my Me-262 B. 1/32 Kit is Trumpeter. All painting and insignia are as explained in: Happy modelling13 points
-
This is my interpretation of the Westland Lynx AH1(GT) that operated with 654 Sqn AAC during the Gulf War of 1991. It was made using the Airfix kit plus the Air-Graphic update set and decal sheet. Whilst making the model I noticed that the decal sheet, plus the Modeldecal sheet only supplied markings for XZ221 (J). As I had already made this aircraft using the Airfix 1/48th kit and as I had some more info I decided to make XZ222 (K), which I did by a bit of cutting and shunting of the Serial No plus using the white stripping to put them around the rear of the tail boom rather than the front of the tail boom as it was on (J).12 points
-
Hi All, I bought this from evilbay back when the French Fancy GB was approved; quite a while ago. Since then it has been sitting in the stash while I built up my courage to attempt it. In the end I decided to just do an out of the box build. I ended up doing a few a few bits of detailing. some of which were pointless. This kit has recently been re-released and I believe may be had from the Big H, but I really hope they have cleaned the moulds up. Somewhere here on BM is a thread where someone said they couldn't find the cowling gun fairings. That really isn't surprising, this is what they look llike on the sprue: Hawk guns I did some bits and bobs to the cockpit and engine based on references to make it look a little better - pointless apart from the harnesses, you can't see most of it: Hawk cockpit 01 Hawk cockpit 02 Hawk engine I tried the Hataka France WW2 Blitzkrieg set for paints. Maybe their Orange Line is OK, but the Blitzkrieg range is rubbish. If you find a cheap one on offer, ignore it! It took me two hours to do just the underside with airbrush clogging and lack of coverage, so I resorted back to Lifecolor and Tamiya for the upper camouflage. The gunsight is from the Eduard 72 403 Gunsight set, well worth the small expense with loads of options and it'll do loads of other models. The Heller decals were very thin and gripped as soon as they touched. The white was dense but the yellow was quite translucent, and the blue is more roundel blue than French blue; but hey. Here it is, finished. Hawk03 Hawk05 Hawk04 Hawk07 Hawk06 Hawk02 Hawk01 Hawk0812 points
-
Hello Everybody ... My latest build Tamiya’s 1/72 Fw-190D. I was kind of inspired to build this because of @Shelliecool‘s Recent 190 Dora. I used the kit decals but opted to go with a change in colors. I like the look of the late war two tone green uppers of RLM 82/83 over the RLM 76. Not entirely accurate but i can live with it. Ive got several builds in the works currently, but some are stuck for paint. So sooner or later i will have more to show for you. Without further talk i give you “Dora.” Please feel free to question, comment, or joke, I hope you like it. Dennis12 points
-
12 points
-
3DBlitz kit of the Pilatus PC-21 in the new colour scheme of the Empire Test Pilots School (ETPS) based at Boscombe Down. The kit is very nicely engineered and fits together well with only a bit of filler needed. It's finished with homemade decals and Xtracolour Oxford Blue and Signal Red over Halfords Appliance White. Scratchbuilt pitot with yaw/pitch vanes Thanks for looking. Steve11 points
-
Hi. He 51 C, Legion Condor 3/J88, Adolf Galland, Calamocha, Spain, spring 1938. Classic Airframes 1/4811 points
-
The was another thoroughly enjoyable build. The research was fun; the interpretation was fun; the whole thing was fun. A typical KoPro/AZ Model kit, no surprises. My first Vokes filter and another bluish Spitfire from my bench. This makes a total of 10 Spitfires I have built in the past 18 months so, like a child who has eaten too much cake, I will put away the Spitfire A-Go-Go for a while and have a rest...build something else. I have a few ideas...perhaps something Japanese or Luftwaffen-ish...I don't do those very often. 😉 The build thread is here... Thanks to all for the support and see you in a tic! --John10 points
-
I have been busy working on the final touches of Tony. Airbrushing the centre of the stand red, and the float silver. After a coat of gloss varnish I put it to one side to finish the aircraft. I added some light weathering, pin wash down the panel lines and dirt streaks. Then I sealed it all in with Vallejo satin varnish, after adding the aerial wire, I secured it to the stand. And so I present Tony...... For an old kit, I am pretty happy with my finished results, not a bad few weeks work. Thanks all.10 points
-
Hi folk's second build for the Grumman GB is Eduard's 1/48 Hellcat as a FAA machine based at Tricomalee,nice kit not without a couple of little build issues I found the kit's USN marking's a bit brittle and poor in density so ordered xtradecal's AM set Yank's with roundel's.Thank's for looking in.9 points
-
Hi, it's mine I-16 type 10 Mosca, Spanish Republican A.F. 1 Escuadrilla , Airbase Lina , April 1938 r.9 points
-
A slow day helping a fellow Bm'er with some browser issues and failing miserably: Made the final push for finishing this. A new idea for the nose light. First a 1.5mm Eduard etch light. Then floated on Bondic 10 second UV and zapped it. Most pleasing. @Nigel Heath this is the same stuff you got at Telford last week, Its a neat way to do clear nosecones, nav lights on drop tanks etc. It doesn't need masking, dries crystal clear (the Bondic version has slight yellow tint I like). As it relies on surface tension it won't do sharp points but for 15 minutes work looks pretty bonzer. Decided to save the lovely master pitot for a better build. Remember how I said I would never yutz around with 0.4mm tube and 0.1mm rod? Well I kept my word , I yutzed around with 0.3mm tube and 0.1mm rod.... Ta Da! On a borrowed stand from the Tomahawk for a few beauty shots, RFI tomorrow. Well that makes 10 11 finished for 2018 so I'm a happy camper: sundowner or two and then I think a new one therapy mate tomorrow.9 points
-
Here is full range of modifications: AR48001 - 1/48 Fairey Flycatcher" early AR48002 - 1/48 Fairey Flycatcher" late AR48003 - 1/48 Fairey Flycatcher" early, on wooden floats AR48004 - 1/48 Fairey Flycatcher" late, on metal floats9 points
-
Thanks all! MarkSH - send it back to Matchbox at the original postal address. What could possibly go wrong?! In all seriousness, yeah that's awkward having duplicated top wing halves - I feel like that might have to be a far out what-if (1930's RAF Ekranoplan anyone?) Or: a recovery diorama, on a Queen Mary trailer? (Image credit from http://www.theinvergordonarchive.org/picture/number1404.asp) I'll pick up where I left off last time. One feature of the Heyford's engines conspicuously missing from the kit (and one of the two sets of plans I've got) are the oil coolers. In all but the very early aircraft these were low down on the starboard side of each nacelle, pretty much directly under the exhausts. They're a type that seems to be standard on RAF types of the period, with examples on Bulldogs and Hart derivatives, among others: a series of lozenge-shaped vanes joining two round pipes. I simulated the coolers from plasticard, sandwiching rectangular and pairs of tiny circular pieces, letting the whole lot dry then sanding the corners off to make the lozenge shapes: These nacelles have been like mini kits in themselves! The last job was to add the radiator fronts (see the shot above) and several tiny scoops and bits of piping (below) Next job on the Heyford was finishing off the spats. Having ensured the wheels go round (the wheels on the Heyford, as is well known, go round and round; round and round), I scribed in the removable panels which exposed the wheel, and added a little cutout and some of the structure visible behind. The door with the bulge covers some of the engine starting and priming gear. With this done, I've attached the spats and engines to the wings! After much squinting at gloomy photos (why didn't someone paint a Heyford white, and take good pictures of it, damnit?!) I ascertained the ribbed surface on the sides of the monocoque forward fuselage continues underneath. MB couldn't really represent this without slide moulding (too groovy even for the mid-70s) or two extra pieces, so I'll let 'em off. Out with the plasticard! While I was here, I sanded off the misplaced (and mis-shaped) crew door, and scribed a new one. The shape is an educated guess from the fuselage framework schematic in the AP, and one very bad photo. Lastly, a few outstanding details on the tail. I cut out the tops of the fins and added some scratchbuilt rudder balances: Finally, I cut the tiny triangular access panels seen on the rear fuselage sides from my trusty San Pellegrino foil, and (with much Grade A cursing) added some control runs from my drilled out conical fairing just forward of the tailplane. MB moulded the raised fairing on both sides, which needless to say I slavishly copied - but there's only one fairing and one set of cables, on the port side. Doh! Out with the filler! That's it for now. Next time...rigging points, and dare I say it...wing-fuselage joints!9 points
-
Hello everyone! Here is one of two Westland Wessex kits I built back in 2015. It is Wessex HC.2 XR505/081, Escuadrón Helicópteros, Aviación Naval Uruguaya, based at Base Aeronaval Capitán Curbelo, Laguna del Sauce, Uruguay, as seen on the USS Oak Hill (LSD-51) during Exercise Southern Partnership Station, Uruguay, in July 2009. This one one of five ex-RAF machines delivered to the Uruguayan Naval Aviation. It is the Mark I Models 1:144 kit with etched parts from Brengun. The kit needs some care and work as the fit of parts isn't great. The Brengun parts really improve the cockpit and supply several missing external details such as the winch and steps. The biggest flaw of this kit, and one that really needs a resin replacement, is the main rotor mast. As it comes, it is nothing like the real thing and makes the main rotor sit lower than it should. My simple solution in both kits was to cut off the mast, make the rotor head thinner (as it is on the thick side) and make a new mast from the kit's sprue sanded more or less to shape. It's not a great fix but looks much better. I'm currently building an HCC.4 and I'm giving thought to adding the links which would really improve the appearance. The exhausts were hollowed out as they came moulded solid. The kit was fully painted and varnished by brush. Thanks for looking and all comments are welcome. Miguel8 points
-
Here are some photos of my latest commission build. Its a 1962 Morris Mini in Fiesta yellow, with old english white wheels and grille, copied from my clients original car. The kit was not of the same spec so quite a lot of modifications were required, some of which were. Changing the kit double carb and airbox layout to a single Front grille and bumper changes Oval speedo was changed to a round one Pull cord door opening system added Seats were remoulded with putty and wire Wicker baskets were made for under the rear seats and rear side panels, which were included with the car when originally bought in 1962 Hope you all enjoy looking at this old classic British car, it was fun building it!!! Chris http://www.wardsmodelbuilder.com [email protected]8 points
-
Afternoon all - Just posting some pictures of a couple of models I completed earlier this year. I've only now decided to post these up as I originally did not consider them my best work and I had lost a bit of my mojo which only now starting to return. These are the Eduard Sopwith Camel (weekend Edition) with some decals used from a previous build: Roden Fokker DVII Both together I really am going through a clumsy phase at present - as soon as I finished taking these pictures, I manage to drop the DVII smashing it to bits ............ Annoyed I am! Appreciate any constructive comments Regards Dave8 points
-
Hello everyone. This is Messerschmitt Bf 109G-12 Yugoslav version, 15/9615, 83 Fighter Regiment, Yugoslav Air Force, Cerklje airfield, Slovenia, Yugoslavia, 1948-49. 1:72 AZ Model kit with Kora resin conversion set. Following the Second World War, Yugoslavia received some standard two-seater Bf 109G-12s from Bulgaria. Needing more, they converted a couple of one-seaters. This conversion visually differs from the original G-12 in the rear cockpit section where an Erla Haube canopy was used instead of the special G-12 rear canopy. As soon as I found out about this variant I went looking for options to make it and found a Kora resin conversion set with decals. This set was meant for a Fine Molds kit but I used an AZ Model kit from the blank 3-kit pack instead. This of course meant more work to get both to come together but in the end I managed and it came out nicely. Paint and varnish all applied by brush. This is the last 1:72 kit I've built so far (I build mostly in 1:144 nowadays) and I completed it last year. Thanks for looking and all comments are welcome. Miguel8 points
-
This is Eduard's little Spitfire XVI. I built this a few weeks ago as a break from the more involved long-term builds I've been wrapped up in. The kit is easy to build, fits great, and features fantastic detail. I built mine in the markings of a 601 squadron participant in the 1949 Cooper Race. Paints are Mr. Color acrylic lacquers thinned with Mr. Leveling Thinner. A very cursory weathering with oils. The whole project took about 2 weeks. \ And I had not realized that I did this, but the squadron is the same as that of the Special Hobby Vampire, I built earlier this year.8 points
-
Cheers Bill! I don't know the answer to that question and I must admit this surely must rank as one of the most nostalgic of early war RAF aircraft, due to the huge sacrifice of their crews rather than the success of the aircraft. Having said that, I do hope a 1:72 offering is not "just around the corner" - purely for selfish reasons! Thanks! I'm looking forward to seeing that Dennis! Tonight's efforts centred around the gun cone. I decided to try plunge moulding, but instead of the paintbrush handle I sanded a buck out of a piece of balsa. This is what I ended up with. The buck CA'd onto a toothpick, and a hole drilled and opened out with a round file to just a little bigger than the buck, hopefully enough to allow for the thickness of the plastic sheet. I used .010" sheet and the first effort gave me this That looked pretty hopeful so I trimmed it out and ended up with a traffic cone! A little more trimming and sanding, and it seems to fit pretty well! I think I can live with that! A little more refinement, and some detailing and it should be ok. My other efforts focused on the interior, specifically the radios. For some reason I had neglected to add anything, so a piece of plastic rod painted black, and some spare PE from the cockpit set gave me a little "interest" to add. I have no idea what the PE is supposed to represent in the Hurricane cockpit, certainly not radios, but at least it looks better than nothing! Next up we'll see if that gun cone works, and can be trimmed well enough.... Thanks for looking in! Ian8 points
-
Hallo again This is my Spitfire Mark XVIe from Tamiya in 1/32. Wonderful kit!. All painting and insignia are as explained in: Stencils are Wet transfer from HGW. Happy modelling8 points
-
Indeed, Patrick - this is build #2 from the box. This was #1 (finished in summer 2017):8 points
-
Hanriot HD 1 7501 Unit Unknown Italian Service, 1918 This was a late entry for the Eleventh Hour GB which ended on Saturday, I didn't finish it for the deadline, but managed to complete it a few days later. I chose this version of the kit markings because I thought that it would make an interesting challenge in trying to achieve some tonal difference between the fabric and metal areas of the aircraft, and you can't beat having a green dragon painted down the side. by John L, on Flickr by John L, on Flickr by John L, on Flickr by John L, on Flickr by John L, on Flickr by John L, on Flickr by John L, on Flickr7 points
-
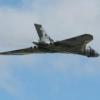
A while ago I ordered a few of these tiny 3d printed Vulcans. All one piece. Pretty amazing. the surface detail leaves a lot to be desired and take a lot of work to sort. I didn’t bother for this just painted it up free hand for a bit of fun. from a distance looks kinda nice as a small bit of interest on the shelf. Cheers All Rob7 points
-
https://imageshack.com/a/img922/7990/IGCuwl.jpg - It seems that I have a problem with Imageshack, so If its works Ill post more pics - Well; I've found a solution as it seems, my photos looks a bit strange but it works.. ........O.K so this is my second Fullback with all the transkits for the subject from CWS fitted. - As comparison this is the first one for those who hadnot already seen it7 points
-
7 points
-
Work on the (many) props has begun! Since this photo I have airbrushed the black sections, so thankfully I'm nearly there!!!7 points
-
Here’s my recently completed Sherman. It’s on a Mini Art base with Mini Art tank crew and Tamiya stowage. Here’s the WIP: Sean6 points
-
I started a series of Italian planes. The first one is over. Macchi MC.205 Veltro, Italeri model, all of you familiar. Here's a picture. Enjoy.6 points
-
Well, you learn something new every day don't you. I've been modeling for a couple of years now and I never realized that white paint was noisier to spray than other colors.6 points
-
I have just finished this badge of 109's, which is no. 211-215. It is the Az model of the F and G. Build out of the box, with aftermarked decals. Cheers Jes6 points
-
The progress this weekend was adding panel line colour and oils, as well as the engine. I had to add the push rods by hand using brass wire. Notice something missing. I did. It is fixed now. This plane will be completed next week.6 points
-
Just the undercart, stencils, airbrakes and some restrained weathering to go. Should make it for the end of the Group Build!6 points
-
This is one of my two builds for the Eleventh Hour: Commemorating the end of the Great War - Group Build. Information about the Renault FT-17 can be found here. This was fascinating little kit to build which went together very well. This was the first AFV kit that I have built which included some of the interior – hence the reason I left the driver’s hatches open. I made this to be part of a small vignette together with a Mark A Whippet and a few figures from Master Box. The RFI photos of the Whippet can be found here. Kit: 1/35 Meng Paints: Humbrol, Revell, Citadel and Railmatch Acrylic paints all applied by brush Extras: None. Most of the weathering was done with acrylic paints and the mud is from Vallejo. WIP thread: Here Vignette photos can be found: Here A couple of photos of the FT-17 and Whippet on the vignette base: Finally thank you to Robert Stuart for hosting the excellent GB and anyone who commented or offered advice in my build thread. Kind regards, Stix5 points
-
Finished it - after a short (for me) WIP: the Matchbox kit plus Small Stuff resin engine + Starfighter Decals: And this chap muscled in too: prospective pilot maybe? Not sure if he's a Gnat T.1 or a Mosquito B.35.5 points
-
Evening all, The Duck is finally getting some attention, I have buttoned up the fuselage and assembled the top wing as well as drilling the holes to receive the rigging: The joins were from perfect and required a lot of filling and cleaning up so a fair bit of the riveting has been lost, some remedial detail will have to be attempted. I used the top wing assembly to set the substantial dihedral for the lower wings. The clear parts are... well not really very clear at all but I masked them before trying to blend them in to the fuselage. To blend the canopy in, I used very thin Milliput sausages, which were smoothed out with Isopropanol. I have applied the first coat of Primer and as you can see there is a lot of detail to re-instate on the top surfaces of both the float and fuselage. Not bad progress and despite its shortcomings I think its captures the shape of the Duck quite well, however I believe the canopy line is too low if I make another? I will certainly think about addressing the height of the canopy. Cheers, Mark.5 points
-
Thanks Dave. Eyes for the Phoenix is on its way to me and I won't be winning any prizes. Thanks Mike. Only need to give the canopy.another coat.of paint, paint the aerial mast and tyres, and paint and install the rockets. Thanks for looking.5 points
-
5 points
-
Thank you Nigel. I've got to remember to try and find some spare, clear plastic rod to support it on display! Otherwise it won't be in flight let alone banking left! I'm sure I've got some somewhere,,,,,,, Thank you Giorgio! Thank you for your comments Mark. Hi Glynn and thank you. The engine detail is very nice from Airfix making it much easier to paint. Today I haven't had the time to get as much done but I have made some progress. The Prop Blurs have been painted with a couple of thinned coats of Revell's Anthracite and then the ends were painted with a thinned matt yellow which I lightened with some matt white. I have found before that, if the yellow is too intense, it doesn't look right. When the prop blades are at speed the yellow is less noticeable on the real thing. I know Prop Blurs aren't everyone's cup of tea but they'll have to do. I haven't got the time to motorise the prop on this build. Once painted I used CA glue to attach the blurs to the slots I cut yesterday in the spinner: Then I tried a test fit on the front of the Wildcat: I also did some work on the pilot figure. The detail is a little on the soft side but he doesn't look too bad for 1/72: Test fit with the pilot: I also got the undercoat applied on the frame of the canopy and windshield using thinned Anthracite applied with a fine, pointed paintbrush. And mistakes were tidied up with the end of a cocktail stick: Next I want to get some pre-shading on the panel lines on the whole aircraft before applying the paintwork - but that will be next week. Comments and suggestions welcome. Kind regards, Stix5 points
-
The WiFi is has decided to play this morning so here's some shots of my progress. First a couple from Friday when the wings were attached to the fuselage.... And how the underneath is looking at present. If the WiFi continues to behave I'll post some more later but I decided to get these up before it needed a rest again. ☺5 points
-
Belgian AF F-104G Starfighter FX-02 350eme/1W Beauvechain air base 1964 Kit - Hasegawa F-104J1/48 scale Eduard etch in cockpit Daco wings, tailplane and crew access ladder Paints - AK Xtreme metal, Gunze and Xtracrylix Decals - Armycast Pitot - Master Thanks for looking James5 points
This leaderboard is set to London/GMT+01:00














.thumb.jpg.cfc129272ffec824439b15e6013d5952.jpg)
