
Leaderboard


Popular Content
Showing content with the highest reputation on 25/10/18 in all areas
-
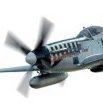
Phinished this Phantom and had a blast building it! Painted with MRP paint and added seatbelts made of masking tape and ejection seat pull handles made of wire. Thanks for looking! Rich25 points
-
Hiya Folks, I originally started this for the `Brits Abroad' GB but due to being grounded for a while due to my back injury it was too late,...... so here it is here instead. This is the real aircraft,...... as used by II.33 `Savoie' of the Free French Air Force for tactical recce sorties around the Mediterranean. These sorties usually consisted of one aircraft fitted with an oblique camera in the rear fuselage and a straight fighter employed as an escort/weaver and this aircraft would appear to be the latter. Here is the real aircraft, complete with 6 stack exhausts and heavy exhaust staining; The model is brush painted as usual and her is the WIP in the GB; And here is the model; Cheers, Tony23 points
-
.......ended......this is a very good kit......all insegna and codes are painted,only the exagon is achivied from a white decal sheet....Ciao from Italy,Enrico.12 points
-
Well this was a monster build, by far the biggest model of my undertaking, even though detailing was kept to a minimum. Not one for the faint hearted as it wasn't a straight forward build and a lot of filler was required. The size of the kit for the cost is excellent, I almost feel like I should have paid far more for it than I did. With the choice of 4 different aircraft the decals give you plenty of choice. However, the actual decals themselves are very flimsy which on the long walk ways its almost impossible to fit them. I tried 3 different decals and due to the size they just tore and rolled up as soon as they left the card. The instructions. Now that's where all the fun is, you could build it by reading kit reviews rather than following the instructions they are that bad. How you can build an aircraft with wings out stretched and provide no strength its crazy. Is this kit worth it. Depends how much effort you want to put in adapting the instructions, you have plenty of space and are relatively experienced. Would I buy it again. Unfortunately the answer is no. Apologies for the backgrounds in the photographs, the sheer size of it forced me to use the floor for the pictures. IMG_9619 by Christopher Newton, on Flickr IMG_9620 by Christopher Newton, on Flickr IMG_9621 by Christopher Newton, on Flickr IMG_9624 by Christopher Newton, on Flickr IMG_9626 by Christopher Newton, on Flickr Just to show the size this was taken next to a 1/72 tornado and a 1/72 Concorde IMG_9627 by Christopher Newton, on Flickr Chris9 points
-
I had wanted to build a 1/72 Atlantic since I first saw one in the 1968 Observers Book Of Aircraft. In 2000 our model club was exhibiting at Scale Model World at Telford and I noticed that someone on the neighbouring club table was selling their unstarted Mach2 Atlantic at a price that I was willing to pay and so the contract was signed and I had acquired an Atlantic at last. This was to be my first experience of a Mach2 kit and a frustrating one it was at times but I was determined to complete this model as at the time I had not seen a 1/72 Atlantic model built up. I built it during 2001 and took a small number of photographs during construction with my 35 mm camera. The very basic instruction sheet Basic interior compartments from plastic card and strengthening wings spars. I decided to cut open the rear crew entry hatch and detail the rear unpressurised compartment. Plastic card strengthening spars added to the wings Nose weights added to compartments under the cockpit and forward cabin Extra detail and crew added to flight deck Model progressing well. Scratchbuilt entrance ladder. Inspiration for this build also came from my first opportunity to see a real Atlantic close up on display at a Mildenhall air display. The photographs I took provided some good detail references. A sketch I did of my Atlantic's interior before I closed it up I sprayed the fuselage and wings and Marigold glove with Halfords Acrylic Appliance White car spray Brush painted Humbrol 156 Grey enamel on upper surfaces. The newly completed model in August 2001. Ready for collection and operational service. On a visit to RAF Scarborough armed with underwing Martel air to surface missiles. Propellers are free spinning with the flick of a finger by the use of brass rod axles spinning inside brass tubes incorporated into the engine fronts Atlantic departing RAF Scarborough. I hope you have enjoyed my Mach2 Breguet Atlantic. cheers, Adey9 points
-
It's OK already, thanks Cookie Another quick update: front U/C bay tidied up, waiting for some detailing The tub received some drybrush with Lifecolor Dark Gull Grey first, followed by Lifecolor Light Grey only on the edges Also, some detail painting using Lifecolor Matt Red, Gloss White and Matt Natural Metal For the IP, I used the kit decal and lots of setting solution, applying it at least five times and pressing down with a cotton bud. Some drybrushing too, around the scope, which was painted inside with Tamiya Clear Green The aiming device on the coaming was also painted with Tamiya Clear Green, and various drybrushing around (sorry for the blurry pic) Some detail painting on the seat - harness and belts still to do Control stick Finally, I completed the wings gluing (leading edges, this time) Comments welcome, as ever Ciao9 points
-
If you've seen the 1966 film The Blue Max you'll remember all the 1:1 aircraft in it, a flying cast consisting largely of accurate-looking replicas of German WW1 types with some Currie WOT-based SE5s for the Brits. In the background were also a handful of Tiger Moths and Stampes to make up the numbers, with machineguns fitted and covers installed over the front cockpits to pass as fighters. When I was 20 I told people that if I ever got a Tiger I'd restore it in Blue Max configuration. Now I'm not so sure, but I still wanted to build a model of one. So when Airfix released its new 1/72 Tiger kit a few years back I grabbed two for different projects and, finally, one of those kits is complete as my Luftsreitkrafte (sp?) Tiger! Untitled by Zac Yates, on Flickr Untitled by Zac Yates, on Flickr Untitled by Zac Yates, on Flickr And here are the three of four planned Blue Max builds all together. Untitled by Zac Yates, on Flickr Airfix kit with Revell Fokker D.VII guns and Aviattic lozenge decals. Roden's Albatros D.II provided the crosses (which mostly survived intact) and the rigging is the silver/white thread sold by Wingnut Wings. Annoyingly the instructions didn't include the elevator cables so I used the Haynes manual and internet photo searches to help establish where they enter/exit the fuselage sides.8 points
-
Dear all, Please find below some images of another recent build. It's the 1:72 Academy P-51C Mustang build as a Mustang Mk.III of the RAAF, as operated from Fano, Italy, on the Adriatic coast in 1944. I used an Eduard Zoom set for the cockpit and dropped the flaps, while the guns were replaced with brass tubes and the kit's bombs with some Eduard Brassin items. The camouflage was sprayed on using a masking set from Kora Models. The decals are from On Target decals for Commonwealth Mustangs as I liked the Southern Cross image on the tail. It's a great little sheet, but it has unfortunately a few errors when it comes to instructions. The Mustangs from 3 Sqn RAAF didn't have a medium blue spinner but a red one (like all allied fighter aircraft in Italy) and didn't have the white identification bands on the wings and tail. They didn't have the yellow markings on the wings either, but I only found that out after I finished painting the whole lot, so I left that as it was. I hope you like it! Peter PS: looking at the images I realize I need to add a bit more grime to the wheels... These Mustangs were kept well but worked hard.8 points
-
Hiya Folks, In order to provide long range fighter cover to the crucial Operation Pedestal convoy heading for Malta in August 1942, 248 Sqn was detached from Coastal Command in the UK, leaving its base at RAF Dyce for RAF Takali in Malta with its 16 x Beaufighter Mk.Ic`s, arriving on the 10th August. As well as providing fighter cover this unit also carried out a number of offensive sorties too, strafing enemy airfields in Sardinia and Sicily and also carrying out attacks against Axis convoys crossing the Mediterranean between Italy and Africa bound. Although proving a great success, 248 Sqn`s tenure in Malta was short lived and during September it returned to the UK. The subject aircraft is T4843, WR-X said to have been flown by Australian ace Sergeant R.F. `Ron' Hammond and seen in the photo below, furthest from the camera, in which he damaged a Ju88 and destroyed an Italian Piaggio (probably a BR.20!) during a strike against Axis shipping off the Greek islands. In this version of T4843`s history, it was later destroyed near to Trondheim, Norway on 28th April 1943. I say `this version',..... because there is another history for T4843 WR-X! In this version the aircraft was said to have been lost in April 1942, again near to Trondheim and so if this is the true account, then it never even reached Malta! While operating from RAF Sumburgh, Wing Commander Ernest Lesley `Johnny' Hyde DFC (from Membury, Devon and the pilot of T-Tommy in the wartime film `Coastal Command') and his Observer Flight Sergeant Jack Ernest Paget MID (from Hornsea, Yorkshire), both of whom were 28 yrs old were flying T4843 when they were lost over Norway during Operation Bluebeard on the night of the 27th April 1942 during an attack on Lade airfield. After attacking shore flak positions with cannon fire off Trondheim, their aircraft was hit by enemy fire, the German`s claim that it was hit by the flak battery at Ladehammeren although one local account states that it was intercepted by German fighters,.... but whatever the case the Beaufighter was ditched into Trondheim harbour (where the wreckage can still be seen today 40m below on the seabed). Both W/C Hyde and F/Sgt Paget survived the ditching but later died of their wounds, both deaths being recorded as the 29th. They are both buried in Stavne Cemetery, Trondheim, Norway. ; EDIT,..... I have just found this photo of T4843, WR-X after finishing the model! This link shows the Beaufighter wreckage said to be T4843 at the bottom of Trondheim harbour; https://ktsorens.tihlde.org/flyvrak/korsvika.html As does this U Tube film; So,..... the history of this aircraft is open to debate! The Air Britain serial book says that it was destroyed serving with 248 Sqn on the 27.4.40,..... which must be an error,... but does point towards the latter story being correct? As usual, the model was brush painted and here is the WIP; Here is the model; And here is the model alongside the new Revell Beaufighter TF.X; And here they are head to head, showing the differences around the cockpit canopy area; Cheers Tony7 points
-
This cat 'gets a piece at every door' as they say up here, but of late it has adopted us. It has taken a liking to the chainsaw sculpture of the Highland cow and her calf,presumably to ensure he is seen from the kitchen.7 points
-
to a new area of Britmodeller that we've been pondering for an absolute age, but have only just gotten round to making, after engaging with two members that also have manufacturer hats that caused some confusion in the Rumourmonger area next door, which was originally intended to be a member driven area for finding out about new products. This one's going to be uncluttered by guesses and surmises, and has instead been developed with manufacturers in mind, to allow them to post their new products, to ask us what we think, and ask for assistance from the vast collective expertise of our hobby (self excluded - I know nothing!). The topics here will be started by accredited manufacturers (not shops, traders etc.), who will need to register as such by dropping me a PM and telling me which company they're involved with. We'll then switch their membership category over to the newly minted Manufacturer type, which will give them the relevant permissions to start a topic to let us know what they're up to. Us members will be able to reply, but crucially WON'T be able to start topics and muddy the waters with duplicates, wishlists and so forth. Obviously it's a work-in-progress, so we can expect some teething issues, which we'll do our best to get out of the way quickly, but we anticipate it being of great use to those manufacturers and product developers that take advantage of it. We've only got two members converted as yet, which are @petr@SpecialHobby and @Jan Polc, but we'll have more in due course, and will be inviting people as and when we remember. My memory is poor, so if we don't invite you from the outset, don't get upset, just drop me a PM and I'll go and add you in just as soon as is practical. Peace out6 points
-
F-4Ds of the 429th Tac Fighter Squadron based at Nellis AFB in the autumn of 1980. By May 1981 they would all be transferred out to ANG units and replaced with F-16A/B. 65-0667 still wearing the blue canopy rails from when it was assigned to the 428TFS. 66-0262 still wearing the blue canopy rails from when it was assigned to the 428TFS. 66-7506 66-7544 66-7554 66-7587 66-7650 66-7660 66-7663 66-7685 66-7701 66-7715 still wearing the blue canopy rails from when it was assigned to the 428TFS. 66-7726 Thanks for looking, Sven6 points
-
USS Courageous | NCC-1861 | Miranda Class | 1/2500 This is a resin kit, by Accurate Miniatures of a "Surya Class" starship. It didn't look too much like Surya class starships I found on the internet, but with a little tweaking it looked very much like a Miranda class might look like in the Original Series timeframe. I completed this kit on October 21st, 2018. The work in progress is here. Not much to say about this because it is a "non-canon" design. The USS Reliant in Star Trek II was always one of my favorite starship designs and the idea of an Original Series Miranda class intrigues me (I've seen some great art of Original Series Miranda class starships on the internet -- I really want to try to kitbash a 1/1000 scale one sometime). Finishing: Completely sanded with 1500 grit sandpaper (see notes below the pictures) Paints: (applied from base coat to surface): Mr Surfacer 1500 black as a primer > Testors Enamel FS36440 (Flat Gull Gray) marble coat > Testors Enamel Black preshading > Testors Enamel FS36440 top coat > Testors Enamel Dark Ghost Gray (FS36320) / Testors Enamel Gunship Gray (FS36118) / Testors Enamel Chrome Silver for details > Alclad Aqua Gloss (3 coats) > Decals > Testors Acryl Semi-Gloss clear coat Decals: JT Graphics Surya Class Decals / PNT Models 1:2500 scale hull details Building Notes: The resin was so slick that my first coat of Mr Surfacer 1500 peeled right off. Once I sanded the entire surface with a fine grit sandpaper (1500), the paint stuck well enough to resist being scratched with a fingernail. The JT Graphics decals worked very well, but the PNT Models decals silvered once the clear coat was applied. Also the PNT Models decals were packed so closely together that it was very challenging to cut them out. The Testors Acryl semi-gloss should've been called "mostly flat". I haven't been really happy with the Acryl clear coats. In all, this was a pretty fun build and looks great with my 1/2500 starship collection. Thanks for looking. Comments, constructive criticism, questions and tips always welcome! Hope you enjoy.6 points
-
Hello friends! I'm new in the forum and I like to present to you one of my latest works - Revell's P-47D. I did some scratch work like the formation lights and traffic lights, just a very small accents. The trigger for building of this model were the excellent decals from Kits-world. I just love pin-ups! Hope you will like my work.6 points
-
Cheers Radders Another big milestone tonight, the wings are now fitted and the roots miliputted. Some bits still to do before painting but I'm hoping to have it painted for Telford and on show even if it is without u/c so focussing on the bits that I know I can get done for now. If anyone has any spare beaufighter props (4 off!), I'd be most grateful, I guess I'm hoping rather than expecting! Here's tonights progress: Cheers Neil6 points
-
Hi all This is my next project: FOKKER EINDECKER E.II "69/15", Baron Kurt von Crailsheim, FFA 53, Monthois, France, October 1915. Baron von Crailsheim scored the first (and his only) air victory for FFA 53 Eindeckers I'll be using the Airfix kit 01086 in 1/72nd scale. The art work(as for most recent Airfix releases) is very appealing Two grey sprue, very crisp details, no sink marks or flash The box back with the painting and decalling instructions Since this will be my first ever WWI project, I'll keep it basically straight from the box. However, I'll add a few things that I've noticed are missing (the windscreen in front of the cockpit, harness and the rigging). Oddly, I decided to start this building by the propellers. The kit brings two propellers types to chose from. One from Garuda Propellers (wider paddles) and one from Germania Propellers (slim paddles). I used the following technique to paint the wood laminated propellers: For the Germania propeller (lighter in colour on the photos below); Paint the part with XF-02 Flat White Watercolour pencil Brown and Ochre to make the wood veins 20% Gunze H91 Clear Yellow + 80% thinner 20% Gunze H92 Clear Orange + 80% thinner Mr Color C218 Aluminium for the metal centre. For the Garuda propeller (darker colour on the photos below); Paint the part with XF-02 Flat White Watercolour pencil Brown and Ochre to make the wood veins 20% Gunze H91 Clear Yellow + 80% thinner 10% Gunze H92 Clear Orange + 10% Gunze H93 Clear Blue + 80% thinner Mr Color C218 Aluminium for the metal centre. After painting with XF-02, use various browns shades using a pointed brush to create wood grain in the Germania propeller You can either draw it on the piece or use the brush to paint it, blende it with some water if desired Next steps is to add colours with the various clear shades Front view: Left the Garuda propeller and on the right side the Germania propeller Back view: Left the Garuda propeller and Germania on the right side I'm still undecided which one to use. Next I started on the cockpit. The first thing I've done was to close some annoying release marks. Only the one on the front of the cockpit would be visible and required to putty I've used the same technique used to paint the propellers to paint the floor board and back of the seat. In this case I've used the lighter wood colour. After the XF-02, watercolour pencils were used to simulate wood For the first time I decided to try the Mr Metal Color lacquer paints. I don't ever use Alclad due it's extreme smell and I'm allergic to it. Therefore it seems to be a viable option. Used for the first time and I was really impressed with the results and quality of the paint Airbrushed MrColors 211 - Chrome Silver on the "metal" parts using the following settings: 1 paint : 2 Mr Levelling Thinner (MLT) @ 15psi. The result was outstanding and I became a fan to it. Metal parts sprayed with MrColors 211 with any prior preparation on the plastic. Fuselages halves ready to be glued together I've added some synthetic fibre harnesses from my spare parts box. Maybe not the correct one but will do the job on this scale. I also did improve the handle on the control stick. The part is hallowed but comes as a single flat piece of plastic in the kit Cockpit masked and ready for the next painting task The Fokker Eindecker had a very distinctive metal characteristic. All Aluminium panels and cowls remained unpainted and were given a "squiggly turned" finish. Please observe the squiggly turned finish on the cowl Since the beginning of this project I was trying to figure it out how to represent it in this small scale. I came up with this technique that I was happy with the result. First airbrush the metal parts with Chrome Silver (211) Spray a coat of Tamiya X-19 Clear Smoke (40% paint : 60% Thinner) Brush paint MrColor C218 Aluminium in format of the squiggly marks Airbrush a final coat with MrColor C159 Super Silver (40% paint : 60% MLT) Next in my list was to add some detail to the engine. The Eindecker E.II was powered by a 100hp Oberursel U.1 (which was a license built 100hp Gnome Monosoupape). I added the ignition wirings to the cylinders using EZLine fine. After a first base with X-01 Black I sprayed it with MrColor C159 Super Silver (50% paint : 50% MLT @ 15psi) Following I did spray the cylinders only with: 1st: 20% X-19 Clear Smoke + 80% thinner 2nd: 20% Gunze H91 Clear Yellow + 80% thinner 3rd: 20% Gunze H93 Clear Blue + 80% thinner 4th and final, Tamiya Panel Accent BLACXK wash. The Eindecker was equipped with an IMG 08 "Spandau" 7.92mm machine gun. Obviously the kit would benefit from an aftermarket representation of this machine gun. However, I have decided to build it as most out-of-the-box as possible, so I just painted the piece XF-01 Flat Black and had some graphite powder rubbed into it afterwards. A new aftermarket machine gun would add value to kit. Note how characteristic it is XF-01 Flat Black applied Graphite powder was rubbed overall I did open the machine gun barrel to add some detail Fuselage is now masked and ready to get painted. Comments and critics are very welcome! To be continued!5 points
-
The kit itself took a fair amount of patience and filler. The fitting wasn't too bad other than for the angle of the rear wings, it causes huge gaps. However, the decals are shocking, some have started to lift already and some never even stuck. I can only guess this is due to the decal paper techniques at the time. IMG_0391 by Christopher Newton, on Flickr IMG_0390 by Christopher Newton, on Flickr IMG_0414 by Christopher Newton, on Flickr Chris5 points
-
There's a much better alternative but as it's in very poor taste I won't post it...5 points
-
Here is my entry for the Group Build. Fokker D VII flown by Oblt Erich Lowenhardt of Jasta 10, Prisieux Ferme, August 1918. Kit: Roden 1/72, OOB other than cabane struts put together from the kit plus some taken from a second kit, a footstep from thin wire and nose louvres and profile modified with plastic card. Rigged with invisible thread and fishing line. Decals: from the kit with additional crosses from SuperScale, lozenge camouflage by Aviatik. Roden's D VII is a bit of a Jekyll and Hyde kit, some lovely details but awful fit issues and a strut/wing geometry that is completely wrong. This was a challenging kit to build and there were a couple of times where I could have given it away, but participation in this fun group build saw me through and gave the opportunity to try out some new techniques and improve my modelling skills. Many thanks to all those who posted encouraging comments and gave support during the build. Anyway, enough waffle, here are the pics: AW5 points
-
Right, here’s the underside view of the upper wing with ailerons and fuel tanks added: The pencil lines are simply guidelines for where the strut holes will be drilled. I haven’t bothered to add any form of surface texture or tape strips etc to the underside; once again I’m keeping it simple. The struts are now keeping my thinking muscle occupied. I’m going to try the following method for the main wing struts: 1. Take a standard wooden cocktail stick/toothpick. 2. Sand two opposite side laboriously until you are thoroughly bored and the wood more-or-less represents a streamlined strut. 3. Cut to the appropriate length. 4. Trim one side at the top and bottom corners to represent the ‘cutouts’. 5. Drill the tiny end face with a tinier drill bit and add an even tinier bit of top E guitar string wire to the hole. A bit like this: The idea is then, obviously, to drill more titchy holes in the upper and lower wings and build up the struts as in a standard kit. The measurements will have to be spot on though. The four struts that attach the upper wing to the fuselage, on the other hand, will simply be four lengths of stretched sprue glued to the upper wing and slid into four holes in the upper fuselage. This should allow me to set the wing gap and upper wing angle of incidence before the glue sets. In the meantime, however, I have the deep excitement of making some more wooden struts before being able to see if the plan will work. Jon5 points
-
Hi All, I'm participating in the STGB on the B-17. Since I posted pics at the group build I thought I'd post him here also. I redid the throttle handles , added the seat cushions and the Eduard belts. So far so good. Any comments appreciated. All the Best! Don4 points
-
Having astonished myself recently by completing (eventually) a scratchbuilt 1/144 Avro Bison that actually bears a vague resemblance to the original machine, I decided to ride the wave and resurrect a couple of previously-abandoned 1/144 biplane scratchbuilds. I do like unusual subjects, especially of between-the-wars British aircraft, so the first of these is a Handley Page Hyderabad bomber. The HP 24 Hyderabad was developed from the W.8 civilian airliner, which was itself a development of the famous 0/400 bomber from the First World War. Named after the Indian city, the Hyderabad was visually unusual in that the nose gunner's position was significantly lower than the level of the cockpit, giving the machine a typically British quirky appearance. Power came from a pair of uncowled Napier Lion engines mounted between the biplane wings, which were fitted with slots, and the aircraft could carry a bomb load of 1,100lb (500kg). The Hyderabad prototype, J6994, first flew in October 1923 and, in total, 45 Hyderabads were produced and served with four RAF squadrons. The rudders of early machines had distinctively curved outlines which were soon changed to an angular shape reminiscent of the W8 and W10 airliners. It was the last RAF biplane bomber of wooden construction and was finally withdrawn from reserve squadron use in 1933. I had previously managed to construct a fuselage from plastic card - it is a simple box construction - and had cobbled together the distinctive nose profile by cutting up some spare bombs and fuel tanks. I had added wings, struts, paint and decals, but I wasn't at all happy with the result so removed the wings and consigned the parts to the 'do-it-later' box. Much later, after producing the Bison, I thought I would be able to do a better job second time round. Here we go! This is where I have got to so far: The fuselage is okay and has been rubbed down with fine wet & dry paper. A new pair of lower wings have been shaped from plastic card, rib effect added and cut to give the appropriate degree of dihedral beyond the engine mounting point. The ailerons may have to be replaced - not a major task - and the distinctive fuel tanks from the underside of the top wing were originally 1/72 Heller T-6 gun pods. The two wheels, which will need a clean up as well as a matching pair, are simply plastic discs with rubber O-rings around the outside. The upper wing is taped onto the homemade plan and I am part way through adding the tape strips that will become the lower sections between the wing rib effect; two or three coats of grey primer followed up by a bit of very gentle sanding works well enough for me. The rib spacing isn't perfectly even but it's good enough for me, especially as 'ribs' and gaps are only about 1.5mm wide each. The lower wings already have this effect applied. Fuselage: The engines are about 15mm long and have 22 parts each at this stage; again, they aren't desperately accurate or detailed but are good enough for me: Finding RAF roundels of the right scale size and dimensions can be tricky; I recently found these by Miniscale so picked up a couple of sheets from Hannants: Please accept the usual apology for less-than-stunning smartphone photos. I've no idea how long this will take due to the continued intrusions of real life, but posting a WiP thread should at least stop me from putting it back in the 'do-it-later' box! Jon4 points
-
Hello, guys Grande Boutique is my second work from the WWI theme. This time I decided to make a background story. The action is located somewhere in France in 1918 ..... Diorama is made on a 20 x 20 cm base, dominated by a weapon store. In this story I played with my imagination, so I made up for a section of the narrow-track railroad with horse racks that were massively used at that time. The truck is RPM's "Mack AC Bulldog", which I've been upgrading with styrene in some places. In the end, the model is of satisfactory quality. The figures I used on the diorama are from the British manufacturer WD models. These figures are of excellent quality and if someone decides to create a WWI theme, I can warmly recommend this company. Prisoners like the horse are from Revell and Airfix. There is also a smaller wooden cottage on the diorama which I have completely made of a veneer thickness of 0.3 mm, subsequently painted with acrylic colors. The wagon and chassis that are in the center of the story are made of self-construction from various remnants of the model, styrene, copper wire, etc. I hope you like work and of course all comments are welcome.4 points
-
Afternoon Chaperinos Well I'm calling the H2R done. I think this is the longest I have ever worked on a Bike, just over a year. I think the reason for that is basically my fretting too much over the Carbon Fibre decals... (too much fretting and not enough doing!) Anyway, The kit is amazing, probably Tamiya's best bike kit, close call between the Panigale and the new Yamaha. Final colour decided upon was TS 52 Candy Lime Green. I'm not totally sold on the original black chrome colour and I'd probably have stuffed it up anyway, but I'm glad that I did it in the Lime Green. Looking at pictures of the real bike, just about the whole thing is black and I think adding a bit of colour actually brings out the evil lines of the bike. Righto, here's the pictures... There aren't really any bad points about the kit, except maybe that the wings are extremely fragile, so probably best to use superglue on those bits. Absolutely no reason why you couldn't finish this without the CF decals, but they do add a certain something. I'm already plotting to build another one, but this time with the HobbyDesign detail set and a completely off the wall finish... I have absolutely loved building this bike and I hope you enjoy the pictures Cheers Mad Steve4 points
-
All right then, let's do some more modelling. The leading edges of the intakes have been added, along with the wings, tailplanes, and vertical fin. It kinda sorta looks like an aeroplane now. The intake fairings fit reasonably well, but will need a dash of filler to properly hide the seams. One thing I hadn't anticipated with the wings was a slight mismatch between the thickness where the wing joins the fuselage. In my case, the wings are slightly thicker than the root fairing, resulting in a step. I decided to align the wings on top, and have all of the step on the bottom. Then out came the sanding sticks to remove the step (and any engraved detail in that area). Oh well, at least it's on the bottom. The fit of the wing on top at the root isn't too bad, but it isn't good either. Typical short run stuff. The same goes for the root of the vertical fin and the tailplanes. All will need some blending work as the fit is not Tamiya-esque. I used the drawings on page 37 in the Birtles book for setting the dihedral of the wings and tailplanes. Sometimes I make a template with the correct angle and use that, but this time I just eyeballed it. For what it's worth, I scanned and printed those drawings out, scaled them to 1:72 (they were very close to that already) and compared the model parts to the drawings. A few minor discrepancies, but overall a pretty good match. One thing I caught is that AZ have the forward fuselage wider at the top than at the bottom. When you look at the model head-on, the boundary layer plates should look parallel to each other, but instead there is a slight angle. This is due to the bottom of the forward fuselage being thinner than the top. If I had realised this prior to assembly, I could have put a shim in the bottom to correct the issue. Oops. On the good news front, I measured the thickness of the wing at the fold line, and compared it to the PE parts in the Airwaves set. Just about a perfect match - the PE parts are a wee bit too long, but that's easy to trim. So I think it will be OK to hack off the outer wing sections. Hand me my axe! Cheers, Bill PS. Probably should get some E wing turned brass cannons, eh?4 points
-
It seems like an age since I last completed anything, and after receiving the first batch of review kits from new(ish) company AMK - Avantgarde Model Kits, I thought I'd give one of their latest offerings a trip round the block after kicking the tyres in the review here. The build was pleasant and uneventful, with some very nice fit and detail to be had straight out of the box. Apart from the nose wheel attachment being a little weak and feeble, all of the minor problems i had were self-induced, and I thoroughly enjoyed the build. Painting was done mostly with Gunze Sangyo paints, and as I was left with splinters from scratching my head over the East German scheme I'd chosen, I opted for H302 and H406 over H418 in the end, with a random yellow doing the job for the nose and wing accents. The decals went on well, although the carrier film wasn't the thinnest, so if you're using the kit decals, remember to overcoat them with some gloss clear varnish and sand back where you can in order to minimise or hide the edge of the film. Enough waffle... pictures! The build thread can be found here if you're interested. What's next? If I told you, I'd have to kill you4 points
-
Today I received an email from Airfix informing me that the part is in the post, I am hoping it might arrive by Saturday (fingers crossed). In the mean time I have been busy taking a trial flying lesson experience at Enstone. Not only was it an awesome experience having control of an aircraft in the air (I now have the bug and am desperate to fly again), we were also lucky enough to see the Spitfire replica's they are building there. Back on the ground I have been working on the wings and engine cowling and any other bits and bobs, until the part arrives.4 points
-
I'm told Airfix do follow Britmodeller. However reading this thread must be rather boring as over 50% are 'off thread' being what people would like to see rather than anything Airfix are likely to tool. Almost everything bar the Scruggs Wonderplane seems to have been mentioned. A lot of the 'I know it would sell' meaning the individual would like it but without any further justification for the sales. It will be aircraft (when did Airfix last produce anything else?) late 30's to mid Cold War. 1/24, -/48, or -/72. Nothing else. There's the mysterious subject near the US Pacific Coast, also said to be the largest subject yet subjected to LIDAR. Rather self-fulfilling prediction as they wouldn't go all that way for something small even if it were to be rendered in 1/24. Even so, there's no surety that it will be the Big Announcement. Remember we had the Victor and B-17 in the same year. But if the word 'big' relates to the announcement rather than the subject, then it could be a break with tradition and even be the 2019 releases! I've a hunch on two subjects: the 'Pacific Coast subject', US and in 1/72, and a much loved British Subject in 1/24. There's no better venue than Telford for the big announcement: forget the Nuremberg Fair. Whatever it is, the news will be around the world in minutes.4 points
-
How about one step further. Queen Elizabeth / Prince Philip Scalextric Bentley "Race and Chase" set.4 points
-
I reallly like that, although I’d prefer to see the 1/72 scale Battle first as they’d be more chance of Airfix up scaling this to 1/48 after watching how many times the little one sells out. Cheers.. Dave4 points
-
This my test model I started to test out some weathering on my Do 217. It is a ICM I-153 1/48 scale in Finnish markings etc. It was a good model to build without any issues that I can remember. The only problem I had was the rigging. This was almost as bad as the He 51 and did some damage to the paint work, so I decided to leave some of the cables off at the back side of the wing. I also put the caul halves on the wrong way and didn't discover until it was painted with quite a complicated scheme. I did have trouble with the decals which are by S.B.S. They are very nice, but they stuck down very quickly and didn't give my shaky hands enough time to get them right. They will be fine for a normal steady hand. If anyone chooses to do this scheme be aware that the decal colours relate to the paint scheme, so you will need to work it out before you paint. I wasn't aware of this till it was too late. I have doctored the edges of the photos because the seat the plane is on is rather rough and was very distracting. The plane hasn't been touched. I hope to find some time soon to make soon bases to photograph my planes on. I will do more photos then. I really like this scheme. No, there isn't a thumb print on the lower wing. It looks like a drop of flat coat leaked out. Must have happened when I flat coated it this morning.4 points
-
Continuing with this building. Some weathering has been done using washes and some watercolour pencils. A coat of Gunze H20 Flat Clear has been sprayed overall to allow for some pigments to be applied. The Me109 were notorious for the oil leaks and overall dusty Port side view showing overall weathering and exhausting stain Starboard side view showing overall weathering and exhausting stain Slats in place The slats add a nice touch to the model To be continued!4 points
-
At Cosford, one hopes - the way things appear to be going, someone would try standing BN on its nose so that the belly can be used for a big interactive touch screen if it ends up at Hendon. Or saw it in half with the ramp as the entrance to a new, exciting cafe and the cockpit as the food preparation area.... (Suspicions that I may not have been entirely impressed with some of the tales about 'great new ideas' I've heard from certain sources in the Colindale area are entirely well founded...)4 points
-
A truly hideous suggestion! Imagine the paints you'd need to buy: Humbrol 664 Radioactive Pink Humbrol 665 Vile Yellow Humbrol 666 Bilious Green4 points
-
FINISHED MODEL Got this kit for £12(?) off a guy on Facebook, it sat in the stash for a week or two, but I was itching to build my first German aircraft (German aircraft being my favourites in WW2). Yeah the canopy needs a little clean up, but that's effort. It's not built to an amazing standard, just enough for me to be happy with it on display without close scrutiny. Criticism welcome though, I'm always looking to improve where I can (be bothered) . Yep wonky gear, haven't glued it yet, so that why. REVIEW Quick version (copy pasted from my review on Airfix's website) The cockpit goes to together nicely, and is well detailed for the scale. I added some seatbelts made from masking tape as that's the only area I can really fault the interior on, not having any. The wing fit however I found to be off, I don't know if this was due to my error or the kit, which also messed up the fit of the engines to the wing. The landing gear doors (front of the nose gear door, and both of the main gear doors) have quite a tight fit, and may need a small amount of sanding to fit well. The decals were a little difficult to get on right around the tail, the checker pattern being made of two decals, which I think were labelled with the the wrong number (which was rather confusing). I got them on in the end, with some chipping using some silver paint it looks acceptable now. I completed the kit in little over a week, a very good speed for me, and it was a fun kit to build. I would consider getting the other variants available to add to my collection. Long Version First thing is the sprues, the parts are aranged onto 3 (not 4, one was cut so it'd fit in the box I was washing them in) main sprues, and one clear. The parts are well organised with only a few small issues immediately obvious, one of the wheels was a little off and misshapen, but that was fixed with relative ease. This looked like it would be an easy build, and as per normal now, I decided on a gear down build, and wanted the cockpit open with no pilot. First thing to build was the cockpit assembly, which goes together very nicely. I added seat belts using masking tape and painted them in a tan-yellow colour (looks more yellow on the photo. Next was the wings, which had a terrible fit with the body, and threw off the fit of the engines I kinda stopped taking so many pictures here... Lots of filler, and sanding, and frustration around the engines (ended up trimming most of the join away and using filler instead), and added bullet holes. Painting, always silver primer for me, Maskol was sued for chipping, and blu tac for the cockpit and wheel wells. Not bad for a first attempt (no practice) at mottling Decals now Tail band decal was a nightmare, and I got aftermarket for the swastikas, which are not included Link to the kit here: https://www.airfix.com/uk-en/shop/aircraft/messerschmitt-me-262-a-1a-schwalbe-1-72.html3 points
-
I think 20 pages of speculation goes to show that (grumblage aside wrong scale/subject/star sign etc etc) how interested everyone actually IS about the new release - which goes to show how much affection there remains for Airfix - not seen a 20 page thread on Revell or Eduard speculation.... I think its rather heartwarming actually - and jolly good fun despite the naysayers. If the Fairey Fruitbat or Scroggs Wunderplane aren't produced well shucks. I'm really glad there's still an Airfix around to make an announcement at Telford - it was such a shame last year when they didnt. Its like a mini Christmas! As for the comments that they wouldnt do anything 'left field' - theres no way I'd have put money on them doing a 1/48 Walrus or Defiant ten years ago, never mind a chuffing Whitley or Shackleton (nor for that matter that the Shack would have competition!). If Big is 1/72 am sure it will be a Vulcan, if Big is 1/48 it would be amazing to see a Lanc (and bearing in mind the 2X 1/32 releases it would be SUCH typical Airfix timing to release one NOW!) in 1/24 the Gladiator is an excellent shout but I go back to the Historic Aircraft Collection hookup.....co-incidence....or a 1/24 Hawker FURY? which put simply is aerial pornography. One other thought, but I dont know how well they sold, potentially a Luftwaffe resupply set? They've done a RAF one and a USAAF one, both of which were boxed with a bomber so pechance posters are right and a JU88 is a-coming with some erks to maintain it. An Anson XIX - C.21 might be a nice shout too....not exactly much competition out there bar the old Aeroclub one.... TT3 points
-
1er and 2e Batallions, 1er Régiment de Chasseurs (Old Guard) and 1er and 2e Batallions, 2e Régiment de Chasseurs (Old Guard) The mounted Major is from the Italeri 6016 French Imperial General Staff set and the remainder are Esci 214 Napoleonic French Guard Infantry3 points
-
What!!! 😧 I'm not playing anymore then. They could at least stick it out there with Anne Boleyn as a Dogfight Double.3 points
-
With the Brits Abroad GB now completed it's time to get back to my Dutch Starfighter ! The model had been sitting on the shelf for a while with most paint on, so it was only a matter of a few touch-ups before spraying a good gloss finish. With this properly cured, it's now time to start adding decals. I generally start from the stencils but this time I decided to first try one of the Italeri roundel The Italeri decals are not really that nice, IMHO the Dutch roundel is not well represented, blue is too light and other things are not good. Not having any spare however means I'm stuck with them. Fortunately these decals are very thin and react very well to the Microscale setting solutions, really sinking in all recessed details and adhering to any surface. I will use very few of the italeri decals, really just the roundels, codes and unit markings and some of the stencils. Italeri have a bad habit of supplying grossly oversized stencils, these would look out of place on a 1/72 model so most need replacing. I will print my own black stencils, maybe not all but at least the main ones. I tried using a couple from the Revell sheet but these are very yellowed and don't stick to anything.3 points
-
A few more bits on, there will be a need for a little touching up where the TET has wrinkled the paint. And obviously the unpainted parts. I've replaced the blade aerials in the kit with slices of plastic strip. The ones in the kit were like wedges of Cheddar cheese and I didn't have the patience or gumption to spend an hour thinning them down. And probably losing at least one to the carpet monster. Just one undercart door and the tanks to go on.3 points
-
Not sure if I'm looking at the same thing some of you are (not the wiper gubbins), but I think there's the edge of a Dark Green area that gives the visual impression of a "nostril" bulge down the centerline, forward of the windscreen.3 points
-
Thank you Badder Here are some pics of the groundwork - sorry about the poor light.3 points
-
It is nice to see you doing the Model 307, which I certainly consider a variant of the B-17. I had the good fortune to photograph the one in the Smithsonian's Udvar-Hazy facility and hope you don't mind me posting a few pics here to serve as reference or inspiration. - - - - - - Again, I hope these can serve as reference or inspiration for your project. I will watch your progress with much interest.3 points
-
Probably the most famous Polish aircraft - RWD-5bis SP-AJU, which crossed the South Atlantic on May 7th-8th, 1933. It was piloted by Stanisław Skarżyński who was known earlier of his flight around Africa (on PZL Ł-2 SP-AFA). The RWD-5bis was specially modified variant of two-seat sport plane RWD-5 (rear seat was replaced by 199 US gal fuel tank) and still remains the lightest aircraft to cross the Atlantic non-stop - her empty weight was below 450 kg. After the record flight the SP-AJU was shipped back to Poland, converted to standard two-seat configuration and used by Skarżyński. In 1939 she was taken by Russians and her later fate is unknown. Kit: ZTS Plastyk (1/72), produced in 1980s. Scratch modifications included imitation of fabric and other details. Decals: Albert.3 points
-
G'day people, I have assembled the engine exhausts. This is the kit part with what looks like a a PE flow straightener on top These are attached to the end of the "S" shaped exhaust outlets. These are split horizontally and a seam needs to be eliminated however given their short length it was a relatively easy task to complete. The exhaust turbines are just visible through the openings but being dark not that easy to see. The exhaust assemblies are designed to be attached to fuselage via two locating pegs. They fit well but when the wing sections were dry fitted, I found that there was a noticeable gap between the end of the exhaust section and the part exhaust outlet portion of the wing. I decided that a better solution was to attach the exhaust assemblies directly to each wing section. To do this, the two locating pegs on each exhaust assembly were removed to allow the exhaust sections to slip into the fuselage. cheers, Pappy3 points
-
3 points
-
That’s the missiles, and central tank finished. DSC_3197 by ian gaskell, on Flickr DSC_3197 by ian gaskell, on Flickr DSC_3197 by ian gaskell, on Flickr3 points
-
Small steps forward. The lower wings have been cemented to the fuselage, assisted by small pins snipped from paper clip wire. While doing this I realised that I had forgotten to reinforce the inside of the lower fuselage to support the wings, so I will have to be careful with the handling: Ailerons were cut from plastic card - actually, they were recycled from the old wing that I had previously removed. Waste not, want not! The upper wing had narrow tape strips applied as per my previous post, then had two heavy coats of Halfords grey primer applied from an aerosol. The strips were then removed and the resulting ridges were’softened off’ with fine wet & dry. A third primer coat was then applied. The result might not be a case of scale fidelity, but it looks a good enough representation to my eye: I’ve now got to decide on the strut construction - I have a plan in mind involving cocktail sticks, pinning wire and patience - and when to add the engines. (Probably after the upper wing is added, to make painting a bit easier.) Jon3 points
-
Morning folk's,good progress made over the last week,both are upon their legs and decals applied. And a wash ran into the panel's,I'm going to apply some exhaust staining with the airbrush(after a practice).3 points


.thumb.jpg.0bac681e0da8e4ed7557610e98fda908.jpg)


Wedge-TailedEaglePortraitRaptorDomains.thumb.jpg.41a306d3445a68f0f2df773e01776ea6.jpg)


.thumb.jpeg.512869d47e412449d69d30d0295c1ae8.jpeg)


.thumb.jpg.1b7e0b29f0d6300d78c7f03e6d716b61.jpg)


This leaderboard is set to London/GMT+01:00