Leaderboard
Popular Content
Showing content with the highest reputation on 23/06/18 in all areas
-
Here's one for our Antipodean members! This is my biggest model to date and one that I've been working on for quite a long time, it's another aircraft I used to see spotting at Heathrow in the late 70s and early 80s. The actual conversion isn't too difficult, I have used the Authentic Airliners Upper Deck Conversion and Bra.Z P&W engines and the rest is mainly cutting down the fuselage and chopping off the wingtips. The only tricky part is reshaping the wing leading edge/fuselage fairing. Most of my problems came from paint which badly crazed due, I think, to laying it on too thick. It's not the first time this has happened to me and is probably because I am often in too much of a rush to wait for the paint to dry between coats so just keep on spraying until it's nice and opaque. Of course in the long run it takes longer as I have to remove the paint or spend ages rubbing it back down. I might learn to take my time one of these days! The other possibilities are I didn't shake the can enough, it was Halfords White Primer, or it was too cold when I was spraying. My other paint related frustration came when I thought I'd use cling film to mask off the fuselage when I painted the wing leading edge. Big mistake as it reacted with the Klear on the white top and the NMF belly and left impressions of the creases in the cling film all over my nice smooth paintwork! As it happens this turned out to be a blessing in disguise because rather than redoing the NMF with paint I decided to use AA High Shine Metallic decal sheet which I'm very pleased with. I will be using this stuff for all my natural metal fuselage areas in the future! The cheatlines and tail are painted with the ochre being a mix of Humbrol 9 Tan and 69 Yellow. Wings are Halfords Racking Grey with Coroguard sprayed on clear decal sheet. Tail logos are from the old Microscale sheet. I was worried about them not being opaque enough so I doubled up with another sheet I bought off ebay. Considering these sheets were possibly 35+ years old they performed perfectly. I used the titles from the Microscale sheet too. Door outlines and other details like the 'City of Fremantle' titles and crest were laser printed. Cockpit and cabin windows and landing lights are, of course, from Authentic Airliners. I would like to build many more 747-200s and will definitely be converting the 747-8 again but will more than likely use the Revell Freighter as it already has the shorter upper deck. I could've built a 747-200 from the old Revell kit but I enjoy the challenge of converting kits and feel the Zvezda (and new Revell) 747-8s have the edge in shape, crispness and detail. Anyway here are some pics. Thanks for looking, hope you like it! Cheers, Ian24 points
-
Airfix HO/OO Village Church I have no idea what I expected from this ancient little kit – which dates back to 1959. It’s not exactly ‘complex’ but I found that most of the parts were badly warped. With such a basic framework it was a prime candidate for a little ‘dressing up’. I only really added the window panes as homemade ‘aftermarket’ though – everything else was done with paints and washes. As usual, I was ‘encouraged’ into going further – by the ‘usual suspects’ and that is where the churchyard around it comes from. It's made from Balsa wood and some strips of moulded plastic brickwork. The rest was done with a bit of blended turf mix and green spongey lumps. The memorial, the graves and the two trees are genuine ‘aftermarket’ though. The build itself was very easy and fast flowing, with a lot of support and ideas being thrown into the mix along the way. The interior lighting was just one example of how a crazy idea can turn into reality. Many thanks to everyone for their comments and encouragement during the build & I'm pleased you some of you enjoyed it and had a bit of fun with me along the way! If you want to see what it looks like ‘on the bench’ - you can find the WIP here… https://www.britmodeller.com/forums/index.php?/topic/235038732-hooo-village-church/17 points
-
All finished. Great kit, with some nice detailing. Very pleased. Finished in Hataka Orange Line lacquer Light Ghost Grey, Air Defence Grey, and finished with lacquer matt varnish. Weathered with AK pigments. Aftermarket used:- Wolfpack Design resin cockpit set Aires resin exhaust Master Models AofA probes Plus Models crew ladders. Ian G-20 by ian gaskell, on Flickr Ian G-20 by ian gaskell, on Flickr Ian G-20 by ian gaskell, on Flickr Ian G-20 by ian gaskell, on Flickr Ian G-20 by ian gaskell, on Flickr Ian G-20 by ian gaskell, on Flickr Ian G-20 by ian gaskell, on Flickr Ian G-20 by ian gaskell, on Flickr Ian G-20 by ian gaskell, on Flickr Ian G-20 by ian gaskell, on Flickr Ian G-20 by ian gaskell, on Flickr Ian G-20 by ian gaskell, on Flickr Ian G-20 by ian gaskell, on Flickr Ian G-20 by ian gaskell, on Flickr Ian G-20 by ian gaskell, on Flickr Ian G-20 by ian gaskell, on Flickr Ian G-20 by ian gaskell, on Flickr Ian G-20 by ian gaskell, on Flickr12 points
-
this kit was built nicely, everything is out of the box, only sails are sewn at home. How do you like it ? PS: I now have a Golden Hind 1/72 and a diorama Morser Karl 1/729 points
-
After one year and two ship's I finally managed to finish one the first one fell off the shelf and was beyond repair so I purchased the new reissue and it was made a little easier with the inclusion of pre moulded ratlines. The rigging was left simple as my big fingers couldn't handle the more detailed stuff. Anyway I hope you like it.9 points
-
Finished the paint job. Painted using Vallejo Model Air. Took its time as I like to leave a minimum of 24hr before masking for the next colour. Next step to mask of for the yellow leading edge and the decals. With luck should finish it this weekend,9 points
-
Time for an update on the big BUFF I haven't had a lot of time for modelling of late due to work commitments, but the end of term reports are almost done so I've had a few free evenings to work on the internal spars in the wings. As you can imagine, such large pieces made from vacformed plastic don't have a great deal of strength, so it's essential to make a series of spars so the wing can support it's own weight. I've followed a similar structure to the real aircraft, and made two spars which run the length of the wing from double-thickness 1mm plastic card, supported by internal bracing to keep it all rigid: I then repeated the process for the other wing, having used the previous spars as a pattern so the process was a lot quicker and also ensured both sides are identical: I've also been working on how to securely attach the wings to the fuselage so have made a series of slotted inserts from plastic card which either thick plastic card or perhaps steel spars will run through (via the fuselage) when the time comes to stick the wings on: The spars pictures are just temporary, but you get the idea: I think the next task will be to make the out-rigger bays as well as the flap aperture detail that will not be accessible when the wings are joined. Stay tuned... Tom9 points
-
I've built this touchwood resin bluebird k7 for a friend of mine,I scratch built the seat and interior, water brake,stabilising fin and fod covers, i used ral 5009 azure blue by zero paints and lacquered it with tamiya gloss - mr hobby laquer thinners, didn't want to let him have it when I'd finished 🤑 Hope you like it Glynn8 points
-
Here is a model I did a few years ago, the Trumpeter 1/350 HMS Hood. A great model to build. It came with a small amount of PE, but I bought the Pontos detail up set for it, and the Eduard set, as my cat knocked it onto the floor while I was still building it, and destroyed some of the PE that I had already used, so I replaced the damaged parts with the Eduard PE.8 points
-
Revell's 1/72 M60A3 with markings from the kit. This was an enjoyable week's building with quite a bit of scratch-built and PE detail, please see my build-log in Work In Progress if you're interested: https://www.britmodeller.com/forums/index.php?/topic/235039592-revell-m60a3-172/8 points
-
I'm more than a little late to the party but I am very pleased to add this commemorative scheme to my collection of Canadian demonstration hornets. The decal sheet was released by Fishbone Inc (https://www.facebook.com/Fishbone.Inc/). Unfortunately, as per the latest information from him, the Canada 150 decals are no longer available. (But he does have the RCAF CF-18 DemoTeam "NORAD 60th Anniversary" decals currently on offer). The Canada 150 sheet is not 100% accurate but to me it is close enough to be more than acceptable. The only real shortcoming in terms of accuracy is that the maple leafs on the outside of the tails do not recline as on the actual hornet. The decals are well printed and are strong enough to withstand the transfer from the backing paper onto the model. Where I had difficulty with these decals was convincing them to conform to the contours of the model - particularly the large maple leaf on top. Decal softeners (Micro-sol, Tamiya markfit strong, Mr Hobby Mr mark softer and Walthers Solvaset) had little to no effect. I was finally able to get that decal to do what I wanted by applying GENTLE pressure repeatedly to the decal with a small folded cloth that had been dipped in boiling water. It is recommended that you hold this folded cloth with a set of locking tweezers and shake off any excess water before applying the (very) hot cloth to the recalcitrant decal(s). Using this technique enabled me to get all of the decals to lay down properly and it seemed to assist the decal softeners to do their job too. The base model is the Academy 1/72 kit.8 points
-
Base tone airbrushed on the airframe: The line seen on the spine is not the seam line, but a panel line. The seam line runs where the antenna mast is.8 points
-
nice thought, however someone has beat me to it though in a much larger scale Thanks, but pretty basic stuff for any CAD monkey. I've since redone most of it and I think the proportions are now much better - I'll post more when it's closer to being finished. onto other more pressing stuff. Not much in the way of work done this evening really. I finished off the swash plate and then decided to cut off the big thick thingies italeri had contaminated the top of the 'gearbox' (and I use the term very loosely) with - and add some brass rod instead. Not up to Perdu/Baron standard in seventy minuscule scale but should be passable from a distance. then added something approaching a torsion link. Approaching from some distance it would appear based on this shot. Not much of an update really was it? Nope... I'd agree. But.... in other news.... in a different kind of build not so very far away... I got some bits today. See ? A bag of bits and some other bags of other bits. Wassat then? Well, one of my colleagues at work recently invested in a very nice piece of equipment for his woodworking hobby, and me being the cheapskate I am, pulled in a favor. When he told me what he'd got my mind started wandering in the usual 'oh, I wonder what he can make that I can use' kind of way. A week or two later, I had drawn up some plans and asked him 'how many beers?' and here we are... I got enough bits to make two of these... ehrrrr.... headstones? and four of these.... any ideas yet? This might provide a better clue... Yup, it's one of those. Or, at least, an early prototype one of those. - I thought it may come in handy later when I have to start adding more bits on the outside of this behemoth. It really is a prototype (no, not the Fly kit - though that maybe arguable!) and I'll need to work with it a little bit to understand what the deficiencies are and how to improve it. I've tried to make it as versatile as I can so we'll find out later if that was a mistake or not. This may provide a better idea of how it all works. In reality, identical to the way all the other plankwing holders work, but I am not aware of anyone offering a design intended specifically for helicopters. We're always at the back of the queue aren't we? The helicopter can be stationed vertically like so and can even be angled over for some detail work or sticking on the transfers. You can see that I included some prong like features so that I can use elasticky bands to secure the helicopter in place if needed. The holder is also designed in such a way that I can hold one half of the helicopter shell to do work on the interior (but forgot to take photographic evidence of such a feat.) Obviously this is the Fly kit at 1/32 and I'll have to see if it will also work in 1/48 or not. Maybe with some slight modifications, who knows. No doubt after I have attempted to use it for a few weeks I'll have a few ideas to improve the helo helper... or bin it. Definitely worth trying out for a few beers though as far as I am concerned and here endeth this evenings small update8 points
-
Colombian Airforce KFIR C10 - upgrade - the brand new AMK upgraded Kfir (one week delivery from Hobbyeasy!! ) kit forms the basis, Wingman Models conversion kit the necessary ingredient, and HPM produced Derby missile and Skunkworks (Kinetic ) Spice bomb, Eduard Brassin GBU-49, some Eduard PE Academy Liteting pod, Academy PhytonV, ..... and ... quite a lot, build during the Britmodeller 10th anniversary GB earlier this year! some canard colleagues: and a neighbour: hope you like it! cheers, Werner7 points
-
Hi all, after the Sea Fury I built the new Airfix Tomahawk Mk.II in 1:48. Used the decals out of the box and add some Eduard PE parts, the pitot is self-made.7 points
-
Whatever the Vogon for mutinous is then... Hope it works for you Giorgio. Doubtless the intensity of the effect will vary from plastic to plastic and also with respect to the grade of graphite in the pencil. The Italeri plastic was quite a hard mix in this instance and I was using an HB lead in a mechanical pencil - the two seeming to work well together. Thanks James. You're right - the number of times I've banged the booms on the bench light now turning it around to look at various parts are beyond counting! Too too kind as ever Bill. 😊 Clearly sir is a man of distinction who shops at the posh end of the freezer cabinet. 🤵 Mine will be from the cheaper 'was once driven past a field of fruit on the way out of the factory but contains no actual fruit' end of the cabinet.... 🍧 😉 I can say with all certainty that no-one has ever asked me that question before Cc! How many do you need and for how long 🐐❔ Thanks old chap. Given the heat where you are I presume you can do it with just a magnifying glass out on the windowsill...? I'm beginning to suspect something rather rum about the predilection for goats on this forum! Have I gotten on to Britsatanist by accident and failed to note that everything modelling-related is actually a cult-euphemism? 🤔 An unusual level of restraint for this forum... That would be a use of the phrase 'take care of' that one should beware of then Cc...as in Rommel saying 'Ill just take care of Tobruk'.... 🤣 Thanks Adrian. Along with aircraft that fly over the sea I must confess to a fondness for those with antlers as well - it fascinated me how aircraft during this period went through some extraordinarily medieval growths of analogue technology before it all got digitialized and concealed within streamlined airframes in later decades: Give it a try Cc. Honestly it gives such freedom to a build knowing that if plastic will be prove flimsy or visually 'soft' for a part, that you can fall back on brass. If my experience is anything to go by then your first attempts will be unimaginably horrible, but that's what drives you to the point of getting a 'feel' for the process. (That's a long-winded way of saying that if a clumsy galoot like me can learn to bodge the odd bit o' brass together, then anyone can - it's just practice, pure & simple...) Lots of small stuff today, starting with the engine exhausts. Italeri give a small 'dimple' to indicate the openings so natch I had to drill those out as thin & deep as the plastic would tolerate: Strikes me that I need to look at sourcing some brass tubing above the 1mm max. diameter Albion stuff I have for making a better job of such parts in future, but that will do on this occasion: Having got them one rigged for future painting it was on to consideration of the antennae farm up on the roof of the Iron Chicken: All sorts of odd-shaped blades and shapes to consider but you also need to take notice in reference photographs of how these vary in shape and location between variants. On this occasion I used reference shots of Pelican 9 for type and location and only then referred to the parts manual for detailed specs. Needless to say my dissatisfaction with the accuracy of plastic for representing such thin parts at this scale has only increased with time, so the kit parts were not an option. You can see in the above shot that I'd set out intending to fabricate many of these from brass sheet in the same manner I'd done back on the Dornier. That had involved just soldering a locating pin to the bottom of the antennae then but I reckoned here a less fragile method at this scale would be to eschew soldering on any pin at all, instead simply insert a length of brass rod inside brass tubing of the required diameter before crushing it flat around the rod for strength, then final shaping with the sihrsc as shown here: The 'swept-wing' top of that I did make from brass sheet, cutting out the centre and shaping the edges with a grinding disc on the Dremel before smoothing the profile with a sanding stick. This was then soldered onto the upright, for which a haemostat proved most useful: None of the remaining four antennae were quite the same shape or size but all were fabricated with the same internal rod/crushed tube process for creating the various vane shapes and cross-sections, her dry-fitted: I nearly forgot that rearmost one near the escape hatches, as there are only a few photos of the 'J' showing this region clearly enough: Off to get the tea ready before this evening's match: sumac-flavoured kebabs, pittas and mint sauce... Have a lovely evening/morning/afternoon (delete according to time-zone) Tony PS. The badge on the Baronmobile has nearly weathered away. Think it worth painting a roundel in there before leaving for Blighty?6 points
-
Also! Actual modelling! As I went to do the second E.V, I thought to myself, "you know, getting the cutout in the bottom would be so much easier if I had a hole punch..." 20180623_002919 by Edward IX, on Flickr "...oh yeah. I do!" Second fuselage sans empennage is decalled. 20180623_004410 by Edward IX, on Flickr The grauniad had an article about it a ways back: https://www.theguardian.com/news/2017/may/25/facebook-moderator-underpaid-overburdened-extreme-content Normally I would, but I'm trying to get promoted (I need more money, having two children is like setting stacks of dollar bills on fire), and given the current political climate in the country, some wingnut would see it as proof of a communist conspiracy So mostly I'll try and be there as long as possible on Thursday, so I can see the Spitfire at the NASM and shoot the stupid video, maybe meet a local Britmodeller for lunch, and see a friend who lives in Maryland. Likely only one or two of these will be possible.6 points
-
There are just too many excellent designs to chose from the worlds of Gerry Anderson. UFO, his first live action series, is full of incredible designs, especially the Moon Base Interceptors. Three were on standby in their silos below the lunar surface, ready for launch against the Alien's craft as they approached Earth. Each Interceptor was armed with a single low yield nuclear weapon (The often criticised failing of the Interceptor, namely one missile apiece, was a deliberate script ploy so that the UFOs stood a chance of getting through to Earth). as well a three machine guns (in space?) which were never seen used in the show. Now courtesy of Studio 2 Models http://studio2models.webs.com/ there is a studio scale model, 23" length, approx 1:24th scale. The main body halves are cast in fibre glass reinforced P-38 car body repair putty: (150mm/6" ruler for scale.) The missile, as well as other parts, are cast in white resin. Main engine bell: RCS side pods, landing skids, cockpit rear wall: Aluminium sheet and sections are provided if you want to build the landing gear from metal, rather than use the resin. Close up of the cockpit wall, and main engine insert: Winglets, cockpit instrument panel, RCS thrusters and some rather familiar looking greeblies for the engine bays: Close up of the greeblies: I have already cut open the cockpit opening, creating a blizzard of dust! It will be a slow process, as it is no shake and bake kit! Thanks for looking, Angelo5 points
-
We were back in Normandy for the D-Day commemorations, driving down a country lane near Creully and came across this Sherman. Personally I have never seen a working Sherman before, let alone in its natural habitat! Link to video https://flic.kr/p/JyyY24 link to video https://flic.kr/p/2899oR95 points
-
Dear all, Please find below some images of my Airco DH.9 Hispano Suiza from the Aviación Militar, on the eve of the Spanish Civil War. For this conversion I used the Classic Plane vacuform fuselage for the DH9, with a modified nose and upper front fuselage, combined with the wings, tail plane and undercarriage of the Airfix DH.4. The Roundels came from a Loire 46, the crow and tail number were custom printed by Arctic Decals I finished it already last year, but didn't have any decent photos until recently (Thanks LJ). I hope you like it Peter5 points
-
My latest two completions, the Airfix Seafire FR.47 and the Special Hobby Seafire XV. The Airfix kit used the BarracudaCast propeller and seat, Squadron Canopy and Aeromaster decals for 800 Squadron in 1949. The Special Hobby kit was pretty much OOB with Aeromaster decals for 803 Squadron RCN in 1947. Vallejo paints used throughout. I've included shots of the Seafire 47 with the Spitfire I, the Seafire XV with its close relative the Spitfire XII and with its replacement in the RCN, the Sea Fury. As usual, please excuse the dust and the poor photography! Thanks for looking! Chris5 points
-
It's a pretty long way from "Viggen LIDARed at Newark" to "I think the Airfix 1/72 Viggen that is definitely coming out is going to be overpriced at more than £21..." Personally, I doubt that a 1/72 Viggen fits into Airfix's range strategy anyway... so we're left with the possibility that the LIDARing was done by *any other model kit company in the world*, for a model *in any scale* or for a Corgi diecast *or any other die-cast company in the world* and it will be sold for *any price between £15 and £1200 (for a 1/24 scale model sold a few pieces at a time on the front of a partwork)* Not so much jumping to conclusions as taking a run-up followed by a flying leap in the general direction of the Archipelago of Conclusions, missing the landing completely and falling over the edge of the world... 😜 best, M.5 points
-
Thanks Ian. I am looking forward to the bash at Tony's and in the unlikely event that there is any ale left after our week away I shall bring it along. I see what you mean Bill. Externally, the 7 and the 8 are very hard to tell apart, excepting the large TR7 or TR8 written on the boot. When she needed an engine rebuild, toyed with the idea of upgrading her to TR8 spec but couldn't see much advantage in it other than the very dubious privilege of having much higher petrol bills. It would also have meant sacrificing boot space as the 8 has the battery in there. Time to go and load her up methinks. I did manage to get the radio constructed earlier and the interior has just been primed with some Mr Surfacer so she will be ready for interior painting to commence upon my return. I am rather looking forward to getting the airframe together, all indications are that even in 1/72 scale she is going to b a bit of a beast. Martian 👽5 points
-
5 points
-
Filling, sanding and priming done. I could do more but 1) I've had enough 2) The amount of filler and primer used is in danger of costing more than the kit 3) What little detail there was is more or less obliterated. I'll try and paint it back in with different shades of grey. I can't believe how "fast" this thing looks! A couple of facts. 1) It first flew 60 years ago! 2) There is only a 19 year gap between it and the Zero in the foreground.5 points
-
Have I wowowowowowow'ed you lately Tony? Wow How the heck do you find long thin lolly sticks? All I ever get is those elongated 'eight' shaped magnum types (this is ludicrous, he's even got me jealous of his lollystickery) She really is a marvellous piece of model engineering, you simply surpass that Tony (you) every time you do the next thing Magic5 points
-
After quite a gap, some progress has been made at last! Tonight was time to get the airbrush going and make a start on the cockpit internals, in order to get the fuselage closed up. Most of what you see was scratch built. Good old Tamiya cockpit green straight thinned a little with Tamiya Acrylic thinners Also the very tiny, scratch built instrument panel, although describing it as such, seems a little high tech, as those who flew in these will recall! I'll let these dry off overnight and then add a little shade with a very subtle wash, and also pick out some detail. Seat straps and possibly some seat cushions will follow. While the airbrush was out I also decided to give the main wing some primer to see how it all looked including the re-scribed ailerons. I used Mr Surfacer 1200, thinned with Mr Levelling thinner. Topside: Underside: I'm quite pleased generally although there are some areas to clean up and redo. I did also find a small crack in one of the leading edges which will need attention. A reminder of how the ailerons needed re-scribing. Red is old lines, black is new. Thats all for now. Some updates due on the Airfix Sabre! Terry5 points
-
What's the point of sunlight if you can't lie there enjoying it streaming in through the windows of a morning? There's such a thing as being too busy sometimes ain't there? Thanks Ced. In short no; I don't think there would be time to paint before leaving for Dorset next Thurs with all the remaining detailing to attend to. It is possible that we might see some primer go on but due to the rather complex masking sequence (not to mention Silhouetting the various masks themselves beforehand ) that I've worked out for the paint combinations, I want to come back to it dedicated n' fresh. Truth is I still get a excited as a kid going away and I wouldn't be fit to concentrate... 😵 Just remember how much fresh chillies sting you depraved Belgian! 🎇 Thanks Roger. Not of til next Thurs so you lot aren't shot of me just yet... 😉 Too kind there, far too kind. 👀 It was really just a test of the principle - I think I've worked out some improvements to that technique already for next time... You're as bad as: ...that depraved Belgian! Fear stalks the land.... Cough: I can still hear all this you know, I'm not off until next Thurs! 🤣 That's all I need to come back to. Bloomin: The massed kilts of Britmodeller in full flourish... 😨 Please do Johnny. Else the surviving band members may leave altogether this time: A Mafia hit? Well they were quite erratic creatively but I do think that's going a bit far.... Well, as the thread looks like it has only a few days'grace before Sodom & Gomorrah breaks forth I'd best cram in as much as poss. New panel lines at junction of tailplane with insides of booms have been scribed in now: Quite by accident I found that running a pencil along a line scribed with a sewing-machine needle is good at cleaning it up - presumably the graphite simultaeously acting as a lubricant helps mollify any rough edges to the lines most effectively. You might recall that the kit join sits inward of the boom by about 2mm whereas on the actual aircraft the seam curves up from the leading edge and runs flush along the base of the tail fin. All other main seams on the boom/empennage interfaces received simply needle and pencil treatment too: Nextly it was on to building the DF antennae that sit either side of the nose on the 'J' variants used on Corona recovery missions. These allowed the aircraft to home in on the radio beacon in the capsule as it fell toward the ocean. Albion tube and rod seems the natural choice but what size: Gauging various sizes by eye I settled on 0.8mm tube for the horizontal arm and 0.3mm rod for the vertical antennae. Having admired hendie's various tube and rod assemblages over on his West Country Helicopter Extravaganza I decided that an homage involving drilled tubing would give the most realistic representation of them antlers at this scale. I wouldn't have considered such an approach at this scale without the workstation for the Dremel letting me pillar-drill the tubing in such a controlled manner. Prudence dictated a test run first to see if it would work out: At 0.8mm diamter there was no way that vice was going to hold the brass tubing reliably without slipping or crushing so I resorted to sandwiching it between two ice lolly sticks, which held it perfectly. Ta-da. 0.3mm rod in 0.8mm tubing works: Time to mark up the real thing: You'll have noticed that (going from left) there is a double set of holes three back from the tip. There is a rectangular antennae at that point as opposed to the single 'spines' of the others - too complex to bend and fit at this scaleso I decided to add the verticals only and cap the ends with some fuse wire later. First tube drilled-out: Right at the last hole of the second antennae I decided to snap my only remaining 0.3mm drill bit so had to drill it out using a 0.5mm bit that nearly sheared the tube. Luckily it just held so I reckoned I could reinforce it again later at the soldering stage. The Britmodeller I Ching : Hopefully that's an ideogram for 'Divine Success'... All 'spines' slotted in, levelled-up and taped down for soldering: Quite straightforward to solder and not much in the cleaning up department: Another little 'discovery' was that the broken stumps of drill small bits make a most precise and excellent tool for grinding away excess solder in difficult to get at areas like those between the spines. Followed by a square needle file, the clean-up took about 10 minutes with no snaps or breaks. I've the pitots to do tomorrow though they will be much simpler, thence some tricking drilling into the curves of the nose fairing for a test fit. Off to knock up some Thai Fish Curry with Roti breads. The beautiful evening seems to demand something delicate and flavoursome. More over the weekend you mutinous Jacobites. Tony5 points
-
Hi, During last couple of months (OK, nearly half a year) I made 8 Finnish machines (Blackburn Ripon, V.L.Pyry, Morko Morane, Fokker CX, Fokker DXXI, V.L. Myrsky II , Shavrov Sh 2 and Gloster Gamecock) . With three I made within previous 45 years (Westland Lysander, Brewster Buffalo and Junkers K 43) it made all together 11. In last days I re-painted green on those old three to uniform it with what now I am using for Finnish dark green. All of them (including those three in previous too bluish green) were already in past on RFI but I hope you will find them a bit interesting brought together, espacially in uniformed colours: And two more takes of Junkers K-43 Comments welcome Cheers J-W4 points
-
SyAAF Gloster Meteor F.8 Airfix 1/48 IsraDecal this morning's decision to take part in this promising GB! That is one of the candidates, I think a good and not too common one! hope you like it! Do you think I need any other aftermarket? Wheels? Cockpit/ MB Mk.II seat? state of today....absolutely untouched cheers, Werner4 points
-
Ready for inspection is my 1:72 Sopwith Camel 2F.1 by Airfix. It was an old kit that I picked up cheaply from my local model shop. This is the first bi-plane I have attempted, and although there was a tremendous amount of flash, bits missing and the decals past their best I thoroughly enjoyed the build. I mixed up my own cream tone for the underside of the wings (as I am none to keen on airbrushing Humbrol acrylics), and scratch built the guns on the nose, and with those problems overcome I became rigging. I purchased some elastic designed for rigging 1:72 models, and set to it. For my first attempt, I'm pleased with the results and looking forward to working on my next bi-plane kit. Thanks.4 points
-
Hi Folks! Id like to enter my 1/72 Airfix Spitfire IXc 'MA574" GC.I.7 "Provence". I was going to have this as a 'Anti AMS' build - but decided to add some quick and dirty detailing to make the cockpit look a little more busy and cramped! started with some spares from another airfix mk.I spit that diddnt quite make it, and added some basic detail from evergreen leftovers... ...Actually pretty happy with the result! 🙂 I brush-painted the instruments with the new tamiya lacquer paints as I hate waiting for enamels to dry in winter, and im really happy with them - really recommend the flat coat for dulling down interiors, goes on smoothly with a brush and has a great flat and consistent finish! As I don't have an airbrush, ill be using tamiya rattle-cans - a good match is TS-3 and 90, as below on a test swatch ( with old decal) Thats all for now! 🙃4 points
-
This is a kit I built quite a while ago, but just got around to photographing. From what I remember it was a very nice kit, but the nose and cowlings required some putty. The cowlings in particular were quite fiddly. It's OOB, with the exception of the antenna masts and antenna wires.4 points
-
Pretty sure 78-0085 came to Edwards from Luke AFB. 78-0085 carried the name FIREBIRD on the inside of the nose gear door when it arrived and the name remained when she was repainted. December 1991, we are on a solo mission in F-16D s/n 83-1176, and were called to join up with '085, also on a solo mission, because they had an unsafe gear indication in the cockpit. Nose and left gear up and locked, right gear indicating still in transition. Here, we've come aboard. Note the gear doors aren't completely closed The gear is up, but the right main gear door is still open Selecting gear down and checking the gear extension The gear looks good. Don't remember if they had a down and locked, i.e. "three green", indication or not. Elected to return to base. On our wing over Rogers Dry Lake on straight-in final for landing. Note that we had a wing tip launcher from one of the Bozo Fleet jets and '085 had two grey launchers. Giving them the lead to land while we continue our mission. Saw them through to safe landing and then we continued into the operating area for our mission. Thanks for looking, Sven4 points
-
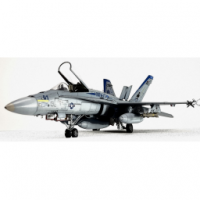
This is F/A-18F Academy 1/72 (12535) Originally VFA-103 Jolly Rogers CAG plane, ended up as VFA-32 plane (Jasmine model decals 172006). Here are some notes regarding this kit from my work in progress topic about this kit: Academy should avoid making these half breed kits. It should be either snap kit or kit for modellers. So many fine details with almost perfect fitting but with design flaws related to snap kit "features". Decals in this kit are USELESS if you want accomplish even humble, decent results. They are simply put, so bad, color is off, they don't stick, they can not be softened, they are too shiny... If you intend to buy this kit, simply count on getting another decals. 1. They were modelling parts in such way that they can be assembled without a glue (this includes canopy). I assume most of us here are using glue so they were targeting another market with this feature. There is also a cost for this, each part must have pins to be fitted into another part and some of these are seriously affecting the reality of model. For example, I had to scrape two large extensions from aim-9x missiles and fill two large holes intended for these extensions on wing tips. Leaving these parts in original form simply looks bad. Doors hinges are too big and toy like. The list goes on.. 2. This kit comes with multi colored parts (MCP). Again feature targeting another market as model painting is the crucial part of this hobby (at least I feel this way). Most of manual does not include color references because of this idea. This was actually changed with next iteration of this mold (F/A-18E, 12547), color references are now included in manual, there are no stickers (which is now bad for those who are not painting model and don't want to use decals) and decals are now Cartograf (there is no Cartograf logo on decals sheet but there is logo on box and the decals don't have that bluish tone and look very good so I assume they were printed by Cartograf. 3. This kit comes with stickers and useless decals. We don't use stickers here and included decals are so bad that it's hard to believe someone from Academy did not try these on actual model before distributing this kit. My point was: Academy should pack and mark these kits as easy fit, painting not required, decaling not required, MCP kits with stickers and make another version of same mold intended for modellers and distributed with good decals. This would be an easy task for them and with current details of this kit would probably make best super hornet (E/F/G) 1/72 version out there.4 points
-
March 1986 saw the end of a chapter for a legend, as it marks the last time F-4 Phantom II launched from an aircraft carrier. Specifically, F-4S Phantom IIs from VF-151 Vigilantes, embarking on a cruise with USS Kitty Hawk and CVW-5. With that final launch, the big Rhino bows down to make way for The Plastic Bug aka. F/A-18 Hornet to replace it in VFA-151, and crucially replacing most other 'Tooms in USN Squadrons. Anyway, to the kit. Hase's F-4, eh? I always love Hasegawa's F-4 kits, since it's such a nice thing to built (apart from the fiddly landing gears). The kit went together with little issues and with little sanding and filling (although I'm pretty sure I missed something somewhere). Suffice to say, I am thoroughly enjoying it, and I am looking forward to buy another F-4 kits. As a bonus, here she is with Hase's VF-31 F-4J MiG killer and Academy's F-8E from VF-201 (personally my best and most beloved kit of all) That is all from me, any suggestions and criticism would be welcomed. Cheers!4 points
-
Hello mates, this is my little 1987 son of Hawk from YuMo Model built 2015/16. Featured in ModellFan Magazine now. Very good model with even better decals. Colors are British standard BSC incl. PRU Blue as for early yugo planes. British Technology Transfer with RR Viper power and MB bang seats. Cheers, Tom4 points
-
Thanks guy's. Yes, you are right. Perusal of the instructions confirms quite a lot of working part options. All of the running gear wheels for the tracks can be push fitted, and apparently the tracks can be looped around and the whole thing should 'revolve'. I think that is probably being a bit optimistic I will opt for a (I hope) more realistic look and try and get some track sag over the wheels with super glue (cue stuck fingers and bad words). They did turn up in Woolies from time to time, but I only had 25p, so opted for a 'plane So, off we go. I found this on the underneath, confirming 1967 and just visible 'Made in England' Looks like a halftrack already! However that was the easy bit. All those wheels........ Cheers.4 points
-
All done & quite pleased with it. I forgot nose weight (it is mentioned in the instructions!) so a tail sitter sadly, held up by a small piece of clear sprue. I'm also not happy with the finish with the wing tip pitot inserts (pitta themselves are from Master asis the refuelling probe tip) so next time I have white in the airbrush, I may fill & respray. All else including decals from the box. Highly recommended!4 points
-
Hi guys, I spent most of the week end working on my generators... Greasy fingers are not very conducive to modelling, but I managed to have a little bit of fun nonetheless with the Sea Hawk. All the main components are now free of raised details and blemishes, so I finally started the dirty work. Just to see how it feels, I began by cutting the wing root area on the fuselage in order to rectify the air duct. A rough, preliminary work... and while I was busy drilling, hacking and filing, I realized that the main wheel wells will require their share of chopping, as they should extend much closer to the fuselage centerline... It never rains! Just for fun I overlaid the main pieces over a plan, and Airfix have actually done a very good job: the wings are a weeny bit too long and the shape of the wing tips need some re-shaping, the horizontal stabilizer are pretty bad (too thick, too long, wrong shape, etc...). All in all very little to correct for a kit that old. One good thing is that the plastic is so thick, no real worry of going straight through by mistake. Unfortunately, back to Harare tomorrow for a few days... Damn. JR4 points
-
Hi, Here is my latest build. I decided to renovate my "old" Flanker built in 2007 In progress here: http://forum.largescaleplanes.com/index.php?showtopic=44533&st=0&p=464100 Nose: Zactomodels Pitot: Master Models Exhausts: Aires PE for bangseat: Eduard Decals: Linden Hill Windshield: Scratch Air Intakes: Scratch It is still far from perfect. But I find it better than the previous one. Thanks for watching! Comments are welcome ;^) Rom4 points
-
What a splendid project, shall be following with much interest! PS - Nothing wrong with MGs or other conventional weaponry in space, in fact it is massively more deadly up there.....One of the Soviet Salyuts was armed with an auto-cannon! https://en.wikipedia.org/wiki/Salyut_34 points
-
I've had some spare time so I've brought this build to a long overdue conclusion, after about 4 attempts on the spray deflectors, i finally ended up with something acceptable, As for the canopy, its a fair rendition even with the slight alteration around the intakes, although it has the thickness of a crisp packet making it impossible to mask and spray the frame work, i cut out some sticky backed foil tape to make the frames, this helped with firming it up a little, but it was clear the frame was going to have to be brush painted, And any missed bits would pass as chipped paint, i hoped, i finished off th fod covers, and added the ariel and pitot, and mounted it on the base, job done, I'm happy with how its turned out, so is the new owner by the way, thanks to all who have commented and liked it, i hope you like the finished article too. Cheers Glynn 14 points
-
Finally some progress! The new decals went on without any real problems, so I think I'm on the final straight now. From the disaster of this: To this: My plan was to stop there, and complete the decaling on the finished model - only the colour stripe really needed the wings and tailplane absent for careful application, but since I was set up for it and it was all going so well, I decided to continue with all of the fuselage decals. So I'm pretty happy with the results. Thanks again to Ray at 26 Decals for the replacement sheet - I can report that they were like night and day compared to the first sheet, and were flexible and obedient! If anyone else is contemplating building this livery, definitely make sure you get the modern sheet straight from the source, (STS44279 and NOT STS4499). This also uses the windows and cockpit from Authentic Airliners. There are still numerous small detail decals to add to this, but I'll save those for the final reveal, which shouldn't be too far off now! Thanks for looking.4 points
-
4 points
-
USAF s/n 78-0088, taxiing in to the 6516th Test Squadron ramp, August 1989. That's a General Dynamics crew chief. Crew showing hands clear in the cockpit while chocks are put in place. On the 6512TS support fleet ramp, July 1990. She carries the name MISS PIGGY inside the nose gear door With tanks, October 1991... ... and the name's been changed to "CRAZY EIGHT". Thanks for looking, Sven4 points
-
Lovely soldery work, that's given me an idea for the "artificial horizon" on the Muromets when I get to it. I don't think the parrot wants to play this year, can't say I blame him! We probably need something a little bigger and more resilient. I hear there's an Albatros available somewhere nearby, but for God's sake don't give it any chili, that would make the goat VERY uncomfortable! Ian4 points
-
Car Nice, very nice (you do keep your eye on the power block in the wiring loom left side of the engine compartment I'm sure. As I was an AA man during the TR7's prime, that was a little expected glitch when corrosion got inside the plastic plug unit and ate away the cable end) Yes I know, and Martian knows I know its not a 7 really Have a damned good time, (guess who found a French Real Ale Brewery in Le Mans? Zeugma, quite a decent brew ) Actually if Pete brings reinforcements should we all pop down there?4 points
-
Still bogged down in the cockpit. I wasn't happy with the first attempt at creating a panel complete with bezels, to exactly fit over the decal supplied. You can see first attempt left and later one right. The bezels are small squares of 10 or 15 thou card glued over the hole and drilled out. I'd made a start on the first one as you can see. First attempt ............... er! Much happier with second attempt. Then the bezels again A bit wonky but they will clean up. Finally this: They don't fir too badly over the decal: Need to work out what to do with the lower part. I have also re-worked the Airfix side walls and backing panel a bit also. They didn't run accurately at the side, so re-built these, from this..... To this..... The new panel and decal sandwich will fit onto that. More work has also been done on the seat, 22 additional parts so far! And a repositioned headrest. And it all fits still! And finally, I decided that the mechanism behind the seat, that slides with the canopy, was not good enough despite my attempts to improve, so I used a rejected cast I had made for the Avon Sabre (it has some flaws) and rebuilt to a more accurate part. So in the pics below you have Modified Airfix part (at the back) Pavla Resin part (middle) Re-cast Pavla part with flaws (air bubbles) fixed (bottom) Thats all for tonight from me! Terry4 points
-
It's been a fair few years since I put this one down on the table of doom, Moved house and now I have the urge to finish this one off, to be fair it's not far from finishing but the house move has taken it's toll. A couple of the resin parts got broken and the bits lost I also miss placed the remaining bits to complete the build but found them last week after a tidy up in the workshop. I think I bought this kit direct from George Turner at the Leamington Spa boat show back in 2006 that Longshanks and I attended, Longshanks has built finished and probably sunk his kit so I thought I best get mine done. A small part of the Vickers twin gun mount was the first victim and I decided to scratch build the lost arm from the mount. I'm also making the mount for the sight unit which wasn't included in the base kit. Please remember that this kit is not an exact scale model but a fun RC boat, some details have been simplified and ruggedized to allow for this so I'll not embellish details too much. It's such a shame that George Turner has finished these kits now as they are really well thought out and work a treat. One of the bollards got busted and lost, I need to scratch this item yet. 5 years worth of dust almost removed. I'll be dipping in and out of this build along side my 436 conversion 🙂 Cheers for looking Dan3 points
This leaderboard is set to London/GMT+01:00


