
Leaderboard


Popular Content
Showing content with the highest reputation on 13/06/18 in all areas
-
Something I built just over a year ago now and forgotten about. Not even taken it to shows or the club. So you nice people here get to see it first! ICM kit from the box. Found it to be a very good fitting kit with very few issues. Alclad I think I used fro the silver finish and Xtracrylix Red Arrow red( too orange for the Reds really) to represent the dayglo-ish areas. https://imageshack.com/a/img923/5347/7hx4y7.jpg15 points
-
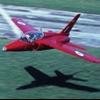
Built using a Airfix 1\48 red arrows hawk and altered to predict a earlier machine by using extra decals. But using a later machine it may not be entirely accurate but I am pleased with the result. And unusually for me I did both pilots.15 points
-
MiG-29s are backbone multirole fighter aircraft of Myanmar Air Force. Great Wall Hobby is making very nicely detailed MiG-29s so I gave a try. It is built and painted in Myanmar Air Force Camo. The Air Force markings and numbers are from Caracal Decals printed by Cartograf. I left one engine cover removed and one engine displayed on a stand. This model will be at Malaysia Miniatures and Hobby Show 2018 very soon.13 points
-
Built this for the Hawker Siddley GB. Thought I should post it here too. Hawker Tempest F5 3Sqn RAF Wunsdorf Germany 1947-48. Academy kit with Airfix rockets and Freightdog decals. Painted with Humbrol enamels and hairy stick. All comments much appreciated. Phil13 points
-
Cheers Cookie, thanks for the appreciation On a different subject: got work? Thanks John. It kinda worked, see below Thanks Jaime Wait no longer, see below So, directly from the spray booth, here she is after multiple thin coats of Lifecolor FS34102, airbrushed on the areas I previously identified with the brushed on demarcation lines You can see that the pre-shading lines are barely showing through - definitely not enough to survive all the remaining stages. I think the problem is that Tamiya Black Green isn't dark enough to show through FS34102, and even more so when it will be time for the FS34092, which is an even darker green hue. Best laid planes an all of that ... So the only way to have a better contrast is to add some post-shading, which I did by mixing FS34102 with Lifecolor Matt White, thinning with Vallejo Glazing Medium. I airbrushed this mix in light passes in the central area of the various panels, thus: Top side It may look slightly overdone, but adding the remaining two camouflage tones, clear coats and markings/decals will knock back the effect a lot, so I'm happy with the way it turned out. Last thing I did was to spray a protective Future coat on the painted areas; I always do that prior to masking with blue tack, to ensure no residuals migrate to the paint (ask me how I know ) That's it for the day, comments welcome Ciao12 points
-
Hey guys. It’s been CrAzY busy this weekend. Thanks you all for your lovely comments over the past few days. Saturday saw us at Download watching some choice rock ‘n’ roll bands. Topped off with a three hour set by Guns ‘n’ Roses. Amazing!! 🤘 Then Sunday we headed for Cosford where I managed to fulfill a life long ambition to see a Lancaster in flight. Beautiful, flanked by a hurri and a spit. I nearly cried. 😍 This has really boosted the old mojo to get this baby done. It was such a great day with so many amazing planes. and a special one for @CedB. There was also this.B I’d planned on going inside but too many other things cropped up and time flys at an air show. ✈️ I did however find some bits and bobs to spend my pennies on. Also got the new Phantom, it was on sale for £20 too good to turn down. 🤓 Anyway I’m sure I was building a Lancaster right? 😳 Before the rudder debacle I managed to get the under lights started. I used some clear sprew, sanded it down and painted in clear Tamiya colours. looks pretty good. So I did the rest. these got their holes drilled bigger to fit. lightly sanded then I fitted the transparent parts. They worked out quite well. Then later on in the day I read about the bits I’d not got quite so right. 😔 never mind, I’m on it with all that extra MoJo. 🤠 Looking through my Cosford pics I had taken a pic of a York for my old man. look at that rudder section. 🤔 looks familiar.🤨 So with a spring in my step I skipped off to the LMS in Brum today and bought some thick plasticard. this should do the trick? errrrrr nope! 🤨 the angle is too shallow and the bit at the end is in two parts, that just won’t work, so caution to the wind I sand off the little arm things and cut out the mini rudder bit, cut the angle more akin to my reference and scratch a new mini rudder thing. now that feels better. 😀 I’ll need to glue that and fill the gaps etc aaaand do the other side but I think that should do it. ☺️ well I’m leaving it there. I’m pretty confident that is a good representation of what I’m after but I need to sleep on it. Thanks for all your input and help on this guys. It’s much appreciated. Please say I can paint her soon? Pretty please.😎 hope you are all all having a great week. Take care and as always. Happy Modelling. Johnny tired eyes.11 points
-
For your inspection folks straight out of the box battle worn slightly. Thanks to Stix about the wing tip finish for lights.10 points
-
Hope you don't mind if I share one of mine as well Ced? I might have told it before, apologies if so, but it's one of my best ever 'life memories' - 'It was the summer of 69 77 and the spotty faced, wannabe fighter pilots of the University of Wales Air Squadron were on summer camp at RAF Shawbury. Before flying our first sorties we'd had a local area briefing & were told that after take off from the runway in one direction (memory has faded so don't recall which) we were to climb to 500 feet, level off & then fly straight & level on runway heading for so & so miles (memory etc). as not far off the end of the runway was a low flying route. Anyway, one fine sunny morn Acting Pilot Officer Prune here & his instructor received permission for take off, Prune in control. Final check of gauges, visor down, throttle fully forward, the usual neck breaking acceleration from Billie Bulldog, VR reached & we're flying. Tum de dum de dum, 500 feet, level off, tootling along and.... ....lovely day suddenly went dark - well darker due to visor! As one, Prune & instructor pushed visors up, & craned heads upward, to be greeted by the amazing site of a Vulcan apparently motionless immediately above us - and apparently close enough to touch. I could see panel lines that looked like they'd had too dark a wash, oil stains, hydraulic fluid stains and drips and streaks everywhere - and some rivets in the engine covers actually rotating....I still can't believe what I can remember seeing.... ...for instantly she was gone. And Instructor says 'I have control'....and Prune says 'You hav....' before the jet wash hit us & flipped us almost inverted!! Wow, that was fun - and so was the rest of the flight. What wasn't was the b*llocking Prune got in the post flight debrief for 'keeping a poor lookout' Which to be fair was true - it was a flipping great Vulcan after all! What wasn't quite so fair was that Flt. Lt. Instructor didn't admonish himself - after all it did creep up on us from his side...!! APO Keith Prune, RAF, Retired.10 points
-
Thanks chaps! With a fair wind this model will be complete tomorrow, Thursday at the latest. I've been aiming to complete it before I head off to a do in the West Midlands over the weekend, and when I get home it's back to the "day job" building model railway thingies. Right. Paint. I rummaged in my paint box and came up with a couple of Humbrol tinlets that might be useful. Plan A is to mix Hu14 with some white to match the transfers. Plan B was to use other blueish shades in various combinations until it worked. The lower part of the fuselage still needs to be painted aluminium, so I could use it as a sort of tester area. In fact, that's exactly what I did, though I haven't photographed my current results. Happily, despite a lengthy bath, the transfers have actually adhered to the surfaces they are on. Happy Heather! The serials have been done, too. I'm not going to be bothered by silvering, as the misregistration is bad enough anyway. It is what it is. Tomorrow, I shall airbrush some gloss enamel varnish over the tail bits to fix the transfers, and then I can look at retouching as necessary. Getting the fuselage stripe round that rump is painful. Lots of Micro Sol has been applied, and I hope it'll settle adequately. I ploughed on and did both sides, plus the rotor tower. That just leaves the "Fairey Rotodyne" script below the windows which will have to wait for the aluminium to be done. It's starting to look really nice, warts and all. Well, that'll jinx it if nothing else does! By the way, I'm sure you're all keen to know, the paint scheme is pretty much as I outlined previously. White acrylic primer on everything. The wings and tailplanes (and the lower fuselage eventually) have been brush painted using a flat sable brush and Humbrol Metalcote 27002 Polished Aluminium enamel. This has just a little shine to it, which is nice. Sadly, it doesn't polish further, but there you go. It does rather show up the scratches and sanding flaws, too. The fuselage had three brushed coats of Humbrol Clear (lovely stuff that self levels, can be brushed with ease, or airbrushed straight from the jar, and cleaned up with just water), and I will spray some more over the transfers tomorrow morning. I'll paint the fuselage lower bits, then retouch the transfers as best I can, and paint the canopy frames in the same colour where required. The final acts will be to remove the canopy masking, repair the inevitable damage, attach the wings and tailplane, pop the rotor in the hole on top, and get some proper photography done for the gallery. Yeah, right!10 points
-
Thanks Lord... I think @robvulcan is doing that on his own! Haven't seen him for a while but worth a search to see his Vulcan passion. Always good to see another though Great stories Keith, John and Simon - thanks for sharing them I have one of my own, passed on by one of the bosses at Henlow. He was a Vulcan Nav on night duty during QRA duties and was surprised to see two guards either side of the wings of a Vulcan on the pan making strange gestures. One would raise an arm and lower it quickly, then the other would raise and arm seemingly in response and then repeat the downward movement himself. Curious, he crept closer only to see them bouncing a superball (remember those) to see who could get it across the wings. Impressed he was not! Thanks CC - yikes! 😮 I had a similar experience learning to fly a Twin Comanche at Old Sarum. On final approach I looked in the mirror on the nacelle to make sure the nose wheel was down and saw a small biplane spiralling in on 'non-radio' finals. I told the CFI and asked if I should go around. "Nah, not yet, give it a minute. I've told him before he should look out properly and it's time he learned a lesson". Not up to the Vulcan's wash but disruptive nevertheless! Back to the kit... for a while. Crew have been cleaned up, before and after with tools: The Citadel Seam Scraper does really well on kits like this with only a bit of sanding required and a quick trip between the legs (oooh, nasty) with the #10a. They were then given their Ratskin base coat and other bits assembled for a black coat: … then sprayed: As stated previously there's a lot of flash on the kit. Out with the Molding Flash Sanders and the Dremel then. Best to knock off the nibs with the sihrsc first but then the flash seems to know it's had its day and peel off in thin strips - very satisfying when you get it right. Then the Dremel battery went flat. Cuh! I'm sure I charged it, er, last year. I'll have to do it manually! Oh, the shame for a tool tart... Care required with the sihrsc as the plastic is quite soft and scratches easily - probably pressing when I know I should just 'stroke'. Not to worry though, that'll be inside and not seen again. Soon the intakes are done: I know what you're thinking... possibly. They should be white inside with metalised turbines - I'll sort that later. They should be prettier - er, OOB? Does that work? Maybe I'll have a play with some filler. Next step is part #18, the lower window, trimmed and glued in with TET: Must remember to mask that and hoping that the tape is a reminder after lunch.9 points
-
Airfix 1/12 Lifeguard Trumpeter 02506-99 points
-
Regarding Malta Hurricane`s,...... the Hurricane was operational during 1940-41 as the main RAF fighter across the British Empire`s oversea`s war zones,...... from Malta, N.Africa, Greece, Russia, Burma, Singapore , Java etc and the delivery scheme was Dark Earth and Dark Green,.. later with Sky or Sky Blue undersides,... although up to 1941 black and white halved undersides were specified for overseas based fighters. Those in N.Africa began to receive Mid Stone over the Dark Green areas after delivery at Egyptian MU`s during 1941 but many continued until the end of the year in the original delivery scheme until it became more common in 1942 when adequate numbers were arriving. It was not until very late 1942 and more likely 1943 that the desert scheme was applied on the production line in the UK. So those arriving in Malta from the UK also wore DE/DG uppers. However,...... in 1940 the RAE in the UK was experimenting with a new desert scheme incorporating a new colour which eventually became Middle Stone,..... and at least two aircraft were delivered by carrier to Malta in this scheme,....... with black and white halved undersides which were still specified for overseas`s based fighters into 1941. One of these aircraft was this famous Hurricane; 48-2g by Tony OToole, on Flickr 48-2k by Tony OToole, on Flickr One squadron of Hurricane`s did deploy from Egypt to Malta and they could well have worn desert colours,...... but it was not common for Hurricane`s to be delivered from Egypt,..... those that did generally arrived directly from the Takoradi Route,..... without going to the MU`s to receive Desert Modifications,... which included the colour modification. After discussing colour schemes with Malta based groundcrew,...... I was told that in 1942,.... just before 249 Sqn received Spitfire`s,..... that some Hurricane`s had their schemes altered to cover the Dark Green areas with a Blue Grey colour,..... most likely Extra Dark Sea Grey,.... from stocks at the Flying boat maintenance base at Kalafrana. This same scheme was also soon applied to the first Spitfire`s to arrive. Here is a model that I made in this scheme; DSCF8096 by Tony OToole, on Flickr Compared to an early Spitfire on Malta,..... although I accidentally transposed the colours on this model,...which was built a very long time ago!; jen by Tony OToole, on Flickr For night operations, when enough Hurricane`s were available the Malta Night Fighter Unit was formed and the undersides were painted black,...... and some also received an overall black scheme too, with B Type roundels. 48-14b by Tony OToole, on Flickr At least two Hurricane`s were also converted for Photo Recce purposes,.. a Mk.I (see below,.....it was fitted with a later Rotol for better climb performance,...as were many Malta Hurri`s,.....the props were brought in by submarine!) and a Mk.II,..... and these PR Hurri`s were painted Dark Bosun Blue,..... similar to the 2 PRU aircraft in Egypt. 48-2o by Tony OToole, on Flickr I do hope that this answers some of your queries,...... so no,...... not all Hurricane`s were DE/DG,...... but the majority were! Cheers Tony9 points
-
25 years ago, I began building a plank-on-frame model of the American clipper Young America. At that time, I was struggling to make a living at it, and not having much success. Having just had a fairly disastrous result at the maritime auctions in London with another American clipper, I became disillusioned with it. I made a shallow box and filled it with sand. I stuck the hull in it, and put it outside where it has endured the wind, rain, snow and ice and occasional blistering sunshine for quarter of a century. This evening, I took this photograph from directly above it. It closely resembles photographs of real wrecks that have been lying on the sea bed for considerable lengths of time. It makes a change from usual photographs of models. I sometimes wonder how much it would have fetched if I had persevered with it, because shortly after that, the models began to rise in popularity. It is quite large (for me) having a hull length of fourteen inches. Bob9 points
-
I dont know if this should be in armour or diorama section. My first attempt at water ,not to bad ,the bridge was built from balsa wood . any comments welcome.8 points
-
As far as I’m aware, there has never been any kind of airport terminal building kit available in 1/72 or even 1/144th scales, despite the profusion of airliner and civil aircraft kits in these scales. I have always fancied making a small British airport diorama that could be used in a variety of periods from the late 1940s to the ‘70s, with aircraft types such as Dragon Rapides, Herons, perhaps a DC-3 and a helicopter. Airfix’s only airfield structure was their Airfield Control Tower, which was first issued in 1959 in their Series 3 range priced at 3/- (three shillings old money = 15p today!). This kit is still available today, having been reissued many times, but now costs £9.99, which really is overpriced for such an old mould! I have only seen this kit built from the box as a WW2 Airfield Control Tower and occasionally with additional detail work, there have been some splendid examples built. However, with a little imagination and creativity, I felt I could turn several of these kits into a suitable small airport terminal building. Okay, purists will say the kit is marketed as 1/76th scale, which was in line with Airfix’s 00 gauge railway range, but what the heck, I have seen this on more 1/72nd scale airfield dioramas than model railways! I have had an early issue of this kit in my loft for years, together with the Flightpath etched brass detail set, so it was time it got built! I purchased another two of these kits and found all three were pressed in different coloured plastic from different decades! My earliest one in cream, one in medium grey and the latest one in light grey, which wasn’t a bad thing so I couldn’t get the parts muddled up with eachother. Having said that, the mould doesn’t appear to have suffered over the years, with little flash or wear, so all three kits were quite compatible with eachother. I decided if I joined them all together and rearranged the doors and windows, the result would produce a satisfactory terminal building. With all three kits joined together, I have filled and sanded all joints and blanked in the centre windows, as well as some of the other windows and doors with plasticard, so as to not make the building uniform in appearance. Also I cut pieces of plasticard and inserted them as wall dividers and to give strength to the structure.8 points
-
When PC ( @Procopius ) came over to the UK some time ago he very kindly sent me a couple of kits as a thank you. I finished the Beaufort some time ago but I've been saving this one until I thought I was up to the job and now I think I might be ready. The kit is the Hasegawa Mk. VI but when looking for themes I stumbled across an image of the prototype: Has to be done. The various modifications required are specified in the WiP here. Eventually. Finished with AK True Metal (the paste) Dark Aluminium and Aluminium, sprayed roundels, masked underwing serials and a soldered brass tube pitot it's been a great exercise. Worn out now8 points
-
Sorry guys, out of likes again Thanks Hendie - good to know I guess that's why the new tool Airfix are far better? You spent how long? John that puts my few minutes below to shame. Perhaps I should try harder... More great stories - I really like these, thanks guys John your slipped in comment of "… so I asked the pilot why at the wind-up party on the last night" did NOT go unnoticed! Lucky chap Thanks Håkan - or perhaps wait for a new tool? Thanks Er, which bits are those please? Thanks Davey - if I inspire you to wait for the re-tool my job here is done Remember I stuck the control columns to cocktail sticks to spray them? Where's the other one gone then. I gave up late this afternoon and had my apologies ready but then thought 'one more look' this evening. Of course it was in the last place I looked: … under my Dyson Desk Lamp (I love Dyson). Duly stuck in: The crew were finished and seated: I have no idea why my Humbrol 163 is shiny but hey, they're not going to be seen again except in this shot: Intakes. Ahem. They are not the best kit parts I've seen: Gappy. With ejector marks. But John spent ages on his so I should try. Chisel, chisel, riffle, riffle, fill and wipe: Hmmm. Need more work. I think I'll try to get this effect: (From the walk around here on BM) Should be do-able. With some black paint. With those done I was ready to close up! Already! A quick dry fit showed that it wasn't too bad for its age but some over-sized locator pins were holding it back a bit: No worries, I know (with this plastic) I can soak, melt and squash 'em. See? I used the Touch-N-Flow 'cos I had a lot of seam to fill and I know that one tube will do the lot AND give me some nice control. What's that you say? You can see what in that picture? The INTAKES! Oh good grief... rip it open, instal the intakes and try again: Another shot, with scalpel. We all know I'm an idiot, but that one takes the biscuit. There will be wine tonight...8 points
-
Morning folk's I'm determined to get this one over the finish line now just four pieces of glazing to add which I've painted already,the windows were a tight fit but are now in place 10/10 Airfix for their method of fitting too.I'm very tempted to have a go at Revell's newer Ju88 to go with this one I notice it has two Med based schemes.8 points
-
I've got fed up waiting for the never-ending Freightdog/CMR resin Westland Wasp kit that has been 'in production' for years. We have also been promised a similar kit from Kiwi Resins, a conversion kit from Air Graphics and a Scouts and Wasps in 1/48th & 1/72 from S&M. Anyway I have had several Airfix Westland Scout kits and an Airwaves white metal conversion kit in my stash for a number of years, so time to beat all these people and get on with it. I thought the task might be quite daunting, but with care and patience, I'm pleased with the result. The conversion included the Airwaves etched brass detail set, a Tasman vacu-formed cockpit canopy and a pair of resin torpedoes by Eduard. Finally the decal sheet 72-036 from Model Art includes a machine from 829 Squadron aboard HMS Rhyl. My local airport had an Open Day and the Wasp was very popular!7 points
-
May i present my 1/144 DOUGLAS DC-3, built oob. Bought this at a recent show, but when starting build I saw I had warped wings and to add to my problems lost wing light lenses, so had to do a first for me, bodge new ones, so i hope you like, all comments very welcome. DSCF9257 by john dann, on Flickr DSCF9260 by john dann, on Flickr DSCF9258 by john dann, on Flickr DSCF9267 by john dann, on Flickr7 points
-
The windshield is glued in its place. In order to fix it in the right position, I applied glue only after it was aligned with the antenna (the right angle for the antenna mast) and with the rest of the canopy. Probably due to the modifications performed (IP, antenna mast, etc.), the fit of the windshield was not great. I had to use some very small plastic pieces in order to fill-in some empty spaces here and there. I have to apply some putty and then some fine sanding in order to get a smooth contact area between the windshield and fuselage. The antenna is not permanently installed, it can be removed. It also had to be shortened a little bit, but I think it captures the shape and attitude of the real thing much better that wat was in the box. I will permanently install it only in the final stages of the build. Thanks for looking and cheers.7 points
-
Thanks PC - I'm really pleased you like her after your kind gift of the kit. Thanks again matey Thanks BB As you know, I'm with you Neil! There's just something about their designs. Thank you Sir Thanks Simon, glad you like her Thanks Gorby I'm hoping to improve my soldering with a bit more practice! Thanks Heather I do spend a lot of time modelling at the moment... but not as rapid as your Rotodyne! Thanks Dennis Thanks Benedikt Thanks MB I think so too... like a lot of Bristols IMHO. Thanks Tony Thanks Steve - and well done for keeping up! Thanks Stew, glad you like her matey Thanks Mike Thanks Giorgio - especially for your earlier help on the vinyl cutter - couldn't have done this without it Thank you Sir, very kind Thanks Cookie - I did eventually get the RAF font to work (sort of) on my Mac so more to come (one day) Thanks Martin Thanks Stu, I couldn't resist after seeing that photo Thanks Steve - yep, I think my 'future Beaus' are going to be less Beautiful Thanks Dave - oops, just stole your pun! You've got me thinking now... more prototypes... Thanks Stuart - come on over! Thanks Johnny Thanks Horatio I'm not sure of anything I'm afraid and information on the prototype is a bit thin... I'm hoping to get some time in the Bristol archive soon and will let everyone know if I find anything relevant and/or helpful. That said the Beau had several engine changes so I wouldn't be surprised if the bulges were added later.7 points
-
All the major bits are assembled. Cute little guy. It has a touch or two of Me 163 about it, but I'm sure that's coincidence. Once the spinner and contra-props go on the back, that goes away. What might be more telling is that the shape of the fuselage has a resemblance to the aircraft's namesake - a bullet. Was this design intentional, as the story goes for the later Bell X-1? Not that I've been able to determine, but I haven't found a lot of reference material for the little fella. I'm also intrigued by the bits on the end of the wings, as I have yet to find out what these were for. I have a photo of the second prototype up on jacks (with a P-61 in the background) and the tubes at the wingtips look hollow. That same photo also exists on the interweb in a Photoshopped version - as if it were an in-flight photo, complete with the pilot added. Something just didn't seem right when I first came across that one. It looked too nice to be an actual 1944 photo. Cheers, Bill7 points
-
This is the 1/72 Trumpeter M4A3E8 HVSS kit converted with parts from the Model Miniature's M50 conversion set, plus a lot of scratch-built details and other bits including the gun barrel (but not the muzzle-brake). It took 9 days to build and complete, my build log can be viewed here: https://www.britmodeller.com/forums/index.php?/topic/235039050-172-idf-m50-super-sherman-trumpetermodel-miniature-conversion/&6 points
-
6 points
-
Thanks for your encouragement and inspiration guys. The VCR has had its windows glazed with acetate sheet and interior populated with desk and controllers in situ, whilst the lady assistant has just come up the stairs with the tea! The fencing posts are joined together by 5 amp fuse wire around roof and balcony. A paper clock face has been printed out and glued on the front, as well as other signage printed out on my computer. Spectators have started to arrive, including a party of school boys and teacher. Oh for the days when airports had open viewing terraces!6 points
-
Getting Stuck In Now that the submarine is basically finished it needs to get stuck into the seascape. Drill some holes in the base. Screw the submarine into position. Note that as submarines are weapons of stealth the model has been made invisible in this picture. Assemble any furry white fluffy, wavy, frothy looking stuff you can find - except cotton wool. Cotton wool never seems to work quite right for modelling purposes I find. Note that when I cut the hole in the seascape for the submarine to sit in I cut it far too wide at the stern, see the big gaps that have formed. I'm about to pay for that mistake. If I do this again I will keep the hole as closely conforming to the hull's waterline as possible. What should happen is that I should be able to stuff a thin slither of fluffy stuff, in this case more of the rayon from the cuddly toy that I disembowelled a few months back, to fill in the tiny gap. What I have here is a canyon that needs to be filled in. Oh well, carry on... It's not so bad near the bow. Once you have had a fair go at loosely filling in the gaps all the way around the vessel, start painting this all over the fluffy selvedge. Just like this... Then repeat the process, filling in all the gaps up to the water line. It's much quicker and easier where the gaps between the seascape and the vessel are smallest. Even once the gap was filled, the edge between the fluffy gap filling rayon and the solid sea base was quite visible. Here I'm hiding it under some white oil paint. The Rayon seems to turn a bit greyish when saturated with liquid resin so a bit of white paint also helps to 'lift' the appearance of the wake. So, when it was all done it looked something like this. My only concern is that the vessel looks like it's going fast - really fast. Perhaps too fast for a WW1 submarine that probably rarely exceeded about 8 knots? Part of the problem is as discussed above, I made the gap too wide between the base and the waterline of the submarine so there had to be a lot of froth in the water to fill the gap, which makes the boat look like it's really moving! Still, I have to say that I am pretty happy with this and many people have seen it now and no-one has commented on the fact that the thing's about to start hydroplaning! Note that in this picture this one is flying a white ensign. How that got there can be the next post. Only three more updates to go now I think... Steve6 points
-
hello. That is my new model. VIP is here6 points
-
Amelia's tailwheel had a tarp or leather dust cover, absent on the kit's part, so one is fabricated: Whilst looking at photos, I noticed a tie-down in the vicinity, so one was made too:6 points
-
Welcome everyone! Crikey, a crowd already, I hope you're not disappointed... but you're ALL very welcome For this who miss her, here's a video I took of the last time I saw her at Weston-Super-Mare on 21/6/2015, part of her final display. It was windy so apologies for the noise (of the wind, not the Vulcan): Note the vertical climb and rollout at the end; I think this was banned to preserve the airframe but I guess the pilot though 'What the hell, last time eh?'. So sad... Anyway, enough of this nostalgia. Oh no, wait, it's an old Airfix kit, right? For those who want to see how she should be built I refer you to: Phil's thread here Mark's here and the walk around here. OK, I might be using that. For me, this time, I'm just going to build the kit OOB. No, honestly. Well, that's my intention at the start Bag of bits: If I'm going to get anywhere without knocking things over, the sprues (which have been pictured many times before) need breaking down. Even then... "We're going to need a bigger boat". Cripes. There's plenty of signs that the moulds are old and have started leaking: Flashy! Although, oddly, some small parts have survived: Until, of course, they break coming off the sprue The crew ladder hasn't survived: … but luckily I won't be using that - wheels up as usual.6 points
-
Having sealed the paint in with Quick Shine gloss varnish, last night I began applying the decals. If I'm honest there aren't very many and using micro sol they have settled really well (apart from a slight mistake on one of the wings). Not much to report really.6 points
-
It is an undisputed matter of fact that there's quite a connection between Irish and Italian people. In general they love each other, maybe it's because of Catholicism, most likely it's because of a number of similarities in their approach to the joys of life. Who knows, maybe it's because Trapattoni was Ireland's football team manager for some time while Liam Brady left great memories in both Juventus and Inter ! There could be other reasons but it's a fact that Dublin is one of the preferred destinations for Italian tourists and a good number of Irish tourists visit Rome and other Italian cities. It is also an undisputed matter of fact that both countries have had some troublesome relations with Britain but they have afterall been good commercial partner and a lot of products have been moving between both countries and Britain, including aircrafts and other weapons. And this brings us to another thing that Italy and Ireland have in common: both countries used the DH Vampire as their main combat type ! Ok, this is not really surprising since the Vampire gave many air forces their first taste of jet air power and I could have chosen many other countries to show some unusual markings on DH's great little fighter. There is however one good reason for me to choose these two countries and it is another Italo-Irish connection: both have been places where I've lived ! So as an Italian born modeller who lived several years in Ireland, building both models in parallel made perfect sense to me . The history of why and how each Country used the Vampire will be told during the build, let's for the moment just show which kits I'll be using, kits that will have to differ as the two countries used different variants. Scale will be the same though, 1/72 for both. Italy built the FB.5 under DH licence ( a lot more info will follow...) and the kit I chose is the recent Special Hobby offering, here in the Azur branded box for aircrafts used by France (another large user of the Vampire) The Irish Air Corps on the other hand selected the two-seater T.55, an export variant of the RAF T.11, and for this variant the best option is the Airfix kit Decals for the Irish machine will come from one of Max Decals sheets, those for the Italian aircraft will come from assorted Tauromodel and other sheets5 points
-
Finally completed my Botha, or rather I can't look at it any longer! This is my fourth vacform, what usually happens is I choose a subject, Bombay for instance and then Valom produce a kit or Sparrow and...you guessed it. There is not much chance with the Botha. Out of my vacs so far this has been the most difficult, even the Iris for the Floatplane GB was easier. Not sure why this one has been so problematic but the main additions/changes are; -total rescribing -replaced cowlings with Halifax ones plus gills of plastic strip -cockpit interior -scratched landing gear -I overcut the front glazing and replaced it with a plunge moulded one -scratched gun turret detail etc Some pictures Hope you like it, very glad to move onto something else, a nice simple OOB Bristol Bulldog in the Airfix GB for instance, it will certainly be less Botha.5 points
-
Hi Guys, Here is my recently completed Heinkel He 111H for your inspection. It's the first time I've built an ICM kit, and I was very impressed with the parts fit. I used Humbrol 91 and 116 for the upper surface camouflage, with 65 for the undersides. It was brush painted with Humbrol Satin Cote to finish it off. All comments, good or bad are welcome, but I hope you like it.5 points
-
Hello ! Some pictures of one of my few completed kits from 2017. After it was done i was a bit disappointed by my paintjob and decaling, especially after taking photos. After some touch ups done recently i am more pleased but still some problem areas. Hope you like it. It is the new Eduard Fw 190 in 1:72 scale and it builds very well. Gun barrels and the pitot are from Master. ( one of the censored photos )5 points
-
5 points
-
Stopped in at Luke AFB in August 1988 while traveling between postings from MoD(UK) back to Edwards AFB. Here's the 302nd TFS Vipers with tail code LR for Luke Reserves. The tail emblem is a devil profile on an outline of a map of Arizona. The unit has since been relocated to Elmendorf AFB in 2007 and is now an associate unit flying F-22s. 86-0212 Those are portable cockpit entry ladders in the foreground. Never really saw them used much. Thanks for looking, Sven5 points
-
Cheers John! Yes, flight testing might have been an option. I doubt it would have been as successful as the real one. A day of two steps forward, one-and-a-bit back. So close to completion - and this is something I find with my railway modelling work, too - you have to watch what you're doing to avoid a visit from Captain C*ckup and his Crew. I Clear coated the transfers. I thought they'd be safe to mask. I was very wrong. Rather than just give up at this point, though I was sorely tempted, I put my best foot forward, took a deep breath and decided to just fix it. Luckily I only used a thin tape, as I'd planned to brush paint up to it. A wider tape would have ripped the whole transfer off. So, a couple of further Clear coats, horses and stable doors and so on. Once they were dry, out with the blue paint again. I mixed a lot to get more consistency, and I dabbed and blobbed to repair as best I could. Inevitably, the white pin stripe had blue in it. I cast about my bench for a solution. I am well used to working with a bow pen (ask your granddad!) for applying paint lines on railway models. I won't say I'm good at it, but I have done it before with moderate success. That would be an option, for both the blue and white linework. As it was, the blue bits were okay. I just needed to tidy the white bit. I felt a bow pen might actually cause more damage to the transfer surface, so rejected an otherwise workable idea. In my brush and pen pot I found a paint pen that only rarely gets used as the density of the ink is thin. It was, however, just the right size to repair the white pin stripe. Worth a try. It couldn't get any worse. This one's a silver one, which I also used to give me a bit of a cheat line under the bottom edge of the transfers to paint up to later on. Anyway, long story short, the white pen did the trick. It's a horrid bodge, but I rather fear this is all I will be able to manage with what I started with. Here you see blue blobbiness, some white repair, and silver cheatline. Pretty, it ain't. Onward! At the front end, the white line is showing a little of the lack of density. Once it had dried, I went over it again, which helped. Note the blue blobs from earlier colour match tests. Happy with the bodge repairs, I decided it was worth just getting on and painting the bottom of the fuselage. Flat sable brush, Humbrol polished aluminium paint, a steady hand, slow and carefully painting up and just over the silver cheat line. I managed it without Captain C*ockup making further appearances. The big reveal: time to take off the cockpit masking. What horrors would be revealed? Well, surprisingly few, and nothing the odd touch-up with a fine brush and suitable colours couldn't deal with. One sigh of relief. Something that's always been missing from this kit is the instrument probe on the nose. Yes, I know there are other things missing, but you know what I mean. As I'd started adding details, like the window runners, windscreen wipers (soon), and even the cabin door handle (again, soon), I had to include the probe. Diving into my metal stocks, I took a length of 1mm diameter brass rod and trimmed it what I felt was the right length. A slight kink lets it pass through the nose and up into the instrument binnacle beyond while remaining horizontal on the outside. If you look at photos, you will see the real one does this, too. I spent a while carefully attempting to file the round rod square, and imparting a taper towards the end. I finished up soldering a shaped bit of 0.45mm nickel silver wire (it's what fell out of the packet when I dragged it off the store shelf) to the end. Soldering is bread and butter work for me in the "day job". I know it's something some of the BM community struggle with it. I'm not about to set myself up as any sort of expert. I chemically blackened the probe, polished it up to get it slightly shinier, then painted Humbrol Metalcote Polished Steel on it. That was also polished up to a nice shine. Push in the nose, bedded in with a drop of canopy glue at the hole, and checked for being square on and level. Happy with that. Something going right again. Having painted the lower fuselage, it was time to think about *shudder* the final set of transfers. As I trimmed them from the wreckage of the sheet, the surface felt gritty. Alarm bells began ringing, and I feared contact with water would result in an immensely complex and minute million piece jigsaw puzzle. After comments up-thread, I thought I'd try a coat of two of Clear over the transfers, which I also split up to make it easier to handle in case of disasters. My current thinking is if the Clear holds them together, we're winning. If it doesn't, and they still fall apart, I shall simply leave them off the finished model. We shall await the outcome in due course. What's left to do? Fit the wings and tailplanes. Final paint touching up as required (the tailplane support struts, for example, which are the last kit components to fit). Oh, and windscreen wipers. Where's me road vehicle bits box?5 points
-
Grumman Hellcat F6F-5 VF-74, operating from USS Kasaan Bay in the Mediterranean. Operation Dragoon (the invasion of Southern France), August 1944. 1/96 Lindberg kit finished using Xtracrylix Gloss Sea Blue and an assortment of spares box decals. The build thread is here. Cheers Cliff5 points
-
At the weekend I painted up the seat and interior I should point out I'm building a Supermodell Cant Airone alongside this. The Spitfire is for light relief! I forgot to photo the belts before installation. Hopefully you can see them in the 'pit. I also drilled for the fuel filler - omitted in the kit. I'd already stuck the wings together so then it was a case of bringing the fuselage to the party. One wing root turned out perfect, the other will need some filler. The tape was to ensure dihedral as it looked a bit flat, even though the fuse is not pushing on the upper wing halves. However when I took the tape off this morning it still seems a bit flat or that there's a slight curve in the outer panels flattening it out in a front view. May have to tidy up a bit before continuing! Cheers Will5 points
-
I've read through this and still have no idea what's going on I do however have one very important question. Why is that man's bottom buried in the wall?5 points
-
ok after a bit of a brain wave today at work I've fixed the scalloping issues! After some careful checking of the reference photos I found there was room to do what I wanted. The pitch is now perfect and while it's a little bit courser than it should be. it looks fine. It ended up costing me a couple of the smaller decals but that's easy to sort out. I still have the final bit to finish, I didn't do anything on her last long weekend, instead I worked on the beast behind! Trumpeter's Su-24M with full correction kits and AM stuff, sort of makes this build seem like a walk in the park! I'll finish this build off this weekend.5 points
-
And the airplanes were still pretty new "back then". But I think that as Giorgio said, it will be "knocked back" when successive coats are added ... after all, he's a master at "knocking it" -- out of the ballpark. ⚾ (or as you say on the other side ... GOOOOOAAAAAAAAAAAAAAAAAAAAAAAL. Gene K5 points
-
Adrian, thank you. I am envious of you having seen the machine actually flying. Like TSR2, Rotodyne fell to a victim of political circumstance. It's often surprising to look back at the 1950s and realise the UK was literally leading the world in aviation technology, yet we virtually threw it - or gave it, in some instances - all away. I inspected the transfers round the rump first thing. They had settled a little, but still exhibited some wrinkles. I decided to cut my losses and gently used a sharp No10 blade in my Swann Morton handle to slice the along each wrinkle by rolling the curved blade. I then applied a brush coat of Clear over all the transfers on the fuselage. I used a wide flat brush, and used it to press gently on the cut wrinkles to encourage them to bed down. It more or less worked. The tail end stripes are all a bit wonky, though. Not much I can do about that now. Oh, how I wish for someone to give this kit some aftermarket love. Perhaps Airfix will reissue the kit with new decals transfers as part of their Classic range. Leaving the Clear to dry, which it does quickly being acrylic, I whipped the wing and tail assemblies into my paint shop and airbrushed some gloss enamel varnish over them to protect the transfers on the tail feathers. While that is drying, the Clear had done its thing, so it was time for some more colour matching. Here you can see how I used the area below the transfer as a mixing palette to try colours for best Mk1 Eyeball match. It took several goes, and even now it's not absolutely spot on. It is, however, the best I'm going to manage, and applying the Two Foot Rule*, it's hard to see the touched up areas. Close to, you can see them if you look hard enough. It all kind of depends on the lighting. The worst thing with these 1990s Humbrol period transfers was they tended to flake along the edges. The pin stripes along the fuselage are particularly prone to this, although the upper one benefited from the white being misprinted slightly off. That doesn't show against the white painted fuselage. I've touched in the bottom edge as best I can - allowing for approaching old age and an increasingly shaky painting hand - and now I'm wondering how safe it might be to mask along the transfer so I can paint the aluminium areas by brush. This will be the final major painting exercise for this model, at least. *If you view the model from two feet away (60cm for younger viewers) you can't see the flaws. This is never going to be a competition or museum-quality model.5 points
-
And he's done5 points
-
preshading and black underwing painting done DSC_0002 by Reinhard Spreitzhofer, auf Flickr5 points
-
Hi All Hi Tony, yes it looks like my grains are too large, should have gone for the bag with the chaps in the Bowler hats. Hi SUB-SAM, I've never heard of slate powder, but packing it into the gaps and adding CA is a neat idea, on my "To Do" list! Thso, as I've recently purchased a three pack of that Stynylrez primer, it seemed like a good opportunity to try them out, one each And here they are Nice, very nice, I like! The white (although you can't tell from these photos) is slightly mottled, and if it was to be finished in white, I'd probably give it another coat for evenness. As it is going to be the red target tug, I'm sure it will be fine. It looks slightly blurry in real life too, hard to focus on. The grey went on just as smooth It's probably slightly mottled too, but being light grey on light grey it doesn't show up as much. This is going to be the silver trainer. But my favourite is... That is a very satisfying paint to spray, even with my bargain basement Frankenstein setup, full coverage. (Ignore the sandy filler, I left it rather than mess up the rest of the underside trying to remove it) That's the Bagdaddy, shame to cover it up, but I think I've a P-61 Black Widow somewhere... Anyhoo, I'm going to leave them alone for a week or so as work calls me away. Comments and suggestions welcome Cheers Steve5 points
-
We’re going to have to agree to disagree on this one. It is as you say stuck on, 😉I’m not leaving it like that. Tis just a dry fit. I’ll fill the plasticard part with milliput or similar, sand then prime. I can’t see the point of cutting off a whole section and replacing it with a bit exactly the same. I might be wrong but I’m pretty sure this will work. Thanks for your help though. John.5 points
-
Buffalo #3... The rest are in the gallery...Thanks for all the support and the extra information.5 points
-
Pitot, Venturi, aileron actuators added. Decals will be next:4 points
.thumb.JPG.3498f40362ff13ebfc4b2e45abbd545e.JPG)


.thumb.jpg.76f12b87ce9ca9929c9aabdcf8f9d2dd.jpg)


.thumb.jpg.d63052df9f30de247fb49bf44f442289.jpg)


This leaderboard is set to London/GMT+01:00