Leaderboard
Popular Content
Showing content with the highest reputation on 10/01/18 in all areas
-
Hello, being a new member on this forum, I like to share some of my past work. Please. Feel free to comment! First an oldy :Horten nightfighter! (1/48 Dragon) Blohm und Voss 212 (1/48 Fonderies Miniatures) TA 152 from the comics by Hugault (1/48 Italeri) A quickbuild : The Airfix members special 1/48 Me 109 And the special edition by Eduard of the Roden Gladiator31 points
-
Before Christmas I decided on a quick "out of the box" twin build of the Airfix 1:72 scale Mk I Hurricane. It all went well until I hit the canopies - which I made a complete hash of and had to strip and start again. They are still not terribly good - not sure what went wrong. Just out of practice I guess. Brush painted with Tamiya acrylics, with the white and aluminium undersides coming from Tamiya rattle cans.I tried a wash with oil paints rather than my usual water colour wash, and I finished with a matt coat from a rattle can (Tamiya Clear Matt). Pretty happy with how that worked out - although note for future reference the matt coat didn't react well with the aluminium undersurfaces of the 111 Squadron machine (even though I thought I had covered it enough with gloss coat). Both completed straight out of the box, the first as a 111 Squadron machine from 1938, the other as a 85 Squadron aircraft in France, May 1940. Thanks for looking. And some photos outside in the late afternoon sun.31 points
-
Hmm, Trumpeters Wellington goes for about £32, the MPM one £26 ( or £29 for the italeri rebox). The Lanc at £30 sits between revells £20 and hasegawas daft £55. AMG's Sea Fury - about £40, Trumpeter's crap effort £36- Airfix £25. Meng Mustang £35, Hasegawa or Italeris rebox £28-£30. Airfix £20 ( about the same as Tamiya's). Airfixs new Hunter £36 - well you can find the italeri rebox of the totally crap Academy kit for between £20 & £35. I know which I will opt for. I'd say Airfix arent excessive overall - though the Shack I admit is a puzzler ( perhaps they just think they can charge £45 because they can! - and they probably can) Too much moaning gentlemen. You might not be happy this year but someone else will be. Next year it might be you in the glee-seat. Swings and roundabouts. Jonners20 points
-
Just finished the A&A Models EWR VJ-101C-X2 German VTOL fighter testbed.... The main engines are in VTOL mode - with the translating intakes extended and the front lift engines intake and exhaust doors open. The main engines horizontal in CTOL mode (when the translating intakes would be retracted and the forward engine doors closed) CTOL..... VTOL. Build and finished model photos here..... Ken15 points
-
I made the rigging with EZ Line. It was my first and last time. In general, the model has really drowned me. Kit - old Matchbox, decals Yellow Wings.15 points
-
I can’t belive the amount of negative comments that these threads about Airfix generate. For years, I wished they retooled some of their classic kits....and they are doing. They’re also bringing out some fantastic new kits that were needed for years (Whitley, hunter as examples). These are the golden years for me, I just wish I could build quick enough to keep up with their releases, keep up the great work Airfix15 points
-
Today was several brainless hours highlighted by dwindling eyesight, photoetch that goes zing, knocked over bottles of decal solvent, subtle cursing...in other words, a typical day in Navy Birdland working on 1:72 scale cockpit stuff. Why do they make it so small?? Anything accomplished? Here's a couple of shillings worth - first, the ejection seats, back to back because they won't stand up by themselves, and only posed this way so I could show off the metallic green tubes on the back side. Which are really there, by the way, I got the photos that say so. Once the seats are installed, you'll never see those tubes again. Alloy finish on the seat structure (Alclad Dull Aluminum), with black cushions and a dark grey headrest. Harnesses are from the Eduard set, as those in the CMK set are the wrong colour (tan), and look suspiciously like WWII surplus. The instrument panels were fun. I used the CMK resin, but remember that the CMK photoetch (made by Eduard) was pre-painted in the wrong colour. The Airfix decals, however, are in the right colour. So I added the photoetch to the resin and then applied the Airfix decals over the top, with a lot of solvent to make them snuggle down over the etch. Here's the deal, though - I had to cut the Airfix decals into individual sections and add them one at a time, matching instruments up the best I could. The pilot's panel has eight separate decals, whilst I lost count on the navigator's. Here they be at the end of the day: A big chunk of the navigator's controls are part of the cockpit tub itself, that's why it looks like there's a spot missing. Here are the seats posed in the cockpit: The cockpit tub, seats, and instrument panels all had a wash applied made from Tamiya dark grey, Future, water, and a drop of some magic ingredient that escapes me presently. I like this wash, you can use it over matt paint and you don't have to wipe off any residue after it's dry. All the paint molecules seem to line up along the edges, and the clear Future gives a nice gloss layer over everything else - ready for any decals you want to apply. For instance, the side consoles (also several individual pieces each). Whoever thought this up was brilliant - oh yeah, that Barracuda guy. Nice man. A flat varnish was applied when I got tired of working on it. Next I need to look at the destructions to make sure I don't do something out of sequence that I'll regret later on. Ta for now. Cheers, Bill PS. There's more work to do in the pit, but this stuff stays off until the end because I would break it off when masking. PPS. Future wash not suitable for panel lines, which you shouldn't be washing anyways.15 points
-
Hi, Considering that this Aurora kit is almost 50 years old it is not that poor IMO. Since I built the Monogram reissue more than 20 years ago my memories have more or less faded but I still remember three major problems: In those early days kits with opening doors, bonnets and even boot lids were rather popular even if their usually poor fit spoilt the appearance of the model when closed. This applies to the Aurora kit, too. Making equal gaps and gluing these movable parts shut flush with the rest of the body was rather laborious. The optically extremely distorting glass parts for the windscreen and the side windows were unusable and had to be replaced by clear sheet. The rear window was still just acceptable but today I wish I had replaced it, too. The kit had massive „wire“ wheels, similar to those of Tamiya's Morgan and Jaguar Mk II, but rather clumsy by comparison. As usual I made a set of real wire wheels. Since the (whitewall) tyres of the kit were very crude I replaced them by better ones from my spares box. I mixed a green metallic that was obviously popular on restored vintage Aston Martins because green metallic was (and still is?) Aston Martin's racing colour. Overall the kit was certainly far from being perfect, that may be the resaon why you don't see it finished very often. Nevertheless with some effort it can make a nice model.14 points
-
This kept me occupied over Christmas and New Year. All I can say is...... Micro-sol!!!! Unbelievably brilliant stuff!!! (Oh and the windows in the side doors have been put back the right way round since these photos were taken)13 points
-
Hello mates! I like tigers and cats made in USA. One can see. F9F-2 Panther of ATU-206 at NAS Pensacola ca. 1956. Hasegawa 1:72. I built this 2001. Hase didn't provide a number 53 for the rudder. The AC in front have them. There are differences in colors and sizes of insignia, not all have the same standard, AC in front grey flaps. 30 and 60 have big insignia. 53 with a small one is not in this common licensed pic. But there are, a very nice clean 53 in formation too, there are white flaps.... Cheers, Thomas12 points
-
Thanks Gorby, some more.... the Horten flies on a metal pin: And one of the shelf queens: enjoy!11 points
-
Hi, I enjoyed this build, really has a presence in my cabinet. One of my favorite WWll aircraft. Cheers Jim10 points
-
Thanks Giorgio - noted! Touched up. No more close ups, right? Oh OK, just one then. I fixed the code letters with a tiny brush: Not perfect but it looks fine from normal distance. Prop fitted, she's now being left overnight: I'll satin varnish in the morning and then fit some gun covers and rip off the canopy masks. Yay!10 points
-
Well, here's my second effort, a Revell Focke-Wulf 190 A8. I was going to make the R11 nightfighter version but Dot gold hold on one of the sprues and the radar aerials were a bit nibbled so I was left with the A8! The overall scheme is RLM 76 but to be honest the colour I was recommended, Vallejo 70.961 Sky blue looked very bright after I had painted it. I had been recommended a series of vids by a young lad by a kind soul on this forum which were very instructive and it is where I got the pencil idea from. After a bit of scratching around on panel lines etc I tried to make a bit of realistic gunsmoke staining etc and I think I managed to break up and tone down the bland bright blue easter egg I started with! Compared to what is on display here and in other parts of the forum this model still looks rubbish but hopefully a slight improvement over the F4F. Of course all criticism/encouragement is welcome.9 points
-
Short S.23 Empire C Flying Boat 1:144 vacform by Welsh Models Paints: Vallejo Model Air Decals: from kit except some homemade to replace damaged decals WiP here Some doors, hatches and wing platforms opened for future diorama setting. Starboard outer engine cowling opened, with scratchbuilt engine; plus cowling case on wing.9 points
-
Hi All, This is my reveal for the Airfix 1/72 P51 D mustang which I built alongside a Tamiya 1/72 one as a side by side build. This was built during this years Mustang STGB. Build Summary The Airfix 1/72 Mustang. A gem of a kit. Went together really well. I painted it using Tamiya Enamels and Humbrol Enamels. I did not give it a wash since the panel lines just highlighted very well after I applied the paint so I left them as is. The decals went on phenomenally well too. Build Thread http://www.britmodeller.com/forums/index.php?/topic/235014643-172-mustang-airfix-v-tamiya-side-by-side-build/ Final Reveal Video Final Photos I hope you all liked the post. All comments welcome.9 points
-
de Havilland DH 60G Gypsy Moth Coupe The British Arctic Air Route Expedition 1/72 Avis (AModel) This is my latest completion for the Flying Boats and Float Planes Group Build, in the main it was built OOB with a few detail refinements and rigged with Uschi's rigging thread. A late decision to add the flying control cables meant that I had to leave off the rudder cables, I found it difficult juggling the model, tweezers and rigging thread with my arthritic fingers. In hindsight I should have added these cables when carrying out the main rigging work. I hope that you enjoy looking at my efforts by John L, on Flickr by John L, on Flickr by John L, on Flickr by John L, on Flickr by John L, on Flickr by John L, on Flickr by John L, on Flickr by John L, on Flickr8 points
-
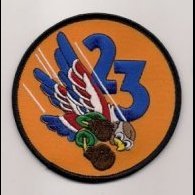
Hello all! I just signed on today after browsing the site for a couple of years. For the last couple of years my models have been almost exclusively 1/48 aircraft flown by my old USAF squadron - the 23rd TFS "Fighting Hawks". Hence my avatar (also since it was one of the few photos/graphics small enough to meet the restriction). I was an F-4E backseater at Spangdahlem AB from Mar 1984 to Feb 1987. While there we had a squadron exchange with the Danish RF-35 Draken squadron at Karup and the 617 Sqd Dambusters at RAF Marham. We deployed to Zaragoza AB, Spain twice a year for bombing practice and qualification. From there I went to Mather AFB, California as an instructor at the navigation school. Our students included NATO German and Italian fast jet backseaters destined for Tornados and Phantoms. I have kept in contact with one of my German students that flew the Tornado IDS with JaboG 33 at Buchel. After the USAF started getting rid of the F-4 and F-111 the number of cockpits available to backseaters grew scarce. My options after nav school were to go to Korea as an air liaison officer with the army, or leave the service. Now, a few years prior, going to work with the army was a 1 year tour, but after that you got your choice of assignment, the classic good deal after a bad deal arrangement. But when it was my turn that deal was over. It was suck it up or get out. I chose the latter. I ended up working as a Space Shuttle simulator instructor for 16 years at the NASA Johnson Space Center in Houston, Tx. That was a fun job working with the astronauts and flying the simulator. When it was announced that the Space Shuttle program would end, I switched from being a contractor (Rockwell, then United Space Alliance) over to being a government civil service employee with NASA. Of the about 25 people in my group that I worked with as a contractor, once the dust settled from the layoffs when shuttle ended, only 4 were still working for the contractor. Three of us had previously transferred to civil service. Anyway, I worked space vehicle safety for 10 years and it was not fun. Paychecks were nice, but the job itself was boring and frustrating. Different story for a different day. While living in Houston I volunteered with the Collings Foundation and flew their F-4D Phantom II several times. I helped out with maintenance and was one of the "seat guys" that took care of the ejection seat inspections and many, many seat removals and installations. It seemed like whenever something broke on the jet the rear seat bucket had to be removed to access some box in the aft cockpit. We also had a TA-4, T-33, F-100F, Me-262B, and UH-1 Huey. But I only ever flew the F-4. I did get a ride on the B-17 and B-24 when they came through Houston a couple of times. My wife and I were also involved with a Corvette car club. I owned 5 Corvettes at various times while in Houston (in order - 1978, 1969, 2002, 2008, 2012). I sold the last one right before we moved. I currently drive a Mazda 3 hatchback. It is a surprisingly zippy little car. One benefit of being a US government employee is the fairly generous retirement system. I was able to retire early, at age 56, one year ago. My pension is reduced, but my wife, who retired from being a public school teacher at the same time, gets a pretty decent pension. And now that we've moved back to her hometown, in Washington state, she is back to work teaching full time again. This allows me to stay home and take care of the house, watch TV, and think about building models. I still have 5 or 6 23rd squadron aircraft to build to complete that series, including a couple of F-4s. But I also started collecting and building European jets. I started on the Hasegawa 1/48th RF-35 Draken and got to the painting stage when it got sidelined to start packing for the move from Texas to Washington. In the last year I did finish a Revell 1/48th P-47N and the Revell-Germany 1/72nd Me-262B in the markings of the jet operated by the Collings Foundation. I also was about 70% done with the Revell-Germany 1/48th Eurofighter Typhoon but broke the canopy in half while trying to clean up the mold line. Revell did send me a new canopy, thankfully, but I haven't gotten back to it yet. In the meantime I started the Italeri 1/48th Gripen and an old Heller 1/72nd T-33 which I'll finish as another Collings Foundation aircraft to complete the set that I did for them. After these are done I'll either finish off the Typhoon and Draken, or start on the Rafale or Tornado ADV. I have both the Revell-Germany 1/48th IDS and new ADV kit. That's my story for now. Once I figure out how to post pictures I'll start contributing more to the forums.8 points
-
Arguing over whether a kit is expensive or not is a totally pointless row. What's cheap to one man could be a fortune to another, so it's totally irrelevant. We don't need eachother's circumstances, whether that person is on a limited income or independently wealthy, or whether they're just a tightwad or not. Let's not get bent out of shape over it though, eh? It's ok to have different opinions, but it's NOT ok to come to blows over something that is subjective.8 points
-
Not content with the lack of new tools by some they now moan about the cost of the kits!! Look at how much Italeri kits have gone up to let alone some of the eastern European ones an far eastern kits. I still think Airfix are a lot cheaper than most others in Europe Come on .... reallly!!!8 points
-
Hifolk's got an hour in this morning started the assembly of the bogie's seems to worked as far as ease of painting is concerned7 points
-
My Academy Hawker Hunter GA.11 conversion in August 2010. V.P.7 points
-
I felt a little embarrassed that my completed builds for last year were less than half of those of the previous few years, one thing I have realised is that as long as I keep building kits I keep a fairly steady rate of completions up but if I stop for any length of time I tend to find it hard to get started on the next build, for all the usual reasons - laziness, pub, laziness and pub. Also laziness and the pub might have been a factor. Anyway in an attempt to avoid a repetition of the vague feelings of shame that stirred when I assessed last year's output, I shall try not to stop this year, even if it means less pub, though obviously not if it means no pub - as W. C. Fields observed* there's no point in being a damn fool about it. My attention was caught by a gift from my friend Procopius who was kind enough to send me a couple of the new Arma Hobby kits, one of which is the PZL P.7a: There are a few different versions available, this is the Expert edition which includes a fret of photo-etch, film instrument panel dials and windshield masks as well as four markings options: I quite fancy the second one with the skeletal-winged-arrow sort of a badge on the fuselage: So that's the one I'll be going with. Here are the instructions, which are clear and look pretty straightforward, and the transfers: There's also a small supplementary transfer sheet and here is the clear sprue with a choice of two types of windshield, the film IP instruments, the vinyl canopy and wheel masks and the etched fret: Here's the main sprue: The mouldings are nicely done and include a representation of the interior frames and stringers: As you can see at the left, there is a degree of flash present on some of the parts but it doesn't look problematical, just a bit of a chore to get rid of. The 'corrugations' on the wing skinning are very delicate: Panel lines are recessed and not too pronounced: For reference I have the Mushroom Models Publications book on Polish Air Force Fighter Colours: Which as well as a wealth of information on colours and markings includes a profile of the very aircraft I intend to model: Finally by way of extras I have on the way from Hannants the Attack Squadron resin Stomil wheels and propeller which I thought I might as well add since I was ordering the IBG PZL P.23B Cheers, Stew * He was talking about perseverance, not the pub when he said that, but from his reputation as having a fondness for the odd tipple now and then I feel sure he would not mind my re-purposing his quotation in this context.6 points
-
Hi there ! I want to share with You my recently finished project - Tamiya 1:48 P-47d "Smokepole" flown by Lt. Hal Dunning and Lt. Doug Towner on Saipan in 1944. I added rivets and some details on engine. Decals used: SuperScale 48-1099. For national insignia I used diy masks. Paints used on this bird: Gunze H-52, C-12, C-22, SM01, Tamiya XF-4, XF-53, cockpit colur is a mix XF-5 with XF-50. Weathering done with use of oil paints. Feel free to coment.6 points
-
Here is my Moebius Space Clipper finished. Unfortunately something went astray with my LED strip wiring inside the fuselage and only half of them are lit. You cannot tell that the interior is lit unless it is in complete darkness. Oh well, not much I can do now. I decided to finish her like a modern airliner all clean ans sparkly in pristine condition.6 points
-
Hi, this is one of my last works... The kit is a classical Trumpeter, divided in too many pieces but very simply to build... Here's a few pictures That's all folks !6 points
-
Hi All, second mustang from last year. Still could not get the checkered nose decal to play ball. Bit happier with this one and again another superb Tamiya kit. Cheers Jim6 points
-
Once upon a time, well, in 2016 anyway, there was the Airliners III group build...... Despite never having built an airliner before, I decided this was going to be my first group build contribution. In a triumph of enthusiasm, naivety and recklessness, I entered late on with an Eastern Express Boeing 737-300. The group build archive documents my attempts to force the warped fuselage and wings into reasonable shapes, but it was inevitable that I would eventually run out of time. For the past year the model and I have had occasional interactions, with long periods of rest and recuperation in between, but finally, having fought me all the way, I've reached the point where I can declare the thing complete. Even the painting, given that its such a simple scheme, took far too long, learning that Humbrol Clear over Halfords Appliance White is a no-no, and that DBI Boeing grey goes on beautifully and simply, but comes off with equal ease. The paint scheme is a bit of an oddity, and represents G-GDFB in the transition livery it wore in 2011 when it became part of the Jet2 fleet having previously served with Aegean Airlines. Decals are from Britmodeller's own RICHW, and gave refreshingly little trouble. Apologies for the makeshift photographic set up, all white models are a bit of a challenge. Would I do another Eastern Express 737? Absolutely.........not. Jon6 points
-
Lightning T55 55-714 RSAF (ZF595) BAe Warton. c/n B1/95027 Built 1/2/68 as 6-27-73. 22/3/68 Coltishall coded D/212 it was delivered to the Royal Saudi Air Force Jeddah 11/7/696 points
-
Hi All, I completed this effort a few months ago. Superb kit to build and 1/32 is my favorite scale that suits my eye site and shaky old hands. I stuffed up the decaling so any advice with applying decals to the nose area. It was supposed to have a checkered band behind the spinner, I just could not get them on without them breaking. Jim6 points
-
Latest of the bench and the first of the new year. It's the Tamiya 1/32 Birdcage Corsair in the makings of 738 NAS. at Lewiston, Maine, USA April 1944 Markings are from Eaglecals and the only other addition is the seat harness from HGW. These kit are proper plastic engineering. Hope you like. Please feel free to comment Cheers Dick6 points
-
Dear Lord me nerves is shredded on another bumper high-wire act of Cedulacious proportions! Your good spirits never fail to shine through Ced. Offering no advice as still finding my way with masking & homebrewing decals - which makes me empathize all the more with such tribulations. Grace under pressure. As they once said about the hydraulically-operated Grace Darling exhibit at the Bamburgh Visitor's Centre. Dreadful mess during the opening night - too much hydraulic fluid in the system and both oars shot off taking Lord Mayor Clive May's trousers with them. Headline in the Bamburgh Free Advertiser the following week- 'Darling: Nads of May'. Tony6 points
-
Previously on Bette Midler Britmodeller.... As Ced suggested, it makes sense to remind both of us where things stood at the end of the summer, so let's see if I can remember what all these blooming bits are again: Rollers for front and rear of cable deck. Cockpit window masked inside and out. Fuselage ceiling, inc. rebuilt rear section to fit expanded J-variant end section. Fuselage fuel tank covers. Cable tray. Oxygen cylinders for roof. Cable deck. Cable drum and support. Recovery poles. Aircraft floor. Recovery poles supports. Honeybucket & water tank. Seating for pole handlers. Hydraulic actuators and collars for recovery poles. The paratainer rail (that long straight bit at the top of the photo) has warped over time so I'm going to chuck it and build a new one from brass. Looking at the original seat I built for the cargomaster it looks crap, so I'll scratch a new one as well as a fold-down one for the stairwell to the flight-deck (which I've learned existed from the now-invaluable parts manual that I didn't have before). The main fuselage is in good nick: There's still a little bit of filling and smoothing to do around the join between the original fuselage and the new vacformed section I added at the rear, but of a minor variety. I can't remember was it Keith or Bill (or both!) towards the end of the thread last time who suggested some metal reinforcing at the back in the new roof section: Which I think is an eminently sensible idea and will be acted upon in due course now that I've acquired various strips and sheets of brass over the last few months.... As you can see as well the interior detailing took a hammering during cutting the bird up in order to fit the vacform sections - it doesn't really bother me that that happened as to be quite frank, the quality of my workmanship on some areas left a lot to be desired with the perspective of a few month's absence and I'm glad of the opportunity to try and do a better job. The vacformed 'Flight Operable Door' (as I now know its official title to be from the parts manual) does look good still: I'd added a reinforcement strip to the underseam of the roof and a strengthening plate to the inside of the curved lower door section, again to stop the plastic from flexing. With clear engineering diagrams to hand now I'm more confident about adding correct structural details for those regions than photographs alone would allow previously. From what I can see in the breakdown of the various hydraulic actuator (for which there is a prominent junction box to be built and added at the junction between door and fuselage) and hinge components inside the F/O door, there are four elements (an actuator and hinge on each side) allowing the overall structure to be angled up and out from the fuselage for recovery operations (- as you see here: ..whilst inside the ceiling is a horizontal arm-like mechanism that serves to retract the curved lower section up into the roof, giving it that 'hollowed-out' appearance in the photo above. I've decided to pretty much build the aircraft in-flight as you see it here, recovery poles and lines deployed on the run-in to catch the satellite payload. It struck me that this display would look odd without any crew visible so I've some PJ Productions' Transport Pilots and Ground Crew (who's overalls can be modified and have parachutes attached) on order. Even if it does look like Pelican 9 is being flown by Tom Selleck: I think the co-pilot is saying to him: 'It's alright Tom, I've got your beer while you do this.' whilstthe Flt.Eng. is engaged in reading out the juicy bits from Henry Miller to the crew over the intercom. I don't envisage this build proceeding at the same level of intensity of the Dornier due to a busy Winter and Spring at work, due partly to me moving into developing VR environments on top of existing matters with the result that real modelling matters time will have to take a back seat to virtual ones at periods. I hope to make updates here as regular and satisfying as I can however. First task is to buy some more primer and W&D with a view to rebuilding and painting the interior regions.... Tony6 points
-
Sorry, but no. Nineteen quid for a 1/72 Me 262 is insane! If Eduard can do a really good Spitfire or Fw 190 for around a tenner, and Avant Garde a stunning Kfir for eleven quid, one has to wonder why Airfix, a company that mostly relies on impulse/pocket money sales, can't or won't compete. Chucking an extra set of stickers into a series 1 kit and bumping the price by three quid is, at best, a cynical marketing ploy. Want more people to buy your kits? I know, keep whacking the prices up. That'll work! People are quick to point out that Airfix aren't a charity. By the same token, neither am I. I don't have the luxury of being able to splurge on what to me are overpriced kits just because I want the company to survive. As for the likes of Italeri, well, I haven't bought a brand-new Italeri kit in over a decade. I bought just two Airfix kits last year, and both of those were in sales. To be honest, Revell are getting just as bad. Asking twenty quid for the re-popped Hunter is just daft. They'll sell precisely none to me at that price. Oh well, I guess my money will be staying firmly in my wallet this year.6 points
-
Thanks Ian - overspray? Where? It will be removed! Thanks Bill - ah, the old 'I'm here now so there must be something I need' conundrum. Frome have actually moved their counter to block off the tool racks, presumably to deter the light fingered. For me this has significantly reduced my spend as I now have to ask for exactly what I want. I mentioned this to the nice lady that runs the place but I guess their extra 'impulse' sales didn't match the pilfering. Sad really. Thanks John - sadly the port side seems to be my favourite viewing angle and my plan is to have this, and Wacky, in formation over my desk so it needs to be right(ish). I shall persevere! Booked your flight? What in a Spitfire? Wow! Where are you flying from? You won't regret it At that dangerous stage this morning where you think 'nearly done'. Hmmm. Sticky out bits need to go on before touch up and, after all the pain I decided not to take any chances: Anti-ping by Ced Bufton, on Flickr Of course there was a small nub that needed sanding. Take no chances, use some ribbed tweezers: Curses! by Ced Bufton, on Flickr They're long handled ones. Imagine my surprise (as they used to say) when, as I gripped the tiny part and applied the sanding stick, the tweezers twisted and flicked the mirror skywards. Luckily just on to the bench. I apologise to the residents of Bath (and probably Bristol) for the foul-mouthed tirade that burst from my mouth, the worst I've heard for ages. I changed to a pair of more reliable tweezers and, after drilling a suitable hole, applied the damned thing to the canopy frame: Phew! You can see the 'custom decals' in that shot too. Enjoy it, it's the last close up you're getting! Probably. Pitot and tailwheel glued in with Contacta and without drama. Or were they? Mr Metal iron applied to the exhausts: Touch ups when those are dry.6 points
-
And finished! Amazing how long the final little bits takes. The wheels were a bit tricky, I eventually used superglue gel to allow me the time to get the "flats" appropriately positioned. The canopy was glued on with some white glue (which is still wet in these pictures). More photos to follow in RFI once everything has dried!. A bit frustrating at times, but I am pretty happy with how it turned out and I have learned a few useful skills along the way. Thank for following.6 points
-
I love that Airfix has now claimed one undeniable prize... ... most expensive major European model company. Seriously, in what planet does Airfix thinks it exists that models are worth costing 50-75% more than an equivalently-sized Revell model... and still well below in surface detail/fit? It's absolutely bonkers. £30 for a Welly, £45 for a Shackleton when a Revell Lanc or B-17 is £20.6 points
-
Hi all, This is my final reveal for the Italeri 1/72 Wessex UH 5 Helicopter. This kit came in a 2 in 1 with a 1/72 Harrier as part of the Italeri Falklands War Anniversary set. Build Summary I had a lot of fun with this one. It has been painted using Humbrol and Tamiya Enamels. Weathering is done in the form of preshading with highlighting the panel lines with a Copic Marker and minor dirt marks using Tamiya Panel Line Accent. I did scribe in a few panel lines and details as well. No scratch building was done. Some silvering occured on on one of the decals with the Helicopter number as can be seen in the photos, but apart from that I did not have any major issues. The exhausts are of a different colour as well, this is just personal choice. As always accuracy is never my concern, the build and paint job however are. The canopy is also not my best job, but hey live and learn. Build Thread http://www.britmodeller.com/forums/index.php?/topic/235015532-italeri-172-uh-5/ Final Reveal Video Final Photos6 points
-
Today I finally had all the things I needed to do the soldering. In the finest traditions of 'my' modelling this hurdle has caused me to stop any other forward movement, I could have had the wheels primed and painted! Anyway, I needed a soldering iron with a bit of oomph, the 30watt couldn't deliver enough heat (and such a small bit of brass as well!). Today the 40 watt iron was collected and that has a broad tip which I used to tin both pieces of brass with a very fine layer of normal solder: In the photo above, I have positioned the 2 pieces together ready for stage 2. With the tinned parts smoothed with a bit of wet and dry I moved on the stage 2. I set the variable heat soldering iron to its minimum temp, cut off a tiny piece of low melt solder and used that to join the 2 pieces. I use to use the low melt solder on white metal locos 'back in the day' and found my supply, along with a bottle of liquid flux. End result: The end result is tidier than it appears although I now realise I should also have tinned the piece this side! Araldite will have to suffice.6 points
-
Hi, everyone! Happy New Year! It's my first model in this year. All photos here: https://karopka.ru/community/user/9868/?MODEL=5031165 points
-
Hi everyone, made this kit last year and was pleased with the outcome. Starting to get the hang of things especially the airbrush. Feel free to comment. Cheers Jim5 points
-
I have had a first bash at the port wing fold tonight Here the second hinge and the retraction pivot added to the basic wing plug And the holes for the blown air ducts, them retraction point is not yet trimmed, getting these lengths and locations right has been a bear but I think I am close now the hole between the two hinges is for the cable runs into the wing, any idea how I'm going to show runs of cable tied wiring in 72th Me neither I couldnt get this close without a play could I? Of course the plug wants to pull out but it's not getting to see glue 'til its seen latex first, a promise is a promise Bri This has to be cast-able from I think the retract thingy might need a sideways tweak but I'm quite pleased with the story so far5 points
-
Rule one should always be stick close to your references. Of course I’ve failed to heed my own advice, and not looked back at the photo of the 107 Squadron IV that I am building. A belated rush of commons sense saw me realise among other things that the elevators were dropped, but nothing else. So I’ve bent mangled fixed the tail of mine to match, and then noticed that, unexpectedly (to me at least) the cooling gills (is that what they are?) round the engines appear to be open, Fortunately Airfix offer both options in the kit. So we have, bomb bay doors, flaps (none of the problems PC experienced) and ailerons fitted, note obligatory finger print (have to have one somewhere) on bomb bay doors, since cleaned and polished off: Oops by jongwinnett, on Flickr Beginnings of the power eggs. Airfix would have you paint the flat base of these interior green, probably correct but too much faff for me, so they’ll all be getting a base coat of semi-gloss black: Engines and exhausts by jongwinnett, on Flickr Finally, the exhausts, as Stew’s build showed, the Barracuda replacements are exquisite, but in a fit of parsimony I thought I would see what I could do with the bland kit parts. A quick twiddle with a couple of drill bits, of increasing diameter, and think these will pass muster: Engines and exhausts by jongwinnett, on Flickr5 points
-
Started this kit last year. Nice kit. Goes together fairly well. Had an accident the week before christmas (fell off my pushbike in a park and ride carpark and managed to fracture one arm and badly bruise the other). I managed to finish this kit off over the past week as my arms have been getting stronger) I didnt want to do it in boring grey so I chose The NSAWC 'Sukoi Blue' Colour scheme P1090058 by Richard Page, on Flickr P1090057 by Richard Page, on Flickr P1090056 by Richard Page, on Flickr P1090051 by Richard Page, on Flickr DSC_0060 by Richard Page, on Flickr DSC_0057 by Richard Page, on Flickr DSC_0048 by Richard Page, on Flickr _20180109_131206 by Richard Page, on Flickr _20180109_131125 by Richard Page, on Flickr _20180109_131013 by Richard Page, on Flickr _20180109_130907 by Richard Page, on Flickr5 points
-
More: http://www.aimkits.com/aim-fan-model-he-60-c-d-german-seaplane/ V.P.5 points
-
Hi Gav, think what occa's getting at is the quantity of negative comments re Airfix, some may be justified, many are just sour grapes, for whateven reason. Remembering also, that English isn't occa's first language, his command of it is better than my command of Austrian, you know the place, North of Italy, South of Germany! Trumpeter and Hobbyboss could do FAR better than they do, it appears with them it's a case of 'get the moulds cut, get the plastic boxed, get it out and sold' accuracy HAS taken a back seat. BUT that finger can be pointed at all LARGE model companies, up to AND including Tamiya (SHAR FRS.1 anybody?) Some of the 'wish lists' have been, hmm, how to phrase it? OFF the wall! with NEVER a cat in hells chance of mainstream production. Guess what............the posters KNOW this.......so it becomes a 'bit of a laugh'. The tendancy over years, by some people, is to rip the 'Airfix' brand to shreads whatever they do. Are Airfix bothered? NO CHANCE! but it can become a bit wearing to be constantly harangued. CONSTRUCTIVE critism is a good thing, provided it's targeted to where it NEEDS to be. Critism for it own sake get ignored by the people it's directed at, a no win situation. Remember folks, (it's already been posted here) we 'mature?' modellers account for 15% of the Airfix market, or £1.8 million, the other £10.2 million is down to Mum/ Dad/ Aunt or Gran buying for 'little Jimmy'. From a view of what is produced and at what price point, WE DO NOT HAVE A SAY, and I doubt we'll be invited to a board meeting! Only thing we CAN do is 'vote with our pockets', or fill out the 'market research' list at Telford..............and HOPE! If it's not what YOU want, don't buy, If it's too expensive, again, don't buy, simple. Just DON'T bitch about it! the World and his brother ain't listening. YES.................... Paul5 points
-
THE SSV NORMANDY REMEMBRANCE FLIGHT (link here for what this is.) Urdnot Wrex: Bristol Beaufighter ARMAX ARSENAL AFTER SERVICE REPORT Substantial repairs needed after the SSV Normandy Remembrance flight did its scheduled show on Tuchanka. As de facto leader of the Krogan people, Urdnot Wrex was invited to take a flight in the aircraft he chose and designed. Eyewitness reports state that the aircraft returned a short time later filthy, dust-scarred and full of bullet holes. When asked for a comment on how the aircraft could end up with damage from weapons unseen in combat for over two hundred years, Wrex just grinned and sniggered. So, this was... let's say it was a troubled build. This is one of the first models I made when I was getting back into the hobby, using rock bottom cheap materials and gear. I made a start on it over two years ago, getting as far as painting. It's a really nice kit, Tamiya's Beaufighter from 1998, great fit if a little skimpy on internal detail. That time round, the paints were all dark and muddy, the surface finish was all sandpapery - and to make matters worse, after completing the quite complex camouflage pattern I had spilled a load of paint on one wing and wiped off the existing paint when I tried to clean it up. So, I stuck it on a shelf, telling myself I'd do it when I had the energy. Two years later, I thought "sod it, I'll give it a go". I think it's come out alright. The finish was a bit of a headache, I was trying out Tamiya polishing compound for the first time and it got all over the place. I experimented with various varnishes, and in the end a few coats of Future worked nicely. The heavy weathering and battle damage didn't come in until right at the end, when I decided it was missing something. The paint chipping is done with aluminium paint on a washing up sponge. The dirt and all over dark was done with artist's oil paint straight out of the tube. The good side of that is that if it's going onto a gloss surface you can blend it really well and choose how much or how little you want to stay on the surface when you wipe it off again. The downside is that it takes days to dry. Looking at the photos shows me just how many bits have obvious wipe marks, but *shrug* I know for next time. But yeah, if you read this far, I'm happy with how it came out given how much punishment this poor model has taken.5 points
-
Not twenty minutes ago I had "I thought you were only spending five pounds..." Humbrol Filler, Couple rolls Tamiya tape and a 2mm curvy line Tamiya tape, Tamiya TS80 Spray and a bottle Tam Ex Thin other odds and sods Over thirty quid... and what was SHE doing delving in my wallet Its only a game5 points
-
I did a bit on the hinges tonight but most of my time was spent organising where the hinge line needs to be for the front hinges which run with the main spar There are secondary hinges toward the rear spar area but the beefy ones at the front seem to be the ones taking the load There's to be a latching wedge in there too but first it needs to set in place for carving This is being done under the 'no stinky stuff' rule too so glues get used under very strict timetables first part on the blanking units Checking against the hinge cut outs on the upper wings I will be building up the inserts then making the other detail bits that will be cast onto the inserts before I mould from them I am a bit scared by this bit, but its only an old plastic kit, what can go wrong huh "That's all folks"5 points
-
The Revell 1:48th Dassault Rafale M kit (85-5842) first released in 2000 has been on the modeling scene for close to ten years now and it's becoming harder to find at the LHS. Also in 2000 Revell of Germany released the Rafale B kit (04549-0689) the two seat version and now with the RoG new tooled Rafale B (4610-0389) in Tiger Meet markings it’s now in the modelers stash. This kit is awesome, upon opening the box you will find excellent surface detail, fine recessed panel lines, tough landing gear, and highly detailed exhaust that are comparable to resin aftermarket sets. I built this kit back in 2000, the fit was good with some areas needing a little more attention, but nothing requiring filler. Test fit, test fit, test fit and you will be rewarded with a straight forward and quick build. I’m now clearing the work bench for the Rafale B. I may post an in-progress thread. Hobby Boss has a line of Rafale kits, but are very expensive and are of less quality. If you have been putting off building this kit, trust me you are truly missing out on a fun and quick OOB build. If you don’t have this kit yet, get one, no get two or three…and build em!!! Thanx for looking... Le Vander Need some motivation… http://www.cybermodeler.com/aircraft/rafale/rafale_all.shtml5 points
This leaderboard is set to London/GMT+01:00


