
Leaderboard


Popular Content
Showing content with the highest reputation on 22/12/17 in all areas
-
Hi folks, It's been a while what with working away from home a lot, but I've had the past week off for Christmas and managed to get back to the bench, and took 11 hours to produce this. It's Airfix's offering, and is a very nice kit, going together with the minimum of fuss. I know the real version isn't as shiny as this, but I wanted to try out the Xtreme Metal Aluminium. I did it as a quick build just to get my hand back in, but it's come out ok. Tiny though - I don't usually build 1/72, and now I remember why... Ahhhh...1952... Cheers, Dean30 points
-
For those following my WIP thread, I can now finally say it's finished! In fact there were a few other bits I was going to do (wing stays for one), and I may well do them at some point but for now I'm happy. Thanks to all those who followed.26 points
-
This is Academy's 1/72 P-40M/-N done up as the well-known NZ3148 G/"Gloria Lyons" on the strength of No. 4 Servicing Unit of the Royal New Zealand Air Force's Fighter Wing, operating through the Solomon Islands from October 1943. Gloria Lyons was a 19-year old spinal tuberculosis patient in hospital in Christchurch who had become a pen-pal of several members of the squadron, and was 'adopted' as a mascot by the unit as a whole. This was the first of four aircraft that would be named in honor of Miss Lyons---(3) P-40s and an F4U Corsair---each earlier aircraft crashing, lost in action or otherwise being taken out of sevice. NZ3148 was damaged in crash landing at Torokina on Bougainville island on 09 February 1944; the engine failed just prior to landing and the aircraft missed the runway, hitting a mound of earth and somersaulting. Sergeant Pilot Charles Woods of No. 18 Squadron was unhurt. The airframe was written off the books in March of that year. [For those who are curious...Miss Lyons herself eventually recovered, married, and moved to Australia; she had a long life, passing away in 1998.] NZ3148 was a P-40N-1, similar to the earlier -M model, still with older-style canopy and six wing guns. Scheme was the factory-applied standard OD & neutral gray with Medium-green 'blotch' pattern on wing leading and trailing edges; white spinner, tail surfaces and fuselage bands were theater and unit markings. The Academy kit itself is basic but cleanly-molded, and comes with the option for the older style canopy with quarterlights aft (which I used) or the cut-down aft fuselage with 'greenhouse' style canopy. Kit isn't 100% perfect---a few gaps and some shape issues here and there---but went together well with overall great fit. I used bits of both Eduard and Part etch sets, mainly to amp-up the simple kit cockpit (most of which is barely visible), and as a more-articulated option to the single-piece cowling flap assembly beneath. Decals came from the excellent AeroMaster RNZAF set (SP72-10), and---as per my previous experience---were utterly trouble-free. These birds were hard-used and at the end of a long and iffy supply chain, and photos show them heavily-weathered. I used a combination of washes, dry-brushing and pastel highlighting to try to make it look suitably 'bitty.' I've always found the long-tail P-40 marks the most elegant-looking of the lot, and few were more attractively-marked than the Kiwi birds of the RNZAF. Hope you enjoy!25 points
-
Just to prove I stick plastic from time to time. Hasegawa Voodoo with the Airwaves conversion and Microscale decals. Robin Olds ship when he commanded the 81st.20 points
-
Hi all, here is my new 1/72 Eduard Fw 190 A-8 (late) "black 10": The kit: The eduard kit is probably the best 1/72 Fw 190 on the market. The kit parts and also the brassin aftermarket parts fit together very well. The surface details are fantastic. Original aircraft: The Fw 190 was a very durable construction. Equipped with a BMW 801 D star engine, the aircraft could be used for a variety of operational configurations. The A-8, which was built from mid-1944 onwards, was equipped with four 20 mm MG 151s and two 13 mm MG 131s. My model: My model represents the black 10, I./JG 11 in Darmstadt which was participated in the defense of the Reich (Reichsverteidigung) at the end of the WW II. Construction: The Eduard kit is not easy to build but with a lot of dry fiting you can put all parts together without putty and sanding. I have used some Brassin Detail-Sets (fuselage MG 131 and flaps) which i can highly recommend. Several details (e.g. brake lines, MG 151, position lights, antennae) were scratch built. The kit was painted with Gunze acrylics and Alclad II metalics. I built two Fw 190 at the same time: Weathering: Preshading, postlighting, Tamiya Smoke for traces of oil and gas plume, various oil and pastell colors for dirt and wear, silver pin for scratches. Walk arround: Bottom: Details: I hope you like this model. Criticism, notes, and comments are gladly welcome. Merry christmas! Kai18 points
-
US Navy HS-14 CAG SH-60F Oceanhawk NF 610, BuNo.164460 of HELASRON HS-14 "Chargers" served from 2000 to 2003 with CVW-5 assigned to the USS Kitty Hawk CV-6. Basically OOB with some scratch build parts such as cables, pipelines and those parts which Hobbyboss doesn't provide such as rear view mirror and pitots. Lastly, Merry Christmas and Happy Holiday!!17 points
-
Hi, Ive been building the old Revell Wildcat Kit which dates from the 60's. Here it is OOB but with some Superscale decals for an aircraft from VF41 on USS Ranger. A fun build and a nicely sized model not bad for a 50 yo. Thanks for looking Plasto16 points
-
Hi all, this is the Merit X-Craft submarine which I recently built for Airfix Model World, and jolly good fun it was too. A sterling effort by Merit though there were a number of errors and omissions that needed to be dealt with to model a truly accurate X-Craft and some scratch work and a few embellishments were needed along the way. A quick, fun build and a complete change from my usual 1/700th scale stuff, saving, in the process, a fair bit of eye strain. The small Eduard PE set which included a correctly sized screw, upper horizontal deck panels and detailed ballast tank vents was used and the known issue with the single side hydroplane/rudder control mech and rods dealt with as they should only be fitted to the right side, not both. The kit went together without any fuss. I certainly learnt a lot about these amazing machines and the brave souls that manned them, heroes, to a man... References came via the excellent Paul Kemp book, 'Underwater Warriors', thanks to Chris (Whitestar12chris) for highlighting the publication, the IWM and Royal Submarine Museum Gosport archives and information from the nearby ex-Marshalls Yard, Gainsborough, where many X-Craft were built. The 1953 film 'Above us the Waves' provided useful images and information on the W&D chamber as well as some of the surface details, (the boat used for filming, XE08 was actually a later, improved version but the chamber and certain exterior details were essentially the same). A quick list of the main improvements made to the kit; Scratch-built 'Wet & Dry' diver's compartment including a hand-pumped WC, diving light, flood valve and two watertight hatches with furniture. Replacement attack periscope, ACO Mk XX magnetic compass tube and night periscope. Scratch-built entrance hatch inner facing and locking handles. Scratch-built hydroplane/rudder control mechanism added to the drilled out centre of the plane. Early style attack periscope base structure made from brass rod. New base plate detail, speaking tube and replacement Hezlet safety rail added to the snorkel mast. Shortened and sleeved side cargo fitting and release attachment points. All flood holes drilled out and correct pattern drilled into dive plane. Scale cable and fitting parts added from scrap resin and lead wire. Two fairings added to the front upper hull area, (Merit just had two indentations for some reason). The model was painted using various shades of Admiralty Dark grey, NATO Black and rusting and weathering added from several AMMO-MIG and AK products. The White Ensign decals on the small kit provided sheet weren't used as they were oversize, although one did end up on the base. At some point, I may well make a base from seasoned hardwood and use polished brass finials to support the model along with a brass nameplate. Thanks for looking, hope you like it. Melchie Some of the additions made to the basic kit, The hatches were just simple discs devoid of any detail so these were fabricated from plastic card and scrap PE. The 'W&D' compartment was made from 1mm plastic card, wet and dry grit paper (for the anti-slip flooring), scrap resin and plastic rod for the WC pump, diving light, valve and watertight hatch parts. The kit's side cargo attachment parts were fictitious and were replaced with lengths of brass tubing and eye connection hooks made from the ends of the unused hydroplane actuator rods. As I was four short extras were made up from scrap plastic. All flood holes needed to be drilled out as they were only portrayed as indentations. The hydroplane part had them as raised 'pips' for some reason (also incorrectly placed), so these were removed, the new pattern marked out and holes drilled in the appropriate places. The brass screw blades are also seen here as is the replacement two-way hydroplane/rudder actuation hub mechanism and enlarged hole, the kit part is way too small, now everything moves freely as per the real thing).15 points
-
Well once again the cupboard of doom is under siege as I have resurrected another long time inhabitant. It is Tamiya’s original release of their 1/48 Lancaster which I am embarrassed to say has been under construction for more than 20 years! Incorporated with the build was Flightpaths metal etch number FP-48-11 set which includes cockpit, canopy, various turret and other details along with the very complex flap structure. I also used an original issue EZ canopy mask set which saved considerable time and introduced me to a product (pre- cut canopy masks) that I now use religiously as they save a lot of time. I chose to finish the old girl as S for Sugar RAAF 467 Squadron at the completion of her 118 missions. I have seen the real thing at Hendon on a few occasions and have the original historical booklet also obtained from the museum way back whenever?????? Early on when I started this build I was allowed access to an original Lancaster which is housed at the Bullcreek Aviation Museum. (A side story to this, I remember when this aircraft arrived at Perth airport and my father taking me to see her on the tarmac – I couldn’t believe how big it was walking underneath the open bomb bay). The museum curator allowed me access to the inside and crawled around with my camera shooting everything I could see. When clambering over the main spar moving to the cockpit it became apparent that the guys that operated these machines were in my opinion superhuman! It is impossible to imagine how difficult it would have been to transit this at night with the aircraft gyrating all over the place, enemy trying to shoot you out of the sky – incredible respect for these brave gentlemen indeed! I vaguely remember there have been many modifications over the duration of the build which included dropping the flaps to utilize the extensive Flightpath flaps. Also the paddle prop blades where exchanged for period pointed blades. Again over the duration of this build I have experimented with a variety of different weathering techniques. One of the most impressive features of this kit is the size of the Lancaster. In 1/48 it presents a significant presence in the collection. The only problem now is to find where I buried the box with the rest of the components so that I can finish. This is where I am at present, apologies for the poor quality images. They were taken with my mobile, anyway hopefully I will be able to finish over the Christmas break. Cheers and well wishes to all for the festive season. PJ14 points
-
Here's my version of the FROG Me262 done mostly out of the box. I did vac-u-form a new canopy using the original as a master. Nice simple model, which is what I like to build.14 points
-
Here is my latest build and second Lynx Mk8. It was built for a mate who was the M1 on the flight doing counter-piracy in the Indian Ocean. I used the Eduard Big Ed photo-etch set and scratch built a few bits as well. Red12 points
-
Hello everyone! I have just finished having great fun over in the Group Build section of our lovely BM, where there are many gallant folks building a selection of aircraft that float and fly, seaplanes, flying boats, float planes Eraknoplans etc, and this is one what I did (sic)! The build log is here The kit was a basic Scaleplanes 1/72 Vacform that I picked up for £3 at my local model show a few years ago, Moulding were pretty crisp and fitted well, especially the top and lower halves of the main float - in fact I have had injection moulded parts that failed to click together better than these two bits! I added some detail in the cockpit, but as usual it is almost impossible to see. I had better luck with the engine - that was an interesting looking blob on the sheet, so I wondered whether to but a Small Stuff resin engine or scratch one, I did the latter in the end. In fact the engine ended up with something like 30 bits of plastic and copper wire, but was well worth doing, and added to my scratch build armoury. I also built the fuel tank, this time the kit parts were good, but I just felt like doing my own. I wrapped Aizu tape round for the strengthening straps and coated them in thin CA to seal them. Rigging was a mix of EZ-Line and a couple of types of speaker cable core pulled taut between two pairs of tweezers to get the wire straight. I tried to accent the rib tapes on the wings despite only using a paint brush for the colour scheme, and I think there is still practice required. Anyway, here it is, but please accept my apologies for the tattieness of the rigging exit points on the wings - this model was really fragile, and I was rather scared of holding it too hard when trying to clean them up as the struts were just butt-joined to the wings! Thanks for looking, all the best, Ray12 points
-
20171221_165818 by Jes Christensen, on Flickr 20171221_165844 by Jes Christensen, on Flickr Hope you don't mind me embedding them, but these are beautifully finished.12 points
-
Getting closer, but still no cigar, yet, looking like end of next week till it all comes together, a few more bits and bobs to add and then the accessories, oh yes and the vehicle that is being recovered which im still waiting for (damn christmas post) joined up the cab and back and I gave it a coat of future with a flat brush and decaled, I've given it a line wash and dabbed some oils on going to let this dry a day or two and do some pigments around the tyres and around the back, and some final touch ups,, thanks for looking,, comments on the weathering welcome, Glynn (silver highlights, must be toned down, after looking at the pictures close up)11 points
-
Hello Dears, The first finished kit of 2017 was tiny and yellow winged Aaaand a Sailor's bird The 1/48 accurate Grummann F3F-2 of the VF-6 part of a bigger project to be continued ! Then justifying my nickname !! Came the 1/48 Hobbycraft Corsair Heeeeeavily modified ! here with her USN bro ! She is also a part of a bigger project, A Tungsten one !! There has been some Wind here Sooo ! She is a part of my tribute for R.P. Beamont It's the Hasegawa one with a modified spinner and prop plus a detailled interior ! It's time now to get down Under with this one The Eduard Mk VIII almost from the box, must say that's pretty hard to add Something to the profipack ! did'nt know yet that the Spit collection will be doubled in 2017 there has been a first trip in UK, seeing this ! A view of the Queen E from the Victory,; Symbol ?? who talk about symbol ?? Then came a time for some american "Finesse" !! This the heavily modified 1/48 Academy one, still in the Pacific theatre So, after that, we're back in Europe, East side in fact with this unusual Luftwaffe subject She is a 1/48 Tamiya FW 190 F-8 with Eagle cal decals Let's go west now but for a very short span of time Let's have some beer ! with this one The 1/48 Eduard Mk IX with Xtracrylics paints as usual Aaaand now, back in USSR It's the 1/48 ICM MiG 3 and a tube of putty ! How many times did I think about smashing the whole thing up ! But I managed to finish her Back west in Germany now but for a New Zealander She is an ICM 1/48 one, second hand kit with a lot of parts from Eduard and Resin ! Also an heavily modified one Then My second trip in UK And my first SMW in Telford and a third type encounter Then the first GB for me it has started as a joke and here's the result, back down Under again The Testors 1/48 Ryan PT-20 / STM in Royal Dutch colours Funny thing and very good GB, really a great bunch of nice modellers ! Here's Steely dan's floatplane !! The year draw to a close and here's the last finished kit did'nt get too far, Seletar !! A Griffoned Spitfire ! It's the 1/48 Airfix PR XIX Lot of detailing too here, and the last for the family album 2017 has been a very good year after all, I wish you both a merry Christmas and a happy new year ! Thank for watching. Sincerely. Corsaircorp10 points
-
Not much doing this year, haven't had time. It was my 50th, so I was spending most of my free time ticking off things I've always wanted to do (see my avatar). I managed three completions though, first one in April was a 1/48 Hasegawa Phantom FG.1 which I did as a Royal Navy airframe: Then in August I found a couple of days free to do a quick build of an old Airfix 1/72 FW190D: And then today I finished another quick build of an Airfix 1/72 plane - this time, a new tool Vampire T.11: And that's my lot. I might start something else this year, but chances are I won't finish it before year's end, so this trio is the Deanflyer Collection 2017. Cheers, Dean10 points
-
Hiya Folks, I quite like Allied twin engined bombers and here is my latest,.....the 1/72nd Hasegawa B-25J built as a Mitchell Mk.III, KJ596, NO-Z `Blasting Basterd' of 320 (Dutch) Sqn, 2nd Tactical Air Force, Belgium, 1945, which also bore the Dutch orange triangle marking on the nose along with 45 bomb markers and the name `Margriet' and a flower, after the Dutch Princess Margriet. This unit was actually a naval unit,..... the personnel coming from the Dutch Fleet Air Arm (rather than the Dutch Army Air Service who mostly manned one of the Dutch Spitfire units, 322 Sqn) and after the war it retained Mitchell Mk.II`s within the newly re constituted Netherlands Armed Forces as a coastal patrol unit, its relatively few Mk.III`s were not retained. DSCF2195 by Tony OToole, on Flickr DSCF2182 by Tony OToole, on Flickr DSCF2178 by Tony OToole, on Flickr DSCF2181 by Tony OToole, on Flickr DSCF2180 by Tony OToole, on Flickr DSCF2190 by Tony OToole, on Flickr DSCF2184 by Tony OToole, on Flickr DSCF2203 by Tony OToole, on Flickr DSCF2198 by Tony OToole, on Flickr The model was brush painted using Humbrol 155 Olive Drab with Polly Scale Neutral Grey undersides. I had intended to build this model as a Free French aircraft from 342 Lorraine Sqn, but the kit decals (and the old Matchbox decals too!) had grey codes and no nose details,....whereas the codes were red, usually with the nose code shadow shaded in white, with the free french crest and an individual name (usually after a French town), but as the Dutch aircraft was slated for another kit,...it was brought forward! Cheers Tony10 points
-
Thank you, Cookie, but actually it was surprisingly easy. Much easier than getting decent panel lines in the thing at the end of it! Here it is with the sanding complete and marks drawn on to guide panel line scribing: Here the airfoil seen end on - it isn't quite as thin as the kit part, but they are close enough for it to look convincing when they are a full wingspan apart! Here showing the fit onto the wing. The missing piece had been sawn away from a one-piece moulding, so the join is actually slightly better now - not that it matters, since the whole point is to have the wings folded: Here a comparison of panel lines (underside of the wing, so probably the more visible of the two faces): And finally here posed in approx the end position: Right. Now I can get back to doing something other than sanding wingtips! More soon Crisp Edit: Oops! Missed one. Here is a comparison shot with both wingtips visible. It's over-exposed, so you can't really see that I have hollowed out the end facing us (yet another triumph for Crisp's Tool of the Year 2017, the Micro-Chisel). The dot is me getting ready to position the main kit hinge part (which will be supplemented with wire, you may be sure!). Here you can see that the airfoil section isn't identical - fatter towards the trailing edge, in particular. Part of the problem is that you also need it to taper towards the tip, and judging a double taper / compound curve by eye while sanding is not simple. I'm happy with it, anyway! [I actually think my trailing edge is better!]10 points
-
I had got into the habit of finishing around 20 kits per year and considered this perfectly normal, so it was a bit of a disappointment to find myself with only 9 done and the year's end just around the corner. I know the reason, because I had quite a long period in the summer of not building anything and spending what could have otherwise been productive modelling time in the pub with my dog Anyway here's what I did finish this year, all are 1/72: 1. Hobbyboss A-10 Thunderbolt II With Authentic Decals, Eduard bombs and missiles and Colourcoats paints (ACUS03 Light Ghost Gray and ACUS40 Dark Ghost Gray) - RFI here 2. Hasegawa Brewster F2A-3 Buffalo USMC Kit-supplied transfers, Squadron Vac-form canopy (centre section only), Infini Lycra thread for the r/t wire and painted in Colourcoats ACUS05 WW2 USN Light Gray ACUS06 WW2 USN Blue Gray. RFI here 3. Hasegawa Brewster B339C Royal Netherlands East Indies Air Force The navy-type tailcone provided with the kit was replaced by a Quickboost resin one without the arrester hook and the straight pitot was replaced with a 'cranked' one from an Airfix P-40b. Colours used were ACUS20 Dark Green, ACUS19 Green Olive Drab (Vietnam) to represent the 'Jungblad' and 'Ouldblad' colours used on RNEIAF Buffaloes, with Alclad Semi-Matt Aluminium to represent the (painted) Aluminium undersides. Transfers were from the Special Hobby B339C/D "Dutch & Japanese" kit. RFI here 4. Tamiya De Havilland Mosquito NF Mk.II Built as provided by Tamiya with the exception of the AI dipoles in the wings which I replaced with Albion Alloys brass. Finished in Colourcoats ACRN17 Night. Built for the De Havilland Group Build, gallery pics here 5. Tamiya De Havilland Mosquito PR.IV Again, as provided by Tamiya, finished in Colourcoats ACRN14 PRU Blue. Built for the De Havilland Group Build, gallery pics here 6. Tamiya FW190D-9 "Langnasen Dora" 1/JG301 Aeromaster Decals, paints used were Colourcoats RLM74 Grauviolett (ACLW14) RLM76 Lichtblau (ACLW15) and RLM83 Dunkelgrun (ACLW01). RFI pics here 7. Hasegawa Yak-3 Finished with Begemot Decals and Colourcoats ACS02 AMT7 Blue, ACS11 Blue Grey and ACS12 Dark Grey. Built as part of the 'From Russia With Love' Group Build, gallery pics here 8. Hasegawa Yak-3 As with the Yak above, finished with Begemot Decals and Colourcoats ACS02 AMT7 Blue, ACS11 Blue Grey and ACS12 Dark Grey. Built as part of the 'From Russia With Love' Group Build, gallery pics here 9. MPM Fokker D.XXI This was built 'off-forum' to try out the new Colourcoats Dutch Air Force colours; chronologically it is not number 9, but I can't actually remember when I finished it and as I never posted it on Britmodeller I have no way of finding out until I get home and check the dates of the original pictures, which I won't do because really it doesn't matter; it was finished this year and that's what counts. So that's me then, hopefully I will get my hindquarters in gear and have a more productive 2018... Cheers, Stew9 points
-
That's enough about your briefs young man. This is a wholesome family-orientated thread. Addams Family that is... Phoenix: thank-you for taking the trouble to write that extended reply, which touches upon both the paradox and the multiple perspectives inherent in what we do here: it's not an original thought on my part to suggest that apparently simple things are frequently connected by complicated patterns of meaning... We're nearly there now Jaime! Dinnae think that hadn't crossed my mind at the third instance of taking it apart Bill! As a gift from Tony Tiger though I felt honour-bound to make as good a job of it as possible. The moulding/shape isn't bad compared to the actual trolleys in use, just that the kit designers seemed a little errrr.... circumspect at how the parts might be securely attached together to make a vehicle. Here! Here's the brush! Where's the paint? Your observations on things Kora-esque were spot on in your original post sir - I'd have gotten away with it too if it wasn't for those pesky wheels! My thanks for those kinds word Crisp! My lubberly sensibilities could see no advantage to that staggered arrangement, so at your suggestion of a structural imperative I went and had a look at the parts of the handbucher that deal with the steering gear. There is what looks like a series of bicycle chains looping around various cogs allowing control from the cockpit; a helpful schematic shows the whole control run terminating (on the twin wasserruder D2&D3 variants) at an angled relay just forward of station 22. This relay is offset (in relation to the longitudinal axis of the fuselage) at an angle matching the differential placement of the rudders stocks. The starboard side of the arrangement seems to be close to - if not actually mounted against - station 22, so it is entirely possible that you're correct Crisp and that the extra force involved in controlling two rudders required that the relay be more firmly braced over on that side. Well reasoned you! No, neither do I Johnny and it's certainly as you say nothing to do with glorying in warfare - quite the reverse. Ok. Friday night. End of the working week and I am clocking off of this building site. We've finished building stuff as of today and I'm feelin' just: Built a mount for the towing-hitch of the trolley: It goes up. And it goes down. As you would expect. Balance weight for the rudder/fin area got done: That rig really really has made life easier for tasks such as this. The brass is 0.5mm tube with 0.3mm rod down the centre to stop it snapping during the more acute bends. I left it longer than required as I wouldn't be exactly sure how sort to make the rear returns until it was threaded through: Cut to length and glued with CA: It looks slightly asymmetric in the view below because I had decided on a modest deflection to the rudder: This tool btw has been the star of the build: Tube, rod, plastic, metal - it chews through everything with aplomb and accuracy. Like a tiny little Terminator in green plastic trousers. Two euros to buy iirc. Will be ordering more in the New Year. Lastly, the gearboxes for the gun rings: The paintwork got a final going over with MM earlier as well to get rid of any remaining 'scaliness' from the primer: Bar the cockpit canopy, anything not stuck on at this stage will be left until after that has all been painted. There's a little bit of glasswork to add just in front of the rear gun position as well but I'll knock that up over the next week or so during painting sessions. Woohoo @etc. I hope you're all enjoying yourselves in whatever you're up to/in to... Tony9 points
-
Hi fellow modellers, one of my last builds this year, the Eduard 'Wurger'. Opted the markings for one of the best Austrian pilots, Walter Nowotny, who flew this machine on autumn 1943 on the eastern front. Cheers Libor8 points
-
Season's Greeting to you all. Having been a bit less frequent on here this year - I thought I'd prove i have been a scalplin' and a gluin' and a paintin' - and not just lying around being fed grapes and wine by scantily clad demoiselles... but I digress Everything is 1/48th scale apart from the Hannover which is 1/32. The year began with the Kinetic's Sea Harrier FRS1 - and there were a few of building them concurrently as I recall - which is always nice when one build can inform another - plus the wealth of knowledge here was invaluable for adding details. Then it was onto another carrier fighter - Wingsy's Mitusbishi A5M Claude - a superb model! Hmm - seems there was a wee themette here - 'cus next up - a Seafire FIII - Special Hobby with bits borrowed from spare Edaurd & Hasegawa kits! The far east aspect then - in true James Burke style - led me to here: Tamiya's new Ki-61 Tei Hien - another model that oozes quality. And speaking of models that ooze quality - I finally finished Wingnuts big Hannover, with lashings of Aviattic lozenge, and some nattily painted steel hats Being flung from a carrier as a profession returned for the next build. Hobbyboss's curate's egg of a Corsair. This time finished as a FAA mk IV in markings I've wanted to do for ages. And at some point the shelf of doom's grip was crowbarred away from this Trumpeter Sea Hawk too. The shelf of doom needs to up its game - it's been a bit of an absolute shower this year! As the year's denouement beckoned, Airfix's new P-51D appeared, and was finished with some decals from Kits World for a subject I've always found appealingly different for a USAAF P-51 And last, but in no way least - the year will probably end with Eduard's lovely Spitfire Mk XVI - finished as a Central Gunnery School example- as made "famous" by Heller's venerable 1/72 kit from the 1980s. So nine for the year - pretty good for me! Wishing you all a Happy Christmas and a peaceful & prosperous 2018 Jonners8 points
-
I finished this a few weeks ago but then spent the weeks since mucking about making bases. After three jet builds this year I felt like something quick and easy . Nothing in the stash from the good guys took my fancy so I pulled out my double boxing of the Hasegawa Hs 129 and Ju 87. The Hs 129 looked like the more simple of the two. Reading a few reviews confirmed this. The aircraft I chose was an aircraft from 9 Ground Attack Air Wing 10 (anti-tank) Company Eastern Front: July 1943 More images at my blog.8 points
-
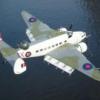
The P-47 was nicknamed ‘Jug’, short for juggernaut, or ‘The Flying Milk Bottle’. The 56th were the first unit to be equipped with P-47Cs from July 1942. This is s/n 16224 LM*X, which was based at Wittering, Northamptonshire, from 13th January to 5th April 1943. The 56th Fighter Group became one of, if not the, most famous Fighter Groups of the Eighth Air Force. It achieved the highest number of enemy aircraft destroyed and had the greatest number of aces of any Group as well as the two top pilots in the Eighth. It was also the only Group to fly P-47’s throughout the war. Built basically OOB (just a little detail added to the cockpit - not that it can be seen) Painted with Tamiya, Vallejo and Humbrol acrylics Markings salvaged from my decals spares box - Airfix, Techmod and some unidentified8 points
-
This is the classic Matchbox Me110C/D built out of the box and marked with after market decals. Even for it's simplicity it looks good when built up. No issues at all, just normal filling and sanding. Nothing out of the ordinary.8 points
-
Hello all! Here is my completed floatplane, The Burgess-Dunne. These were continually being modified, crashed, rebuilt and remodified, and references were scarce for a particular airframe. The kit was the Scaleplanes 1/72 Vacform, and I scratchbuilt the engine and fuel tank. I could not see any markings on images on the web, so I did not have to figure them out! Thanks to everyone who gave encouragement during the build, and what a fabulous GB this has been, you have all been great! Build log is here (I hope!) http://www.britmodeller.com/forums/index.php?/topic/235026084-burgess-dunne-floatplane/& All the best everyone, may your Seaplane find still waters, Ray8 points
-
Eh voila c'est fini! Here's one of the images...the rest will be in the Matchbox gallery. I really had lots of fun with this build. Someone mentioned that it is one of the best Gladiator kits around, and I must agree. Having built the new Airfix kit as well, I liked this one better. Rigging is .008 monofilament except for the antennae which is EZLine. This was also my first attempt with Flory wash and it may seem a bit heavy-handed, but I have a feeling that these Gladiators were used a lot and were very much obsolete by the time 1942 rolled around. So I present Capt. Jean Louis St. Jacques and his sturdy English mount... --John8 points
-
Leaving aside my 1/72 aerobatic collection for a moment, I show you my most recent project: 1/18 Rey's speeder made from a 3 3/4 hasbro figure. Disarmed and completely rebuilt again, it has more than 100 new scratch pieces, including full cut of the figure for repositioning the body, and dozens of small pieces for more detail. The carrion bird (steelpecker), was made from Epoxy and wire, covered with fibers. (video) Also and to give it a touch of vividness, the speeder engines have 2x5mm red LEDs. The wiring and the battery are housed in the base of wood, especially made for this function. The speeder and fully diorama were painted with Vallejo Acrylics and an Infinity Harder & Steenbeck airbrush. Cheers!7 points
-
Here is my rendition of the older but excellent Hasegawa Me262a. Model Master paints.7 points
-
This is the Aviation Usk 1/72 Ki-10 built out of the box. Aviation Usk kits are short run models but surprisingly after careful cleaning of the parts they fit nicely, including the photo-ecth. Painted with Tamiya XF-14. Kit decals shattered so there are some missing on the kit. The owner of my local hobby shop asked me to build it for him. I gave it to him last week. He gives good deals on old kits.7 points
-
Here’s a roundup of the 1/144 airliners I finished in 2017. Most of the models have been in RFI but there are one or two new to BM. As usual a few builds didn’t work out (notably the over-priced, over-hyped Eastern Express/MikroMir MD11) but overall I’m happy with how things went in 2017 and I’m hoping 2018 will be equally productive. Roden Douglas DC-6 with F-DCAL decals Hybrid Roden/Minicraft Douglas DC-6B with TwoSix decals Minicraft Douglas DC-4 with F-DCAL decals Revell Airbus A319 with F-DCAL decals Revell Airbus A319 with TwoSix decals (an old model which was stripped and re-finished) Revell Airbus A320 with Nazca decals (another old model which was stripped and re-finished) Revell Airbus A321 with Liveries Unlimited decals Revell Airbus A330-300 with BraZ engines and TwoSix decals DACO Skyline Boeing 737-300 with Drawdecal decals Revell Boeing 737-800 with BraZ engines and Nazca decals.7 points
-
Hello Dears, Here I come back, Thanks to @AndyRM101 who shared a tip to post images from Flickr Here's my PR XIX I really enjoyed the kit, she's built almost OOB However I changed the seat for a resin one from my stash I used the excellent Barracuda cast propeller And I changed the Rocker cover, wich is not really necessary since the difference is really not noticeable The prop' is a real enhancement, glad to have used it ! The camera compartment has been detailled and the exhaust stacks are just bored and weathered !7 points
-
along with the front deck of his Walrus Folks... I don't think the Sea King is on hold, In the last few weeks he's "lost" his mojo, lost half a Walrus, now he's gone and lost a wing ..... I think he's lost the entire Sea King and just too embarrassed to admit to it!7 points
-
After my last build (SR-71 Blackbird, see here: http://www.britmodeller.com/forums/index.php?/topic/235030457-gentlemen-start-your-engines-academy-sr-71a-blackbird-172/ ) I had hoped to finish off the year with Academy's 1/72 F-4J Phantom II, but I am still waiting on some aftermarket detail parts to arrive. So as an interim project, I have this project instead: Hopefully, being a 'quick build' I will be able to get this done promptly. All I need to do is control my appetite for adding extraneous detail LOL! Having just finished an all-black aircraft, I just don't feel up to another one, so this Black Widow will be in green garb, instead. I'm hoping to replicate the weathering seen in this photo: The specific paint scheme I'm looking at doing is "Borrowed Time", which was stationed in England to intercept German V-1 buzz-bombs: This is the kit's parts breakdown: and my progress after a couple of evenings' work: Pilot and Gunner's positions: Cockpit IP and sidewalls: and the Radar Operator's office in the rear (work in progress): My office is closed between the holidays (today was the last day of work) so I hope to finish this build quickly and begin my Phantom by New Year's.6 points
-
So far "only" 25 models by my dad this year, some more time consuming and bigger subjects among them. 1-2 models could still make it until year´s end. My dad and I enjoyed all of your work here, hope you had the same pleasure with ours. We wish every Britmodeller and their loved ones Merry Christmas and joyful holidays. So, here´s the 2017 output, as usual all in 1/48. Airfix Meteor F.8 with Isradecals DSC_0001 by Reinhard Spreitzhofer, auf Flickr DSC_0003 by Reinhard Spreitzhofer, auf Flickr DSC_0007 by Reinhard Spreitzhofer, auf Flickr DSC_0011 by Reinhard Spreitzhofer, auf Flickr Hasegawa A-4E, decals from the kit, Hobbycraft and Isradecal DSC_0001 by Reinhard Spreitzhofer, auf Flickr DSC_0003 by Reinhard Spreitzhofer, auf Flickr DSC_0007 by Reinhard Spreitzhofer, auf Flickr DSC_0011 by Reinhard Spreitzhofer, auf Flickr Tamiya JGSDF Type 10 DSC_0001 by Reinhard Spreitzhofer, auf Flickr DSC_0003 by Reinhard Spreitzhofer, auf Flickr DSC_0010 by Reinhard Spreitzhofer, auf Flickr DSC_0014 by Reinhard Spreitzhofer, auf Flickr Eduard Bf108B with Fantasy Printshop decals DSC_0001 by Reinhard Spreitzhofer, auf Flickr DSC_0003 by Reinhard Spreitzhofer, auf Flickr DSC_0007 by Reinhard Spreitzhofer, auf Flickr DSC_0011 by Reinhard Spreitzhofer, auf Flickr Eduard Bf109F-4 with HAD decals and some from the sparesbox DSC_0001 by Reinhard Spreitzhofer, auf Flickr DSC_0003 by Reinhard Spreitzhofer, auf Flickr DSC_0007 by Reinhard Spreitzhofer, auf Flickr DSC_0012 by Reinhard Spreitzhofer, auf Flickr ProModeler/Revell Germany Ju52 with decals from Fantasy Printshop and IPMS Austria DSC_0001 by Reinhard Spreitzhofer, auf Flickr DSC_0002 by Reinhard Spreitzhofer, auf Flickr DSC_0003 by Reinhard Spreitzhofer, auf Flickr DSC_0004 by Reinhard Spreitzhofer, auf Flickr AMG Bf109B-1 DSC_0001 by Reinhard Spreitzhofer, auf Flickr DSC_0003 by Reinhard Spreitzhofer, auf Flickr DSC_0008 by Reinhard Spreitzhofer, auf Flickr DSC_0012 by Reinhard Spreitzhofer, auf Flickr Classic Airframes Bf109D DSC_0001 by Reinhard Spreitzhofer, auf Flickr DSC_0003 by Reinhard Spreitzhofer, auf Flickr DSC_0007 by Reinhard Spreitzhofer, auf Flickr DSC_0012 by Reinhard Spreitzhofer, auf Flickr Tamiya JGSDF Komatsu LAV DSC_0001 by Reinhard Spreitzhofer, auf Flickr DSC_0003 by Reinhard Spreitzhofer, auf Flickr DSC_0012 by Reinhard Spreitzhofer, auf Flickr DSC_0013 by Reinhard Spreitzhofer, auf Flickr GWH MiG-29 9.13 with Caracal and Fantasy Printshop decals DSC_0025 by Reinhard Spreitzhofer, auf Flickr DSC_0023 by Reinhard Spreitzhofer, auf Flickr DSC_0010 by Reinhard Spreitzhofer, auf Flickr DSC_0006 by Reinhard Spreitzhofer, auf Flickr DSC_0009 by Reinhard Spreitzhofer, auf Flickr Revell Germany C-47 with decals from North Star Models DSC_0006 by Reinhard Spreitzhofer, auf Flickr DSC_0011 by Reinhard Spreitzhofer, auf Flickr DSC_0014 by Reinhard Spreitzhofer, auf Flickr DSC_0018 by Reinhard Spreitzhofer, auf Flickr ICM I-153 Chaika DSC_0001 by Reinhard Spreitzhofer, auf Flickr DSC_0003 by Reinhard Spreitzhofer, auf Flickr DSC_0007 by Reinhard Spreitzhofer, auf Flickr DSC_0012 by Reinhard Spreitzhofer, auf Flickr Stransky Bücker Bü181 Panzerjäger DSC_0001 by Reinhard Spreitzhofer, auf Flickr DSC_0003 by Reinhard Spreitzhofer, auf Flickr DSC_0007 by Reinhard Spreitzhofer, auf Flickr DSC_0017 by Reinhard Spreitzhofer, auf Flickr Tamiya P-47D with Tigerhead decals (partly) DSC_0001 by Reinhard Spreitzhofer, auf Flickr DSC_0003 by Reinhard Spreitzhofer, auf Flickr DSC_0007 by Reinhard Spreitzhofer, auf Flickr DSC_0012 by Reinhard Spreitzhofer, auf Flickr Hasegawa F-4E with Hi-Decals and Icarus Decals DSC_0001 by Reinhard Spreitzhofer, auf Flickr DSC_0003 by Reinhard Spreitzhofer, auf Flickr DSC_0007 by Reinhard Spreitzhofer, auf Flickr DSC_0012 by Reinhard Spreitzhofer, auf Flickr Tamiya Elefant DSC_0001 by Reinhard Spreitzhofer, auf Flickr DSC_0002 by Reinhard Spreitzhofer, auf Flickr DSC_0003 by Reinhard Spreitzhofer, auf Flickr DSC_0014 by Reinhard Spreitzhofer, auf Flickr Hasegawa F-86F-40 with Hi-Decals DSC_0022 by Reinhard Spreitzhofer, auf Flickr DSC_0024 by Reinhard Spreitzhofer, auf Flickr DSC_0028 by Reinhard Spreitzhofer, auf Flickr DSC_0033 by Reinhard Spreitzhofer, auf Flickr Xuntong Il-4T DSC_0001 by Reinhard Spreitzhofer, auf Flickr DSC_0004 by Reinhard Spreitzhofer, auf Flickr DSC_0007 by Reinhard Spreitzhofer, auf Flickr DSC_0017 by Reinhard Spreitzhofer, auf Flickr Hasegawa Bf109G-6 with Kagero decals DSC_0003 by Reinhard Spreitzhofer, auf Flickr DSC_0005 by Reinhard Spreitzhofer, auf Flickr DSC_0009 by Reinhard Spreitzhofer, auf Flickr DSC_0014 by Reinhard Spreitzhofer, auf Flickr Hasegawa Bf109G-6 with decals from RB Productions DSC_0001 by Reinhard Spreitzhofer, auf Flickr DSC_0003 by Reinhard Spreitzhofer, auf Flickr DSC_0007 by Reinhard Spreitzhofer, auf Flickr DSC_0012 by Reinhard Spreitzhofer, auf Flickr Taymia F-84G with Hi-Decals DSC_0001 by Reinhard Spreitzhofer, auf Flickr DSC_0004 by Reinhard Spreitzhofer, auf Flickr DSC_0009 by Reinhard Spreitzhofer, auf Flickr DSC_0013 by Reinhard Spreitzhofer, auf Flickr Hobby Boss IAR-80 with decals from RB Productions DSC_0001 by Reinhard Spreitzhofer, auf Flickr DSC_0004 by Reinhard Spreitzhofer, auf Flickr DSC_0008 by Reinhard Spreitzhofer, auf Flickr DSC_0012 by Reinhard Spreitzhofer, auf Flickr Hasegawa Fw190A-4 with decals from the sparesbox DSC_0001 by Reinhard Spreitzhofer, auf Flickr DSC_0003 by Reinhard Spreitzhofer, auf Flickr DSC_0007 by Reinhard Spreitzhofer, auf Flickr DSC_0011 by Reinhard Spreitzhofer, auf Flickr Revell USA Mil Mi-25D with Aztec Decals DSC_0001 by Reinhard Spreitzhofer, auf Flickr DSC_0003 by Reinhard Spreitzhofer, auf Flickr DSC_0007 by Reinhard Spreitzhofer, auf Flickr DSC_0012 by Reinhard Spreitzhofer, auf Flickr Hasegawa Bf109K-4 with EagleCals DSC_0001 by Reinhard Spreitzhofer, auf Flickr DSC_0003 by Reinhard Spreitzhofer, auf Flickr DSC_0006 by Reinhard Spreitzhofer, auf Flickr DSC_0011 by Reinhard Spreitzhofer, auf Flickr new Eduard Fw190A-4 DSC_0001 by Reinhard Spreitzhofer, auf Flickr DSC_0003 by Reinhard Spreitzhofer, auf Flickr DSC_0007 by Reinhard Spreitzhofer, auf Flickr DSC_0011 by Reinhard Spreitzhofer, auf Flickr Italeri AH-64A DSC_0001 by Reinhard Spreitzhofer, auf Flickr DSC_0003 by Reinhard Spreitzhofer, auf Flickr DSC_0005 by Reinhard Spreitzhofer, auf Flickr DSC_0013 by Reinhard Spreitzhofer, auf Flickr6 points
-
We're currently missing a can of evaporated milk, which was called for in the pumpkin pie recipe. I'm not entirely certain that I actually bought it when I got the other ingredients (it has been a week or so), but I'm blaming the cat.6 points
-
Here are the rest of the photos...a cloudy, wintry day, early 1942, somewhere in Northern France... ...and with its other lovely and obsolete brethren... This concludes my entries for the Matchbox GB. Thank you all for the kind comments and enthusiasm. See you all in January for the 10th Anniversary GB and a brace of Nieuports 10! I am sure I'll work something up before that... --JDCM6 points
-
Jerzy's insight has persuaded to to that effect also Simon. Thanks. I've not lived in Germany Keith but do understand the moral and legal minefield that a modern democracy has to negotiate in such matters. One of the problems of being European is the sheer amount of history all of our nations are haunted by. You are a gentleman for offering Keith and I thank-you for that. I reckon though if I'm going to go ahead I should have the courage of my convictions and do it myself rather than contract-out to a third-party. Tony Hi! Thank-you for that thoughtful reply. That seems a potential solution - if the tail can get some weathering then that might serve to mute - but not erase - the presence of the hakenkreuz. Even a decade ago this symbology wouldn't have seemed such a painful problem, but my how times have changed... I love the way your own Dornier turned-out btw! A fantastic piece of stylization that shows just how imagination can find new life in an old kit. What was I saying last night about the trolley being fun? A nice little build to finish-off the main build with? Oh but weren't The Furies watching and waiting! If memory serves it was @Pete in Lincs who cautioned me about the possibility of 'fit' issues with Kora stuff. Last job on the trolley was to stick on the little wheels, one each at front and back. No matter how I twisted and turned in relation to the instructions, repositioning the main axle, flipping over the base, the small wheels were always too high in relation to the main wheels. I'm quite prepared to admit to being a dumb beggar but I could not seem to get 2 plus 2 equalling 4 here. So I did what any self-respecting BMer would do and just went to town on building something that did work without contravening the base model too much. First then the pesky wheels that caused all the problem got a secure mounting: Then out with the old bone saw to cut a channel across the chassis so that the axle would sit at the correct height: This is how much it had to be lowered - painful - no? As we went along the various bits were just tacked into place with CA. Straight and level at last! Now the upper frames: I added my own diagonal braces out of channel as the resin parts weren't long enough. In a temporary fit of competence it occur to me to check that the aircraft fitted ok: Hmm...that paintwork along the keel line looks a bit scaly in places still in an oblique light - more MM'ing before paint! Here it is now all reinforced by a second pass around all seams and joins with a generous dollop of epoxy: That can now sit near the warm stove curing before I touch the buttery blighter again. Also on the menu was to knock up the tow-bar for the trolley out of some 1.0 and 0.8mm tubing sweat-soldered together. The replacement towing hitch was just some 15 amp fuse wire looped round a tweezer-tip: To build the big dorsal aerial for the night/blind-flying apparatus was a reprise of the above sweat-soldering method to add a couple of wider 0.8mm collars to some 0.6mm tubing: Which will eventually sit in place here on top of the gondola: You'd be right of course to suggest that there isn't a single photograph - leastways not one that I can discover - of this apparatus in operational use, despite detailed drawings and electrical schematics in the handbucher (iirc there's a cluster of batteries in the laderaum that provided power for the array) - but given our beloved @Martian Hale's earlier enthusiasm for said structure and the fact that it does give a certain Rococo decadence to the gondola, I've decided to include this apparatus in the guise of 'ground-crew carrying out full system-test during routine maintenance'. Well, you've got to indulge a little whimsy now and again haven't you? A little more detailing around the gunner's positions, handles for the doors, a mount for the towing hitch onto the beaching trolley tomorrow, and then I reckon that's about it for the building phase. Time for thoughts to turn towards colouring this baby in. My stars but the bench will need a deep clean before we do that! May your own endeavours bring you peace this evening. Tony6 points
-
Hi Everyone, This is a big model. It has a three foot wingspan and it weighs over one pound. That's me in the sunglasses. And yes, I made a mistake with the decals. The star and bar should have a red stripe.5 points
-
Good evening all Tempest fans The Hawker Tempest is one of favourite aircraft so this Gb is the perfect excuse to build the Matchbox kit I had in my stash I am goiing to udpdate it with a PE SET Eduard , a Pavla resin seat and with the Xtradecal decals set I will represent an aircraft of the Squadron 26 based at Zeltweg Germany in 1947 Some Books Eduard set and Pavla seat I started by the seat where I added Eduard belts I also started working on the cockpit I placed the Eduard Instrument panel I scrath built a floor I glued a stick donated by a Heller kit Patrice5 points
-
Revell 5" Star Destroyer kit (as you can see from the markings, which are accurately measured out!) Silliness aside, this was my first experiment at DIY decals, which worked OK although the transparent area is still just about visible.5 points
-
Good evening Today I placed the seat and closed the 2 fuselages halves ( I repaired the left fuselages damaged ) I also glued the wings Patrice5 points
-
Finished the diorama last night. Great fun, looks a bit better than the last time I built it when I was 9 2017-12-22_03-57-03 by Dave Oliver, on Flickr5 points
-
Cheers Andy FLIR fitting, sponson is tacked on with CA glue at this stage just to allow me to line up all the bits, some fettling left to do with the turret. It's not glued at his stage. More later folks Dan5 points
-
Hello all, I apologise for not updating this for about a month, but things got in the way and I was unable to do much modelling for most of that time. All is sorted now though, and I have managed to get the Burgess-Dunne done! Limeypilot, thanks for that. I have to admit I can get quite confused with the written word, and despite reading that a number of times, I am still non the wiser (my fault of comprehension rather than yours of explanation!), but I think the prop is on incorrectly. If I can find a pusher prop I will replace it, that should be easy to do as it has come off twice already, so all may not be lost. I completed the spider's web rigging with a mixture of EZ-Line and thin speaker cable core. I have two lots of cable, one is silver coloured and very thin, the other is copper and a bit thicker. I found the silver cable was more brittle when stretching between two tweezers to get rid of the kinks, but I found that if I pulled until it snapped, the wire was straight. I coloured them with a black Sharpie pen and it worked okay. Anyway, here she is in all her glory (warts and all): I will pop a few more into the Gallery in a mo, but I just want to say a huge THANK YOU to all who have commented and 'liked' this build, I have thoroughly enjoyed this, and I hope it has reinforced the lure of building the 'unusual'. Merry Christmas everyone, and Happy New Year to you all! Ray5 points
-
It seems, that my "Britmodeller holidays" gone... :-) Joypacks - under AZ label we will release P-51B, under KP label there will be MiG-21bis. Mig-21 family - in 2018 there will be bis version and PFM and we are very close to UM version. And what about Venom family?5 points
-
Hi mates, I started this model for the Prototypes, Experimental, World's First & Record Breakers Group Build, but life got in the way and I wasn't able to finish it in time. Eventually, it came together and here it is! The Curtiss-Wright XF15C-1 mixed-propulsion fighter was developed for the United States Navy at the end of WWII, first flying in February of 1945. Only three prototypes were built, as the US Navy moved their focus to pure jet propulsion. Only one of the prototypes survived. Similar to the Ryan FR Fireball, which entered service on a limited basis, the XF15C-1 had both a Pratt & Whitney R-2800 radial engine/Curtiss Electric propeller up front and an Allis-Chalmers J36 turbojet (license built de Havilland Goblin) under the tail. The mixed propulsion concept was devised to counter the slow acceleration of the early jets, a characteristic that limited their appeal for carrier use. Including the radial engine allowed for safe carrier launch and recovery, and the turbojet in the tail would contribute to higher cruise speed. Or so the theory went. The need for further development of the mixed propulsion concept for carrier fighters was negated by improvements in jet power, and the Curtiss-Wright XF15C was never ordered into production. It was the last Curtiss aircraft to be built for the US Navy, and the penultimate design for Curtiss itself. This kit, from Olimp and their Pro Resin brand, represents the T-tail design as incorporated into the second and third prototypes after the crash of the first, which had a more conventional tail. The casting of the resin parts is very nicely done, with lots of detail and no real fit problems. This was my first Pro Resin kit, and I wouldn't hesitate to build another. The only issue I had were the stickers, which refused to lay down without silvering no matter what I did. The spares box is meant for these occurrences. Project: Curtiss Wright XF15C-1 Kit: Pro Resin (Olimp) Kit No. R72-008 Scale: 1:72 (if you're not building in this scale, you've got a lot of 'splaining to do) Decals: Kit decals were unusable, all markings from the Island of Misfit Stickers Resin: Hey, the whole thing is resin! No need to buy any aftermarket... Photoetch: Supplied with the kit and included instrument panel, seat belts, landing gear torque links, cooling flaps, etc. The usual stuff. Paint: Testors Model Master Dark Sea Blue FS15042; Gunze Flat Black, Flat White, Interior Green, Tire Black; Tamiya XF-69 NATO Black; Alclad Aluminum, Magnesium, Steel; Floquil Flat Weathering: None. I'm starting to like my models clean and without tar in the panel lines. Besides, when the second prototype XF15C had these markings, it hadn't flown very much. Improvements/Corrections Scratch built the inner main landing gear door retraction mechanism All the splendid (?) details of the build (and a lot of off-topic stuff) can be found here (Part 1) and here (Part 2). Enjoy the pictures! All right, that's enough of that. On to the next project! Cheers, Bill4 points
-
Hi everybody, After the C2 and waiting to finish my Ki-100 of Aoshima I started on the C7. Not too many squadron choices because only one had it in the IAF, but my Wife choose the name, so it's the 514 nickname "titan" With it's little brother the C2 Will finish my Ki-100 now By Joel4 points
-
High time updated my progress I think... So, on and off for the last few days I've been taking the cockpit sidewalls and floor parts through the painting process. After all the paint was done they were given a very light drybrush with various light beiges and greys before being glossed and carefully pin washed to add a bit more contrast. I used dark browny coloured enamel washes mostly. Just a tip when trying to clean up washes out of intricate little details use a tiny brush dampened in white spirit to brush and dilute away any staining or tide marks. Just be sure to wipe the brush onto some paper towel to get rid of the removed wash and redampen it every so often. I also went through and added a whole pile of little placards. These were cut from aluminum tape, stuck on and carefully burnished using a toothpick end and then painted over in red or black. I wasn't too worried about getting to the very edge of each placard to leave that aluminum border effect. I then used white oil paint with a sharpened toothpick to pick out the writing. I did have an Airscale placard set as well but struggled trying to find the right sizes and / or general look I wanted, in the end it was easier for me to scratch these. Just to elaborate on the oil paint stencils, make sure you get the very tiniest bit of paint on the end of the toothpick and dab it down once on a piece of paper before you start. This will remove most of the paint and let you get a very fine dot. Also before 'reloading' the toothpick make sure you wipe any remaining paint off to keep the end sharp. Most importantly remember that oil paints take forever to dry and before doing anything else make sure you seal it with a gloss coat. I also rebuilt the flare cartridge case from a bit of plastic (and aluminum tape) discarding my rubbish milliput molding. I also added the little cloth cover thing which covers an wiring junction in the bay next to the oxygen hose connector. It was made from a bit of tamiya tape carefully folded in to form a sagging cover and painted. And finally I used some Airscale instruments for the floor fuel gauges and a little gauge on one of the cockpit sidewall boxes. Once flatted down I went back and re-glossed over the dial faces with some Tamiya X22 thinned slightly with water. I also freshened up the shiney metallic parts which predictably lost a bit of lustre after the flat coat. And so without further waffle here are the finished sidewalls and floor sections. I think the IP will be next, I found the Airscale instruments worked pretty well, which is good since I'll be putting down a whole lot more of them.4 points
-
Hi there guys! Well the fuselage is at last skinned!...a tad laborious but worth it in the end I think! I'll walk you through the process which I chose to do....not everyone would do it this way but it works for me! So what I needed for this task was a few scraps of plastic card ...some paper card...glue and my favorite riveting tool!...which I will show you ............ I use this to punch out the rivets on the plastic card....I basically got a piece of kit sprue...drilled a small hole in the end and super glued a sewing pin in the hole...and Bingo there's your riveting tool!.......with gentle pressure on the plastic it makes great rivets as I hope you will see in the coming photos.....and it cost #ugger all! Using the paper card, I placed it over each panel of the fuselage ...a panel at a time ...and carefully measured the panel to make a template which I then drew with pencil onto the plastic card.This is not as easy at it seems because the card has to go round some awkward shapes....easier with paper card than plastic!.....the rivet lines for the fuselage were then parked on the reverse side of the plastic panel and then the little riveting tool did the rest!. Here are some shots of the fuselage half covered.... You can also see that with a few scraps of plastic I added some of the detail on the cowlings...air intakes and the like!.....the next few shots are of the fuselage completely skinned. A coat of Humbrol 64 was then applied as an undercoat to see if there were any blemishes..(awful errors on my behalf I mean of course!!)...and there was!......a bit of PVA glue sorted that out and then another undercoat was applied. I then sealed that lot with a coat of Johnson Klear. More detail to be added at a later stage but here is now the skinned fuselage.... So there we go then! I am off to Blighty tomorrow for the Christmas and New Year period and will be back in about 3 weeks time to continue with this scratch build.....next up....the dreaded attaching of the wings and things!!! I wish you all a very Merry Christmas and a happy New Year and see you next year!!! Cheers Fozzy4 points
.thumb.jpg.cfc129272ffec824439b15e6013d5952.jpg)


.thumb.jpg.ba34a9f6ddce411193946dbdcc7b5fe8.jpg)


This leaderboard is set to London/GMT+01:00