Leaderboard
Popular Content
Showing content with the highest reputation on 07/07/17 in all areas
-
26 points
-
Italeri Typhoon 1/48 - Out of the box build other than the Eduard zoom. (I did the 'Jasper' version in memory of my beloved dog Amber, who I miss every day.) I did this about a year ago and it seemed to go down surprisingly well on Scalemates, so…. Warning – Waffle ahead. One of my many brother-in-laws is called Tony Fellows. Why am I telling you this? Because his dad was an RAF fighter pilot during WWII – 'Nibby' Fellows. He flew many different aircraft during and after the war (apparently second only to Eric 'Winkle' Brown in the different types he flew). The Typhoon was a particular favourite of his. On 17 July 1944, he was flying his Typhoon over Normandy looking for something to pump lots of holes in. He saw a German staff car with motorcycle out-riders, so he attacked – doing the aforementioned hole thingy. This is the exact day, and in the same area, that Rommel suffered major head injuries as a result of being strafed in his staff car. Some other pilot got the credit, but me and my brother-in-law know the real story (well, our version of it anyway). Unfortunately my brother-in-laws sister threw away most of Nibby's service stuff, including his flight books and many photos (he was a member of a crash investigating team after the war) so his claim can't be proved now. Nibby claimed the 'kill' long before the Allies knew of Rommel's injury, so I don't know why it was attributed to another pilot. Thanks for looking.20 points
-
Just finished the new Tamiya kit. Totally Out of the Box. It's for Tamiya Canada so the RIO is in but the pilot seat is empty to show the variables. What was crazy about it? Well look down the photos and you will see that the model was built, painted, decalled and mostly detailed in sub assemblies and then brought together. Crazy - yes, was it a risk? No. As you can see no visible seams from this construction and it actually made painting much easier especially on the underside. I wouldn't recommending this process on any kit but on this one- absolutely. The WIP link is here: http://www.britmodeller.com/forums/index.php?/topic/235023242-f-14a-tomcat-modular-construction-updated-final-assembly/ During pictures I noticed the nose pitot is broken, the stabilators are not pushed all the way in, the refueling probe cover fell off at some time and in some pics the right side wing bladder and fairings are not installed. These. are all fixed now Thanks for looking! And as promised the pile of completed sub assemblies.16 points
-
This is the Tan Model kit, built strictly OOB - no aftermarket, no scratch-building, no detailing. Heck, I even used the kit decals! All in all, a much more pleasant experience than I had anticipated. Such minor glitches as I encountered were of my doing - the kit is lovely. Enjoy . . . Keep bashing the plastic!12 points
-
Edit Hi all, Back to the hobby after a long break, I decied to finished what I have started a long time ago: the L-39ZA 1/32 from HPH models. Includes here are some work in progress pics that I took along the battle. Yes, I called it the Battle as this is my first resin kit and oh boy…. A/The Kit: For the price tag, you will get lots of resin, PE both in color and brass, fabric seat belt, masking for canopy, clear resin canopy and formation lights, vacumm form for wing tips lights cover and round up with 2 decals sheets. The fit: quite nice in some place and horrible in many places. Watch out for these cons: 1. The intake or you can call it the nightmare. It took me ages for sanding and swearing to make the damn things fit properly. 2. Wings to fuselage, a better nightmare compare to the intake but still…It’s better if you attach the wings to fuselage before attach the intakes as you will have more spaces for sanding the joints. 3. The boarding ladder is a very nice touch and well detailed. However, you have to sand the cockpit tube then test fit then sand again to accommodate the PE boxes for the ladder. 4. The canopy is made from resin and must remove from the casting block with care as they are really fraglie. 5. The inner frame for the canopy is another drama, somehow the fit really out of places. 6. There are no location pins but there is location holes so all I have to do is made location pins from brass tube 7. There are some details HPH required the modeller to scratch-build. 8. Rivets everywhere but very sallow and couldn’t hold a light wash so I have to punched every single rivets with a sharp needle (I won’t ever ever do this again) Pros: 1. Stunning cockpits, outsanding details especially the seats. The fabric seat belt took me 2 hours for each seats. 2. Decal are really thin but fragile 3. Resin, PE, farbric seats belt, nice decal, stunning details on most of the resin parts..etc. you really don’t need any after market parts for this 4. And most important, this is the only L-39 1/32 in the market for the time being. The Build: Paint: gunze all the way, weathering used Mig product and color pencil for all the chippings Scratch build items: the avonic bays as I always love the look of it. FOD cover, ground equipment from Lego blocks, the base is from Noy minatures with extra homemade grass and extensive weathering. The background is picture found from the internet, printed out by laser printer then repaint some sections for a better look. All figures are from unknown source, I’m understand those figures may incorrect to use in this scence. These figures is to add some human touch and acts as a size comparison to the L-39 which is really small. Out of those scratchbuild items, the avonics bay took a lot of time and effort, however I’m pround that I did that as this will help my L-39 stands out from other 1/32 L-39 out there ( for the time being ) After 5 months on and off, here I am with the completed model and some final though: Am I happy with the result ? Yes, I did my best. The kit worth the hard earned money? Yes ! The fit of the kit is good ? Hell no ! The details is good ? Outstanding ! Will I build this kit again ? Maybe in the next 3 years. Hope you like this as I do.12 points
-
The He-70K, often referred to as the He-170, was a fast reconnaissance airplane variant equipped with a license-made (originally French) Gnome Rhone 1000bhp radial engine was used by the Royal Hungarian Air Force in early WWII during 1941-42. The main weakness of the He 170 design soon became obvious. The He 170 airframe was made out of so-called "electron metal", a very light, yet strong alloy of magnesium, which burns spontaneously in air when heated, and is only exhausted when covered in sand. A single hit from a light machine gun usually set the entire plane ablaze, killing the crew. Model Matchbox 1988 Plus aluminum sheet, metal tubes and a lot of patience, I will look at the construction photos.11 points
-
Good Afternoon folks! Here is my first ever Luftwaffe subject! Always had a spot for the long-nosed Dora so decided to have a crack at the Hobbyboss kit that I picked up in Seoul for £12! Its a beauty and even comes with photoetched parts. I added some seatbelts and the old-style canopy from the Eduard kit. Paints by Mr Hobby and Xtracrylix, decals by SkyModels. The colour scheme may be inaccurate, I used an old article in a Luftwaffe modelling guide which I later found out contradicts Jerry Crandall's research. There is a good chance that it should be 'Black 11' and the RV band should be black and white too. Oh well! I like the JG2 markings Apologies for the depth of field issues with the photos, I took these outside and its nearly 50 degrees. It was a race to see if the model or I would melt first and as the flat coat started to get tacky after about 30 seconds there was no way I was going back out there to take more!!! Thanks for looking, Chris11 points
-
Airbus A330-200 Gulf Air Reg A9C-KA - New Livery Concept! Kit - Revell Thai A330-300 1/144 scale Engines - Braz 2 x RR Trent 700 Decals - F-DCAL 787 Dreamliner Gulf Air This model started life a rather shabby Air Mauritius and this was the original conversion from the -300 to the -200. Engines were different again from the original kit. thanks for looking!10 points
-
10 points
-
Hi all! Here is my recently completed Flitzer. A nice quick build, especially since I only added seatbelts! I used the kit decals and painted with Tamiya paints. This is my first attempt at black basing and spraying the mottled camo. I sprayed through my Badger Renegade airbrush and really like the results. Tried to get nice, scale-sized splotches. Thanks for looking!10 points
-
The Sea Vixen FAW.3 In 1961, the Royal Navy Fleet Air Arm was very interested in acquiring the US Navy's latest carrier borne fighter, the McDonnell-Douglas F-4 Phantom. It seemed the answer to all their problems of a successor to the Sea Vixen, twin-boomed fighter, which would fly from the planned CV-01 carrier. However, a monetary crisis intervened and the British Government firmly put it's foot down and declared that the successor to the Sea Vixen would, it seems be, well, another Sea Vixen! De Havillands had worked out how to fix some of the worse problems of the Sea Vixen. It improved the size and the shape of the Sea Vixen's radar scanner and brought the radar operator out of his "Coal Hole" and placed him in a tandem cockpit, behind the pilot, where his eyes would be useful in a dog fight. They improved the missiles carried by the aircraft, adding some Blue Jay radar homing missiles, based on the Red Top IR guided missile. They retained the Red Tops the previous versions had been armed with as well and kept the 30mm Aden cannons, much to the delight of the pilots. The Model The model is based on an illustration of an F-14 nose which was added to a Sea Vixen fuselage, which I have unfortunately lost track of. It fitted surprisingly well, actually, coming from a Hobby Craft kit. The Missiles were converted from standard Red Tops. The fuselage and wings are from a Frog kit.10 points
-
Dear all, A build I have been undertaking between other projects just completed last night. This is Eduard's 'Weekend Edition' of this particular kit - and what a great little kit. All fits together nicely and was something a little bit different in terms of aircraft genre. As a mainly OOB builder, I really like these Eduard weekend editions as I'm not a great fan of PE parts, and are cheaper to boot. I'm no longer using PB to upload images, so this my first use of another photo hosting site 'Imgur'. Regards Dave10 points
-
Here are my pictures of my recently completed Martin Baker MB5 completed in the colours of Squadron Leader JB Prendergast of 414 Squadron Royal Canadian air force Germany May 1945. I've always loved the Martin Baker MB 5 and bluntly the advent of jet aircraft at the end of World War II prevented going into service I always wondered what it would look like in Squadron colours and in Osprey aircraft of the aces number 81 Griffon Spitfire Aces there is a colour drawing number 26 on which I based the model. 414 Squadron had been assigned to the second tactical air force to perform armed reconnaissance and the red nose I thought looked really good with contra rotating propellers. I've used xtradecal roundels & ccodes. I also did a live pin wash and used clear satin varnish varnish for the first time which looked really good at this scale. Apologies for the rudimentary stand, I prefer aircraft with the undercarriage up and the somewhat rushed photographs. This was the new AZ model MB5 went together well with the exception of the canopy which was badly fitting and the propeller blades which needed considerably cleaning up at their bases. I hope you enjoy9 points
-
Thanks Ian, Benedikt and John Benedikt I hope you enjoyed the storm! I'm a bit clumsy this morning but I did get some of the crew fitted. They are not happy. The pilot went in OK but the Nav needed a bit of encouragement to get his legs under the table. Then the Wireless Operator refused to scrunch himself up: Untitled by Ced Bufton, on Flickr Oh, the joys of getting figures to fit. Removing the detail on the seat and cutting down the pillar helped: but he's still working in the dark, poor chap: As for the Flight Engineer... @Michael Enright sent me a nice PM discussing seating and the Halifax crew he'd interviewed seemed to remember just a fold down seat arrangement at the rear. Most of the time they thought the FE sat on a folding seat next to the pilot during take off. Who could blame them? I could do that...9 points
-
Convered using Hamilton Hobbies fuselage plug. I just couldn't find the love for this one I cut a lot of corners finishing it. I know it's a Viscount but there is just something about this model that either does not seem right or just doesn't "do" it for me. The only thing I am happy with is the decal design..I found this a really attractive scheme.. I enjoyed that. (thinking of doing a B707 in this scheme now) anyhoos, I am calling it done6 points
-
Hi All A couple of starter sets, done OOB including most paint. Some awkwardly applied washes, but every day's a school day! Airfix A55107 North American Mustang IV Airfix A55101 Curtiss Tomahawk IIB Comments and suggestions welcome Cheers Steve6 points
-
I really enjoyed the small Airfix kit. No issues during assembly. The decals are from the portuguese maker BlackCat decals.6 points
-
Hey guys. Must be worth a cheeky post. I got a little bench time in between life things and this happened. I roughly painted in some ply wood effect basing locations on the Ws book, painted the ammo in the pockets and glossed ready for weathering. I did this last night, I popped another coat on when I got back from work expecting to have to wait for it to dry but it's so hot it only took an hour and I could add some Flory action. One think I can thank Photo Bottom for is the opportunity for me to trawl my old builds, how I forgot that airbrushing Flory was the way to use it I know not. Sooooooo. This method is a 100 times better than brushing. You can just catch a glimpse of the fuselage in the background. The wooden door turned out nice too. (Drying for 20 mins) then using a sponge block I got with some Brassin parts I went at it. look dad no bubbles. Right MUST REMEMBER Airbrush Flory, Airbrush Flory. Here is one internal side. I'm a bit weary and yearning for a G'n'T so the rest can wait. I've cleaned up now and apart from the one dodgy bit of wire work. ( if you don't say anything I won't) it looks pretty good. I'm planning on a lemonade drinker start tomorrow so possible update alert. have fun Modelling this weekend guys if you manage it if not just have fun. Thanks for dropping by. Johnny.6 points
-
This is the Tamiya Pz III L kit. I built this as sort of a test bed for my Tamiya paint mixes, track link armor ideas and additional camouflage in the form of trees and such. I used a lot from my spares box and scratchbuilt the jerry can rack. I used Bronco jerry cans for the first time. Not impressed.... Model railroad scenery was used for the tree limbs. Very fragile, it took all morning to accomplish what you see here. Pz III L, 7th Company, 1st Battalion, Panzer Regiment 8, 15th Panzer Division, Tunisia, 1943. G5 points
-
5 points
-
Hey Tony just out of interest, as I've had a few people enquire, what is the exact type of carpet you have in the lounge and wallpaper in the hall way, plus the exact colour match for the paint. Nothing to worry about honest... just that quite a few of us have expressed interest and wondered where we could purchase copies for replacements for use in our homes cos they look so good after some prisoners on day release local community volunteers popped by and urm...nothing to worry about...oi Bill is that the neighbours at the door again...oh it's the police this time..oh..er..yeh Tony they're on a neighbourhood watch visit...got a go...nothing to worry about honest...tell Mrs Baron everything is okay...5 points
-
6th Update. Weathering and Tracks. Before proceeding to the weathering stage, I added a camouflage net and a tarpaulin made from tissue soaked in PVA glue to the left hand side of the hull rear, and some crew kit wrapped in tarpaulin to the rear stowage bin. I also added straps to the latter before painting both lots with acrylics. The handles on the pioneer tools were painted cream and then wiped with burnt umber oil paint. The same treatment was given to the gun cleaning rods. The dust cover around the mantlet was painted with a canvas coloured acrylic and then given a dark wash. I kept the weathering fairly simple because most photos that I have of these tanks show them with just a dust covering. A dark pin wash didn't really show up on this dark green, so I applied a thin line of raw umber oil paint around ventilators, hatches etc, and then blended it in with a brush dampened with thinners. Various MIG pigments, Europe Dust, Africa Earth and Gulf War Sand, were applied all over, paying particular attention to the lower hull. Final couple of jobs were the aerials (Accurate Armour), and the tracks. I used the T54E1 tracks from Panda who supply sufficient number of links to cover the A4 lengthened hull, and still have some left over. They can be assembled without using glue so that they remain semi workable, because the end links are a snug fit. Once assembled, I sprayed them with a mixture of Tamiya black and brown and then coated them with a slurry made from MIG's Gulf War Sand. When it had dried, I removed most of it with an old tooth brush, then assembled them around the sprockets, idlers and suspension. The metal chevrons were rubbed with an HB pencil as were the parts of the wheels that would rub against the links. One last item. The headlamp lenses are 3.5mm ones from Little Cars. And that's just about it. I used up a lot of spare parts, but I also used some parts from complete kits, so there will be a few more Frankenshermans in the future. Now all that remained to do was to put it on a suitable base and add a figure for scale effect. Thanks to all for following along with the build and I'll be posting it in RFI soon. John.5 points
-
While the forum was flooded with beautiful Tamiya Tomcats I was finishing the Hobby Boss F-14A. Goal was to make a accurate Persian Tomcat, so the choice was the Hobby Boss one. Added with Eduard Sidewinder Niner Juliets to represent the Iranian operated Pappa's variant the job was done. Besides the Sidewinders some other Eduard add-ons were used, Aires exhausts, Wheelliant weighed wheels, and Hi-Decal, well, decals. Hope you like!4 points
-
TRUMPETER WESTLAND WYVERN 1/48 I have previously posted a couple of completed FAA models on BM but this is my first WIP - I only decided to do a WIP when I was part way through this build - there have been quite a few nice builds of the Wyvern on BM since its release and my main interest was in improving the wing fold detail to make it more realistic plus a couple of other refinements. I think this is a nice kit of the Wyvern that captures the feel of this heavy turboprop aircraft. REFERENCES I used the 4 PLUS book and the From the Cockpit publication on the Wyvern as well as some photos I took of the TF1 prototype at the Fleet Air Arm Museum at Yeovilton in 2006 – also found some clear walk around photos of the TF1 on the Prime Portal website. After a lot of searching in books and on the internet I found it almost impossible to find "in service" Wyvern close up photos showing wing fold details – there are Pilots Notes available but I could not find any maintenance manuals that are available for some aircraft like the Sea Fury and Spitfire. I scaled up the 1/72 plans 150% to 1/48 scale on my scanner THE BUILD SO FAR I used the Wolfpack WW48014 resin cockpit & Eduard air brake etches - still deciding on how much detail to add to the wheel bays as the inner u/c doors will be closed - brake lines were added to the undercarriage legs. The exhausts for the engine were replaced by K&S aluminium tubing I also reshaped the end of the inner flap fairings by adding plastic to the bottom of the fairing as they looked too pointed to me WINGFOLD BREAK The wing fold details are therefore based on the TF1 which I assume is basically the same on production aircraft but there are some detail variations particularly on the outer wing flap – the main aim was to get rid of the over scale parts (E21 B25 & B29) representing the hinges. I used the kits aerofoil sections for the wing break (parts D14, D15 & D16 &D17) as I think they give a quite accurate cross section of the aerofoil – I also missed out seeing parts E12 & E13 that provide detail at the wing break which could have saved me a job making them. To give the wing fold strength I used brass strip and wire incorporated into the wing hinges which were fabricated from plastic card and strip – jury struts were made from K&S brass wire and tube so the plastic hinges only needed to be cosmetic and don’t carry any load. Once this basic structure was sorted it was just a matter of bit by bit of scratch building the detail at the wing break with plastic strip & rod, solder wire, copper wire from electrical cable etc until it looked busy enough from a viewing distance of about 18 inches (450mm approx.) SOME EXTRA PHOTOS OF HINGE DETAILS Brass wire and strip reinforcing the hinges holes drilled for the brass pins and cut away area around hinges to accommodate the fold sketches of estimated shapes hinges and wire reinforcing Photos I took of hinges on the TF1 Wyvern at Yeovilton 2006 Hydraulic lines are made from lengths of copper wire twisted and soldered each end to make it easier to handle - the photo below shows prepared copper wire to represent hydraulic lines to go into three different holes in the outer wing The thicker cable is from solder wire Photo below shows some hydraulic lines installed in an outer wing panel - the brass etched pieces are from an old Airwaves wingfold etch for the Wyvern - I have no idea what the flap looks like at the wing break at the so used this piece from the etch - the flap on the out wing panel differs between the prototype and production Wyverns. I think the wing fold is just about done except for tidying up & final fitting out once the angles are checked and the wings go on permanently. thanks for looking CJP4 points
-
Hello all! I've been around a few months and love the site, the content, and the great contributors on here! This is my first WIP and my first real journey back into the world of modelling. I decided to build Trumpeter's 1/32 A-6E and represent the bird I had the privilege to take care of as a plane captain in VA-115. We were stationed in Japan at NAF Atsugi and deployed aboard the USS Independence. After qualifying as a Plane Captain, I was assigned to aircraft 503 BuNo 152950. She was the oldest in the squadron yet she had lots to offer. While on deployment in support of Operation Southern Watch, she racked up more sortie hours than any other aircraft in the air group! Just a quick note: I am not a rivet counter and my memory is a bit faded. I do appreciate any and all comments, advice, criticism, etc. PLEASE do not be offended if I choose not to incorporate your particular suggestion. It's nothing personal. And here we go! I chose to start in the office. I used the Eduard PE set (first time using PE) and upgraded to Quickboost seats (I used the GRU 7A seats and modified them to my liking).4 points
-
Hi all! My latest two completions, a pair of RAF highback Mustangs. First up is the Accurate Miniatures Kit converted to a Mk.1 using the Ultracast conversion. Wing panel lines filled to simulate the putty used by NAA. Eduard Seatbelts, prop and exhaust stolen from an Eduard P-39 kit. Tamiya paints including a home-made 'Mixed Grey' from Tamiya MSG and Black. Decals from the Spares box to represent and aircraft of 26 Squadron. AM148 later became a test aircraft for Rolls-Royce. I'm sure this is a lovely kit however my butchery to fit the Ultracast conversion didn't help!!! Second is the Tamiya P-51B built as Mk.III. Wing panel lines filled again, Eduard seatbelts, Rob Taurus vac canopy. Tamiya paints and Techmod decals to represent the aircraft of Sqn Ldr Bohdan Arct of 316 (Polish) Squadron. He bailed out of this aircraft and was captured in September 1944 after an engine failure. Not much else to say about the Tamiya kit, it's an absolute beauty! As with the Fw190 thread, apologies for the out of focus pictures. It's 50 degrees outside and I don't want to go back outside to take new ones! Thanks for looking, Chris4 points
-
Hi all, tis is my last model. The plane has been riveted and AK product used for chipping. The plane is the mount of Major Saito commander of the 85th Sentaï. Cheers. DSC_0005 by jean Barby, sur Flickr DSC_0003 by jean Barby, sur Flickr DSC_0004 by jean Barby, sur Flickr DSC_0002 by jean Barby, sur Flickr DSC_0001 by jean Barby, sur Flickr4 points
-
Thanks! Thanks, nice to be back. Thanks. I'm hoping I am being quite sympathetic to the insides. The windsock books have been a great help. Looking forward to whatever this has got planned for me. Good luck with the Roc, I'll pop over and see what you've been up too. Nice playing catch up. Thanks. Not quite out of the PB nightmare yet but getting there, one. Thread. At. A....time.4 points
-
Fire extinguisher = weight. If it catches fire on start up, the chappie standing outside will have one. If it catches fire in the air, get it down, get out, If possible, retire to the nearest pub. If it catches fire after the crash, if possible, retire to the nearest pub. Await transport.4 points
-
4 points
-
4 points
-
Might it be better to wait til the plasterer has finished the ballroom ceiling? We were lucky to have been able to match the kitchen tiles after all Are you still going for dramatic black and white Hammer Horror effect carpet, the one with the phoney perspective lines woven in? I don't think I can drink in there again if you do, the illusion will make me feel a 'need to heave'4 points
-
I only just found out, doing a flickr test now, see if this works ok whitley finish top by Jon Howes, on Flickr So with this I can see flickr works really well better images too. Go flickr guys4 points
-
Thanks to everyone for the kind support over the past few weeks, it's been greatly appreciated. I've re instated some of my threads but this will be an ongoing process for a while. Anyway enough of that! We has some bench time. not a lot but some. I figured the internal cloth would be kind of dirty white as all pics are BW but look that way do I pre shaded in a lighter brown. then using a Tamiya mix of deck tan and white we arrived here. looks wonderful to me not because it's particularly good but because it's a model, and I'm painting it. feels like it's been an age. Any road the wooden parts got a coat with a hairy friend. im going to add some grain to the front and back black up the ammo in the pouches then gloss coat ready for the first dark wash. before that I dry fitted the fuel tanks. all looking good. As I said not much but it's great to be back at it. Thank you so much for sticking with me and popping in to have a little look. Going through all my old pics and popping them on Flickr has really lit my Modelling fire again. Looking forward to more of this beauty. Take care guys and as always, happy modelling. Johnny's back!4 points
-
Hi folk's,put a wash in the detail just to add a little depth to the finish.4 points
-
SAAB B-17C, Danish Army Air Corps (Hærens Flyvertropper), Marivox 1/72 Made this one back in 20123 points
-
Hi chaps. I was lucky to see three Gnats display at Waddington a few years ago and I though I would give the Airfix 1/48 kit a bash. It would be nice to do all three but I think I will do just the one for now.Anyway here we go.My first look at the kit and I am impressed. Everything is nice, clean and sharp apart from the pilot which is a shame but then again at lease you get a pilot. The clear parts are nice and you get a choice of open or closed canopy. I will be using the closed canopy option as its an in-flight display and as sods law would have it there are a few small scratches on the one I will be using, but they should polish out. As for the decal sheet, they are also clean and sharp. The instructions are very easy to follow and well laid out.I am also going to use Eduard's photo etch set to add a bit more detail to the cockpit. I was going to use a resin pilot but I changed my mind and decided to use the kit one.I am a starting this later than I wanted due to the fact that I had to fix my shed roof to make it watertight and keep the rain off me. That hopefully done and on with the build. I am going to use bent acrylic rod to support the aircraft and have it in a banking climb. So first I measured the internal diameter of the jet pipe which was just over 6mm and then I had a look to see if I had roughly the right size rod which for once I did. I attached the rear plate of the jet pipe and once the glue had cured I drilled out the 6mm hole first with a 3mm drill, then a 5mm and finally with a 6mm drill. I did it this as I wanted a smooth regular hole for the rod.My attention then shifted to the fuselage halves. There were a few injection marks on the cockpit sides so I filled them and I attached the air intakes and wheel wells.Then on went the wheel well doors without any problems.Now it was time for the cockpit tub, which again went together easily as per the instructions.While I was doing this I also removed a bit of the instrument detail ready for the photo etch. I did the same for the seats but I haven't glued the seats to the tub yet.As for the pilot I cleaned him up as best I could and to add so life to him I chopped off his head. Strange I know but you have to be cruel to be kind as you will see.With the surgery done I drilled a hole in his head and neck to take a copper pin.I used copper as it lets you move the head to the right position without snapping.When I was happy I glued the head in position.As I have said before the aircraft is going to be banking so hopefully now the pilot will be looking in a more natural direction than he was. Thats the plan anyway. His arms were attached one at a time and left to cure before moving on to the next. This was done to ensure his hands are covering the right controls. Again hopefully.Next job were the internal air intake pipes that were painted and glued together and inserted without any problems.As for the fit, I would love to say it was due to my skill but no it is the kit. As you can see the fit is very good which so far is the story of the kit. Now for the turbofan which is an important part as you will see. I sprayed it and added a bit of an oil wash just incase it will be seen.With that done I glued the jet pipe and turbofan to a fuselage half.As you can see, the moulding at the back of the fan has a hole in it but not 6mm and due to the shape of the fan I couldn't drill in to it as I wanted it to support the end of the acrylic rod. Oh well never mind. To get around this I decided to use a pencil sharper to reduce the rod to the required size.And it worked.With that done I went back to the cockpit. I painted it and gave it an oil was then I added a few bits of photo etch.3 points
-
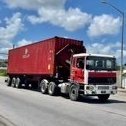
Spotted this kit for sale on BM, and thought it would be something different for me to build. Owned by A.L.E in Stafford, so a local connection. I saw one of these a few years ago, real heavy haulage! DSC_0001 by richellis1978, on Flickr DSC_0003 by richellis1978, on Flickr DSC_0008 by richellis1978, on Flickr Thats 2 models so far this year! Shall be in Truck Model World Magazine in due course3 points
-
Well this really is my first RFI for ages, I've been battling with this mixed media kit for months and finally given in, definitely going to stick with injection kits now I've removed this from the loft lol! Ive had this kit for ages and finally decided to build it last Christmas to go with my Airfix F6 - to be fair the kit goes together ok, just my cack handed modelling that made it more difficult. The base kit was actually an F3 but I wanted to do an F1a as I had a spare Airfix F1 fin. So with that in mind its probably not 100% accurate, I shortened the ducting on the lower fuselage but theres probably more I should have done. The Eagle Eyes among you will probably notice the markings on the fin are not quite right for an F1 either, they are modified F3 decals kindly supplied by fellow Britmodeller Rob G (Cheers mate!). All OOB apart from the pitot tube. Paint used was Revell Aquacolour Aluminium & Silver and yellow and black for the spine and fin. Anyway, here is it, only managed to get a few passable photos :-)3 points
-
Sprues on display at the Malaysia Military Hobby Show. Mark3 points
-
That, my friend, is just downright cheating ! No more free decal sheets for YOU ! mike3 points
-
Quick update everybody; expanding the answer to Keith's question, here's how the propeller blades look like after completing the painting and with some chipping on the black side too Last night I also managed to mask the canopy and airbrush a Tamiya Flat Black coat on it (internal frames on Aermacchi built C202 and C205 were black) Ciao3 points
-
3 points
-
Melisa has been showing me her Baclavas. Lovely they are, really tasty for a quick nibble. A bit later I'm going to tuck into her pilaf . Does anyone know where I might find some yoghurt? 💃. T3 points
-
OK so the assembly of the sub components is done. Intakes to the main fuselage... And glued into place The joints are invisible... And the very important and visible nose section to main fuselage. These two are meant to come together... Closer and time to add liquid cement... Underside needs to fit too... And here is the result - as good as it could be. Note the little "dent" in the joint of the centre square panel is the result of a previous dropping of the main fuselage onto the desk - DOH! So the worries about it coming together were needless. Compliments to Tamiya's excellent engineering and quality. They don't produce many models only one or maybe two a year bit they are outstanding when they're released. A real treat for the model maker. Next pictures will be in Ready for Inspection. Thanks for looking!3 points
-
A Heliotrope is a metaphorical balloon attached by string to a small child... and can someone please identify what I just trod in?3 points
-
Mrs B says thanks guys for the Birthday wishes - very kind of you Thanks Bill and Nigel - pleased to have you watching Thanks Ian - is it that they're legless or because of the all over tans? Hmmm. the crew have now been finished and are ready for seating: Untitled by Ced Bufton, on Flickr TT asked if the moulded bomb aimer had a face: Uh, yes, if you squint. This damned heat is slowing me down and my task today has been sorting out my 1:1 DIY tools. Load of junk but some good and treasured old tools. In danger of actually doing something with them if I don't put them away again quickly!3 points
-
I thought a heliotrope was some kind of navigational device.... Sorry I went AWOL Bill, went out for some air & got cornered by the chickens - bleedin' monsters they are, had to wait for to come rescue me...!!3 points
-
I was walking past and heard a noise and came in to investigate. I think you need a few bin bags to clear up the mess. And who painted the bath heliotrope? Trevor3 points
-
First coat of blue paint. Elected to go with Humbrol Oxford Blue enamel. Might not be strictly correct but was good enough for my dad when he built the same kit 45 years ago....3 points
This leaderboard is set to London/GMT+01:00























.thumb.jpg.76f12b87ce9ca9929c9aabdcf8f9d2dd.jpg)
