
Leaderboard


Popular Content
Showing content with the highest reputation on 06/07/17 in Posts
-
While the forum was flooded with beautiful Tamiya Tomcats I was finishing the Hobby Boss F-14A. Goal was to make a accurate Persian Tomcat, so the choice was the Hobby Boss one. Added with Eduard Sidewinder Niner Juliets to represent the Iranian operated Pappa's variant the job was done. Besides the Sidewinders some other Eduard add-ons were used, Aires exhausts, Wheelliant weighed wheels, and Hi-Decal, well, decals. Hope you like!13 points
-
Hi lads, Finally finished another Sherman. I really enjoyed building this model. Now it's time to see what you think about it.13 points
-
Hi all. Here's another kit I recently finished. This time it's the Revell Tornado kit. Very nice details in the kit but quite some work to build. Almost all parts need cleaning up and some carefull fitting is needed in places. Decals from the Italeri kit were used and were not bad at all for their age. Gunze Aqueous over Alclad black primer was used. Weathering was dome with Mig Productions wash and pastel powders. Thanks for watching. René11 points
-
Dear all, A build I have been undertaking between other projects just completed last night. This is Eduard's 'Weekend Edition' of this particular kit - and what a great little kit. All fits together nicely and was something a little bit different in terms of aircraft genre. As a mainly OOB builder, I really like these Eduard weekend editions as I'm not a great fan of PE parts, and are cheaper to boot. I'm no longer using PB to upload images, so this my first use of another photo hosting site 'Imgur'. Regards Dave11 points
-
Hi Everyone, Finally finished my latest addition to my Indochina collection, My attempt at Czech Models 1/48 Grumman Goose kit Finished to represent an aircraft of Esc. de Servitude 8S, Cat Lai, Indochina, 1952 Built mostly from the box contents, additions being: Pitot Tube, Antenna Mast and Aerial Wire, Anti Collision Light, Window Blinds and Ignition Harness. Replaced some of the fiddley and weak resin items such as seat legs with more robust materials, especially as you can`t see them anyway Decals from Berna Decals set BD 48-81 Hope you enjoy, Thanks for looking Cheers Russ10 points
-
New models of AMG. Bf.109B & Bf.109D9 points
-
I really enjoyed the small Airfix kit. No issues during assembly. The decals are from the portuguese maker BlackCat decals.8 points
-
So having finished my build at 1:144 Scale I have decided to shrink back down to 1:700 scale again. I thought I should share my build of a kit I picked up at the South West Ship Show in Portishead a couple of months ago. I had not seen one of these before and was not aware of the manufacturer also there was a nice model of Victory on the stand and temptation got the better of me. I know that this model doesn’t fit with my usual of modern warships but my excuse is that HMS Victory is still in commission as the Flagship of CinC Fleet and features on the back of my Long Service and Good Conduct Medal. So starting in the usual fashion with the contents and packaging label The hull is cast in resin to a good standard the mast and spars are white metal with PE ratline. I bought the extra fret for the sails. The following pictures are my progress of my build so far. Much of it has been a lesson in hand painting which was made easier by using Vallejo acrylics. Rigging is 80wt cotton thread. More to follow soon. Thanks for looking.7 points
-
Hi folks little more progress to report, but some quite satisfying work.. I added steel wire to the U/C doors to mount them to the legs via a small bracket.. ..I then added some tiny tube brackets and carefully stuck these on as it was all dry fitted together to ensure alignment.. the wires were then cut down to size and the doors are a slide fit into the brackets so they can be tweaked at final assembly.. ..then both legs were primed and painted in alclad.. ..and this is sort of what they look like on the airframe.. ..and in the wheel well - these need more detail, but i don't think it's too noticeable that those upper arms are only half arms.. see you soon TTFN Peter7 points
-
Just finished this - reasonably happy with it. It is a nice, straightforward build - not too much filling and sanding, great fun, a nice subject. Mostly out of the box, I used Hataka acrylic paints, gloss seal coats by Pledge, decals ( 501 Squadron, RAF Filton) by Xtradecal. Top semi matt finish by Model Master acrylic, with some very light panel washes using Flory washes. Metallic finish was using Vallejo acrylic metal aluminum colour. I didn't go attempting multi metal shades, since the actual aircraft were painted high speed silver, rather than left as bare metal. I attempted "black basing" for some shading / tone variation. It didn't quite come out as I wanted, but I still feel it made a positive difference. Build thread:7 points
-
Hi all, tis is my last model. The plane has been riveted and AK product used for chipping. The plane is the mount of Major Saito commander of the 85th Sentaï. Cheers. DSC_0005 by jean Barby, sur Flickr DSC_0003 by jean Barby, sur Flickr DSC_0004 by jean Barby, sur Flickr DSC_0002 by jean Barby, sur Flickr DSC_0001 by jean Barby, sur Flickr6 points
-
G'day All, I'm calling this one as of now done. It's my take on the aircraft "flung" off HMAS Sydney between July - October 1918. Built OOB and rigged with Ez-Line. It's my third WNW kit. I experienced a bit of trouble with the decals cracking but other than that, any other dramas were of my own making. Apologies for the picture quality....one day I'll learn to take better ones....and today isn't it! Devo P.S. Rigging that little bullet fairing in the last pic was.......interesting6 points
-
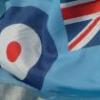
https://s5.postimg.cc/qcr3o5vxj/spain-sig.jpg https://s5.postimg.cc/i3jtnhrl3/france-sig.jpg https://s5.postimg.cc/n3h9vfx7r/gabon-sig.jpg https://s5.postimg.cc/ssxifr3dz/israel-sig.jpg https://s5.postimg.cc/hhuurdwiv/Oz-sig.jpg https://s5.postimg.cc/q7ncehomf/saaf-sig.jpg https://s5.postimg.cc/q1e8p54vb/swiss-sig.jpg https://s5.postimg.cc/atypo5tyf/kuwait.jpg https://s5.postimg.cc/jtsf9zh0n/Peru-sig.jpg There you go, feel free to use and if I've got anything wrong (thinking direction the 'Roo is facing?) let me know and I can correct. If I've left a participating nation out, ask for it and I'll knock one up. In case anybody isn't sure how to insert a signature, click your name at the top of the page on the forum header > from the drop down menu, click 'account settings' > on the left side of the next page is a 'signature' option. Click it > copy the link to the sig you want (above, next to each graphic) and paste into signature field. The forum software automatically embeds it.6 points
-
SAAB B-17C, Danish Army Air Corps (Hærens Flyvertropper), Marivox 1/72 Made this one back in 20125 points
-
An imagined interception of a Miyashishev Bison, somewhere over the North Sea in the '60's Both planes and sea are modelled in Modo with a little postwork in Photoshop..5 points
-
It looks like the 'Heroes of Kosciuszko' will be a popular scheme in this Group Build, and I plan on a adding a couple more - the man and the squadron can not get enough recognition in my opinion. Here is where my 1/72 Kosciuszko squadron collection stands so far. I guess it's time to add some jets to the mix, and this Group Build is the perfect opportunity. I'm planning on using the Italeri and Trumpeter kits. I've got a few aftermarket bits winging their way here now as well. Can't wait to get started!5 points
-
HHi,just a touch of weathering to suggest Normandy dust5 points
-
Hi everybody; on with painting - but first a little chipping on the spinner and propeller blades. I read somewhere last week about using a brass brush to effectively chip paint, so I used this Dremel tool (only the tool, not mounted on the Dremel ) What I did was to gently tap it on the area I wanted to show paint chipping (in some cases tapping and spinning at the same time) Then I masked the main airframe for the Gloss Grey overpainted areas I airbrushed Tamiya Neutral Grey mixed with some Future and thinned with IPA Insignias and codes are going to be next; that's it for the day, comments welcome Ciao5 points
-
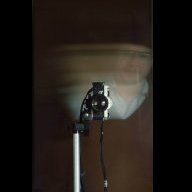
Yesterday was a holiday here in the States (out of respect for the British hosting this site, I won't go any further than that). I had hoped to some get time in for building but events conspired against me. I was only able to get a couple of things done. Trumpeter would have you place the engine exhaust much too deep in the fuselage, the nozzle should be even with where the airbrake petals attach. I put it in the correct location but with the lack of a forward attachment point, I had to improvise some bracing to keep it from wobbling around. I also added wiring details to the landing gear. This is part of the Eduard PE set, which saved some effort but it was still quite a fiddly job and took longer than I would have liked. I'm just about at the point where I can close up the fuselage. Although none of the reviews or builds I've seen online have mentioned need for nose weight, I believe I'll add some anyway just to be on the safe side. On a side note, I found that there is a local chapter of IPMS in my city (Huntsville, Alabama) and attended my first meeting a couple days ago. They're hosting a show & contest on August 26 -- that gives me about 7 weeks to finish my Thud (less, actually... I will be on business travel for the better part of a week in mid-August). Better get cracking!5 points
-
Right. I plucked up patience to complete the build tonight. Turns out the title of my opening post who doesn't like a shark mouth is slightly ironic. I actually dont. Ha ha Anyway, here's a few pics of the finished product. It's definitely not the best and its not winning any awards. It was a nightmare but it's done and I'm proud of myself for finishing it. The left undercarriage leg is refusing to stick properly so I'm going to have to be super careful with it. On to the pics.5 points
-
Hi all! My latest two completions, a pair of RAF highback Mustangs. First up is the Accurate Miniatures Kit converted to a Mk.1 using the Ultracast conversion. Wing panel lines filled to simulate the putty used by NAA. Eduard Seatbelts, prop and exhaust stolen from an Eduard P-39 kit. Tamiya paints including a home-made 'Mixed Grey' from Tamiya MSG and Black. Decals from the Spares box to represent and aircraft of 26 Squadron. AM148 later became a test aircraft for Rolls-Royce. I'm sure this is a lovely kit however my butchery to fit the Ultracast conversion didn't help!!! Second is the Tamiya P-51B built as Mk.III. Wing panel lines filled again, Eduard seatbelts, Rob Taurus vac canopy. Tamiya paints and Techmod decals to represent the aircraft of Sqn Ldr Bohdan Arct of 316 (Polish) Squadron. He bailed out of this aircraft and was captured in September 1944 after an engine failure. Not much else to say about the Tamiya kit, it's an absolute beauty! As with the Fw190 thread, apologies for the out of focus pictures. It's 50 degrees outside and I don't want to go back outside to take new ones! Thanks for looking, Chris4 points
-
Hi guys, I'm not usually an aircraft builder however I decided to incorporate a diorama into this build and have a go at adding an electric motor to one of the engines, also this is my first attempt at modelling a grass base. I wanted a patchy and worn looking effect where a lot of work seems to have been carried out under the plane and the grass has suffered for it. I hope you like the results.4 points
-
Airbus A330-200 Gulf Air Reg A9C-KA - New Livery Concept! Kit - Revell Thai A330-300 1/144 scale Engines - Braz 2 x RR Trent 700 Decals - F-DCAL 787 Dreamliner Gulf Air This model started life a rather shabby Air Mauritius and this was the original conversion from the -300 to the -200. Engines were different again from the original kit. thanks for looking!4 points
-
Hi all! Here is my recently completed Flitzer. A nice quick build, especially since I only added seatbelts! I used the kit decals and painted with Tamiya paints. This is my first attempt at black basing and spraying the mottled camo. I sprayed through my Badger Renegade airbrush and really like the results. Tried to get nice, scale-sized splotches. Thanks for looking!4 points
-
Only additions are Brassin' bang seat, wheels & Aires VT nozzles. Really good kit, no build issues, definitely will build another one, only dirtier with replaced RAM patches. John4 points
-
Mrs B says thanks guys for the Birthday wishes - very kind of you Thanks Bill and Nigel - pleased to have you watching Thanks Ian - is it that they're legless or because of the all over tans? Hmmm. the crew have now been finished and are ready for seating: Untitled by Ced Bufton, on Flickr TT asked if the moulded bomb aimer had a face: Uh, yes, if you squint. This damned heat is slowing me down and my task today has been sorting out my 1:1 DIY tools. Load of junk but some good and treasured old tools. In danger of actually doing something with them if I don't put them away again quickly!4 points
-
The new night fighter scheme of Dark Green and Medium Sea Grey with Medium Sea Grey under surfaces was ordered by HQ Fighter Command from 25 August 1942 and was mandatory with the exception of aircraft in the intruder role. There was a very brief period from 6 August 1942 when the scheme had been promulgated as Dark Green and Ocean Grey over Night with the proviso that the upper surface paint was to be "applied over an under-coating which is lighter than the present under-coating in use" but it was strongly objected to and quickly rescinded for the revised 25 August order which went to everyone including MAP. The 25 August order also specifically mentions Beaufighters being "flown in" to a contractor to begin the re-paints at the rate of one per day and that it would take "several months" before the Beaufighter re-paints were completed. It also states that all units holding night fighter aircraft (Mosquito, Boston, Havoc, Hurricane and Typhoon as well as Beaus) should commence the re-camouflaging immediately. On 18 October 1942 HQ Fighter Command further instructed that Night Fighter "Intruder" aircraft were to be finished in Dark Green and Medium Sea Grey over smooth Night under surfaces. Therefore it seems unlikely that this particular aircraft would have been in Temperate Sea scheme with Night undersurfaces in 1943. It is possible that it was in Dark Green and Ocean Grey over Night before a re-paint but that would be dependent on the date of any photo. I'll post copies of these instructions on my blog - only because I can no longer post images here. There is a lot of preliminary documentation from early 1942 covering night fighter camouflage trials which I'll also post in due course. It has some surprises in it. Nick4 points
-
Morning folk's,I really love the way Trumpeter have approached the landing gear which I had doubt's over when I saw each leg was a four part assembly but everything fit's beautifully and lined up as planned. I cut off the glazing for a dry run before painting and as with the Revell G10 all's well.4 points
-
Gun armament was not a requirement for the Royal Navy, so the FG.1 was not fitted with the capacity to carry the gun pod. This included the 14 that were delivered directly to the RAF to form No.43 Squadron. RAF Phantoms were purchased for ground attack duties, so the gun pod was an obvious weapon for the FGR.2. Once all FG.1s were transferred to the RAF they were equipped with gun pod capability as they went through maintenance,upgrade etc. As regards Skyflash, Hook is quite correct. It was first delivered to the RAF for use on the Phantom in 1978, but no RN Phantoms were ever equipped with it. The AIM-7E remained the standard medium range weapon throughout the FG.1s service in the FAA. stever219: You are correct; the Airfix FG.1 will feature both styles of fin top.4 points
-
No Crisp-Roc Let's have Crisp Roll While awaiting for a Crisp Roc & Roll I think that I've hit the bottom of the bottomless Sincerely Corsaircorp4 points
-
I've applied the flat coat, Gunze 182 in this case, also attached the tail feathers and prop. The splash of color from these really complements the dirty camouflage. Thanks for looking.4 points
-
Don't look at me; I'm up to my ears in Sea Kings. I don't even possess a Roc in my stash; a Skua, yes, but no Roc. Of course, this might well change, though not unless I get a flipping job soon! In short, don't hold your breath for any Crisp-Roc anytime soon.4 points
-
Thanks to everyone for the kind support over the past few weeks, it's been greatly appreciated. I've re instated some of my threads but this will be an ongoing process for a while. Anyway enough of that! We has some bench time. not a lot but some. I figured the internal cloth would be kind of dirty white as all pics are BW but look that way do I pre shaded in a lighter brown. then using a Tamiya mix of deck tan and white we arrived here. looks wonderful to me not because it's particularly good but because it's a model, and I'm painting it. feels like it's been an age. Any road the wooden parts got a coat with a hairy friend. im going to add some grain to the front and back black up the ammo in the pouches then gloss coat ready for the first dark wash. before that I dry fitted the fuel tanks. all looking good. As I said not much but it's great to be back at it. Thank you so much for sticking with me and popping in to have a little look. Going through all my old pics and popping them on Flickr has really lit my Modelling fire again. Looking forward to more of this beauty. Take care guys and as always, happy modelling. Johnny's back!4 points
-
The Saab 36 Nidhögg Sweden's nuclear weapon programme was started after World War II and the American atomic bombing of the Japanese cities of Hiroshima and Nagasaki. In the early years after the war Sweden made a decision to become a neutral power that could defend itself militarily against any invading power. The biggest threats to Sweden were identified as being Soviet nuclear capabilities and in the late 1940s and 1950s much research was made into nuclear weapons to act as a deterrence to them. In 1948 the first solid plans on how to create an atomic weapon was presented to the FOA ("Försvarets forskningsanstalt", Swedish Defence Research Agency). Plans were established to run a civilian nuclear power programme in parallel, using domestic uranium resources as nuclear fuel. The Ågesta and Marviken reactors were to be used to produce plutonium for the weapons, while also producing energy. Plans were created to develop initially aircraft to deliver these nuclear weapons, and later on, submarine launched missiles as a means of delivery as well. All of the nuclear development activities took place at the FOA. The plan was to produce 100 warheads in a timespan of ten years. During the 1960s the programme rapidly progressed. The turning point was on 18 August 1968 when a 10 Kiloton device was detonated deep underground in Northern Sweden. The explosion registered on seismographs around the world but was dismissed as a "minor earth tremor" by the Swedes. The Soviets and the United States were uncertain whether it had been an earth tremor or not. Scandinavia and in particular, Northern Sweden, is a seismically active region. For the Swedes, the event proved to them that they now had a successful design which could be weaponised. This test was followed by several more, all in the tens of kilotons and finally in a much larger warhead in the 50-60 Kiloton range, 18 months later. By this time, suspicions were aroused amongst observers. The Swedes though, again announced that more earthquakes had occurred. Both superpowers though, started to watch seismic events much more closely in Scandinavia. The Swedes never conducted another test, having proved the design and it's scaleability. Officially, all plans for nuclear weapons were scrapped in 1969. Unofficially, the Nuclear Programme continued in deepest secrecy. The first weapon produced was a free-fall bomb, with an estimated yeild in the 100 Kilotonne class. While the Nuclear Programme had come to fruitition, Saab, the Swedish aircraft manufacture had been designing and building the means to carry it. Several designs were proposed, some more exotic than others. In the end, taking a leaf from the book of French designer, Marcel Dassault, the decision was taken to simply scale up the Saab 35 Draken fighter. Utilising the aerodynamic data accumulated from the design and testing of this fighter meant that the design and testing process for the new strike version would be decreased. The result was the Saab 36 Nidhögg. Powered by twin license produced Rolls Royce Spey engines, the Nidhögg was capable of Mach 2.5 at altitude. It could carry a payload of 4,000 lbs, 2,000 nautical miles in it's internal weapons bay. It had a crew of two. Initially armed with nuclear free-fall bombs, later in it's career it was able to carry the RB-09 "Mjölnir" Nuclear Attack missile which allowed it to attack targets over 400 miles distant. It was able from bases in Sweden to reach all major targets in the Baltic and even as far afield as Moscow and Murmansk. The Saab Nidhögg were stationed on remote airfields with hangars built inside tunnels under many meters of granite. Through out it's service life, the aircraft received several upgrades. Perhaps the most important were the addition of canards during it's development and the addition of an attack missile late in it's life. Intended to improve controllability at lower speeds and high angles of attack duing the approach, particularly onto the roadway emergency airfields that the Swedish Air Force expected to be the only ones which were likely to survive a Soviet Nuclear attack, the canards earnt the aircraft it's nickname amongst some of its crew who resisted the Swedish Air Force's official discouragement of such frippery - "Puckelrygg" - "Hunchback" in Swedish. The RB-09 "Mjölnir" nuclear attack missile enabled the Nidhögg to be able to attack from outside the Soviet SAM defences. Named after the hammer used by the Thundergod, Thor, it had a range of over 400 miles. Powered by a ramjet, the missile flew at Mach 3 and could be pre-programmed to fly a dog-leg course and attack from either low or high altitude. It carried a 100 Kilotonne warhead. The Nidhögg carried one missile semi-recessed into its weapons bay under the fuselage. Nidhögg was deliberately chosen as the name of this remarkable aircraft. It reflected it's role, as the weapon of last resort. Nidhögg was of course the "dragon who gnaws at a root of the World Tree, Yggdrasill," in Norse mythology. Nidhögg is said to have been controlled by only one person, the Norse goddess named Hel (Goddess of the underworld for which the Christian realm of Hell is named after). When Nidhögg was released, Ragnarök - the end of the world - would occur. The Swedish high command recognised that if there was a need for Nidhögg and it's weapons, then the end of the world had arrived. The existence of both the Swedish Nuclear weapons and the Saab Nidhögg strike aircraft was not publicly revealed until 1993, when the Swedish Government officially announced that as the Cold War was over and the Soviet Union had collapsed, their need was ended. Throughout the career of the Saab Nidhögg, neither superpower had been able to detect it's existence. The Swedes had taken special care to only fly the aircraft at night and made sure that it was never left stationed next to a standard Saab 35 Draken fighter, so it's considerably larger size could not be easily ascertained from satellite photos. Keeping them inside the hangar caves kept them out of view as well. The revelation came as a surprise to the world. While the Soviets and the United States had both had their suspicions, they had never been able to confirm them. Sweden, with South Africa were the only two nuclear powers to unilaterally relinquish Nuclear weapons of massed destruction. Today, one Saab 36 Nidhögg resides in the Swedish Air Force Museum at Malmen Airbase in Malmslätt, just outside of Linköping, Sweden. Where it is displayed next to an RB-09 "Mjölnir" missile. A remarkable aircraft that thankfully, never flew an operational mission. The Model The model is a combination of a venerable Lindberg Saab Draken and a Heller TF-104 forward fuselage. Despite it's age and its several toylike features, the Lindberg kit had little flash and fitted remarkably well. The TF-104 nose went on extremely well as well, almost as if it was designed to. The undercarriage comes from a spare Mirage IV set I had in the spares box as do the drop tanks. The tail cones are Maestro Draken ones. Along with quite a bit of Milliput, PSR and effort, the aircraft has been painted in a combination of Vallejo and Tamiya acrylics by hand. The bang seats are Pavla ones. The missile is scratch built from spares in the spares box (couple of pods/fuel tanks and some plasticard for fins). The cart it's posed on is a modified Bloodhound one. The markings were supplied by Pellson (thanks very much!) after I discovered my stock of Swedish roundels had all perished. I originally wanted to paint it in splinter but then found out only two Drakens ever wore splinter so decided to go with the green/dark blue scheme. This fitted well with the subterfuge contained in the story.4 points
-
Hobby Boss 1/48th F-111C Paint: Mr Hobby and Tamiya acrylics, Model Master Metalizer Lacquers Extras; Eduard BigSin F-111C set Eduard – F-111A Interior set Novascale – F-111C RAAF 1 & 6 Squadron decals OzMods – F-111 Afterburner Cans Ozmods – F-111C Wheels & Tires Ozmods – F-111C Long Range Fuel tanks Custom made and cast Recon Pallet. build link This was built as part of the F-111 STGB. I had always wanted to build an F-111 having worked on them in them in the 80’s with the RAAF, so though this would be the perfect opportunity. For something a bit different I’d build one of the Recon versions which I worked on, sounded simple…… My first mistake was the model, the Hobby Boss model for those who don’t know is an absolute dog of a model! Everything fits really well and is a joy to build, but not if you want an F-111 that’s accurate. If you want a F-111C forget it, and if you want a Pre-Pave Tack or Recon bird good luck!! This was going to be an uphill build right from the start plus I ended up being away for over 8 weeks of the build. The real hard part of the build was the Recon door, nobody turns out a 1/48th conversion kit, and the only conversion kit available anywhere is an old rough one in 1/72nd. I ended up using this for some of the design work. Actual detailed draws are just about non-existent as well (though someone here is bound to have some). So I had to make the door from scratch then cast it, for something so small there’s around 40 hours work in it. That part was easy! The rest of the build was such a pain in the a#*e! Anyone following could attest to my constant ranting about the model. If Hobby Boos had just spent 30 minutes of research on the internet they could have fixed the majority of issues with the model! Unfortunately in the end I just fell out of love with this build and the model, a bit heartbreaking actually for something I had really wanted to do. I ended up just going through the motions to finish her and get her off the bench! It was a hard build and definitely not some of my best work…though the Recon door did turn out quite nicely. Please Tamiya release a good 1/48th scale one….I now have a door for it!!!!! Thanks for looking and please enjoy, comments welcome, you can be a savage as you wish!4 points
-
Dora Wings is to release 1/72nd & 1/48th Percival Proctor Mk.I/II/III & Vega Gull kits. Source: https://www.facebook.com/permalink.php?story_fbid=2005654616331772&id=1929101897320378 V.P.3 points
-
Fred's comment arrived a bit too late, I had ever wrapped my branches. But I will keep my wrapped branches, because I really don't see any contrast of color between the branches and the manifold. And I like it like that... And I am fed up doing and redoing. Read Lafontaine tale "le meunier, son fils et l'âne", you'll understand my state of mind... In other words, maybe I am wrong, but I assume!3 points
-
to comfirm 1. Training scheme with the sharkmouth in the green/grey 'angular' camo 2. Operational scheme in the green/grey disruptive camo 3. Operantional scheme in the dark grey/grey camo with sharkmouth and russian flag colours3 points
-
Formula 560 Canopy Glue I use all the time: dries completely clear, fills gaps, and is actually very strong after 24 hours to cure fully. (It sets much faster than that, but it continues to gain in strength for 24 hours, so if I'm using some nice rigid clear parts to pull a car body into shape, for example, I leave it taped and clamped for that long in the airing cupboard) http://www.modelshopleeds.co.uk/catalog/product_info.php?products_id=105 best, M.3 points
-
Given the date quoted, the night fighter scheme of DG/MSG would be the production standard. The Night underside would normally indicate an Intruder role, but local requirements may have changed that. The Temperate Sea Scheme would not normally have appeared on a night fighter, so the question is in which role was 46 Sq employed at this time? In 1942 it was in use as a Coastal unit, but from the beginning of 1943 it returned to a night fighter role. So the question may be when ND243 was built? And how long had it been on the squadron?3 points
-
Hello, Installation of the exhaust pipe fairing: The same thing after a lot of Putting and sanding .... I undertook to engravethe panel lines and the screw heads of the aluminum panels which covers the fuselage.3 points
-
Sherman is finished. Ready for inspection.3 points
-
Hello, the motor grader is mostly finished now. Some last details need to be done, also the base which I have begun needs some further work... But before I could go on I will leave to summer vacatiln now Cheers, Micha3 points
-
Yes and yes. There is no point comparing Hermes with QE they support different aircraft with different operating procedures. The fact that QE can carry far more aircraft can sustain a higher sortie rate and needs half the crew to operate her are hardly a source of embarrassment.3 points
-
Hi folks! Last year I built the wonderful Airfix Defiant as the famous N1801 "Coimbatore II", a nightfighter of 264 Squadron RAF, complete with lots of extras including Eduard photoetch, Barracuda wheels, Xtradecals, etc. You can see that build here. This left me with the quandary of what to do with my old MPM Defiant, built something like 9 years previously while I was still doing A-levels! I did take a photo of the model last year but it's gone astray so you'll have to make do with this one from 2008: As you can see, same scheme. I'll hope you'll agree it's not as good as the one from 2016! Anyway, having thrown all that AM at the Airfix kit left me with a lot of bits left over, including most of a decal sheet, a complete set of undercarriage doors, and two spare canopies. So I elected to strip down and repaint the MPM kit, and finish it as a Dunkirk/Battle of Britain machine - attempting to fix some of the worst inaccuracies of the MPM along the way. These chiefly involve the turret and canopy (both 2mm or so too high, the turret is also too large in diameter), and the undercarriage legs, which I'd already shortened by about 2mm back in 2008 shortly after the above photo was taken - but still looked too long. A quick test fit confirmed the Airfix closed canopy made the model look vastly better, and I combined this with sanding the turret down from the bottom. The undercarriage legs were quite badly damaged from being cobbled back together before, so I attached the Airfix door parts directly to the wing undersurface as a height guide and a solid anchor point, then having reattached the cleaned-up wheels I pieced back together and cut down the legs until the right amount of tyre showed underneath the bottom of the doors. This was another 2mm at least removed so the MPM legs are a grand total of 4-5mm too long. That's about a scale foot. I also had to scratchbuild some replacements for parts lost or too far gone to save, such as the rear undercarriage struts, radio masts etc. As usual it's brush-painted, although the Sky and the flat varnish come from a rattlecan. Decals were from Xtradecal stock, stencils I'd saved from the kit first time around (MPM helpfully provided two complete stencil sets, one in red and one in black!), and the fin flashes from the Airfix sheet. Scheme represents L7006 of 264 just after the Defiant's brief period of glory over Dunkirk. Hope you like it! I think this proves the the MPM kit can be made to look pretty like a Defiant without major surgery, although with the Airfix available it's almost certainly not worth the bother! Lastly a brief comparison shot. I think the MPM may still be touch plump around the centre fuselage, and it lacks some of the subtle shapes Airfix capture well, but the modifications make it look a lot better in my humble opinion3 points
-
And now back to the MiniArt kit itself and its poorly designed parts... I was going to have a little rant about their stupidity in designing the railings for the front steps, but I was half way through a paragraph and lost the will to live. Needless to say that once again, extra work had to be done to get the parts to fit together, and yet again the so called instruction sheet was as useful as a chocolate Sabot Round. Anyway, I've fitted the sloping railings together and have fitted the two sets of square railings for the platform at the top. That's 4 parts in total. They come on 4 separate sprues........................ Wooooohoooo!... I was just interrupted by a low flying Herc! And when I say low flying, I mean I could have hit it with a well aimed stone! It would have taken off from RAF Lyneham where they were once based. Nowadays they are an uncommon sight, but they always seem to practice their low-level manoeuvres when they do pay a visit., right over the top of our house and banking sharply over the wooded valley. Great sight! Where was I? Ah yes. 4 sprues, with 42 parts between them, 38 parts of which are not used in this kit. Talk about a waste of plastic. (Only of course, I will be using the extra parts in other dioramas.) So, I gave the parts their undercoat. Guess which colour? Yep, Brussel Sprout Green. Simply because I had some left in the airbrush. I will of course paint them the same blue as all the other blue things. No photos, because I bet you're all bored stiff of seeing green things, even if they are Brussel Sprout Green as opposed to Lime Green. I may be going fossil hunting tomorrow, in which case no progress will take place until the evening. It will be quite rapid progress though... with the railing to paint and fit, and then the exterior wall lanterns. (I'm going to make two as I have a spare or four) TFR, (Thanks for reading) Badder.3 points
-
The final stretch3 points
-
Thanks chaps - driving in shorts of course... and yes, vinyl seats are to be avoided! Thanks Simon Wow, what a trip - well done that man Thanks Alex - your method as advertised earlier on! Works really well but the 'fine' is white and white and does need more attention methinks Thanks Bill. Tea in bed this morning and lunch at a local organic farm. She's now out with the WI on a walk around Bath. Crew painting is stalling assembly but I have touched up the seat and other bits: Untitled by Ced Bufton, on Flickr Oooh look, fire extinguisher - nearly missed that!3 points
-
evening chaps and thank you interesting suggestions, thank you - I have a bit of time to decide so will give it some thought a slight change of pace now, I have finished the canopy though not futured it yet so it is safely put away - it was time to turn over and start finishing up the U/C.. first up is this wierdly shaped bellcrank and the arm it attaches to at the top of the leg (thanks for the pic Tony :)) I started out by making the central spigot from tube as the basis, with a few watch cogs for the gears - the shapes themselves were taken from plans and cut from sheet brass (this turned out a bit of a mistake as will be seen in a minute..).. ..the sheet parts were sheathed in thick card so I could shape the 'I' section profile.. ..and some time later they were pretty much complete... ..the same was done for the arms at the tops of the legs - plus on these, the bearing where the contraptions meet each other was made from thick brass plate.. ..the mistake was forgetting the top wing skin on the model is not scale as it has big brass strengthening plates in it so those complicated bearings needed the bottom arms removing to fit in the wheel well.. I added other details like the uplocks and bits & bobs and these are pretty much ready for paint before I add the doors.. ..when they are in place and the skin is added in this area, the loss of the upper arms shouldn't really be seen so not noticable (apart from me telling you :)) paint next & back soon.. TTFN Peter3 points
-
As promised, I have started on the landing gear, having decided to ditch the SCS metal gear for the stock plastic ones. But, first I built up the main landing gear doors from the Eduard PE set. Each door is two pieces laminated together with superthin CA. After the glue had set, I used the original kit doors to as a mold to bend the PE ones into the correct shape. I always dread using superthin CA, as it seems to always find a way to get on my fingers! This time, I tried a different technique. I bought a box of cheap lab pipettes from Amazon, and let capillary action draw the CA into the pipette stem. Then, it's just a matter of touching the pipette wherever I want a bit of CA. Sometimes I get a bit more than I want, but a touch with a paper towel quickly draws off any excess. But now, back to the landing gear. First, I airbrushed the kit parts with Vallejo's aluminum Metal Color acrylic. After allowing a good 24 hours to dry, I began assembling the gear. The Thud carries a total of four landing/taxi lights -- one on each main gear and two smaller ones on the nose gear beneath the ILS radar reflector. A while back I had read in another post about using miniature lenses to represent landing lights, and I had bought some in the appropriate size for this kit. The lights for the main gear were no problem to install, but the nose gear lights gave me fits! First, Trumpeter molded these lights onto the piece with the ILS reflector, so I had to cut those off. The problem now was that there was nothing left that I could use to attach the replacement lights. My solution was to drill a very tiny hole through the kit part, below the ILS reflector, into which I threaded a thin plastic rod (actually, a bristle from a household cleaning brush). That gave me a place to glue my lights, but my troubles weren't over. I tried using thick CA, but whenever I tried to glue a light into place, it fell off before the CA could set. Mind you, this is a very tiny light and my hands aren't as steady as they once were! I eventually gave up on the CA and instead used good, old fashioned Testor's tube cement. Results of my troubles are shown below: And now for something completely different! On returning home this afternoon I saw on my doorstep what I, at first, thought was an old shoelace. I nearly stepped on it before realizing it was alive. You can't tell the scale from the pic, but this little guy was at most 1/4 inch wide, yet disproportionately long. I gathered him up and transplanted him to my garden where he will hopefully find a good home.3 points


.thumb.jpg.d17ff607fc7e89ed057e63fcb6f2a888.jpg)


This leaderboard is set to London/GMT+01:00