
Leaderboard


Popular Content
Showing content with the highest reputation on 15/02/17 in all areas
-
She's finally done! It took only 11 monthsIt's the ancient Academy kit, which I still believe is far more accurate in terms of the overall shape than the modern HobbyBoss one. Aftermarket goodies: Verlinden cockpit (modified according the F version) and AN/ALQ-131 Paragon flaps & slats FlightPath Pave Tack Master pitot tube Eduard GBU's, some of the photoetched details NorthStar wheels Afterburner decals Made of scratch: gear bays, bomb bay, doors, wheel legs, nozzles, Pave Tack cradle, blah blah... Cheers from Czech rep. Andrew F-111F Miss Liberty II, No.70-2390, 48th TFW flagship, Col Tom Lennon56 points
-
Hello guys. I finished this model last December. Great kit. Out of box except the cockpit and some small details as antennas and cables. The biggest problem is the Hasegawa decal. I did not use the orange ray decal. Bad quality. Terrible! I made a stencil with 3M tape and painted it. I used acrylic paints - Tamiya and Gunze. Please enjoy and comment. Cheers, Cristian Zarichta27 points
-
Hi all, I'm a long time admirer of the work displayed here & have taken ALOT of inspiration from the astonishing work posted. I've only ever built 1:20 F1 Cars & "thought" that an Aircraft would be pretty similar........I was wrong! Pre-shading, Post-shading, Weathering all things I'd never had to deal with before, so I'm very grateful to have had your work to refer to. I'd wanted to build a Spitfire for a while & thought that G-ILDA would make a good subject. I started by using the 1:48 Brigade TR-9 Resin kit but felt that the Hasegawa Kit it was designed for seemed a little, basic. So I complicated things by using the beautiful Eduard 1:48 Spitfire & having to file, Sand & fill just about every joint & mating surface in order to make it all fit. As if that Wasn't enough I was determined to add the stunning Eduard Merlin too. This caused Headache after Headache & although the Bodywork/Cowl still need work it's vastly better than it was! The Forward Cockpit is the Brassin upgrade set & the Rear is the "original" standard Cockpit chopped around. Eduard three spoke Wheels were also added. Nothing about this is standard & although it still needs work, it's pretty much completed. Weathering has been kept to an absolute minimum simply because SM520 is so beautifully maintained, if anything the Exhaust Soot I've added is a little on the heavy side. I used Windsor & Acrylic Varnish mixed to my own taste (the Matt was TOO Matt, the Satin TOO Glossy, so it was a suck it & see approach). Anyway it's taken about 18 Months (on & off) hope that you enjoy. Thanks for looking.19 points
-
One of the latest Eduard's kit. A real pleasure to build. Rendition of a Jabo of the 10.JG2 (F. Liesendahl) for a forecoming issue of Wingmasters. Cheers Pierre17 points
-
This is my recently completed (though I may well add some more decals and a wee bit of weathering) 1:72 Airfix Vulcan XL390. Decided to go for the 70s Scampton scheme, and bought the aftermarket decals. Model is finished with a gloss cote as they liked to keep the Vulcans' shiny at that time. This has been the biggest project I have done (newbe 4 models in) and found the 80's plastic a challenge to work with, I seemed to spend weeks scraping plastic off and the intakes were a 2 week process of file > sand > paint > file > sand > paint x n to get them as smooth as I could. This was the first time I had modifies a model to get the desired finish too, filing the tail to round it. There's much I am pleased with, and also lots I tend to over reflect on. I know this is isn't as professional looking as most that is published here 'as finished', but some of us are simply mortal in the world of model making16 points
-
Hi Everyone, Thought I`d show you some pic`s of my very latest effort, yet another attempt at making Matchbox`s finest into something resembling a `Fat Faced Spad` Finished to represent an A-1E of the 602nd Air Commando Squadron, based at Bien Hoa Air Base, South Vietnam in the early/mid 1960`s Made quite a few improvements, including: widening the propeller blades, reshaping the cowl front, ignition harness, vent on the fin leading edge, wing fences at the wing trailing edge,...... steps on the fuselage, static whips on the rudder, much work on the undercarriage and wheel wells, tarted the seats up, a little detail in the `blue room`, aerials, made a windscreen wiper... and cowling shutters ( that you can barely see ). All were made from scratch, I did get an old Monogram one with the intention of robbing it, but decided to build it instead ( coming soon !) the weapons all came from the stash and I tried to recreate a fairly common load for the plane and time frame The decals came from Caracal Decals set CD48046 Hope you enjoy, thanks for looking Cheers Russ15 points
-
- The weather is quieter for a while so , the photos can be taken ib the openb at last -One of the main mistake of the Trumpeter kit is the bad shape of the rear fuselage. The first photo show the kit OOB This one is the real thing now the KZ About Begemot decals ,the Su 24 sheets are wonderful and I couldn't resist to the sharkmouth. The transfer is very large and so, difficult to settle around the nose gear well, door and nose both side probes. The instruction sheet says nothing about this . I've been obliged to resort on a hand painting job I cannot do better unforetunatly. notice the forgotten masking tape on the laser range finder and on landing lights; THe weathering is very heavy according to Begemot but Ididn't know to what extent I may have been heavy handed14 points
-
There has been quite a lot gong on with this build over the last day or so. I began by gluing the main undercarriage mountings in place in the nacelles and went on to button up the wings. Once cleaned up, the fit of the upper and lower engines was bad and needed a lot of filling and sanding. Re-scribing has begun on these areas. All this left the recesses for the exhausts greatly reduced in definition. This was overcome by adding 10 thou' strips of plastic to the edges. The tail planes have been re-scribed and cleaned up. I decided to order a new canopy for the kit (that will ensure my Falcon set shows up!). This is designed for the Italerii kit so, to guard against the possibility of it not being able to made to fit, I decided to initiate plan B and start sorting out the kit parts. Cleaned up, these are not too bad a fit although some work will be necessary to restore some clarity to them. Thanks for looking and enjoy the pictures. Martian13 points
-
Hi all, Here is one of three Eduard MiG-21s I've just finished. This is their 1/48 kit with Begemot decals and finished in Mr Color 8 Silver. This was from the ProfiPak boxing, although there's a lot of PE I did not use. Full write up at https://jonbryon.com/eduard-148-mikoyan-gurevich-mig-21sm-fishbed-j/. Comments welcome, and thanks for looking. Jon11 points
-
Hi This is my last kit from Special Hobby. This B-18 was quite easy to build except around the engine cowlings which are different depending of the chosen type. As a pre-war era aircraft this one is clean. She is from 7th Bombardment Group, Hamilton Field, California 1938. She should be published in Model Airplane International. Patrick10 points
-
Let me guess. Hypnotist? Member of the Swedish Royal family? Chocolatier? Danke Johann! Painting those blighters is fiddly but satisfying out of all proportion to the task. That compass cutter is a brill investment for circles down to 5mm radius, but any smaller and I reckon Tomo's advice on a punch set is de riguer.(Unless you've a laser cutter at work alongside the 3d printer...hmm, there's a thought...) Them gloves are the business, - they don't rip half as easy as other disposable I've had, possibly due to being favoured by tattooists - even when I'm fumbling around in them the feeling of panache is so much better than a pair of yellow Marigolds... Thanks for your kind words on the roundels Tomo - I'd encourage anyone to at least try the process once. The RAF ones are fine of course, but the US 'stars n' bars' one needs some thinking-out! That video is classic. From a certain angle there's a roguish hint of Ian McShane as Lovejoy about Big A, even if you have to wonder whether he was the inspiration for 'smell the glove' in the Tap movie: Thanks Ian. There are two types of that Tamiya stuff, both the same grade I think but one set is marked out with a grid to make measuring and alignment easier. Had I know that before I'd have bought the gridded set instead of the plain I'm using. It sticks really well though - even on curves - and pulls off easily enough with no apparent damage to the underlying paintwork (on Tamiya acrylics that is). The only issue I had really was a slight bleed from the white undercoat so as mentioned earlier by somebody, sealing the edge with a layer of the underlying colour first before applying a white base should cure that. As I've spent the last few days swearing at circles, her ladyship has undergone only modest revision Martian. A little more Mr.S to make the blouse material smoother and more cotton-like in the folds: Plus a thumb to add: That forearm still needs some modest thinning/smoothing I see (aren't close-ups cruel at 1/72), but I'm most proud of having given her convincing rolled-up sleeves. Go figure... Cheers K! Do you know each time I see the little feller now I actually imagine I hear a scale roar coming from his jaws! Thanks, as ever, for all your comments and for reading my ravings. Tony10 points
-
Hello All, Time for a new cockpit, using card, leftover bits from the new Blenheim and other scraps. Compared with the cockpit supplied with the kit: It's going to be wheels up so I need a pilot and bomb aimer. I ended up using a pilot from a Lindbergh Me410 with arms from the Revell RAF set: Thanks for looking, Adrian10 points
-
Decided to attempt scanning my slides in date sequence where poss. The ones below were taken around the June time of summer of 1975 on one fine Sunday with a couple mates. We did this sort of thing frequently all year round but this particular day was fun and I hope you all enjoy a trip back..... First, Upper Heyford..... A couple 17 Squadron Phantoms made it worthwhile. One was XV467. Then on to Brize..... Among the Brits I logged this day were XL638,657, XM496, 516. Among the Belfast and VC s were XR808 and XV103( not those in the above pic!) for the 10s and XR365 Belfast. A few miles drive took us to Lyneham.... Comet C.4 XR398,399,396 and another. All ending up with Dan Air!!! Meteor T.7 WF825 Above and below, around the other side of the airfield... Other herks logged were,XV183,188,203,207,215,291,294,296,301, 302, 304, 307. Note the slight variations in the way the camo was applied! With one of two Iranian Herk visitors. The other was 5-129 ..and this USAF one passing overhead. This Varsity(WJ889) with a flat looking nose too. I think this was at Brize. The nasty flare in the pic was due to the camera back opening I think. It was a nuisance as it happened several times while I had the Zenit E!!! Which got replaced by a Nikon FM in 1978/79. On our way home we stopped by Farnborough to get this Hastings WD480 parked out on the North side if I recall right. Cheers for now many more goodies to come...9 points
-
1/35 AFV Club M35a1 Vietnam Gun Truck with Bravo 6 and Verlinden figures along with an awful lot of paint brush bristles. Thanks for looking Si9 points
-
Hi Guys, here is one of my latest build, finished a few weeks ago, The Azur Caudron 714. It's a nice kit, quite easy to build allowing spectacular painting schemes. The plane was excellent as a racer but was a poor fighter even though it performed in the hand of brave polish pilots. (and they needed courage to face Bf 109 E in that kind of plane). Thanks for watching, Cheers, Manu.9 points
-
Thanks Rob The kit exhausts are separate parts but are solid lumps, so I drilled them out - pre-drill at the back, drilled at the front: Here one is fitted to the B339C engine: ... no, it will look fine with a bit of black paint in there when it is done I attached the fronts of the cowlings - they didn't seem to fit spectacularly well, especially the one that attaches to the resin part for the F2A-3, and some sanding and bad language was required to get what I hope will be an acceptable finish: Here is a tip I tried to explain to our forum-peer Ced yesterday, but I'm not sure how clear I was as I was in a hurry. If you need to plug an irregular-shaped hole to prevent the ingress of paint during spraying, cut a slightly oversized piece of an old washing-up sponge: It doesn't have to be very thick as it is surprisingly impermiable. Then using a toothpick or any implement of your choosing, stuff the sponge into the hole that you wish to block: Like that. After spraying you can just pull it out with tweezers. Works for cockpits, landing gear bays, intakes etc. Still working on these, hopefully I'll have some more progress before the end of the day. Cheers, Stew9 points
-
/rant on Frustrated as hell this morning thanks to 'The Pension Regulator', or more accurately I guess some 'outsource outfit'. Trying to complete our online 'declaration of compliance' (bored yet?) and got an error. 'Help desk' says Apple Safari causes problems, use Internot Exploder or Chrome. Instal Chrome (they're tracking me) - same error. Called back - "Our agents are all busy". Surprise, surprise. Sent them a strongly worded email via their 'Contact us' page - that'll teach them! They promise to respond within 5 working days. Oh good grief. Don't put yourselves out chaps, I have plenty of spare time just having a small business to run... /end rant Following the Baronial advice I looked to the bench to calm me down. What's next? Engines and nacelles. Five parts, nicely detailed, with some locating pins. Untitled by Ced Bufton, on Flickr Remember the advice from the 'master builder'? Tape everything first. Well, that sounds like a good idea but: you can only tape things when they're fitted together properly you can't see through the tape to see if the join is OK tension in the tape makes the parts wiggles (lucky parts) and fly apart, regularly Tamiya Extra Thin loves to get under the tape and melt the detail. Frustratingly you can see that each individual join would be PERFECT, if only you could get two together at the same time. Perhaps, a bit like HHGG question and answer, they can't exist together in the same Universe? See? When I put that on the bench the right hand join was perfect and the left mis-aligned; by the time I'd picked up the camera it has shifted. Not a lot. Just a frustrating amount. Frustrating. Have I said I'm frustrated? At times like this it is wise to take a rest and relax, pondering on past glories, like getting the right screen to fit: Turned out nice. See that nice detail on the frame? Nice innit? Wait, that middle top mask isn't straight... gaaaaahhhhhh Frustrated (did I mention that) of Bath Calm, calm...9 points
-
Come to think of it, I think you posted some photos from it! There's an old guided-missile cruiser kicking around Buffalo as well, isn't there? Hmm. I'll need you to lead. Anyhoq More like if SHIELD had a voluntary professional association they could join and that association had a guy who tweeted on their behalf with limited supervision. Also he was in charge of organizing pizza lunches for his coworkers and making sure everyone used the English language correctly except once he corrected his boss's grammar three times in a row in a meeting and she got a tic in one eye so not the last one so much. That guy. 2017-02-14_09-58-36 by Edward IX, on Flickr I masked the first canopy -- I'm not a huge fan of the masks for the sliding hood, since they just sort of outline the framing and leave me to fill in the rest, which feels an awful lot like work. Also, I got a haircut! I desperately needed it, since I hadn't had one since November and was starting to look like, as one of my friends put it, I was "about to drop the hottest indie track of 1996". 20170207_123227 by Edward IX, on Flickr Now I look more like the affable loser I really am: 20170213_142259 by Edward IX, on Flickr I'm like a loveable wisecracking sidekick in an action movie. Maybe the bad guy kills me to show how serious the situation is. Maybe I manage to tell him he'll never defeat the protagonist and spit a little blood at him before I go. Maybe I just get thrown through a wall and show up in the end with a sling on my arm. Who can say?9 points
-
Sorry Bill. Be careful what you wish for, though: I spent a week visiting poor Cookenbacher last year. Any airshows near you? They generally look their best before I get too much paint on them. But that dark day draws nearer. 2017-02-14_04-25-01 by Edward IX, on Flickr I put in the gunsights (I broke three of the reflector gunsights trying to put them in one Spitfire and had to use Gator Grip glue -- which is amazing stuff by the way -- to repair one), added the cockpit doors, the ailerons, the elevators, and the rudders. I need to do the radiators, that little roll bar doohicky that runs from the back of the seat to the fuselage, add the canopies, and the guns, and then prime. I added the 0.50-inch machinegun barrels and the blanking stubs today, and mightily frustrating it was, too. Happy Valentine's Day to you all! I told Mrs P I loved her more than hedgehogs and Spitfires, but she didn't believe me.9 points
-
I've pondered having a go at Airfix's 24th scale Focke Wulf FW190 A8 kit on and off for some time. This was mainly due to online articles berating this kit for poor fit. I finally caved in when I saw this one in the window of a local model shop. Well I have to say that this is, without doubt, the worse Airfix kit in this large scale series. The molds are really past their prime being very poor on the sprue and each part is covered in flash. Add to the fact that the instructions are pretty vague regarding part placement which means you really have to try and figure things out for yourself. Assembly itself has been a right headache as absolutely nothing fits as it should. The first problem is getting the cockpit assembly into the fuselage halves. I had to really remove a lot of plastic before I could achieve a half reasonable fit. I then started to discover that some parts are missing - namely the clear reflector gunsight (replaced with clear plastic sheet), cockpit headrest support strut (fabricated from piece of the sprue cut and filed to shape) and most serious of all, the lower portion of the port side elevator. I could only think of using two pieces of sheet plastic glued in place then trimmed to size once set. Not perfect, but best I could do here. The next serious fit issue is the engine and cowling covers. If engine is assembled as shown in the instructions, there is a fan disc that sits in front of the radial engine and immediately behind the prop shaft and spinner that extends beyond the front cowling by some distance. I was already aware of this issue but did not expect it so difficult to overcome (fan disc should sit just within the front cowling ring) with a lot of effort. Long story short, I ended up having to remove the rear cylinder banks completely and installed the front half of engine using sections of sprue and replacement engine mounts - obviously not ideal but I wanted engine within cowling anyway. Then the real pain began. The separate cowling panels just do not fit together as they should, causing me the most real grieve of the whole build. I got each panel roughly together then once set, filled huge gaps with strips of plastic sheet, trimmed these flush, applied model filler and sanded this all smooth when dry. Still not perfect, but take a look at what others have done on the web and I see what I mean. Final part of the building pain was fitting the lower wing half section to the fuselage - a completely and utterly useless fit. I simply persevered using lots of cement and super glue till I got an OK join. I then installed upper wing sections. There is then a lovely large gap at the wing root. Overcome with more strips of plastic sheet and simply pushed vertically up against the root until it set. This was actually good because it gave the correct wing dihedral angle so was happy with this. The wing root could then be tidied in the usual manner. Most strips of plastic sheet was then used on large gaps on the leading edges of the wings. How this kit never ended up being thrown against the wall on more than one occasion I will never know!! However, despite all this, now I have finally got this one together it has built into an impressive looking model - I admit to being really pleased with how this has turned out. As always, entirely brush painted. Regards Dave8 points
-
You're right! I forgot to put the tie on.8 points
-
Hello fellow Breguet XIX fans! I apologize for jumping back in here after being away from the thread for so long but I've been busy working on Formaplane's Super Bidon version, "Cuatro Vientos". A few photos to show what I've been up to: After cutting out and cleaning up all the Vac-formed parts, I sanded off the crude stringer detail on the fuselage and made new skins from plastic sheet that was embossed on the inside surface with a ball-point pen to replicate the stringers. The skins were added to the fuselage sides after the fuselage had been glued together and the main seams filled and sanded. I carefully cut away the kit's cockpit enclosure and glued it together to make a form to use in vacuforming a clear replacement for the entire area. I built a cockpit based on my best guess for what it might have looked like. Here are the fuselage skins in place, the photo also shows some of the work done with Milliput to form the wing fillets. White metal landing gear legs and some of the detail added under the nose. It gradually starts to look like an airplane! She looks good in a coat of primer. Even better in white! Lots of masking and careful painting. Paint is done. Decals are now on too, still a long way to go though. -Dan8 points
-
Frog/Novo 1/72 hotspur glider where it really began many many years ago. I first built this kit about 35 years ago, my dad had given it to me. i had built kits before this but they where put together in an afternoon and then used to attack the troops in the flower bed. I wanted to finish this one properly, made over 2 days , painted it with thick humbrol enamel paint and put the decals on over the still sticky paint, i was very proud of it. Found this kit on a well know 2 hand model website and just had to build it. the fit was fine, but the sink marks needed some attention. a little detail in the cockpit, painted with xtraylics and decals from the spares box. i know the lower wing roundels are wrong!!! potholes are filled with krystal klear, and the canopy is very thick and dosn't fit at all. really enjoyed this build7 points
-
Perhaps, but it's more eco-friendly than my previous preferred method of using the wings of baby Sea Eagles Rhinoplasty: The fit wasn't bad, I'm hoping the joins will be concealed by panel lines. I've just dunked the canopy parts in Klear, the next step will be masking those when I can rustle up sufficient motivation... Cheers Stew7 points
-
Thank you gents - as Hasegawa include two clear part for the ventral windows and two solid blanking plates I thought I'd try to drill them out of the opaque parts - what do you think? I'm not going to attempt the same thing with the clear part, as the transparent plastic always seems to be harder and more brittle than 'normal' plastic and I don't have a spare of the clear part anymore since I messed about with the other one. Thanks PC, apparently despite the super-chunky appearance they were still occasionally prone to collapsing after hard deck landings, which must have inspired even greater confidence amongst the men who flew them Thanks Ced, they are very nicely moulded aren't they? I have now painted them and added the reduction gear casing(?). I am a big fan of Hasegawa's method of including a poly cap in the engine assembly so that the prop can be added (and removed if required) after painting: I didn't make any effort to replicate the wiring loom which is pretty noticable on the real Wright Cyclone engine, because... well I couldn't be bothered, really. Also I'm not sure I have the patience or talent, though I do have a variety of small reels of copper wire which would have been ideal for the job. I've got the day off so I hope to get some more done today... Cheers, Stew7 points
-
Hi Mates, today, i would likt to show, one of my last builds. I got the strong feeling to build "something from Matchbox" It should be something i did not have done during the last 40 years. Tha amount of this was`nt big. So i decieded to do this ugly bird. I got the Version fron Revell, done several years ago, containing no other parts/decals, as Matchbox did, during their release. Doing this build i felt more and more in love with this early ugly bomber. I changed the guns into whitemetal ones from Aires, no more change done. I used Xtra Colour: British Nivo, done, as allways, by brush. Hope you like this rarely seen bird. Any Comments are warmly wellcome. Best regards Stefan6 points
-
Hi folks I don't really 'do' ships but this was a labour of love, and at nearly a yard long photographing it was a bit of a challenge! The p/e set was used for the railings (can't remember who by now) and is a must imho if you're going to do this kit justice. Regards JA6 points
-
This is the old Airfix Lightning F1A warhorse done as Lightning F1 XM141/D, 74 Squadron, RAF Coltishall, June 1960. The only mods/details are: removed cable ducts, reamed out exhaust fairings and added afterburners, shortened the overlong stabilizers, repositioned the gun ports, sharpened the radome and replaced the wimpy Afx Firestreak launch rails and the bent pitot. Paint is Testors spray can silver with some panels buffed a bit by hand. The decals are a mix of old Modeldecal and Esci! There's a few things I goofed up along the way but I am happy with the overall result. Comments and suggestions welcomed. Thanks for looking. David6 points
-
I had started this build some time ago and it is a combination of the Special Hobby best bits from a PP Aeroparts multi media kit that I have burried away. As I wanted to do the Target Tug Mk6 version I have also stolen the tug winch and various other relevant bits which are included in the very comprehensive PP kit. One of the first things that I noticed was that the Special Hobby prop blades and spinner, I don’t believe they are the correct shape. Those in the PP kit are cast resin and white metal blades and in my opinion a much better representation of the real aircraft. Anyway after way too long in the cupboard of doom I have resurrected and completed the build. Special thanks to Steve Long for some invaluble detail shots of their aircraft, certainly is a bonus to be able to connect with such knowledgable resource, – much appreciated sir.6 points
-
My latest Starwars kit. A beautiful Finemolds TIE Interceptor 1/72. I used acrylic paints. Easy assembly. Thanks for watching. Comments are welcome. Cheers;6 points
-
Afternoon all, I've been waiting for a spell of good weather to get some pics of this build but I live in Glasgow! Anyway I relented this afternoon and have taken some pics indoors of my latest completion (minus crew seats before anyone shouts at me). I was quite shocked last year when I realised that in my 30+ years of modelling I've never had a completed RAF Phantom, of any variety or colour, in my collection. I finally decided around August time to get my finger out and build a couple of the Fujimi kits I have collected over the years, this was prior to the Airfix announcement. This kit is the FGR.2 from the Alcock and Brown boxing, built pretty much out of the box with the exception of scratch built intake blanks and decals from Xtradecal X72132 "111 Sqn history". The kit went together like a dream with only a little bit of fiddling and filling where the lower fuselage section fits under the cockpit area. I snapped off both tail pitot's and had to replace these with short sections of stretched sprue. I had intended to build it as XV416 from March 1975, just before it was written off in a take-off accident at Coningsby, but I stupidly followed the Xtradecal placement guide and had put the tail markings on as per this "borrowed" 64 Sqn jet rather than the intended placement for XV416. It was either go with it or back to square one, I took the easy option but am still pleased with her. RAF Leuchars was always my "local" air show, and when I lived in Aberdeen during my school days we would always detour past the end of the runway on the way to visit grandparents in Edinburgh. My love of aviation definitely started here and I have an affinity for anything that was based here from the late 70's until the base closure, the favourites without doubt being the Phantoms and Tornado's, both of which feature heavily in my stash. A 43 Sqn FG.1 is already underway for my next Phantom, and roll on Revell's 1/48 Tornado F.3! Anyway on with the pic's, hope she meets with your approval (seats to follow mind!):- [URL=http://s128.photobucket.com/user/eng1170/media/00E31107-1703-48DF-9CF6-34D22DF0615C_zpsjktewhmo.jpg.html][/URL] [URL=http://s128.photobucket.com/user/eng1170/media/A4B967B9-993D-4929-8D1D-ED6FBF049181_zpsvftxbiam.jpg.html][/URL] [URL=http://s128.photobucket.com/user/eng1170/media/7C770795-5DAE-4EF0-A040-5A9F7EF2D0D8_zpsxrejpfkq.jpg.html][/URL] [URL=http://s128.photobucket.com/user/eng1170/media/22FE3D8B-FAFF-451D-8EF5-D7B0F1526044_zps6ch2v0ip.jpg.html][/URL] [URL=http://s128.photobucket.com/user/eng1170/media/1D9A48A4-B8B6-427D-BF38-68B36A1C8C59_zpsyxtqja2p.jpg.html][/URL] [URL=http://s128.photobucket.com/user/eng1170/media/35E4BD44-0AC0-44ED-8C53-4B1820507BCE_zpsweolcim2.jpg.html][/URL] [URL=http://s128.photobucket.com/user/eng1170/media/81365C42-1083-4FE6-A9DC-9DF165254060_zpsfrxfr5qp.jpg.html][/URL] [URL=http://s128.photobucket.com/user/eng1170/media/D25B5A57-7B37-4B91-AF87-0BA309A1E33F_zpsxgij4m7y.jpg.html][/URL] [URL=http://s128.photobucket.com/user/eng1170/media/89FBD8B0-27B4-4879-8ED6-98F73946BE6F_zpsqdfzpy0k.jpg.html][/URL] All comments and criticism most welcome, Rgds, Eng6 points
-
You mean this end? Oh, and just a photo to show you the start of yet more madness: Yes, that's right; it's Forth Road Bridge time! [And before anyone says it, yes, I know that the Forth Road Bridge is a suspension bridge and it is clearly the RAIL bridge that the blade support gear resembles - but I didn't name it.]6 points
-
Finally for today, something less demanding of the concentration - I have started converting the main rotor blades from metal to composite. For those of you who don't know how to tell the difference, this means removing the BIMS (blade integrity monitors - a system of pressurised gas inside the blade spar which told you if there was a problem with the blade; it manifested itself as a bump at the blade root at this scale!), and sanding off the lines - quite nicely done, actually - that depict the pockets on a metal blade so you are left with a smooth composite surface. That's where I have got to so far: Next up will be to add a fillet section to the blade root so they look like this: For those of a Kirk-esque persuasion who don't understand helicopters... those are my wings! More tomorrow Crisp6 points
-
Working my way through this snag list, I seem to have reached one of those points where your eyes hurt after a while; we are talking tiny pieces today. First up, something relatively simple; after a few experiments and taking an example from other builders of this kit, I have decided to use the kit parts for the tail strake (albeit duly thinned down to a better scale thickness). However, I don't want to fit it yet because adding the rivets with it already there would be almost impossible; after all, the real thing was bolted on top of original rivet lines, so why not mine? The challenge is to get a good finish when you add the part after most of the paint, so what I have done is add a row of 0.7mm Aizu tape sections along the line of it, to act as mini masks - then when I add the part it will have something to grip on. That's the theory, anyway: Then under the nose, to attach three things. First up, the sea anchor attachment point - a half-shackle underneath the nose - Eduard provided a neat little plate, to which I then added a suitably bent piece of thin wire. Note also - slightly blurred in the foreground - the little spigot around which the cable runs (presumably to keep it completely clear of the Doppler aerial); this was a 2 minute job with drilling a shallow hole and inserting a suitable piece of plastic rod. The sea anchor cable will run something like this rather rough and ready illustration with copper wire: The other piece added is the T-handle for the nose electronics bay - it goes into that small indentation which you can see above in the curve of the nose, but it is so tiny that I haven't been able to get even a half-decent picture of it! (Don't look for it above; that photo was taken before I added it). Just for a giggle while I was working with unfeasibly small pieces of brass, I tried building one of the Eduard exhaust blanks. Yes, I did say "building"; these things come with two teeny handles which have to bent to shape and added. This is now safely stowed in my fragile parts bin, which is becoming increasingly crowded! I have to say it does look good, and will be even better once painted a battered yellow colour with an RBF tag. More soon Crisp6 points
-
I'm sorry Rob, I'm afraid I'm going to resort to a more permanent solution.6 points
-
Thanks Clive - I have a friend in a similar situation... but he's 'pressing on regardless'. I think that 'they' think that they need to simplify all their processes to simple tick lists (here's a list of companies to tick off) so they produce a 'fool proof' system that they can then outsource to someone that employs, er, fools. But maybe that's just me being cynical? Thanks Giorgio - BluTak! Genius. please feel free to remind me of these things; my memory's not what it was! Thanks John - proof of life? What did you send - a finger perhaps? Spring is coming - great! Shan't 'cast a clout' just yet though. Thanks Benedikt - crikey, music can really take you back can't it - great song. And thanks for the German warning - it rhymes! Thanks Rob - your builds are looking good, you're too modest! Thanks TT - don't start me on Broadband and IT 'help' desks! Most should just have a recorded message saying 'it's your fault', although there are some good ones. Some. So what can I do that's not frustrating. Wings, they're easy... Untitled by Ced Bufton, on Flickr Famous last words. Mold bumps on the ailerons, nice attempt to replicate actuators and strange step thing on the outer join all covered in flash. Weird. Right, leave the for later. In better news the bomb bay cover is a lovely fit:6 points
-
Hi Stix, I think it has come out not to bad, here are a couple more pic's before paint Now these are after paint but before weathering, still not sure the colour is right, have looked at a lot of pictures, some are like this others are darker/greener?? I am very please how the shape has turned out Regards Richard6 points
-
Hi all, Here is one of three Eduard MiG-21s I've just finished. This is their 1/48 MiG-21bis kit with Begemot stencils and main decals and finished in Mr Color 8 Silver. This was from the Weekend boxing with a Cold War Studio resin nose added. Full write up at https://jonbryon.com/eduard-148-mikoyan-gurevich-mig-21bis-fishbed-l/. Comments welcome, and thanks for looking. Jon5 points
-
Hey guys, here's my try at Academy Fortress. Almost OOB, with exception of QB gun barrels and scratchbuilt landing lights. Markings are from Revell, since i always wanted to do "Shamrock", with it's replacement tail, it makes otherwise dull overall Olive Drab looks interesting. I preshaded the model with Gunze Tire black, and then gradually painted OD in about a dozen thin layers. I used Gunze OD and faded OD, and repainting of markings is done with MM OD. Wash is Tamiya, weathering done with Tamiya Smoke + Tamiya D set. Sligh chipping is done using artist silver pencil. Comments are welcome, thanks for looking!5 points
-
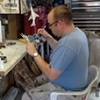
She is a PBY-5A Catalina . She is also the oldest surviving PBY 5-A in a museum. The crew Bob works with like to call her a Canso and no amount of stating the obvious works with them ! Canso A was designation of Canadian built ( Boeing in Vancouver and Canadian Vickers in Montreal) and were used by the RCAF. To confuse matters Vickers also built a large number of OA-10A Catalinas for the USAAF . The particular airframe that Bob is kindly working on, was built by Consolidated in San Diego > It was used by the US Navy on the East Coast of the States from 1943 until the end of war , flying out of Norfolk Virginia.After the war it served with the US Coast Guard, eventually ending up hauling freight on the East Coast of Canada with Eastern Provincial Airlines. It crashed in thew wilds of Labrador hauling diesel fuel into remote sites. It was subsequently recovered(1986) in an epic adventure, involving an CAF Chinook and Huey, along with a ferry ride and trucked to the Atlantic Canada Aviation Museum in Halifax NS. Its a Catalina plain and simple, except to the crew working on it! MRP5 points
-
The cockpit looks much better now, and the rest of it is coming along in leaps and bounds. SWMBO recently became eligible for the UK State Pension and within two weeks of the first payment received a ' proof of life ' form to return to DWP! The mind boggles. John PS early Spring here, a friend saw some Gru ( storks ) flying over yesterday which is a good sign and at 5PM today it was 19C in the shade. Just thought you'd like to know.5 points
-
My employer is a not-for-profit, and one of our divisions at one point had a Director, two Assistant Directors, and a temp who did all the work that they shared with another department because somehow, they had used up all the money allocated to them for staff salaries.5 points
-
Any targets of opportunity? I'm not busy next week. Actually PC they're disposable tattooists gloves and they go on with a most satisfying rubber snap!, one that immediately creates an expectant air of harsh discipline and incipient pain: http://www.ebay.com/itm/100-Black-Nitrile-Disposable-Tattoos-Industrial-Gloves-Medical-Grade-Exam-/131996590658 Btw. from reading that recent 'America's Top Model(ler) entry over on your thread, I note that we appear to frequent the same optician! la classe non è acqua dear boy! Thanks Ced. I should have added in the above 'only to be matched by the detached pleasure of reading through the forum with a hot cup of tea/cold bottle of beer in one's hand'...Having found myself amongst such friends here is a wholly unanticipated pleasure in life these days. Merci Bob. Only on Britmodeller would somebody say 'slow down' on some madness that's been going on for over three months! Your anti-tailflash wrecking tip is of course the kind of common sense that routinely eludes me. The nuclear power industry is an immeasurably safer place due to my lack of involvement in it... Most pound/dollar shops should have some generic version of those nail brushes I reckon. I have to admit that I've a bizarre fascination with the nail-bar phenomenon, possibly on a spectrum with those ASMR videos on Y-tube, watching all that delicate painting. Until that is you realize that you've just been staring in a shop window at women for about ten minutes and realize that phone-calls to the constabulary are probably imminent....5 points
-
Nak-nak, nak, naknaknak-Nak-nak. Nak, nak, kaknak. Nak. Nak, nak. Christian, exiled to africa (In homage to Mars Attacks)...5 points
-
Thanks Matt I've got all the construction finished now. To be honest there isn't that much of it, once the main fuselage is together. Just a few detail parts need adding, one of which is the good old Sherman suspension unit Before I added the clear part for the rear hatch, I painted the top of the fuselage that's underneath it with black, as otherwise you'd just see the grey plastic of the body through the glazing in the hatch The top panel that clamps the wings in place has a couple of ribbed plates that attach to the rear end (on the right hand end in the photo). These are about the last parts that are added in the instructions, but guess who thought he'd be clever and add them earlier Well, that didn't work out that well because, once the wings are in place, there are a couple of triangular fillets that close off the wing pivot area.The ribbed plates that I'd previously attached prevented these fillets from sliding in to place and in the end I had to cut all the mounting tabs off the fillets to get them on. Lesson learned; don't second guess Bandai's instructions That finished off assembly. Conveniently, you can leave the wing section separate for painting, and click it into position at the end Next up is painting. In the mean time I'll post some shots of the finished build so you can get some idea of how it looks. Now that it's built up, I'm liking the lines of it more and more (there's a small turret under the cockpit, but I forgot to add it when I took the shots) And a scale comparison (yes, I did put the Interceptor upside down ) Andy5 points
-
Hello Tony I would like to explain in german : "Willst Du Schmerzen in den Hoden, kauf'nen Bausatz dir von Roden!" ( Do you like to have testicular pain? Then buy a kit by Roden.) Cheers4 points
-
It's less organic than using fruits and berries for masking, but I'll concede it's a good solution4 points
-
Mars Attacks! Great film... just remember to always have "When I'm Calling You" on your iPod - you can never bee too careful4 points
-
Cockpit complete.4 points
-
Apologies for the late reply Docotorgaz. I understand. It's frustrating not having any pictures for this exact vehicle. Slow progress due to the usual (work, work, work) The turret builds up very nicely - fit is excellent throughout Onto tracks and painting Thanks for looking Rob4 points


.thumb.jpg.d17ff607fc7e89ed057e63fcb6f2a888.jpg)


.thumb.JPG.3498f40362ff13ebfc4b2e45abbd545e.JPG)


.thumb.JPG.ca9d91d3c605f2ca36aeec8f5a1b648a.JPG)


.thumb.jpg.b4a5069fd2c2dd5708ce1694345c5b11.jpg)
This leaderboard is set to London/GMT+01:00