Leaderboard
Popular Content
Showing content with the highest reputation on 28/11/16 in all areas
-
Hi Colleagues! Just would like to share with you photos of completed B-17G Miss Little Mischief model from Revell in 1/72 scale. It was built 1.5 year ago, but your opinion about result will be highly appreciated. Work-in-progress topic with step-by-step assembling and interior photos you will find here: http://www.greenmats.club/topic/87-b-17g-flying-fortress-172-revell-краткий-обзор-и-постройка/16 points
-
Gents, glad to sign in again, as been a while Job is keeping me away from the hobby, my schedule doesn't gives me the time I wish I could spare but its what its. So anyways here's my attempt to represent this incredible plane. The Academy kit is ok, not at the level of Tamiya or Eduard, but allows you build a good model. I didn't like at all the way that the sidewalls on the wheel wells meet the sides of the fuselage, so I just filled the gap flush with the edge of the well, I don't know how accurate that will be. Also the canopy is Spartan and I followed the instructions ending having the instrument panel way to forward so it became invisible. I took the dull approach, corroded, dirty, weathered metal, not the shiny kind that you see on museums or factory pictures of brand new planes. I used a combination of the salt technique and Mig weathering wash, now the jury still out on the results, I have my personal doubts about. The only aftermarket were the decals, I used a beautiful sheet from Bombshell decals, the are just perfect all around, besides that, just the cooper wire for brake lines, a leftover decal of the seat harness glued over metal foil, nav. lights from a forgotten manufacturer, and a tiny piece of brass tubing on the end of the guns to make them look hollow. It was painted with Model Master Metalizers and Alclads. Thanks a lot for stopping by . Ohhhh I haven't glued yet the side windows16 points
-
This is the 60th anniversary of Operation Musketeer. Hunter F5 WP130 was with 34 Squadron and flew out of Cyprus during the campaign. It's a Novo issue of Frog's old F1. Pretty accurate but VERY basic. I left the solid cockpit as is but moved the pilot's head further forward and added a headrest. I scribed in the control surfaces on the wings as they were represented by raised lines!! The nose profile needed reshaping to be more tapered. I added the cannon troughs and I replaced the overly small jetpipe with a beautiful resin one from Aeroclub designed for the Revell kit. I also had a junk Airfix Hunter spare so I used its fin, tailplanes and airbrake. The decals are a mix - the squadron badge and Suez invasion stripes are decals from a sheet given free with Scale Aircraft Modelling magazine in 1984. Serials and roundels from Xtradecal and stencils from a Superscale sheet. The kit has no wheel wells so I made decals for the undercarriage doors on my inkjet. Comments/criticisms/suggestions welcomed. David14 points
-
Hi,I have completed Airfix's 1/72 RAF Mustang IV as a quick 4 day build. Started on Thursday and finished today.Very easy and nice kit to build. Kit Manufacture: Airfix. Scale: 1/72. Type: RAF Mustang IV (North American P51-D).. Extras used: OOB. Paints and colours used: Primer was white Stynylrez. Paints used were Tamiya XF-4, XF-69, XF-81, XF-82, XF-83, XF-84, XF-85 and X-35. Weathering: Flory Dark dirt clay wash and some soot pigments on the engine exhausts.12 points
-
Finished at last! This one had to be wrestled to the ground. It was started over a year ago as an entry in the Vacform GB. It didn’t look too difficult – three triangles attached to a tube – if only! The initial phase of the story can be found here http://www.britmodeller.com/forums/index.php?/topic/234986765-convair-xf-92a-airmodel-vacform-172/ but then it came to a halt partly because I ran out of time to finish it before the end of the GB but mainly because seeing the Hunter crash at Shoreham left a very empty feeling and it was a while before I got back to doing any modelling. The biggest problem was the u/c. The shape of the u/c doors, and in particular the shape and size of the main u/c legs proved difficult to define and while it is now ‘finished’ I’m not really happy with that aspect of it. I’m not happy with the canopy either. It doesn’t look right and I could not get a neat edge to the framing. The finish is Alclad Airframe Aluminium over gloss black acrylic. No decals were supplied with the kit so the 6682 had to be made by copying that from the Mach 2 kit (and are not correct) and the stars and bars came from other sources. The big ‘star and bar’ on the nose proved a real problem as there is considerable compound curvature of the fuselage and the decal would not ‘sit’ without creasing. The actual a/c was the first true delta wing a/c to fly, in 1948, and Convair expected it to be a lot faster than it was. It started with a J33 engine but was later fitted with an afterburner but even that wouldn’t make it supersonic unless dived. One thing really puzzles me about the actaul a/c is that I cannot work out how the gear is retracted. I can see no evidence of a jack. The only thing is a strut which appears to have a joint in the centre and if the top half is rotated by something inside the fuselage the strut would fold and pull the gear up. If anybody can enlighten me further I would love to hear from them. John12 points
-
Hi folk's built for the Mustang GB my take on Flt.Lt Arthur Doley's Mustang "Dooleybird" which was for a while posted to Acklington just up the road from me,also I had happy memories of the old Matchbox kit built way back.Dave (Spadad) fixed me up with the decal's and Tamiyas kit was a no brainer for my chosen scale,there are differing views on the actual finish of the real thing Blue front fuselage,Yellow and blue and both with anti glare OD panel but I stuck with Blue,painted with Halford's rattle can silver,thanks for looking in.11 points
-
With the advent of faster aircraft such as TSR2 and P.1154 into service, the need for proper, early high Mach training, especially at lower levels was being appreciated by the late 70's. By the 80's the search had been narrowed down to a version of the F-5 that Northrop were developing. With a single engine, and modern avionics, it would be ideal, if they made a 2 seater version. Thankfully, to secure sales, and as part of a package, which included some single seat ground attack variants, the F-20, as it became known, entered service as the RAFs first true Mach 2 trainer. Seen here in 4FTS colours, RAF Valley. Kit, Freedom Models 1/48 F-20B10 points
-
Another 'What-if' themed project which adapted from Trumpeter's 1/72 Sukhoi Su-30MKK Flanker G, it'll be painted into IDF Air Force 3-colors camo with The 253 Negev Squadron marking (ותיקי טייסת 253). The marking will be hijack from Kineticmodel's F16I SUFA since the generous Kinetic provided two marking option for the SUFA. I'll use the stock decals from Trumpeter for the stencils. Trumpeter kit, IDF weapons from SkunkModels workshop, TVC nozzle from Naza Model Art, ground crew/pilots from Revell NATO pilot pack, no PE use in this build, 99% OOB with very minor modification. THE END. Thank you for dropping by, cheers!10 points
-
Hello folks , this is the 72nd scale special hobby kit of this tubby little airplane and a very good kit it is ! This model will remain a top shelf specimen for me for sure , I just love how it looks I painted the rigging black for contrast , does it looks fine or should I brush it silver ? ps: the decals are really thin and more than one wrapped around itself .9 points
-
my latest finished kit. the 21st century toys A6M5(though the box said A6M2)...it builds as a very early model52 with the collector exhaust rather than the more normal ones with the ejector styled exhaust..only about 200 were made like this. the kit is pretty much out of box except for the seat belts and tail codes that are from the tamiya kit but match an early A6M5 from rabaul. it was a pretty easy build but building large resin models is new to me.9 points
-
Final score 1 Flying Boats and Float Planes 73 2 Made In Britain - The Sequel 70 3 Dassault Mirage 69 4 70s NATO v Warsaw Pact 68 5 Matchbox 68 6 De Havilland 67 7 From Russia with Love 65 8 Radial Engines Rock 65 9 Prototypes, Experimentals, World Firsts & Record Breakers 63 Can all GB hosts please PM me with suggestions as to dates.9 points
-
Hi all, After some stop-start work on her, I finally finished my latest Sabre. As you can see, she is depicted as a Sabre 4 of the Fuerza Aerea Hondurena. The based kit is Fujimi which I have modified in a simple way by removing the top fuselage intake, deleting a few of the odd access points and adding (by cheating with a decal) the small inlet on the fuselage sides. She was simple to build as always. The paints are Humbrol standard 116/117/118/28. I included a Pavla cockpit set but with the MB Mk10 seat that they used. The decals are a mix of Aztec (triangle and flag) and home printing (serials and weapons block). They didn't have any stencils, to my amazement, so nothing else was added. She was finished in Matt Cote after a dirty up with some Flory. I hope you like her. oh, and I just realised that I haven't installed the jet pipe!! Martin8 points
-
8 points
-
Thanks Alex - luckily my attention / mojo stops long before I get anywhere near bleeding... Thanks Giorgio - with Christmas coming, time to leave that list lying around! Thanks Keith - it's a 'yes' from me! I've used it quite a bit on the joins now with the standard #1 attachment and it's been great on the various fillers and that nasty plastic. There are three 'pads' provided but you can buy replacements so I may invest in those and then I can use it for nails (which I hate doing) and modelling. I can see me replacing the pads with W&D or Micro-mesh, so a good investment IMHO. Thanks again for the suggestion SANDING HAS FINISHED! Thanks goodness for that! There will no doubt be some minor touch ups to do after the second primer (partial) coat but it looks OK to me so I've stuck on all the tiny bits and now have clear sprues. Thank goodness. Obviously they were a pain to fit and some of the holes are big enough to swallow the part - beware! I think we can have a sort of Kim's game here. Shots of the model at the moment: and then later we can have another series and you can tell me what's missing.8 points
-
7 points
-
Evening all. The lightning is done. For me a fairly quick build but mostly a really enjoyable one. The kit is one of the best I have ever built. So obviously I ballsed it up several times. I had a few problems with the Klear amongst other things, but any issues are mine, not the kit's. The instructions could be better - I often ended up referring to pictures of the real thing, but that's no hardship with a laptop next to the desk. This makes 3 builds now for this year, since around ..err. July. I had forgotten how relaxing and theraputic modelling can be: It's helping a lot with the mentals. Paints were mostly Tamiya Acrylics, which I love for airbrushing, with some Vallejo acrylics for some of the brushed stuff - every time I try and brush Tamiya it all goes horribly wrong and behaves like paint stripper. I have no idea either, but there you go. There is some Humbrol enamel here too - an old favourite but a lot of the new tins don't seem to be anywhere near as nice to work with as my old ones. Clear coat is Johnson's Klear mixed with a little Tamiya flatting agent, and this is one area when everything went all horrible. The stuff bubbled like there is no tomorrow. I've not had this happen before - I brush paint the stuff as it's self levelling ( and you need to clean airbrushes with ammonia if you spray it ) and normally get a flawless finish: I went over a paint mule with it and it worked fine so I must assume the brush I used for the lightning was contaminated with dust or something. The model is nowhere near perfect, but it's good enough for me and it really is a beautiful kit. I think of it as a two footer: it looks great from a couple of feet away :-) I know lightnings weren't generally parked with flaps down and brakes out, but I like the way it looks. Right here you go:7 points
-
The Supermarine Attacker. Trumpeter 1/48 F.1 kit. The last aircraft that technically had any lineage tot he Spitfire.7 points
-
Hi, X-47B US Navy UCAS model from PLATZ in 1/72 scale. Completed in Apr'16. Construction blog is here: http://www.greenmats.club/topic/1742-x-47b-us-navy-ucas-172-platz/7 points
-
Cargo cabin floor... 1. Floor cover is done with 0.5mm plastic and scriber'ed (1mm step) 2. Door from pilots' cabin to cargo is added (0.5mm thickness) 3. Loading rails are added (two 1x1mm profiles). As for me, it looks quite narrow now and I plan to increase width a little bit later... 4. Power lines' protective cover (0.5x0.5mm profile) is added in 2 places 5. Rear side bulkhead... I didn't find good picture and clear description of this part, so you can see flight of my fancy on next photo7 points
-
After that, I started to play with cargo door... http://www.airliners.net/photo/Airbus-Transport-International/Airbus-A300B4-608ST-Super-Transporter/735166?qsp=eJwtTUsOgjAQvctbswBJCGGnF9CFF5h0JkpE28zUYEO4u2Pj7v3fhhBfWT75WpJggglpuKNBIqWnYdrwNlFM3WEcxgYPKWtUdgPUt60HLWo%2BFedMWY4hSMrCf/2s/OuCxULdvPlH50D0UjH6wXWeLS1UNyTTvGDfv9pWMQE%3D Picture removed - link inserted. Airliners.net photos should not be posted directly. Please link to the page from which they were taken. That is bigger challenge than ribs on fuselage... because we need to follow the door's curvature in several directions. Anyway... That is not 100%-copy of original, but I like it...7 points
-
Thanks Alex. Kim's game is quite fun with kids and adults alike. Most people use a tray with various objects covered by a cloth, time the 'exposure', cover it up, take one object away and the kids have to say what's now missing. The second (partial) coat of primer has been applied on a nice sunny day in the garage. I thought the sun would help but actually it just showed up the differences in the plastic: I am quite happy with the joins though (as far as I can see at the moment): She's staying in the garage until she stops ponging. More later.7 points
-
Thanks Rob and Giorgio - it was the sun... The front seam has gone as far as I'm concerned: but the back ones: Gaaaaaahhhh! Right, that's it! I've used every filler on this and most sanding devices known to man except W&D and I've also done no woodwork. Time to change that: Don't worry, the sandpaper is for the 'sanding blocks' having been unable to find one like Bill's. Actually I don't plan on doing much more of this in the future so these will do. Started with 400 grit (thanks Alex) and that was enough to set the model shivering and to give in after just a few minutes: A quick smooth over with PPP (you know where) and some white Stynylrez and THAT is your lot!6 points
-
Hi everybody, time for another WE progress report Where were we? Oh, yes, the nose FLIR, refined and with a bit of a dark wash to check the outline: So I glued the nose section to the main fuselage, with CA gel for the resin surfaces and Tamiya Green Cap for the plastic ones: This showed multiple gaps and steps, not sure how many of these are self induced and how many come from the kit itself ... Anyway, above you can see a plastic shim in the nose bay, but the worst part is here: Port side intake has a gap and a step. So out comes another plastic shim, which I had to taper on one end to actually fit inside that gap: I marked the outer profile to cut it accordingly (sort of trying to match the inner profile, this way) Then i glued it back in position with again CA and Tamiya Green Cap, according to the mating surfaces. Once everything had cured, I started the sanding chore, for which I added a DIY tool to complement my ETS: It's just a tapered MDF piece, with sanding paper taped to it. Pretty effective, though So, after much sanding, checking, filling, sanding ... here we go: bottom joins Time for some rescribing: I used Tamiya Curving tape as a guide (stealing from Fritag, here ) marking the line with a black marker, to make sure I wasn't drifting away: Assorted set of tools to carry out the task: The scribed line isn't that visible in the above pic, but it should survive primer and paint coats .... hopefully Adding a couple more details in that area, one raised (styrene disc cut using Eduard scribing mask and glued on), the other just scribed in: For the nose blade antennae, I decide to use some leftover form previous builds: these come from an Hasegawa F-4 sprue, with the front one being slightly modified They need refining, but not before having thoroughly cured I glued on a few more bits, like the Frog Eyes and other vents: Now, the scratch built foil vent came out OK, but is very different from the resin one. But in a moment of confusion, I glued both on I'm thinking of removing the resin vent, and I just hope the 100% LERX supplied with the kit has those vents molded in, so that I can copy them with foil once more ... In the middle of all this, I also did some detailing on the canopy base: Priming stage not too far, now ... Comments welcome, as ever Ciao6 points
-
The lights painted and mounted together with the camera. I am pretty please how they both turned out:6 points
-
That turned out pretty well all things considered.....Can't see what everyone was getting so upset about.6 points
-
After more than 10 years of entering AFV's in the competition at Telford, I finally picked up a trophy. This one got the best model of an Allied AFV of WWll from IPMS Czech Republic. It's the Academy Honey M3 with AFV Club's suspension and tracks and MB Modellbau's horseshoe turret. There are also a lot of scratch built items such as the sand shields and the large stowage box over the engine deck. AFV Club's suspension and tracks are superior to Academy's items and fitted to the Academy hull with no problems. I changed the turret for the MB Modellbau one as Academy's hexagonal version is incorrect for this tank. The figures came from various sources and have had their arms and legs repositioned and the heads placed with Hornet items. The stowage is a mixture of Resicast, Value Gear and Accurate Armour. The .303 mg is from RB Models and the decals are curtesy of Bison Decals. A very enjoyable build. Regards, John.5 points
-
I started with the new QLD kit and added the tank from the old re-fueler. I detailed the interior of the cab, but you can't see much of it. All detail was sanded off the tank and new added. The round filters behind the cab and the side racks are from scratch. The hoses and piping are soft aluminum wire I found in a craft store.5 points
-
evening folks thank you for your kindness - much appreciated ...I am pressing on with the underwing skinning, so it's pretty much more of the same for a while.. laid down the gun / ammo access panels and the one in between... ..there is a panel within a panel so this was cut out first.. ..and stuck down.. ..then the panel itself, which also has a panel within a panel for the aileron access hatch so this was also cut out.. ..once that one was down I made the access hatch and used a 1mm screw for the latch - I also used the hinge trick as before so cut a slot before fixing it down.. ..then this bit was done & I have nearly finished the same ones on the other wing... ..will start getting into the flap area soon so need to work out how to represent that without actually making any TTFN Peter5 points
-
So with the VTOL out of the way it was time to figure out the remaining unknown - how to make an atomic beam. It turns out that hot glue works well I rounded one end of my acrylic and drilled out the other for the LED, then sanded the outside a bit for diffusion. After that it was just a matter of applying gobs of hot glue. Once it was dry I sprayed it with a fairly thin layer of Tamiya Clear Blue and then a couple of heavy coats of Alclad Aqua Gloss to seal and level the surface. The LED I epoxied into the end after adding a dropper resistor etc. And of course after feeding Bemular the equivalent of a barium meal (resistors) and an endoscope (wire) it lights up! Slightly disappointing that the glow doesn't reach the end. I'm thinking I could make another using tubing with an LED in each end, although avoiding cheesy shadows from the wires will be tricky. It would make the "fireball bit" much more convincing, although the TV series effect is just a rotoscoped beam of fairly constant intensity so neither really match that. Cheers, Will5 points
-
HI everybody Here the SA 321 Super Frelon from HELLER 1/35 that have been ruined by the cat 15 years ago and that was sleeping in a wood box of St EMILION GRAND CRU during this time. I had a dream 3 weeks ago during the night and decided to bring it back to life as i had catched maybe all the broken pieces so .... it's done. I had some hard time to rebuilt it but at the end it seems better that it was, little paint options have been made and now it looks really great. I must say that i am from LANVEOC POULMIC in Brittany (Fr) which is an Helicopter base with a military school for navy pilots the 22S ( Flottille=Squadron for navy) the 34F with Westland Lynx and actually the 32F with 4 NH 90 CAïMAN replacing the Super Frelon which is retire for 4 years i think. I have been flying twice on this Super Frelon, first time i was 11 and this was my Baptême de L'Air, a suprême present from my neighbour who was working at the 32F. So here are the pix, hope you will like it !!! it's the first time i put a topic so i don't really know the procedure, i have hosted the pix on a site and put here the url hope it works !!! JC5 points
-
Even though I knew the title of the thread, I did a complete double-take when I saw the Iraqi markings. "Where are the Balkenkreuzen? What are those warning symb-- oh..." where what flashed through what it pleases me to call my 'mind' for a second or so. You can see where the 'ground crew' painted the crosses out, though. Looking excellent again, Sarge . I got the Airfix Spitfire/Bf 110 Dogfight Double on the strength of Ced's recent 110 build - which may not have been so clever given your comments about the Eduard Weekend Edition above. Oops. Those Airfix panel trenches are something to behold: any aircraft scaled up to 1:1 would have panels floating about unattached, between the framework. Does Hornby own Corgi and/or Dinky by any chance? Cheers, Alex.5 points
-
More practical than fantastic Alex but I take your point obverse reverse stupidly simple really, not even a block to grip the ends b5 points
-
Just thought I`d add these too,......I know the interior is the wrong colour before anybody says,.......but my family and I were lucky enough to get inside B-17G 44-83542 Piccadilly Princess while on holiday in Florida years ago, at the now closed Fantasy of Flight Museum,.........here is my lad Rob, looking very hot and tired, trying out the waist gunners position,......to show you how long ago it was he goes to University next year!; Going further up the rear fuselage,...the ball turret isn`t fitted; The cockpit; The nose; And the exterior of our mount which was situated in a very convincing East Anglian wintery diorama; It was strange seeing snow in almost 100 degree heat!! The tarpaulin hides a screen underneath the opened bomb bay which displays enemy territory thousands of feet below with flak burst going off as you walk gingerly along the narrow catwalk between the bomb racks with bombs hanging along each side., the exit is through a hole cut under the nose where the ladders are. Cheers Tony Here are some more pics from the web; And some period posters;5 points
-
Thanks Ced, Woody and Phil. Today's bench time has been essentially a proving-ground session, to see if things fit as they should when closed-up. I've checked the various cockpit elements previously and they're all shaped and ready to go now, with no remaining issues stopping the fuselage from closing-up correctly. What I wanted to reassure myself over this morning was the big question - does all this additional stuff for'ard of the cockpit actually fit as intended, given the limited internal space? In short, it does: but you can see what a damn close-run thing it is where the plastic exhaust elements start to close inwards towards the front. The eagle-eyed amongst you can see there's still at thick-ish cross-section at the front of the exhaust channels - you'd be advised leaving them like that so that there's sufficient surface area to glue the front of the nose on later (you can see what I mean in the dry fit below). I just noticed there's a bit of cowling still to pare back there on the port side behind the engine. Aren't close-ups great for magnifying flaws in your technique? This all still at the dry-fit stage, except for gluing the lower firewall to the port side of the fuselage. As there'll be some strain on this element (due to the weight of the engine) I added a plastic strip at the rear of the join to increase the total gluing surface, plus the semi-cicular section that forms the top of the firewall can act as a brace to stop it tipping forwards from the top, when installed later. I've used poly cement to glue the firewall on so that there's time enough for the expected wiggling around in three-dimensions to get everything squared-up correctly. You can see the nose-fairing I was talking about earlier that will need to be glued onto the exhaust channels. This also reminds me that there's still that trio of engine and oil rads to build for the lower part of that opening. I'm pleasantly surprised that things seems to fit so well from firewall to prop hub where it goes through the fairing at the front: that was a key dimension I kept paranoically checking throughout this part of the build, so I'd recommend planned-paranoia to anyone else attempting this face of the Eiger. Looking properly busy under there now.... Just to finish-off today's installment, I've shaped-out the lunette section for the top of the firewall. It's been test-fitted for size and angle, but I want to let the glue on the lower firewall have a good long time to cure before disassembling this test-fit and adding any more detail. I'll be grabbing time during the week whenever I can as between now and the Christmas break will be the organizational equivalent of Poe's Descent into the Maelstrom. If you're tucking into Sunday lunch in a bit, have an extra roast spud on me... Tony5 points
-
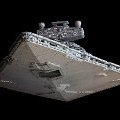
I built this Resin leviathan back in March last year. Took several months to build and pushed the limits of modelling abilities and patience. I finally got round to weathering (a few cotton buds later) and detail painting this enormous Imperial Destroyer: 38" x 24" x 12" (BIG) 10kgs Blockade runner & MF:4 points
-
Here is Matchbox's old but rather nice kit, reboxed by Xtrakit, built OOB, with the kit decals, representing an aircraft from 64 Sq, RAF Duxford 1957: Meteor N.F. 011 by Sean McAleenan, on Flickrs Once again airbrushed with Mr Hobby Aqueous paints, with Humbrol enamels used for the black and silver bits: Meteor N.F. 007 by Sean McAleenan, on Flickr Again, very much a practise build, especially regarding the application of more than one colour camoflauge scheme. I used white tack worms and Tamiya tape, and should of made sure that the second colour had full coverage. Alas, in my enthusiasm to rip off...err.. remove the masking I realised I hadn't : Meteor N.F. 005 by Sean McAleenan, on Flickr Still, you learn more from your mistakes than your successes, (apparently), so I've learnt a lot on this one. Namely, that the tone of the colour when airbrushed, is not always similiar to the the tone when brushed from the jar. Which shows mainly on the canopy...... I should have left it opened, as the fit isn't great either... Meteor N.F. 002 by Sean McAleenan, on Flickr The decals came from the kit, and while the main markings went on well, the minor ones were an utter pain, the walkway lines are from two sheets, and some just didn't make it in one piece, or indeed at all... Meteor N.F. 003 by Sean McAleenan, on Flickr For all that, I still enjoyed making it, and as I have two more in the stash, one Xtrakit, and an original Matchbox, I'll take note of what didn't go quite to plan and apply those lessons to those builds. The base is for my Javelin display, used here as a distraction... Once again, thanks for stopping by... Sean4 points
-
Hi Folks Whilst we were having our weekly model club meet at our local Arts Centre, I passed some excellent paintings of old Colliery trains. One of which inspired me to go off at a tangent from my usual armour to attempt to produce an old unloved and abandoned loco. I tried to get a 'rust coming through' look using thr hairspray tecnique.C Cheers Keith4 points
-
Basically OOB, with the additions of Additional items: Airwaves AEM034 Floor Plate Waffle Pattern Peak Dale 45cm Necklet Chain Silver Plate Painting Profile: Vallejo Model Air 71073 Black (Metallic) = engine, chassis, exhaust Vallejo Model Air 71072 Gun (Metallic) = engine, exhaust Vallejo Model Air 71063 Silver (Metallic) = engine, exhaust, footplate Vallejo Model Air 71069 Rust (Metallic) = sump, exhaust Vallejo Model Air 71057 Black = chassis, tyres, number plates Vallejo Model Air 71001 White = hoses Vallejo Model Air 71003 Scarlet Red = coachwork Vallejo Model Air 71084 Fire Red = coachwork Vallejo Model Air 71085 Italian Red = coachwork Vallejo Model Air 71077 Wood = ladders Vallejo Model Color 182 70828 Woodgrain (Transp) = ladders Vallejo Model Color 178 70864 Natural Steel = drive shaft, cog teeth Vallejo Model Color 172 70996 Gold / Vallejo Model Color 173 70878 Old Gold = framework, lights, horn, connecting pipes Alclad2 ACL-107 Chrome = bonnet Humbrol Acrylic 33 Matt Black = fan belt, radiator grille Humbrol Acrylic 16 Metallic Gold = radiator, helmets, framework, lights, horn, connecting pipes Humbrol Acrylic 53 Metallic Gun Metal = metal tyres Humbrol Acrylic 191 Metallic Chrome Silver = headlights Humbrol Acrylic 61 Matt Flesh = skin tones Vallejo Model Color 19 70927 Dark Flesh = skin tones Vallejo Model Color 20 70845 Sunny Skintone = skin tones Andrea Color 2nd Base / 2nd Light / 2nd Shadow = skin tones Vallejo Model Color 48 70898 Dark Sea Blue = uniforms4 points
-
A little more progress. 1. The container for the sea anchor (FlightPath PE), which lives on the back of the LH pilot's seat with a metal hook poking out of it: 2. The starboard pilot's seat, which is now pretty much done (lead foil straps etc.): 3. The port fuselage rivet-fest, which is now making good progress: More soon Crisp4 points
-
Despite not making it into frontline squadron service, the Spiteful had a brief career in the RAuxAF. 603 Sqn "City of Edinburgh" Trumpeter 1/48 Spiteful4 points
-
Okay - some update photos of the Tiger 1 - 731. I have now added all the remaining parts and extra spare tracks to the front and most of the weathering is complete. I still need to do some more when it's closer to the time of being placed on the scene I'm hopefully going to have time to make! Comments and suggestions welcome. Kind regards, Stix4 points
-
Next step was to make stiffening ribs along whole fuselage... That was a big challenge - 62 ribs with 3.5mm step between centers ... I used evergreen plastic straw with 0.5x0.5mm profile. That is a little bit big, but no chance for me to work with smaller stuff Ribs is placed over false plates on bottom part of fuselage that was done with 0.5mm plastic.4 points
-
By default, Revell gives you opportunity to complete model with closed cargo cabin. Additionally, you can scratch cargo cabin's floor and rear bulkhead (correct me if I'm wrong with naming). For that you can use picture in instructions sheet to copy/paste details' outline from paper to plastic. Initially, I planned to forget about opened cabin and build default version, but was excited with one very interesting project: http://www.airliner-models.org/main.php?page=gallery&mid=126 Final decision was made quite quickly ... I've started from fuselage partition: Floor and rear side part's pig was scratched from 1mm plastic:4 points
-
Released: http://www.icm.com.ua/news/454-mig-25-rbt-soviet-reconnaissance-plane-100-new.html V.P.4 points
-
So Ced, could you summarise please - was my suggestion of the electric nail file a good one? Just asking before I splash out & buy Mrs R. one for Christmas . She's not a great one for new gadgets, so I could probably disappear it by mid January & she'd never notice...!! Keith PS, I'll forego my pimp's cut this time, but next time, watch out for your kneecaps....!!4 points
-
4 points
-
Ced I feel for you bro Sanding those joins MUST only be done using a flat 'thing' to stop the sanding finger finding the edges and causing the dip that lets the join keep showing and sometimes even get worse Always use a firm backing pad for the BLACK W&D Yes always use black W&D Last Chrimble Mrs P bought me a set of modelling tools in a handy brown plastic box, on first sight my heart went 'boop' in slight dismay but in fact it has been awesome There's a wooden sanding block which holds W&D in place and gives a firm sanded joint and eliminates the usual wibbles when you sand There are also some tool blade holders which also hold carving devices (And tiny twist drills) Get a firm sanding block to hold W&D and see sanding transformed into a art form Blocked files and rifflers need the use of a file card I made mine in the seventies and its sharp teeth keep files as clean as a whistle In the tool room we used to get a short length of file card and tack it to a short bit of wood, the file card which is a sharp wire brush has rows of sharp teeth inlaid at an angle to the direction of travel which whisk out the clogging particles from file teeth Maybe a googling can help you here4 points
-
Just so you know the seats did get their finishing legs, here's a shot of the awaiting a pair of harness guides They get them tomorrow after I get some more stuporgoo from the local shop Today has been a day for watching F1, Deep Impact (a dellghtfully scientific fillum), and Humans And fettlng resin for the Wessie HAS3 On the whole I have enjoyed myself ta4 points
-
With such marvellous encouragement I could hardly say no, so I got right down to it.....And promtly lost one of the first two (octane rating?) decals that I attempted to apply! Fortunately I had a Revell 1/72 Bf.110 in the stash and while the plastic is old Monogram the decals are modern Revell and thus both comprehensive and actually somewhat better than the Airfix offerings (which are rather out of register).....The stencilling process continues, here's where I'm currently at:4 points
This leaderboard is set to London/GMT+01:00
















.thumb.jpg.76f12b87ce9ca9929c9aabdcf8f9d2dd.jpg)