Leaderboard
Popular Content
Showing content with the highest reputation on 26/11/16 in all areas
-
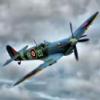
Hello all, Built mainly out of the box, and with minimal or zero weathering as this is purely for display in my cabinet and also because I like the clean look far more than heavily weathered models. I don't get why people heavily weather a model if it isn't in a diorama? It just looks odd to me to see a 'dirty' model on a clean display shelf with nothing else around it?! The only modifications/added details that I made to this kit are as follows: 1 - Three lightening holes which are quite obvious on the real aircraft were missing from the headrest support bracket in the cockpit, these were drilled out. 2 - Seat harness added, made from Tamiya masking tape then painted. 3 - Tiny squares of white decal added to side of the tyre walls to represent the ‘anti-creep’ marks on the real thing. 4 - Whip aerial made out of a single strand from a ‘Hog’s Hair’ artists brush. 5 - Aluminium foil added to the inside of the three 'recognition lights' on the underside of the fuselage to make them more reflective and realistic. 6 - Exhaust stubs were drilled out. Apologies for this being a bit photo heavy, but I took loads of photos and couldn’t decide which ones to use so I thought I’d just show them all: Airfix 1:72 Supermarine Spitfire F Mk.22 Built in the markings of No.603 (City of Edinburgh) Squadron, Royal Air Force, RAF Turnhouse, Edinburgh, Scotland, 1951. The obligatory ‘penny shots’ for size reference - these Spitfires are a bit small in 1:72 scale!! : A couple of shots on a paper display base: Some black and white ‘nostalgia’ shots: Thanks for looking. Kev17 points
-
Morning folks finished a day or so ago just managed the light for photo's.Tamiya Beaufighter,what can I say builds itself,beautiful fit of parts and a fair size model when complete and a menacing looking thing in black,Painted mainly in Tamiya NATO black with a few passes with the airbrush in lighter shades,leading edges and panels painted aluminium then maskol before painting might of overdone it but you get the idea Many thank's for looking in.Taking on board comments from Polo(quite rightly) I have toned down the cowl fronts and a much better result has come forth I,ve added a photo further into the post,17 points
-
Hello all! I have been a bit of a fan of the EE Lightning ever since around about 1970 when I was lucky enough to sit in the cockpit of a 74 Squadron plane in RAF Tengah, Singapore. As a young lad, the aircraft seemed huge, and certainly made a big impression on me. I have always liked to build Lightnings, including the old favourite Airfix 111 Squadron one. However, I have frequently failed with the metal airframe. Brush painted Humbrol 11 Silver Fox never quite looked right. A couple of years ago I built Airfix's F2A and tried Humbrol Metalcote Aluminium, which was nearer the mark, but not quite right. However, I did use Mr Metal Color for the nose ring, and it looked good, so I wondered if I could use the same technique on the whole plane. So I started the Sword T4. From the outset this was a test bed for the paint work, so I made no modifications, so please forgive things like the wrong instrument panel and the over long cable ducts on the fuselage sides. I also used photo etch on a plane for the first time ( I think!) and it was the first non mainstream injection moulded kit for a long time too. Enough waffle, here are the results: As I mentioned above, I used Mr Metal Color Aluminium for the wings, Stainless Steel for the fuselage and Iron for assorted panels. I do not have an airbrush, so it is all brush painted. First up, I polished the life out of the surfaces with Micromesh cloths all the way down to 12000 grit, the got an old brush (quite a large one) that had seen better days. I shook the pot of paint vigorously for a minute or two, then used the paint that had collected on the lid. I dabbed the brush into the paint, then really rubbed it hard onto the surface a few panels at a time. I did this a few times to get the wing finished, but as time went on, I got to shaking the paint more frequently and recharged the lid. By the time I had completed one surface, the paint was dry enough to buff up. I used a Kleenex tissue (other brands are available!) as my polishing cloth and soon had a nice shiny surface. I repainted the various panels with Iron using a smaller old brush and buffed them up too The whole plane took only about 1 hour to complete as far as the Natural Metal finish was concerned. I have to admit that the unpolished paint will look a mess, brush strokes everywhere, but it all magically goes away when you polish it up! The finish is quite hardwearing, but I did use linen gloved when handling the model. I have not varnished or weathered the plane, but may well do now I have taken these photographs. I think it is now too shiny a metal finish, but to my blinkered eyes it is one of the better finished I have had. I still need practice, before I attempt my 1/48th scale Airfix kit. Any comments or advice would be great. Thanks for looking, Ray. PS I thought the Sword kit was pretty good and did not have too many constructional issues with it, except for the wing angles - these do not droop enough!16 points
-
Here is the latest build and the last British one for a while. This is a post war SE5a that ended up in 🇨🇱.14 points
-
Here is my ready for inspection Matchbox Corsair finished in post-war US Marines training unit markings. The model is built straight out of the box although the panel lines have been reduced and sharpened. I had one of these as a nipper, the box art is still a personal favorite. As a last reminder to all Matchbox fans and prospective Matchbox - Revell group builders. The 2017 group build vote is due to close at midnight on Sunday the 27th November. Matchbox desperately needs your support to qualify for next years group builds, please don't forget to vote. Some of our supporters are offering free lifts to the polling stations.14 points
-
Here is Matchbox's old but rather nice kit, reboxed by Xtrakit, built OOB, with the kit decals, representing an aircraft from 64 Sq, RAF Duxford 1957: Meteor N.F. 011 by Sean McAleenan, on Flickrs Once again airbrushed with Mr Hobby Aqueous paints, with Humbrol enamels used for the black and silver bits: Meteor N.F. 007 by Sean McAleenan, on Flickr Again, very much a practise build, especially regarding the application of more than one colour camoflauge scheme. I used white tack worms and Tamiya tape, and should of made sure that the second colour had full coverage. Alas, in my enthusiasm to rip off...err.. remove the masking I realised I hadn't : Meteor N.F. 005 by Sean McAleenan, on Flickr Still, you learn more from your mistakes than your successes, (apparently), so I've learnt a lot on this one. Namely, that the tone of the colour when airbrushed, is not always similiar to the the tone when brushed from the jar. Which shows mainly on the canopy...... I should have left it opened, as the fit isn't great either... Meteor N.F. 002 by Sean McAleenan, on Flickr The decals came from the kit, and while the main markings went on well, the minor ones were an utter pain, the walkway lines are from two sheets, and some just didn't make it in one piece, or indeed at all... Meteor N.F. 003 by Sean McAleenan, on Flickr For all that, I still enjoyed making it, and as I have two more in the stash, one Xtrakit, and an original Matchbox, I'll take note of what didn't go quite to plan and apply those lessons to those builds. The base is for my Javelin display, used here as a distraction... Once again, thanks for stopping by... Sean9 points
-
Hiya Folks, Been feeling rather rough lately so the build has slowed down somewhat, however the Dark Earth is now applied and the first coat of Dark Green has just been brushed on; Cheers for now, Tony9 points
-
8 points
-
Hi Everybody! My name is Pete Mortlock,and this is My first post on the Aviationy bit of the Britmodeller Estate! Cracking build so far Ced,and to give You some heart,it CAN be done...... Built about 7 years ago from the Airfix boxing,it did throw a few problems up,mainly the upper wing roots,I thought (being a very experienced modeller with HOURS of experience (!)),that the locating tabs on the fuselage that support the upper wing skin were interfering with the fit of said wing skin,so removed them......wrong! ......But I managed to sort it out with a few minutes () of fettling and 'plastic surgery! But it all came out well in the end (Note the mandatory use of Workmate......) All build pics are here if required:- http://s235.photobucket.com/user/MORTY333_2007/library/Airfix 1 72 Concorde?sort=3&page=1 Best of luck with the rest of Your journey! Keep Sticking! Cheers, Pete PS....... I did at one stage have a 4" Angle grinder in My hand during the build..............7 points
-
Hello, first post on this forum! I liked to build (very bad) scale models as a kid, and after a 15-20 year sabbatical I decided to pick up the hobby again. I have been lurking around without registering for quite a while now, and I figured it's time to sign up and post something. I've always thought British cold war bombers are really cool, so I wanted to start out on those. I already built the Avro Vulcan in Operation Black Buck camo scheme, so I thought I'd go for Operation Desert Storm for the Victor. I was actually going to build Airfix's new Victor model, but It hadn't come out yet by the time I finished my Vulcan so I got Revell's old tool model. I'm aware of aftermarket improvements but decided to build this one OOB. The fuselage halves and intakes were a PITA, but rest of the airframe went together quite nicely. I rescribed the panel lines, but left in some of the raised details that were too tricky for me to scribe. I sprayed on two layers of grey Vallejo primer (rattlecan). The topside was meant to be "hemp" in colour, but I couldn't find the shade from Vallejo (I really like their paints ) so I consulted the guy at the local hobby store, and we decided on German camouflage beige WWII which is really close but lacks some red. Underside is Vallejo light grey. Weathering was done with acrylic wash and a bit of Tamiya weathering master, I'm worried I overdid it a bit.. Lastly a coat of Vallejo satin varnish from a rattlecan and I called her done! I forgot to glue in the stairs before I took the pictures, oooops. It's my second build, be kind7 points
-
Thanks Benedikt - "kopfkino", cinema in your head, great stuff. Thanks for the videos too - ELO, love 'em Thanks Keith, fingers crossed. I have bits to do before the new tools arrive so I won't be idle! Thanks Bill. "Conky is looking blimmin big" is right. So much to sand and fill and sand and fill and it's easy for me to get fed up with it, and then... she does one of her 'how beautiful am I?' poses and all is forgiven. 'High maintenance' but worth it.7 points
-
I'm not sure if this is proper to this forum or the Figures... Anyway, just a little figure but fun to paint. I was ordering some Vallejo metallics from an Ebay trader when I noticed that the guy also sold the Micro Art Discworld miniatures and decided to pop one into the shopping basket. I was very impressed it is a lovely sculpt and there was no flash whatsoever. Anyhow, my first step was to hot glue the figure to a piece of wooden dowel to cut down on handling whilst painting. It makes the figure easier to handle and when you are finished the figure can be easily popped off the dowel by just a firm twist. Next step is to prime the figure. I use Artist's Gesso which gives a lovely surface for painting on with acrylics. It's strange stuff it shrinks into place so you cna slap it on fairly liberally and just leave it to dry when all the detail will be revealed. The next thing I do is give the figure a wash with thinned sepia ink with a dash of flow enhancer. This sinks into all the crevices and enhances the detail of the figure making it easier to paint but also if you miss a spot it is a nice dark brown so doesn't jump out like white primer would. You can see here I have painted the basic fur colour and a little dab of flesh on the hands and face Next a wash of Vallejo "Face Wash" Now I add highlights to the fur, dashes of bright red and orange onto strands in the sculpt Detail going on. Highlights added to the hands and face. The eyes are painted in and the feather and the ink pot are added. The base that comes with the figure is a simple round "slottabase" in black plastic. I have added a large book from scrap plasticard for my Librarian sit upon to raise him up and add a bit of interest to a rather plain base. Here you can see that the figure has simply been plonked onto the unfinished base but you can see the ink in the ink pot and the "arcane" writings in the Librarian's book. More pictures to follow when I finish up. Moderators please move this if I have hit the wrong forum!6 points
-
After a build of 5 months I've finnaly finished this V-bomber, which I've converted into a tanker. Because white is just white this bird was one big color experiment, to bring "life" into the white......enjoy! The kit Different shades of grey to break the white. Preshade And the final result! Dave6 points
-
Hello, model L-29 from AMK - very pleasant in glue. Added PE, QB scoops and HAD decals. Marking - Uganda AF apx 1970.6 points
-
Finished this one a few months ago. Airfix 1/72 scale Gazelle Helicopter in Syrian Air Force markings with captured Israeli Air Force markings. This example was a machine that was captured by the Israelis during the 1982 Bekka Valley conflict. Decals are from the kit (warning labels) and the insignias and numbers are from I-94 Enterprises. The figure is from the spares box and the kit was painted with Testors Acrylics.6 points
-
Hi fellow modellers, These are latest additions to my Finnish AF collection, the MS.410 has been built for the recent "Continuation War" book from Valiant Wings. Brief summary: MS.410 (MS-624) Azur, OOB except home-made centre canopy part, GSI paints, AK Worn Effect fluid for white distemper, Unit: 2/LeLv28 in March 1943, kers. U.Jakkola MS.406 (MS-311) Hasegawa, Part etched, paints GSI, decals: Stratus Camouflage and Decals no.3, mud and oil leak effects: MIG Production pigments and AK Engine Oil enamel. Unit: kers. Antti Tani, 3 victories, 1/Lentolaivue 28, 1941. Cheers Libor6 points
-
Thanks Francis - I've got this covered. I've chosen to bring the Signal Flag halyards to the aft bridge railings. It's not entirely clear from original pics where they went and I suspect it varied I've drilled and inserted some metal 0.4mm rod. As to the mast stays - I've inserted Bob's Buckles "eyes" on the stack platform and just aft of the 20mm mounts on the bridge The rigging is done with elastic "Ushi" 400G "Rigging Bobbin Fine". I have the 3 sets from Mig Ammo that are almost too fine. It is a real disapointment that the Eduard railings do not "fit" the Revell deck holes - that or my build joining the mid decks has been imprecise The only real solution is to fill the Revel holes - lop the bottoms off the railings and glue them flat to decking That said- in fairness the rear superstructure railings DO fit. There's an upward curve of the deck that is followed well and will make scratching railings from metal even more complex. The aft ladders are gently folded and the depth charge racks are finished off for priming Thanks for looking in and the encouragement Rob6 points
-
John, Keith, Ced, Ian, Alex. Many thanks to you all for the continued encouragement chaps! Mr. C. If this link can be believed then Tescos supermarkets in the UK still stock it. http://www.tesco.com/groceries/product/details/?id=256537088 Well. Here are we on a cold wet Saturday morning, and what else would one do but bend some brass: ...and play around with heavy metals: A beautiful little package came a day or two back from Eileen's Emporium (Tip o' the hat Mr. Heath for putting me onto them!) which included amongst other things, some low-melt point cadmium solder. Once you get to the cadmium part of the Periodic Table in modelling, suddenly it feels like an episode of Edge of Darkness...(still IMHO the best political thriller the BBC ever produced) due to the stark warnings that come with said metal. Not to be messed around with by a long chalk. I think part of my problem with soldering in the past has simply been my general and completely unreasonable ineptitude with the hot-pointy-iron approach. Somebody here mentioned earlier about using a gas torch approach, so I hooked out an old Crème brûlée torch that has languished unused in our kitchen cupboard for over a decade, and decided now was the time to step up a gear. What do you know? I can now solder small parts: That low melt-point stuff is just superb as it stops the very thin 0.4mm tube from simply getting too hot and melting. All it really takes (after buffing the metal and applying a little flux) is to shave a flake of solder off, flatten it in the pliers and drape it over the parts, followed by a brief play of the flame to melt and flow around the joint. Based on a sweary trial run which had bits dropping off, rather than attempt to solder the above sections onto the cantilever, they were simply glued into place: I'm not bothered about the structural inaccuracy of the rear section up by the firewall - this will be hidden in the engine bay once the fuselage is closed up - what I wanted was to make sure that everything from the central truss forward (which will be in plain sight) was as accurate as possible at this scale. A little bit of tidying-up needed on the joints as you can see, but otherwise a productive session. Ooh I say. It's nearly there now: Dying to stick some primer on to see what it looks like unified.... I want to add a little detail to the firewall, but then I think a little bit of a prime tomorrow on this region is on the cards. I got some of that Alclad black Microprimer for black-basing this build recently. Anyone know how it performs on metals, or would I be safer sticking to the usual Halford's grey? This, more than anything else I've built this year, has taken me I think to the limits of my building abilities with metal at this small scale. There you go. You can build a perfectly satisfactory cantilever for a Barracuda at 1/72. All it takes is faith and a few friends. Now for some lunch....6 points
-
Thomson 1448 Glasgow to Lanzarote today. 4 hours flight time 1033 departure 1433 arrival. This is the Authentic Airliners 757 kit with livery by Draw Decals. Windows, windscreen and landing lights are by Werner Lehmann at Authentic Airliners. Thomson light and mid blue are Xtracolor X555 & 556, the dark blue is Revell Night Blue 54 Aqua colour. White is Halfords white primer and Boeing grey is Mr Color 315. Corogard is my own mix of Humbrol 191 Chrome Silver and Metalcote 27003 Polished Steel. Leading edges are silver decal. I have had this on the bench for nearly a year now and was working on it in between my Airliner GB entry. I would have finished it sooner but had to wait for Telford to get some cockpit frame decals from AA where I also picked up Werner's new landing light decals which I feel add even more realism. This is the first time I have used any Draw Decals and I must say I am very impressed with them. The carrier film seems to disappear completely. With this livery there are no decals on any curved surfaces so I didn't have any problems with the stiffness that has been reported with Draw's Digital Silk Screen decals. Looking forward to using some more of my Draw sheets on future 757s, I've got lots in the stash! Only very light weathering to this one! Hope you like it and thanks for looking. Cheers, Ian5 points
-
Ello All, I started this one a little after the DO335 that was my first kit after a couple of years' break and decided to do this one in a real colour scheme. So I broke the decals. Of course I did. It's almost right but has the wrong shark's teeth on it. This really was a lovely kit - an ebay bargain and it was such a lovely build. I used a tiny amount of filler around the nose gun cowling, and that was it. Paints are almost all Tamiya acrylics, and I used some of the new Revell weathering powders. The seat harness is made of masking tape ( I have a roll off DIY stuff designed to go around curves that has a lovely texture that comes up very effectively under paint) and fuse wire. Everything else is straight from the box. I've put in a few "In Progress pics" too. I was going to do an Airfix Lightning after the 335 but I just felt like doing this one at the time, the lightning is going well though and should be done in a couple of weeks.5 points
-
5 points
-
Hi guys, I've started a new project, Dragon's Stug III G with zimmerit. I will be building a small vignette with a few British soldiers moving past the abandoned stug. I've almost finished building the Stug, just waiting for a CMK engine set to arrive. I'ts a great kit and very well detailed. The only real issue I found was that there are no locating holes on the superstructure or fenders for the side skirt mounts. Not an issue for this build as I won't be using them but if you do use them they have to be located by eye. Also the hole in the mantlet on my kit was smaller than the barrel so had to be drilled out. Apart from that it all goes together well This is certainly one of those kits that is built in sub-assemblies. Thankfully the fit is spot on so painting each assembly separately is a certainly an option. It's especially helpful if you are adding an engine bay and painting the interior. I'm going to make a start on the figures while I wait for the engine. I haven't really tackled figures before so this should be interesting! Cheers Matt5 points
-
Thanks Ian, but if you want to see someone who really knows their soldering stuff, the links that Ced posted to Nigel Heath's soldery earlier in this thread are the bees knees - what you see here is only what I picked up from his metal wonders... Glad to have helped C-man! This kit handily comes handily supplied with the AP bomb as an option. I noticed there was some additional (Pavia?) AM stuff for depth charge options as well knocking around a while back. Grieved to hear about the lack of time issue James - at least you get to live vicariously through my stumbling around here... Hi Sean! Funny you mentioning eyes hurting - mine are starting to throb somewhat after today's endeavours... To end off a rather busy Saturday, just a little more activity to report. Firstly a note of caution. If (as I have) you're going down that whole firewall route for the rear of the engine, be conscious that the cockpit floor that extends for'ard of the rudder pedals is too long. You need to reduce it back by a few mm: You can see the fit issue below now that'sbeen corrected: Without a trim you can see there's no room for the firewall, even using thinner plasticard. I've glued the rudder pedals back on since taking this shot. Next up, some pipes and wires on the firewall itself. 5 amp fuse wire wound round 15 amp. I've no idea what any of those pipes and cables are. Doubtless Crisp could tell you by touch alone but without a maintenance manual, I'm just emulating what I see in photos. Of course you'll only get an overhead oblique view of this when the engine bay's finally closed-up, but being a Britmodeller it's important to lavish detail on the invisible, isn't it? That's your lot you lot. Have good evenings all of you! Tony5 points
-
5 points
-
Still puzzled by the very low interest in the SEA campaign GB. Considering the huge success of the MTO GB I was expecting this to excite a similar response. Guess that the men who fought in SEA really were the forgotten army...5 points
-
Cheers Simon , Been a bit rough lately so slow progress, but I`ve got the Dark Earth finished and the first coat of Dark Green applied now; Cheers for now, Tony5 points
-
Well I have now finally had the chance to make a little progress on this. What's been done so far? Painted the inside of fuselage and cockpit area, added transparencies and assembled cockpit. Notes. The kit has a very basic interior that when complete will be barely visible from outside, so I shall just add the pilot figures and call it a day as far as the cockpit goes. The transparencies while clear have a rippled Victorian glass effect to them. All transparencies are glued from the fuselage inside and do not fit tightly or evenly against the exterior of the fuselage. The ball turret is moulded only to turn and shall be glued in place after the kit is finished so that i can gain access to the interior in order to add the guns after removing window masking. I need to get cracking with this kit so such problems as poorly fitting windows will just have to be ignored if I am to finish on time.5 points
-
I currently only have three builds on the go and two of them are nearly finished so it's time to start another. As there appears to be a distinct lack of Hurricanes in this GB, I decided I should do something about it. I got one of these from a well-known Lowestoft-based supplier the other day (they were selling them for about six quid so it seemed rude not to). Obviously, the two decal options aren't suitable (although I really fancy the EAF one); luckily I have a few choices: or, or, I can't decide which one, although I like the 43 squadron as I'm a little sick of Dark Earth/ Middle Stone over Azure Blue schemes, so I'll let you decide. Please post your answers below.4 points
-
South Russia, 1942 , code name Fall Blau. 1/72 scale diorama with Preiser figures, Dragon Panzer and Fujimi Blitz, lots of scratched details. This diorama was awarded earlier this year at the Saumur model show.4 points
-
Revell's 1/48 F-8E Crusader finished pretty much out of the box except for the addition of after-market metal landing gear. Pretty decent kit with mostly excellent fit. Finished as always with Xtracrylix and a brush, this one in the markings of VF-194 ‘Red Lightnings’, USS Ticonderoga 1966 And with my last US Navy creation.4 points
-
This is newest MENG model aircraft kit, easy for assemble, have quite nice detail, but also with one weakness-belt is no include, so I built belt by meself. In my opinion, it would be a better chioce than TAMIYA kit.4 points
-
regarding the camo pattern my dad followed the Hasegawa instructions, but then he looked at pics of the original aircraft on which the camo differed slightly, so now he does some minor corrections the ordnance, six Mk.82 Snakeeyes and two LAU-3 pods accidentally threw away the IFF antenna parts, so my dad made them with plastic rods4 points
-
Well, I've finally completed the kit. Stix thought I should post it on the Diorama section, but I wanted to keep everything together. You may spot the Archaeopteryx, It should really belong in the Brachiosaurus kit, but I decided the tree was the perfect home for it.The lizard has moved to the other kit for safety! Tortoise has stayed. I know the trees in the background should be conifers, Stix wanted to use his background... e I've got some other shots taken without the background: From above with white background Dio with white background Hope you like them, comments welcomed, I know the archeopteryx is shiny, but it's really iridescence! Mrs P.4 points
-
As a bonus for the loyal followers and participants of this thread (and to satisfy my own curiosity) I made a drawing based on possibly correct info. What I did using Drawing 2 as a basis: - In the side view I extended the two mysterious lines at the rear of the body to the end of the utmost body point as indicated by the top view. - I used Photo 4 to measure and calculate the approximate distance between radiator cap to start of grille. - From there I pulled down the grille line, correcting Drawing 2. Interestingly, for the most part this is exactly the end of the grille as seen on the original drawing. - I used the approximate tyre size as calculated before. - I filled the drawing with the colors grey, blue, red and brown. I'm starting to really like these sleek, agressive, ahead of its time looks better than Protar's version, with all respect to those who have built it and all of those who will build the model out of box. (By the way I still like the looks of Protar's take on this car...) Really can't wait to see Nick's Blender model and, especially, the first finished model bearing substantial resemblance to the real car.4 points
-
evening ladies ..just a baby update today as I am off out for the evening The blue side is done.. not cleaned up yet, but in place at least.. This is an access panel on the wing underside that is up next on both sides - note the hinge at the front.. ..these panels are covered in detail in the Monforton ebook, so it is simply a matter of scaling and reproducing. I sense I will never be this spoilt for perfect build research again.. ..the hinge in the panel above is faked through a little trick I invented on my F7F and works equally well in plastic. Essentially score a sheet with parallel lines as seen on the right, then cut a strip and fold it over as seen at the top.. on the left is the panel in preparation - a slot will be cut from it to mount the hinge, and it includes additional side panels each side of it as these are too small to do separately.. ..the panel is then offered to the model to work out where to cut a slit to mount the scored strip made earlier.. ..now the slit is cut we are ready to drop things into place and fake that hinge... ..and here it is - I haven't cleaned the metal up much yet, but I think it works quite well ..until next time folks... TTFN Peter4 points
-
Things generally went together quite well, and I'm glad I beefed up the locating ridges for engine/centre-wing assembly, as this served to hold the Amazing Sculpt filler (like Milliput) in place along the gap in this join line. It was only after completing the airframe that I remembered the two side openings (auxiliary intakes?) in the engine nacelles that the kit has moulded in solid relief. Photos fail to reveal much about these, other than they seem to be open with the engines shut down and in flight. Of course, when I came to open mine, I was left with having to access everything from the outside, which made lining them with ducting and inserting a recessed grill, copied from Ken Duffey's Deka kit build (Ken knows more than me about Be-10's), a bit fiddly. The kit's rear gun turret fails to capture the look of the real thing because the rotating gun mount is a fraction wider than the rear fuselage where it sits. If the real flying-boat had this arrangement the mount could not rotate. I made a vertical cut through the mount to narrow it a little and rejoined the halves, and added some plastic sheet to the rear to beef it up a bit. I also thinned the fuselage walls where the mount sits so that it would look as though the mount could rotate within the fuselage sides. It was necessary to make a small bulkhead to prevent see-through into the gunner's compartment around the sides of the mount. I also added the "roller-door" shutters that run in the gun slots. Almost ready to paint:4 points
-
Hello modellers! Here now the Huey´s companion - the Matchbox AH-1G Cobra in 1/72 scale. Origially I hadn´t planned to build another as I already have presented one here and as the kit used had an unusable canopy caused by a casting defect. But it was fellow Britmodeller Luis Alfonso and his son who talked me into the project and as it was an opportunity to construct the long planned vacuforming machine, agreed to start it. As I didn´t want to change the turret, I looked for an early machine with only the minigun and a not too complicated markings scheme. I discovered “Patricia Ann” a Cobra of “C” troop, 7th Squadron, 1st Cavalry in Philip Chinnery´s “Vietnam - The Helicopter War” and after some internet research Luis Alfonso and me found out that it´s a very well documented aircraft (even with video sequences) with an interesting history. Serial number 67-15447 survived service in Vietnam, was later modified to F-standard and is today on static display in Mark Illinois. As the Matchbox kit is a very basic kit with deep trench lines, I filled these trenches with stretched sprue and later rescribed it. The cockpit was completely reconstructed from styrene sheet and got two pilots from the Revell Nato Pilots set. The tail rotor was shifted to the port side and additional to the canopy a clear nose part had to be vacuformed as cover for the landing lights on this particular machine. The inboard seven shot rocket launchers came from the Esci/Italeri Huey kit. Nose art and Cav patch on the tail were self printed. Painting and weathering was the same as with the Huey as I built both models parallel. BTW: Have added some WIP pics! Mario3 points
-
Here is my effort of an old favourite from my youth, Airfix's 1/72 Angel Interceptor. I used a resin cockpit and pilot by Retrokitonline which I must admit has the world's ugliest looking "Angel", just my luck. Here is the link to the full build thread http://www.britmodeller.com/forums/index.php?/topic/235008043-airfix-172-angel-interceptor/Spectrum is Green.3 points
-
Hi everyone, finally finished my attempt at building a Electric Intruder from the Wild Weasel boxing of the 1/48 Revell/Monogram kit Although not done as a Wild Weasel as I wanted to do a Vietnam aircraft Used a mixture of the kit decals and a few from the stash to represent an aircraft of VMCJ-1, Marines, Da Nang, South Vietnam, circa 1969-72 The actual aircraft is an option in the box but in US Navy markings Apart from a little detailing on the canopy frame, some slightly altered antenna and drilling out some of the various air ducts it`s what`s in the box Paint slapped on with hairy stick as usual Hope you enjoy looking at, Cheers Russ3 points
-
Firstly, excuse the poor background of these photos, I will try and get better tomorrow weather permitting. This is a dragon kit, reboxed by italerie. it was painted in tamiya and Mr hobby acrylics (which are rather nice I must admit) I had some problems with the individual tracks links so unfortunately had to resort to rubber band tracks. after a coat of mud they look ok to me. it was a very nice kit, with lots of etch and no fit issues. This was also my first winter camo attempt and I'm really happy with it. feedback welcome (just not on the photos!Lol)3 points
-
3 points
-
mmmmm! I think I'll join you in whimpering. And Kate Bush in the same post! My cup runneth over! All i need now is a mention of Toyah Wilcox and my mid 70's heaven is complete!3 points
-
3 points
-
I think this could interest you, Roy... Sorry, I have just found it back in the docs sent by Sebastien (several files). I thought it was the same than the one in the book, and now, I see its definition is better (excellent in fact). I apologize, you could have earn some time... Olivier3 points
-
Thanks for all the kind comments folks. Well, USS San Fransisco finally docked at Pearl, and is securely tied up alongside, crew taking a spot of leave if not on watch, and the ship is taking on provisions ready for her upcoming long trip to the Solomons. I've taken a few snap shots, and as usual the camera has shown a few rough spots that one otherwise wouldn't notice, such as some rough streaking there that needs tidying up a bit. Also the concrete quayside looks a bit too clean and needs a subtle muckying up, but on a macro level. It's kind of good how every little thing needs researching when trying something a little different - even spent quite a bit of time looking at photos of moored cruisers to see how to tie a ship of this size and era up properly when alongside, and then doing it to the model is quite fiddly (has anyone else tried this?), had to thread the rope through the correct fairlead then tie up to the ships bollard in a tiny figure of 8 pattern, all with little tweezers and dots of the faithful old white glue, then getting the the ropes to hang down naturally is quite challenging, but all good leaning.3 points
-
- Another Fishpot from Trumpy,as usual for me in quater inch with open canopy and operational looking as much as possible3 points
-
Thanks John I'll look into that more closely after the weekend... must say though that my drawing and coloring practice was very basic, seeing how far I'd come with only minimal amendments to Drawing 2. Some preliminary replies: - You're right about the tail. I tried to correct that a bit. - (Not a reply but a remark:) I had flipped my previous picture horizontally so that wasn't right. I flipped it back in the below pic. - Steering wheel: I was wondering about that too. It may well be that the eventual height of the 'metal windshield' was higher than in Drawing 2 (could be another easy-to-change thing in the workshop... perhaps Bordino felt more comfortable a bit further out of the wind). In the next comparison drawing I added a bit of height to the metal windshield giving that add-on a slightly lighter colour... please let me know what you think (have a look at Photo 2 for comparison purposes). Re. new engine drawing: yes I was awestruck as well. Really great... now we not only have an official engine side view blueprint, but also a front view blueprint. Just amazing. Ok I couldn't resist this... a comparison between (99% certain) Protar's main inspiration for the kit, or maybe even Protar's own kit drawing.... and the amended Drawing 2. It really is a huge visual difference. I used the wheelbase of 2400mm. (originally noted on Drawing 1 so we know it's a fair comparison) as a matching point. When the details are washed out, the two shapes seem to look a bit more alike (or maybe it is just me), perhaps making it a bit more understandable why Protar chose the shape it did. When measuring though, serious differences become apparent. Note that where Hannes originally thought the model was supposed to be longer than the kit, that seems to have been an optical illusion. It is actually shorter. That was a big surprise also to myself, I had never expect to come to that conclusion. The next overlay, using the wheel hubs as matching points, says it all...3 points
-
Dear CC Thank you for your kind words,. Actualy i am currently redoing it using a thinner coat of paint ( another brand). It looks a little thick in reality and i can improve the colors as well. Also, the aluminium on the real dash was actually 'bouchonné' in the 20's but got worn and weathered over the years. One can only see it on some photos depending on the angle. And it has actually disappeared from my above replica altogether. hence re-doing it. ( apologies to those who may have seen these photos before) but my 'aluminium bouchonné' is not at the right scale it seems to me. also some rivets on the dials are not at the right scale. I can do better. So for this combination of reasons, i decided to do a new one entirely. When your turn will come, i am sure you find better 'ameliorations' and i already have ideas where they could come from... but i need to move on with my build.3 points
-
Not been terribly well today so only managed to get an hour or so in this evening. My attention turned to the wooden block for the jack to stand on that is usually stowed on one of the fenders. The kit item looked something like this but about 2/3 the height (sorry didn't get a pic of the actual part before the mods) And is supposed to look something like this.. (Dragon Pz III kit part again for reference) After filing, carving and sanding down to the (more or less) correct size I then used a 60 and 100 grit sanding pad dragged a few times across the top surface in one direction and the two parallel sides to produce a wood grain effect. Painted a bit of tamiya extra thin on it to soften the grain and added the etch straps to end up with this Applied the etch corner brackets temporarily with a dab of PVA and glued them to the fender with cyano Lifted the block out for separate painting. The wood grain effect shows up well in this pic And here it is with the block temporarily placed in it's location. Thanks for looking an all the positive comments Phil the less than fit3 points
-
F'nar. Oh, the hat? sorry. Hey, wait a minute! Whofan mentioned Hill Street Blues. Now THERE was a show!3 points
This leaderboard is set to London/GMT+01:00



.thumb.jpg.ba34a9f6ddce411193946dbdcc7b5fe8.jpg)





.thumb.jpg.b4a5069fd2c2dd5708ce1694345c5b11.jpg)






.thumb.jpg.d17ff607fc7e89ed057e63fcb6f2a888.jpg)
