
Leaderboard


Popular Content
Showing content with the highest reputation on 26/10/16 in all areas
-
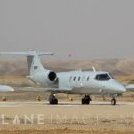
Almost oob model, I used only Eduard's masks, FOD's and UB-32 pods.31 points
-
Here is my "Red Arrows`" Hawk in 1/32 scale. Built with Revell 04284 kit, Eduard`s interior PE parts, Master`s Pitot tube and some "scratch" work (mainly flaps). I thought it will be easy and relaxing work, but it wasn`t. I don`t expect miracles from 1/32 kit which costs about 20 GBP, but Revell`s Hawk has some annoying errors and too many simplifications as for 1/32, not so old (2010) model kit. First of all it`s designed to show in flight position (it has movable ailerons and rudder with retracted flaps, while on ground flaps should be extended with ailerons and rudder in neutral position!). Something`s wrong with elevator position either. There are not any rivets, also a lack of plates under elevator`s mounting positions is visible. Details in cockpit are not so bad, but seat belts from decals are not very good idea - that`s why I used Eduard`s PE sets. The worst thing in this kit is... red plastic!!! It`s really hard to work with it and the moldings are not very good quality because of it! I think that later edition (04849) with grey plasic would be a better option if you would like to build a Revell`s 1/32 Hawk. Main colors are painted with Xtracolor enamels (oh, what a long drying time!), covered with Microscale Gloss and polished with Tamiya polishing compound. Decals in the kit are of good quality, but the white elements are little transparent, so I`ve overpainted them with white acrylic. Summarizing - it takes a little work and patience to make a good 1/32 Hawk from Revell`s kit, but once you`ll finish it - it looks great on the shelf! At least from the distance...22 points
-
I finished this quite a number of years ago now (in fact not long after it was issued by Airfix) but don't think I ever got around to posting pictures - with a couple of builds going on the WIP forum they inspired me to get the old girl out and take a few shots. This kit gets a really bad press, but with some careful planning and thought it actually goes together fairly well - far better than the reviewers will have you believe The only tip I would give is to join the fuselage in complete lengths first, (i.e. add the nose and tail sections to the centre section of each side before gluing the fuselage halves together) as this will drastically reduce the step and amount of filling between the nose/tail and centre section, as the latter has a slightly smaller diameter. I used Halfords' White Primer with Appliance White over the top, and after decalling I gave it a few coats of Halfrods' Lacquer. Decals were as originally supplied in the box. I'd say if you've got one in the stash get it out and build it - it'll provide hours of fun All the best, Tom17 points
-
Hi guys im new to posting on here so here goes, Here is my last off the bench its the Italeri F-16DG/DJ in 1/48 it was a suprisingly good kit to build and didnt take much fettling . Paints used were life colour and xtracrylix, sealed with pledge klear, weathered with tamiya pastels, and washed with Flory washes (dark dirt) finally sealed in with xtracrylix matt coat and then all oil stains/leaks gone over with klear for the oily look, And base was from coastal kits. hope you enjoy15 points
-
Howdy everyone, Just finished my latest `Secret War` build, so I thought I`d show you some picks of my attempt at building an `Air America` ( read CIA ) Hughes 500P, dubbed `The Quiet One` from the Academy CHiP`s boxing Specially designed for laying Telephone Cable `Wire Taps` on to North Vietnamese Army communications on the Ho Chi Minh Trail towards the end of the `Secret War` in Laos Could only find 4 photo`s to work from: one prototype, two demonstrators and one `in service` to work from so had to guess quite a bit as to final configuration Modifications include; four bladed St Andrews cross tail rotor made from wire, plastic sheet and a lot of superglue gel, bigger panel to accommodate terrain following and LLTV systems, change the T tail back to earlier V, Scratch built side panniers..... various lumps and bumps around the nose area and of course the silenced exhaust and rear fuselage, also scratched a carrier at the rear which I presume was to carry...... solar powered relay that sent the Tapped Info back to HQ. Hope you enjoy, thanks for looking Cheers Russ12 points
-
Sorry for the radio silence. On Monday, the New York Times printed an extremely unflattering and, if I do say so myself, incomplete, incendiary and rather biased piece about my employer. As a result, a lot of people said nasty things about us on social media, and I was very busy. Of course, it's always easy to bravely call people cowards, or say they have no testicles, or whatever, if you're in the public echo chamber of Twitter, safe from having to have the courage to directly address the people you blame, but within easy reach of low-level employees who have to stay up until odd hours and skip lunch to make sure press releases get pushed out. Exhausting and exasperating. In any case, I'm a little closer: 20161025_200631 by Edward IX, on Flickr 20161025_200648 by Edward IX, on Flickr Not perfect, but I'm doing what I can. Next is probably some more touchups -- turns out EXTREME!!!! Metal does lift from Tamiya tape -- and then a gloss coat. I am extremely dubious about the condition of the decals.11 points
-
I have just completed this new kit from Airfix, I think that Airfix has done a very good job on this kit and it fits very well. I chosen to convert it to a Z-7 nightfighter using the OWL conversion set. I have used a lot of time on researching the camoflage scheme, first I contacted Owl asking for a reference photo documentation that the scheme in the decals offering was correct, but did give a weak answer that they could publish photo bla.bla. My own research had give me the conclution that the overall black scheme I quistionable, base on the photo published in Luftwaffe im Focus 10, from Start Verlag, and the fact that only 3 aircrafts was converted to Z-7, comparing the spinners and the placement of NJG shield I also backup the finding that Axel Urbanke claims that this aircraft is R4+HK. So I have gone for a 70/71/65 scheme thats has been overpainted in black on undersurface and sides. A thing that was not in the conversion kit from OWL was the armoured glass on the front of the cocktit I had scratch something here, and also the FUG under the fuselage. cheers Jes10 points
-
guess wot I been up to today then ???? Yup, painting. And to be honest, I'm not so sure it was a good thing. I had ordered some RAF Dark Green at the same time I got the Dark Earth, and I had never opened the bottle until today. It was certainly a different shade from the dark green I had used before - this time it had a distinct grey tinge about it. I got out the dark green I had used before and true to form, there was not enough in the bottle to do the job. So I had a choice.... order some more and wait another week or so before I could spray, or use the new stuff and see what happens. I had already spent a couple of hours masking and had psyched myself up for the job... I was going for it. Here's a perfect reason I do not like super glue! Two of my access panels came off with the masking tape. It's certainly not a death blow, just a PITA. Some careful gluing should see those parts back in place before too long. The pattern was the best I could make out based on the photo above. The color is a bit orf as they say - it is a tad greener in the flesh but the camera hasn't picked it up well at all.. I kept the blu-tack sausages as small a diameter as possible as I wanted to obtain a tight but not sharp demarcation line. It seems to have worked. This is a bit more like it in terms of color. There is some slight touch up required but nothing too drastic. The worst is the small area just to the rear of the observers abode, and that will be under the canopy anyway. T'other side.... I took some artistic license based on the uncertainty principle and took the dark green forward of the cockpit up towards the cowling - that will let me do the wraparound of the cowling later. The blu-tack did leave a residue from where it was placed. I can't remember if I had that issue before. Hopefully it will disappear under a coat of varnish. Looking at this photo - I am much happier with the "tapes" on the vertical stabilizer now that they've had a few coats of paint. The question is.... is the green, ehrrr green enough ? Initially I thought it was too grey, but it is growing on me. I'm trying to convince myself that in wartime, there were no doubt several different shades going around and they wouldn't be too bothered about what went on the beast at the end of the day. When I compare it against this.... spitfire & hurricane the colors don't seem that far away. It's only had a cursory clean up at the moment. Once the paint has had time to cure I'll get into it with a bit more fervor (there's still remnants of blu-tack hanging on here and there). I can also see in the photo above that my masking was slightly out in a few places. i.e. Just forward of the tail I can see that my green squiggle didn't fully cover the brown and there's just a very slight touch of the brown at the bottom showing. Now I can try to remask and respray, or convince myself that the painter did a sloppy job Where's all the flying surfaces I hear you ask ? Well, I didn't do them today - for two reasons. 1) I wanted to get the main fuselage and wings done first, then I can offer up the flying surfaces and make sure the masking aligns properly, which I couldn't do with all the blu-tack and tape covering it all today, and 2) I ran out of blu-tack. - I have purchased several different brands of the American version but it's not the same. It seems a lot more dense and I can never get it to stick to anything.10 points
-
Quisque Tenax - Each Tenacious In between working on my mammoth Alberts build, I was asked by a RAFA friend if I would build a Wellington representing that flown by his uncle with 99 Sqn during the summer of 1940, although I must confess to being no expert on Bomber Command aircraft (unlike Melchie or Woody). At that time 99 Sqn (who were the first to operate the Wellington) were parented by RAF Mildenhall but had moved to RAF Newmarket Heath during the previous September; the 'Rowley Mile' at Newmarket being the longest grass strip in the country and the only place from which a fully loaded Wellington could operate. The Sqn would move to the newly established RAF Waterbeach in Mar 1941. Plt Off P S Willatt was posted in to 99 Sqn (detached from 214 Sqn at RAF Stradishall) wef 8 Mar 1940. He remained with 99 Sqn until 6 Sep 1940 when he was posted to be an instructor on 15 OTU at RAF Harwell (taking his aircraft with him). During his time on 99 Sqn Plt Off Willatt took part in the first bombing raid to Berlin during the night of 25/26 Aug 1940. The aircraft stayed with 15 OTU before being lost in Jun 1941 during a transit flight from Luqa to Egypt. My friend had some photo's of his uncle's aircraft so we knew it was coded LN - V but it took some digging around in the 99 Sqn ORB to discover that its serial was P9277. I've modelled her as per the first Berlin raid, the bomb load carried being 7x 250 lb plus one SBC containing 60x 4 lb incendiaries (although upon reaching the target and finding it obscured by 10/10ths cloud, the crew brought the bombs home save for the incendiaries which they jettisoned into the North Sea). At some stage I will add a Fordson tractor and the bomb trolleys. The model is the Trumpeter, which I am told is the most accurate available, built almost OOB save for the Eduard flight deck etch (which, strangely enough came with the kit) as well as Quickboost gun barrels. Additionally I scratch built the turret interiors as well as the open bomb bay doors (all 30 of them!). It will be on the Bomber Command SIG table at Telford.9 points
-
Here are the missing pics about the front wheel bay details: On a different subject: I've been scratching my head on how to reproduce the boarding step, which is always deployed when the canopy is in the open position. This one: Apart form the step itself, my concerns are about its housing in the lower fuselage: I'll have to carve out some plastic in that area, and I was trying to figure out to what extent - meaning if this would involve also the air intake piece, hence having to decide if I'm going to use the kit plastic part or the PAVLA resin offering. This is the area, just right to the tape strip: Looking at other pics of the boarding step, it looks like the housing is definitely going beyond that seam line, like I more or less marked here with a black marker Then again I don't like the kit parts not because of fitting, as that is almost identical to the resin bits, but rather because they need a lot of clean up and the sprue gates left huge dents in them. So I said what the heck, I'm going with resin! And I tested a home made chisel on a spare resin bit to see if it could go: Just a piece of brass rod that I shaped up using my Dremel with a sanding disc. Works pretty good, will see if the "handle" (that would be me )can keep up with that . Now, before gluing the resin intake to the front fuselage, I wanted to rescribe some of the lines that defines the additional vents (if anyone could help here with their name and explaining their function, please? ). So I used Tamiya Masking tape for curves, a razor saw and my Incido (sewing needle), the three of them all Steve's (Fritag) ideas I shamelessly tried to copy Left done, right undone So, using some CA gel, I glued the intakes to the fuselage; the reason for doing that at this stage is for ease of masking and painting of the intakes interior, which I'm going to do before joining this part to the main fuselage. The green circle in the above pic shows some tie-in job to be done. Same on the other side: Bottom joins are definitely better, both outer and inner: So now it's curing, before I do any fill in and sanding Comments welcome Ciao9 points
-
I thought this deserves it own post ..particularly on a UK site because its very interesting I found this on a website of a UK Injection Moulding company today... was this the hold up?.. so much for the issues being shipping Airfix went with a new uk vender to do the molding?..(And I highly commend Airfix bring job back to their home country.. may this kit be a big seller) =================================================================================================================Curtiss P-40B Warhawk – Ready to Fly! We are the proud manufacturers for Airfix of the new 1:48 Curtiss P-40B Warhawk! The first Airfix glue kit production in the U.K for fifteen years. The kits are all boxed and ready to fly out the factory! http://www.plastch.com/curtiss-p-40b-warhawk-ready-fly/9 points
-
The Orange box from cyber-hobby in scale 1/35 (Isu 152) with 3 different guns and included some figures.(build in 2013) Kv2 from trumpter with 2 kind of tracks.(build in 2012) Kv-28 points
-
Well after lots of self imposed permitted indulgences A few nights at Canary Wharf, trip to Cutty Sark (if you havent, I recommend it) and the Tower Of Beefeaters, or grandchildren visiting (if you havent...) and beginning to rebuild the port side sill on the Midget I'm getting back on board Small updates, as I does, beginning with the undercart It might be injudicious to ask how Alan W Hall managed to get his hands on FOUR Hudson tailwheels but that was the source of the legs and wheels he used in his venerable and quite famous Wasp from a Scout conversion Anyway, be that as it is I do not have access to tailwheels from one Airfix Hudson let alone four so other means of holding the legs off the ground needs to be found As the legs units have marked caster angles included I started with a couple of strips of 80 thou polycard (and glued of course) held in my minivice with slots cut out to make the forks from Wheels come from the Airfix Vertol Sea Knight kit with centres filled in to replicate the wheels in the pictures above from Willy, ta mate they're very useful, and the slots cut away to suit The slots will be 'removed' from the big lumps when I get the nerve to extract the forks from 'em And I have been modifying the canopy buck I moulded off my old Scout kit parts I was never quite happy with the 'fit' at the rear windows so I've taken the opportunity to remake the buck without damaging the original parts The main roof panel can be allowed to get reduced significantly to fit where it should Seen here is one of the practice 'pulls' being sized to fit This isnt right yet, I need more of the acetate sheet to get the final size right down Thanks to your help I have been able to get the underfloor area in Here the stiffener struts mounted under the stubwings along with the lamp box and the radalt unit mounted in the nose And the Nimbus is getting some paint treatment Model Air Aluminium 71.062 with a dash of Modelair Gold 70.996 on the ribbed body and a dash of German C Black Brown 70.882 further back along the jetpipes next comes the pastel dusting to give it the burnt metal look we all love Sadly, no pics yet Purrups later tonight with luck Working on making the stores carrying gear next (how to make those skinny little steady arms in 72th scale huh? Fear not, I has some ideas that might just do it)8 points
-
Hail to the good folks of Britmodeller Land, thought I'd post this johnny here for your perusal, it's the test shot of the Airfix Whitley V in its BOAC civvy hauler guise as worn by 15 former Mk V bombers leased to the airline in 1942, and was built for last months issue of Airfix Model World magazine. Twelve were converted using streamlined fairings in place of the FN16 nose and FN4A rear turrets, additional fuel tanks in the bomb bays to extend the range and the interior modified to take freight, (two still had their turrets fitted). Some of these aircraft flew a particularly hazardous route between Leuchers and Stockholm but due to the heavy fuel consumption relative to it's payload the type was replaced quite quickly by the far more able Hudson. In 1943 12 of these aircraft were returned to Bomber Command plus the two armed machines and one was written off in Gibraltar. The Airfix kit is a delight to build, (I have two more on the go) and looks rather natty in the BOAC scheme. The other option in the box is of course the MkVII of Coastal Command which I'll be building once the Mk III is done. One thing to watch for with the decals...... the huge BOAC letters are printed in one piece with a correspondingly large carrier film which could prove very awkward to apply without a certain amount of the dreaded silvering to deal with. I opted to cut the individual letters out with micro-scissors and apply them using Micro set and sol and a moist cotton bud., (same went for the fuselage codes). Well Darling, kindly clear the runway for the next one... Thanks for looking, Melchie7 points
-
This is Eduard's lovely Mk IX Spit finished in the colours of a 316 Sqn aircraft. Built from the box (will use Barracuda's cowling top next time). Decals are from Kagero's Polish Spitfires book. Painted using Tamiya acrylics, weathered with oils, Mig pigments & a silver pencil. Any comments or criticisms welcome. Thanks for looking. Pete7 points
-
Hello everyone. This is one of the three models I've done since my last WIP. I really like this jet because it shows how Israel was so willing to have jets that they made them themselves. The body was painted with Mr Color Lacquer paints well diluted and mixed with retarder. The camouflage was painted with the assistance of liquid latex. I only had a few mistakes, most noticeably the left number decal on the fin and a few few bubbles on the bottom. The front antennae broke in two parts when the model slid off my hand while holding it too gently w/o gloves. I hope you like!7 points
-
Hi all First post here, I've been building armor for the last 10 years but after having my eyes opened to the turn around from airfix in recent years I have bought a whole load of planes that I forgot I loved and with that have found a new fondness for the application of decals, in some cases I've spent two days applying decals to a 1/72 plane! (a nice change from 3 crosses and two turret numbers!) I've also found that I can get models finished in good time and don't seem to get bogged down with the inaccuracies of a kit (due to lack of knowledge). Not to mention kits are £5 each not £50! Anyway hope you like one of my first planes in 20 years.7 points
-
The last of the gift kits. Built OOB and painted with MM non-buffing aluminum and Aeromaster blue. All markings are from the kits. Quick easy builds. Thanks Rick for the opportunity.6 points
-
Just got of the work bench, build oob. Very nice kit with good fit. with a interresting story http://www.worcestershireregiment.com/wr.php?main=inc/vc_w_l_robinson_page6 cheers Jes6 points
-
Hi to all What to do when you get as a gift cheep, simple, not exactly accurate kit...of course built it. So that happened with this Yak 3 from Hobby Boss. Kit is accurate in side view outline, fuselage behind the cockpit is much too narrow, cannon bulges on the upper cowling are very wrongly shaped, radiator housing is too flat in profile view, spinner blades too narrow and too pointed, and so on.... So i started from cockpit, putting something in as it is totally empty, Colors used were Hataka for VVS planes, mat Vallejo varnish, some weathering with artistic oli paints...and that was all. Decals are from Zvezda YAK3. Model was build as comparison to other two Yaks, Hasegawa and Zvezda kits, so i made one picture together with them. So, thanks for looking all critiques welcomed. Regards Two pictures on daily light: Zvezda Yak3, Hobby Boss and at the end Hasegawa:5 points
-
#30/2016 Corsario numero dos terminado. After the FAS Corsair my dad has finished the opposing Corsair too. Hasegawa kit with Aztec decals, seatbelts added, scratchbuild parts for the armament switches on top of the instrument board, brake lines and antenna wire with EZ Line. The kit includes a 1000lb bomb but the biggest ones the FAH had were 500lb bombs. This one, together with the smaller clamps were taken from a Hasegawa P-51 kit. The "T" antenna on the rear belly was taken from Hasegawa´s ancient F4U-4 kit. Painted with Gunze H54 Navy Blue. The flags were painted too, only the stars are decals. The model shows the a/c of Major Fernando Soto Henriquez who became an ace in the war by shooting down two FAS Corsairs and one FAS Mustang on July 19th 1969. Most probably the plane didn´t have the noseart anymore when the war started, but it looks good and we´ve never seen FAH609 done with it so we decided to apply it.5 points
-
This has been languishing on my shelf for that last couple of months just waiting for that final push to completion. Every time I looked at it something would fall off and it drove me mad in the end but eventually I managed to summon the courage (and gentleness) to finally wrap it up. The phots have come out alright but to my eye she looks a bit untidy and messy, I don't know if that is because of all the ancilliary things hanging off it. I am now a bit tired of helo's, having all those dangly breakable bits has really turned me off........apart from the Wessy (X3) GB starting next week(ish), oh and my Lynx, Seaking, Hinds (X2), etc, etc. Oh well looks like a few more choppers in the mix! I will post a couple of pics here very soon ( I was going to do it but my computer is being a pain!) so stand by....... More in RFI later 😊 Bob PS. There is one very deliberate mistake (that I only discovered in the photos!) so a special brownie point if you can spot that!5 points
-
This is great news, and for me makes the cost of the final kit a bit more justifiable, if indeed it brings better quality control and plastic. As an example, the Shackleton kit suffers from horribly soft plastic, lots of sink marks, and trench like surface detail. The cheaper Revell altenative was of far higher Japanese quality. It felt to me that the design dept was let down by production standards. Having said that the older Javelin and Sea Vixen kits were very nice quality and I guess they molded were overseas. My point is, if Airfix are going to ask £60 for a 1:72 kit, which has to appeal to youngsters spending their saved up pocket money, as well as the die hard modeller, then the quality of the kit has to be bang on, and at least of the standards of other manufacturers.5 points
-
There might well not be any unused brackets;, depending on what weapon station configuration I eventually opt for - but one option is to go for the full monty, as in with weapon carrier and all weapon electrics rigged:5 points
-
Sadly, while the Interweb is a wonderful communication tool which gives access to all sorts of otherwise hard to come by information, things like Faceache and Twatter do rather allow the broadast of idiot opinions by cretinous morons who probably should have been euthanised at birth (or at least gagged, blindfolded and tied up in a darkened room).5 points
-
Build Thread can be found at Started this back in march. I used turned brass gun barrels, the eduard interior and exterior photoetch sets and the eduard mask set which was a lifesaver with all the glazing. First couple of pics show the extra wiring added to the gun turret 20160410_152207 by Richard Page, on Flickr 20160821_162728 (2) by Richard Page, on Flickr 20160821_162738 (2) by Richard Page, on Flickr 20161022_104233 by Richard Page, on Flickr 20161022_104354 by Richard Page, on Flickr 20161022_104401 by Richard Page, on Flickr 20161022_104432 by Richard Page, on Flickr 20161022_104438 by Richard Page, on Flickr 20161022_104456 by Richard Page, on Flickr 20161022_104617 by Richard Page, on Flickr Hobbyboss provide a folding window option for the radio compartment 20161022_104639 by Richard Page, on Flickr 20161022_104702 by Richard Page, on Flickr Cant see much of the internal detail thanks to the wing fold 20161022_104849 by Richard Page, on Flickr The photo etch replacement for the wingfold looks much better 20161022_104954 by Richard Page, on Flickr 20161022_104626 by Richard Page, on Flickr 20161022_104656 by Richard Page, on Flickr5 points
-
Remembering that I am on Maritime Volunteer Service duty in Portsmouth Dockyard tomorrow, I thought it best that I do my update for you all now. I am pretty happy that the practice bomb dispenser is in the correct place. If it is not to foul the nose gear, it pretty much has to be. It also lines the store nicely with the tip of the intake cones. Assuming that the store is mounted evenly on it's pylon, then the pylon must be in the right place. My only doubt now is whether the pylon is long enough. However should a good picture of the pylon itself not materialise, I am not going to get too worked up about it as it is not the most visible part of the model. I drilled holes through the pylon, into the fuselage and into the dispenser and passed some Albion Alloys Brass tubing through the holes in the pylon to make sure everything lined up. I had previously sawn off the more pointed nose of the Daco bomb dispenser and replaced it with the blunter Canadian style nose also supplied on Daco's upgrade sprues. I still have to tidy up the seams on the dispenser Thanks for looking Martian5 points
-
Thanks Tony and Alex I've looked at laser printing setups and a ) they were too dear and b ) they were rubbish. As prices come down and quality goes up they'll be even more tempting... Hi Nigel and welcome, glad to have you aboard You used to work at Airbus? Lucky... I'm going to try filler on the visor as I think the missing bit is painted anyway. Wish me luck! Thanks Leon You have missed a Spitfire build, hidden in the MTO GB. Enjoyed it! I agree we've gone backwards in some ways in lots of areas... I guess capitalism has its down side. Thanks Sailorboy - it is a bit scary I've stolen Phil's (HP42) idea of using some card to hide the space under the visor, now painted up and, with the remaining 'never to be seen again' transfer fitted in the main canopy I'm ready for nose assembly (gulp):5 points
-
Hello again This isn't my first attempt at a D50 ... in fact it's not my second, third or even fourth!! Yep, fifth. This was one of my very first scratch builds back in 2002 when I first started this hobby. Not knowing any better I carved it in balsa and quickly found that doesn’t accept detailing. I was also experimenting with silicon molds so I cast it in urethane because that does take better detailing. Soon realized the model was too small (6" long) so I’ll make a bigger one! By this time (2003) I had sourced some free Renshape (a synthetic compound made for pattern-making) and decided on a fresh and larger start so off I went again. I guess I was still lacking a decent set of plans because at some point I decided it was horribly wrong(!) and scrapped it. I’ll skip what happened to #4 and move along to this year when I recently acquired a large supply of Renshape and began yet another. “Fifth times a charm” don’t they say? By now I had found an excellent set of plans so no more excuses!! Sized my plans on the computer and off we go ... this one will be 9 1/2" long. Note: I don't build to any particular scale and all my cars are about 9 1/2" long ... there's a story there but that's for another day. Trace the shapes onto the block and into the bandsaw. Out comes the angle grinder and my palm sander with coarse paper and in a half hour we're down to the essentials. Rough cut a headrest shape, glue on then fair with body filler. As you can see the cockpit has been hacked out and some other details. Side tanks are very basic shapes with only a slight rise at either end. Some careful work with a Dremel and an appropriate tool hollows out the cavities required. I initially made the nose scoop out of aluminium as it's very fine/delicate at the leading edge. Later decided that my newest Renshape is very hard and probably strong enough so ... made another. Made a few of the metal bits to hold the tanks to the body and also the windshield mounts. These bits are all formed from scrap aluminium that I collect (old VCR's, camera bodies, computer hard drives etc) and pore over looking for the piece that contains the shape I need. These bits are still in need of refining so don't judge them too harshly. Remember, those windshield brackets are about 1/8" wide. I'll leave it off there and let you peruse the process. Fire away with questions about anything at all. Thanks for looking. Frank4 points
-
Hi everyone, thought i would show this build as it has a bit of family history attached, the kit was bought by my brother in law way back in the early eighties when he was a teenager, however it never got built as obviously more attractive distractions came along and he passed the kit on to me for my collection, fast forward 35 years and i decided to dig it out of the cupboard and see what I could do with it. I am planning to give it to him as a surprise as he Is now a highly accomplished engineer who has become the family go to man when anything needs making or repairing, especially with our increasing age and decreasing mobility and he has been invaluable on many occasions.He is also a keen motorcyclist now so hoping this will be a surprise as he will certainly have forgotten all about this kit.I am not a motorbike expert myself so hope there are not too many glaring errors,the age of this kit obviously has a bit of a clunky feel about it compared to the latest generation available but it has made into a pleasing shape, hope he likes it.see what you think.[/URL[/URL [URL=http://s1168.photobucket.com/user/michaelr19/media/PA250010_zpsdy8btfkp.jpg.html]4 points
-
Been a very long time since I have posted any work but here is a recently finished PCM Hurricane, loved building this one and have a rag wing version I am wanting to start very soon........... brilliant kit to What a great kit to build but I did add a few extra's which were well worth the effort, particularly the raised rivet detail on the upper and lower wing. Regards. Andy4 points
-
Hello everyone, this is the third of the three models I did since my last WIP. Actually, I had started this one long ago but because I was brush painting it with gloss acrylic white, it was taking ages to get the coats to cover the model properly. And having had great success with lacquer paints, I decided to remove the paint from it and re-paint with gloss lacquer. The drying time is amazing. Despite being gloss and giving it at times thick layers, I could rub it with a 600 grit in less than an hour. Later, though, I realized it needed more and more thinner and retarder for it to level better but there was only so much I could get into the little container. In the end, this little jet was subject to a lot of trial and error along the way and I had to eventually settle myself with a sub-standard paint job. The decals, being 30 years old were yellow so I'll leave this one model in a dark corner somewhere. I'm personally not thaaat satisfied with it and I don't really know why I'm uploading the RFI either...4 points
-
Thanks for the encouragement gents. Much appreciated. This next installment is a diversion of sorts. I sometimes like to put the larger parts aside and get into fabricating some of the more intricate details. The steering wheel. This should be a 3 part piece ... aluminium core with separate wood rims on either side. I mentioned above (I think ... maybe not) that I recently purchased a hobbyist machine lathe so it was easy to turn a disk down to the outer diameter needed. Here it's glued to a block of scrap for that purpose. Once that's done I draw the pattern on it and drill/Dremel out the 3 spokes. The wood rims will be similarly machined from a couple of slices of cocobolo (an exotic wood) that I cut on my bandsaw and glued to a work-block. Next I machine the middle out and reduce what's left down to the size needed. This wood takes a beautiful sheen when wet sanded with 1000 grit then add a bit of wax. CAREFULLY remove it from the block, glue to the centre core. Job done.4 points
-
It's amazing where the mere suggestion of the turbo-prop Spearfish / Gannet missing link can take one!4 points
-
after quite some time of vacation, work and other things that kept me from my hobby, there is finally some progress worthy of mentioning. Having now completed the almost biblical task of creating my own decals for the Hawkeye and 3 newly acquired F/A-18C Hornets, I have created a laser print on the right scale, with the right colors: I scanned a decal sheet of VFA-131 Wildcats as they were flying from the G. Washington (thanks mr Twobobs), then changed them here and there to match the scheme when the squadron was flying from the Eisenhower in 2010. Let's see how these behave in water....4 points
-
Francis next time your in the opticians ask for your reading glass prescription at x 4 magnification. Great for modelling and you can use them with an optivisor for a boost Taking so many steps I'm running........ Thought while I'm on a roll I'll do all the ladders/steps for the boat Including two inclined at 10'. Cut the inner inserts at the angle, hopefully you can see the difference Next up is a crate on deck for ropes, towing wires, fenders etc,,,, Thought I'd show you how I jig up to ensure all square. As per usual all pieces cut on a chopper to ensure maintain the same size. Went with a solid bottom , (scribed for planks ) to ensure its rigid Thanks for looking in Kev4 points
-
I think the great man recommends Mr Hobby Olive Drab - at least as a specific recommendation for the cold war era dark green - I remember this cos I immediately got myself some...... It is. The whole triptych is a delight. One of the panels has this beauty: Which I did think about posting on Crisp's ( @Ex-FAAWAFU ) thread with a comment as to the colour that a Sea King really ought to be seen in - but thought better of it It did, however, bring back memories of Sea Survival drills and sitting inside a one man dinghy floating on the oggin and waiting for someone to think that enough misery had been inflicted..... Of course the RAF club does have paintings of better looking aircraft on its walls: Sorry hendie. Drift over.......4 points
-
Thanks for the great comments everybody Figures were my nemesis for years, I would rarely use them a few years ago as I felt that my painting was not up to the mark, they detracted from my builds to much. I'm self taught 100%, I've stripped and repainted so many times before I became happy with the quality and even now I feel I can do much better at it. A few years ago I made the decision to really give them a go and started to seriously paint them, not stopping until the figures would complement the tank or vehicle that I was displaying. Several books purchased and hundreds of hours researching on the internet got me to where I am now. It's taken a while and trial and error was always my key word when it came to painting faces. The internet has been my biggest tool in the steep learning curve in getting the figure looking just right. To me its now part part of the build, my figures although don't stand up to the competition standards that I would like to achieve are good enough to add to the display for a diorama or a standalone vehicle. They after each one get slightly better so I must be moving in the right direction Never be afraid to have a go, what's the worse that can happen... a strip down and repaint? Sarge, nice find on the extract of the War diaries that you found, it really does paint a picture of desperation for the German forces towards the end of the war, all very frightening indeed when you think some of these crews had only just left school. I served in Armoured Unit, my first unit I was only at the age of 17, thinking back now it's frightening that if we really went to war how many of my comrades and myself would of survived the first contact with the enemy? Not too many I fear. I have ultimate respect for all tank crews no matter what country they served under or what theatre they served in, to go into action you really do have to have "balls of steel " Dan4 points
-
Hi All, Just a quick update about this project, tonight I finally applied tamiya XF86 to her and the look really changed! I'm really happy with the final result with this model and probably try to build it again. Here some pictures, I'll later post better ones on Ready for Inspection. And big Thanks everyone for your kind words and tips J4 points
-
Hi Kev, my Argosy will be at Telford on our Bridlington and Wolds stand. Mr MACH 2 Didier wants to see it too............4 points
-
NOOooooooooh!!!!!!!!!!! please say it isn't true! I think AIRFIX must come out with a Cold War Bomber Re-Supply set once the new tool Vulcan and Victor bomber versions arrive... that Blue Steel missile will be buried in the Victor belly and cannot impress the pedestrians - we need to display the missile on its special purpose transport lorry to effect or - a tractor with trolley at the very least (and look at that lovely Land Rover.... and Bloodhound missile out of sight in my imagination...4 points
-
So here's my first finished banana plant - much less hassle than coconut palms although I've incorporated a lot of the lessons learned from trying to make those: It's 80% masking tape, 20% wire I popped the tree and the cycads onto the board (because it's foam you can just poke holes) and I think I have a good template to follow now - just need to make more. I think the glossy leaves make a big difference to the overall scene - it definitely feels more tropical than it did. Cheers, WIll4 points
-
Tamiya's P-51 built straight out of the box. Very straightforward kit to build with only the most minor of fitting issues. I tried weathering with my airbrush and found my aim to be slightly off, but all part of the learning process. Started a few months too early for the group build, however I've airfix's new tool Spitfire Mk. Vb to start next. Comments and tips always welcome http://s1353.photobucket.com/user/gnh1241/media/3B414F48-8A73-403D-82E7-0983D6C0FE9E_zps4aq1jddl.jpg.html][/URL http://s1353.photobucket.com/user/gnh1241/media/9943BE75-D27D-40EC-A214-95926C56D45A_zpsgh1xouz8.jpg.html][/URL http://s1353.photobucket.com/user/gnh1241/media/F846FC22-413F-4CDC-A17A-48AEA35E63FD_zpsv8wrjufi.jpg.html][/URL http://s1353.photobucket.com/user/gnh1241/media/9BE3362F-7CE4-44E4-BAB6-3AB9B917C9B6_zpskymvvvyi.jpg.html][/URL4 points
-
Here are the wire-and-tape cycad-analogues, I really like them. Still need to paint some details on the leaves and trunk. I've also started a production line for banana trees, since they look jungly and don't need so many cuts in the leaves. Same techniques as the plants, I think they look quite promising and I'm looking forward to trimming and joining up the fronds. Cheers, Will4 points
-
The painting is done now, decals have started. The Whitley will be finished as T4134 GE-T of 58 Sqn lost on a mission to Bremen in September 1940. The decals are the Xtradecal ones for GE-B and some generic letters to make up the difference. I've abandoned Photobucket after two days of trying to get on to upload a picture, patience has run out! The aircraft came down intact and the crew became POW's, photo's of the real aircraft below... Courtesy of Aircrewremembered.com The Hampden is progressing at the same rate, although I'm still torn on schemes at the moment...4 points
-
1/144 Hasegawa NAMC YS-11 straight from the box with Liveries Unlimited Olympic decals. Painted with Tamiya White Surface Primer, Humbrol Polished Aluminium + Alclad Aluminium, finished with Johnson's Kleer and Xtracrylix matt. Some antennas and beacons added for interest. Build thread here http://www.britmodeller.com/forums/index.php?/topic/235006462-1144-namc-ys-11-olympic-airways/ Thanks for looking! Fabio4 points
-
She looks terrific under some paint hendie. I was in London over the weekend and stayed in the RAF club on Piccadilly. I saw this painting by Anthony Cowland, part of an RAF Search and Rescue triptych, with a Lysander displaying her small bomb container and I thought of you:4 points
-
Monday, time for an update Most of my WE modelling time went into detailing the front and central wheel bays; there's quite an intricate plumbing in both of them, and I only tried to reproduce the main features. Before that, I masked off the cockpit area: One interesting bit in the front bay is the actuators for the bay doors: dry fit of the door to determine the correct position and actuators scratch built from suitable brass pipe and steel rod Another interesting feature is a sort of canvas cover in the front part of the same bay, which I tried to reproduce using some plastic card: Tamiya tape stuck on it and cut with a razor blade Painted and dry-brushed, to give te idea of some sort of texture (needs a touch up in one corner, I just saw that form this pic) I forgot to take pics of the other details I've added to the front bay, sorry Main wheel bay: some holes added, for the pipes/cables pass through: A mix of tin and copper wires : and here is the sub-assembly with the speed brake bay: I have a few bits cleaned and ready for primer, now: Comments welcome. Ciao4 points
-
I have thought about it many times, but sticking to a RAF one now, maybe in the future. Not really no, I just get on with it regardless of how bad it is, it just takes me a lot longer than anyone else! I got lucky I think, Didier was cutting off Mil parts in the Civvie boxing, and visa versa at Telford but maybe he missed a few! You should! Thanks too! Thanks Kev, this won't be a patch on something you do, but hoping for a fairly good finish.. Looking a bit rough around the edges at the moment. I'll have a look for the Argosy, and let you know if I see it, I'm pretty sure it was Bridlington IPMS? No not at all, mine is going to be a T.2, only two converted.4 points
-
Wasn't planning on getting one as 48th isn't my usual scale but will now I know it's made in the UK to show support for Airfix bringing some production back here. Paul Harrison3 points


.thumb.jpg.d17ff607fc7e89ed057e63fcb6f2a888.jpg)


.thumb.jpg.0cb281983c298f55509ab7d9a06994bd.jpg)


.thumb.jpg.0bac681e0da8e4ed7557610e98fda908.jpg)


This leaderboard is set to London/GMT+01:00