
Leaderboard


Popular Content
Showing content with the highest reputation on 02/04/16 in all areas
-
hi all. I've been posting on here now for many Years, I was checking my photo bucket account and came across some old favourites some now in the attic otner long since destroyed by the most deadly weapon known to modellers. You guessed it the " wife controlled duster " these are some of my favorites hope you like them. and at last the enemy, the person behind the Duster... Regards Glenn29 points
-
Meet Miss B Havin, my newest completion. Built completely OOB including kit decals. After getting ready to post this, I realize I forgot to paint the navigation lights. In the meantime, enjoy the pics. This is a great kit. The fit is superb. The only things I noticed was that the interior is sparse on detail, and the gear doors are rather thick for the scale. The lack of interior detail is not much of a gripe though, given the scale and the fact that hardly any of it can be seen.22 points
-
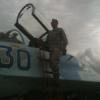
`219` in a low level high speed pass on one of her last test flights looking a little worse for wear.....,19 points
-
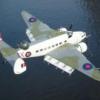
Lt Col Ronnie Hay RM Corsair II Tamiya 1/48 [/url] SLt W Atkinson RCNVR Hellcat MkII Eduard 1/48. S/Lt Atkinson achieved a rare distinction on the night of July 25. Four Hellcats were scrambled on a night combat air patrol. These were conventional Hellcat II's [F6F-5s] without radar, but their pilots had been trained in night flying. Shortly after assuming patrol, incoming Japanese aircraft were detected. Two Hellcats were forced to return to the carrier unserviceable. Slt Atkinson flying X/119 (1844 det'd flight in Formidable 7/45 to 8/45") assumed the lead of the remaining two Hellcats and was vectored out on an intercepting course. Under a full moon, Atkinson identified the bandits as big, single engine "Grace" torpedo planes and took his New Zealand wingman, Sub-Lieutenant R.F. Mackie, into the attack. Atkinson latched on a pair of Graces and shot them both into the water while Mackie dumped the third. Then, in routing the other bandits, a fourth Grace was damaged and the enemy attack was completely broken up. Atkinson was credited with shooting down three Grace Torpedo bombers, with Mackie claiming the fourth. Atkinson thereby established himself as the second Canadian "Naval Ace" of the Pacific war. [/url] Lt Dickie Cork 880 NAS - Operation Pedestal (the controversial one)... 1/48 italeri [/url] And a couple of random pictures... Fairey Swordfish MkI Revell 1/72 [/url] Supermarine Walrus 1/72 (I think this is Revel as well)... [/url] Lastly and completely randomly.... Airfix 1/72 an afternoon of madness.. [/url]19 points
-
Hello, Colleagues! I want to present you one of my new models. I hope you like it! Thanks for looking.17 points
-
The first reveal of a mediocre builder. My builds tend to move at snails pace. I wanted to take part in last years BoB GB but I arrived late and build slowly so have only now completed the series I was building. All these models are Airfix New Tool 1/48. Here is my contribution... As you know 58 pilots were temporarily seconded to the RAF for the Battle. 4 became Aces 242 Sqn RAF Hurricane Ib P2884 Sub Lieutenant Jimmy Gardner August / September 1940 [/url] 242 Sqn RAF Hurricane Ib PP2831 LE*K Sub Lieutenant Dickie Cork August / September 1940 5 Victories [/url] 19 Sqn RAF Spitfire Ib R6991/QV*? (I've guessed at Y) Sub Lieutenant Arthur Blake September 1940 5 Victories [/url] 64 Sqn RAF Spitfire Ib L1035/SD*H Sub Lieutenant Francis Dawson Paul July 1940 7 Victories [/url] 64 Sqn Scramble [/url] Thanks for looking17 points
-
I'm calling this one complete, my 1/48 Hobbyboss FW-190D-9 of II/JG6 in May 1945. using Ultracast's seat and exhaust, Aeromaster decals,and some scratchbuilt detailing. Paint is Tamiya acrylics with oils and pastel weathering. Hope you like, Colin Link to build: http://www.britmodeller.com/forums/index.php?/topic/234996206-148-fw-190d-9-and-d-11-double-build-hobbyboss-re-painted-yet-again-march-18th/ Thanks for looking, Colin15 points
-
Here is my go at this excellent old kit. If you want to see the build its at http://www.britmodeller.com/forums/index.php?/topic/234998810-132-airfix-crusader-mkiii/14 points
-
Hiya Folks, Here is my 1/48th Hobbyboss kit from the Corsair STGB which has been built as a Fleet Air Arm Corsair, 1836 NAS from HMS Victorious in, 1944,.....some modifications include scratch built air vents for the rear fuselage, drop tank from the spares box, harness from the same location, wing fold parts, propeller, wheels and exhausts reclaimed from an old Tamiya Corsair, Fundelkal decals, Here is the WIP; http://www.britmodeller.com/forums/index.php?/topic/234997397-148th-hobbyboss-kit-as-a-fleet-air-arm-corsair-1836-nas-hms-victorious-1944-finished/ And here is the model; The kit itself isn`t a patch on the cheaper Tamiya one and requires a lot of extra work, so I won`t be building another!! As usual it is brush painted and from the WIP you`ll see that I had some `issues' of my own making with the paintwork on this one!! Cheers Tony13 points
-
Hi guys, I used to post the photos of our models in other section of this site (Aicraft Modelling/Military Aircraft Modelling Discussion/WWII) Fortunately our friend Luis could finished for us some decals which allowed my father finished these two models done some years ago. 1) Armstrong Whitworth A.W. 27 Ensing GADSU "Euterpe" October 1942 in Withchurch used on the Cairo Calculta sector of the route to Australia. This model was done from scratch in balsa wood. (1/72 scale) Some photos with the HP42 already done some time ago With the DH Albatross in the display cabinet And the full view of one out of four display cabinet 2) De Havilland D.H.91 Abatross . GA FDK at Whitchurch Airport 1941 . (1/72 scale) And both DH Albatross DH 91 together. The De Havilland D.H.91 Abatross in BOAC marking was done by my father in scratch (balsa wood). The second one was done using a Vacum form kit. My father is doing five Blackburn Firebrand by this moment. Cheers Santiago11 points
-
Here is my go at this kit. Here is a photo to give you an idea of the scale. The one on the ground is a 1/48 Tomahawk by Academy which I built a few years ago. The full build is at http://www.britmodeller.com/forums/index.php?/topic/234998782-172-airfix-curtiss-tomahawk-iib/10 points
-
10 points
-
well after having this kit sat in the corner and starting it a while ago I have finally finished it..... this wasn't my normal scale but picked it up for a fiver as it had had the pit and fuselage done but unknown to me till get home it also had the nose across the rear of pit behind the seat snapped off!!!!! but put me out my comfort zone on both size and having to get the detail/weathering right..... I purchased a microscale decal sheet and a resin seat prior to starting the build. starting with the pit I managed to hack the kit seat out and replaced it with the a/m one. after which I was able to fix the nose back on luck it was a clean snap sand just about got it matched up. I had in mind that wanted to give the finish a heavy used and dirty look but knew would be a challenge and I would have to learn a few new things and tweek a few things I have done before, the first step after assembly was to do the white and grey for which I used the Ak US modem paint set which sprayed on nicely with no issues !!! then on with the decals and this went tits up as the kit decals as soon as hit water just fell apart so had to go on the prowl and thankfully managed to get some, the a/m decals for the scheme I thought would be ok but had problems with them few the big ones broke so had to do a jigsaw on the model lol... for the weathering and after putting up a post in the same folder I got the info I was after and made a start not knowing if it would work out as this would be a big test for me. for the weathering I did it in stages which did take some pics of if needed and carried on as set out:: 1. using the grey I added some white and started to fill in between the panel lines I did this 2-3 times each time adding more white.then I masked up the flaps and some the lines on the hump with some thin tape and sprayed over this with some heavily thinned Tamiya smoke just so gives a more used look and some depth... 2. using both sea salt and some normal salt so get a good variation I scattered it on to the model after spraying it with some water. 3. using a slightly darker grey heavy thinned a sprayed it all over the top sections, next I sprayed a layer of flory grime followed by flory dark wash then left it to dry. 4.once dried using a stiff dry brush I removed the salt then with an old t-shirt damped wiped away the wash and salt residue in the direction of the airframe 5.i put on all the other parts and any parts not weathered were done so, then with a small brush and water I went back over the paint work and feathered the wash etc just so looked more natural instead just long wipe marks going from nose to tail... then was finished well to the best of my ability and don't think looks to bad there are few spots were did slip up but will learn for next time, left the canopy down as cant decide if to have up or down at the moment??? but did enjoy the build and have learned from it and least its not sat in the corner any more!!!!8 points
-
Good day, gentlemen. Let me present you my next model. Photos of the construction process, you can watch here: http://www.greenmats.club/topic/1647-lockheed-pv-1-ventura/?page=17 points
-
Hi all, I thought I would share photos of some of my older builds, all taken in natural light. This is done by using a Fuji camera and a base painted to look like concrete that measures approx. 3’x3’. I use the local airport as the back ground. In my opinion, there is nothing quite like the sun showing the work. When taking the photos, I try to envision the angles that I would be taking of real aircraft. scales are 72, 48, 35 and 32. Hope you enjoy the pics. NEW: got rid of photobucket.6 points
-
A nice kit but seriously over-priced for what it is...but the car is such a distinctive one; however, SWMBO says it can stay on the coffee table on the front room 'because I like that it', so I'll take that as a mark of success, lol and for those of you who are too young to remember, the yellow headlights are correct - its was the standard legal requirement on France until relatively recently6 points
-
As a Fokker Dr.I popped up last week on RFI, I thought I'd add a couple more, together with an E.V and a Sopwith Pup ... Fokker Dr.I (serial unknown) flown by Staffelfuhrer August Raben, Jasta 18, 1918. Revell 1/48th scale. Brush painted acrylics, home-made decals. Fokker Dr.I, 546/17, Jasta 11, early 1918. Eduard 1/48th scale weekend edition, OOB build with kit decals. Brush painted acrylics. Fokker E.V (aka D.VIII) flown by Theodor Osterkamp, Eduard Weekend Edition, 1/48th scale. Brush painted acrylics. Sopwith "Navy" Pup, Flashback Limited Edition, 1/48th scale. Brushed acrylics, kit / home-made decals. B2192, attributed to Capt Foote and Capt. H. H. Balfour at the Gosport School of Special Flying, 1917. For more photos (gluttons for punishment) and details of builds, follow links in signature to web site / club site respectively. All feedback welcome, as ever.6 points
-
Thanks for the enquiry. I have made a start on adding the Press-fix Lining that I acquired from HMRS, and the boiler bands are done. I am hoping to wrap up my P-47 build this week and then it should be full steam to the end to try and get this finished. The lining around the splashers is quite intricate, and it will be something of a miracle if I can get it to look anything like the real thing. Anyway, I should be back on this soon. Edited to add photo6 points
-
with some delay here my recent Meteor build, just in time before the new Airfix kit that I wanna do in some different middle eastern scheme... Gloster Meteor MK.7 Classic Airframes 1/48 Royal Egyptian Airforce, late 1950ies Build thread here Build thread here hope you like it! thanks for comments!5 points
-
5 points
-
Hi, here my latest build: Bf 109 E-3 just OOB of the limited Edition "Legion Condor", Eduard offers together with the Roden He 51. Build 6-123 of the 3.J/88 flown by Hans Schmoller-Haldy in 1938. Hope you like it! And some in Retro-Style5 points
-
Morning folk's,I,m calling this one almost done with only a few odd touch ups here and there I did have a problem with the decals after matt coating some silvered so another coat of gloss and alls well,so I need to re-matt the wings and prop blades after their decals are applied then fill the colour in on the decals representing the cameras.Should get her in the gallery Monday,thanks for looking in.5 points
-
thanks chaps why thank you - I only had one made so it is more expensive than a batch run - this one was about 50quid but worth every penny for an A4 sized fret and all the work it will save me - if anyone wanted one they can PM me... so onto the butchery seminar... ..as the nose was cut wide open, I thought I better open out the exhaust areas and fix something to mount the exhaust pipes to later. There will be no engine so this is a bit of fakery.. I folded up some litho and slotted it to represent the framework that surrounds the pipes - the slots are not where the pipes will go, but rather a structural feature below them... the flat mounting areas are at the angle of the Griffon cylinder banks.. ..then I could fix the lower cowl shape matrix thingy into place as a basis for forming the new nose.. lots of CA and bits of shim to lock it in tight.. ..then sprayed it all black so as to hide the lack of engine... --I needed some thick plastic to fill the gaps and my inner hoarder paid off... I had saved a bit of a roller blind I threw out - it's a plastic weight that holds the blind in shape and as it was a sort of aerofoil shape I thought I would keep it about 3 years ago.. well it made for some nice thick and best of all curved sheet panels.. ..lots of them fitted in all the gaps... ..and sanded to the black lines of the shape structure below... ..with a quick shot of primer, I think I am getting there - good job I don't need a flawless surface as this will all be covered in metal.. ..having a ball with this one as you can probably tell... TTFN Peter5 points
-
Another view of Jimmy Gardner's "England Expects" Hurricane.. [/url]5 points
-
That's a very nice Hurricane, I did a Royal Navy subject as part of the BoB GB last year. 145 Sqn P3155 flown by Sub. Lt Kestin The Spitfires look fantastic.5 points
-
4 points
-
Thanks for all your kind comments. It's a great help. 😊 Not much time again today as I had the kids all day but I have managed to get photo bucket on my telephone so I'll try and post from here (the sofa). The rigging is on and straight. Well ish. Here are A few pics before the wings went on. I really like this little gun sight. Anyhoo the wings are on. 😀 It was a real struggle and these aren't the best picks in the world but They will do fo now. As you can see the rigging has stayed ok and not twisted again. Thank goodness. As I hadn't drilled the holes for the bombs I am leaning towards adding the HUGE torpedo instead. No painting instructions for this but I kinda like the black and brass look some of you have done. Not quite 100% sure yet so I am doing the landing gear, propeller and bits and bobs before I add either way. If you guys have a preference let me know. 🙂 Any way here we are as of this afternoon. Landing gear struts with aluminum under coat, ak fluid, and top coat. Hopefully I'll get them painted and on tomorrow with any luck. Until then. Thanks for looking. John. 🤓4 points
-
Hello, I'm working now on the Hobby Boss kit. It's the black prototype tested during the early 90. The challenge is to represent a credible black overall camo. Gunze/Tamiya black layers and overbrushed with coats of blue/red/gray and brown shades. Thanks for looking at and let me know if you need to understand something ! Anis4 points
-
1/48th Hobbyboss kit as a Fleet Air Arm Corsair, 1836 NAS, HMS Victorious, 1944,.....some modifications include scratch built air vents for the rear fuselage, drop tank from the spares box, harness from the same location, wing fold parts, wheels and exhausts reclaimed from an old Tamiya Corsair, Fundelkal decals, Here is the WIP; http://www.britmodeller.com/forums/index.php?/topic/234997397-148th-hobbyboss-kit-as-a-fleet-air-arm-corsair-1836-nas-hms-victorious-1944-finished/ And here is the model; The kit itself isn`t a patch on the cheaper Tamiya one and requires a lot of extra work, so I won`t be building another!! Cheers Tony4 points
-
Hiya Folks,......its FINISHED!!!!!!! [/URL] I snapped the pitot tube off while taking the pics,...doh!! This kit is nowhere ner as good as the Tamiya kit and I`ll be sticking to these in future! Hope you like it,....... Cheers Tony4 points
-
Thanks for the kind comments. Made a start on painting the main airframe today. Started with the underside, using Tamiya XF21 Sky, remembering to paint the wingtips white as an undercoat for the eventual yellow that will be needed there. The first coat revealed a few places that needed attention with Mr Surfacer and some wet'n'dry. I also attached the radiators and other bits before giving a second coat.4 points
-
No apologies required Guy Bit more weathering with oils and pigments. It's not quite turned out as I'd wanted but it's time to move on And now some feet4 points
-
Thank you for all your really to kind comments. I just nail em together and lash a bit of paint over. I do however like to do my research and find out as much about the subject as possible (even if I don't model it)... So I'll bore you all now... It is sad that of the 4 Battle of Britain aces 2 (SLt Paul & SLt Blake) were killed during the battle. SLt Cork was killed in an air accident in Ceylon in 1944. Only SLt Gardner survived the war. SLt Pauls 64 Sqn Spitfire Ib SLt Pauls flew L1035 was flown extensively by SLt Paul from 01.07.40 to 25.07.40. Francis Paul score most of his 7 victories in this aeroplane, being shot down in it over the Channel and succumbing to his injuries 27.07.40. [/url] SLt Blakes 19 Sqn Spifire Ib R6991 According to the 19 Sqn Operations Diary R6991 was assigned to 19 Sqn on 12.08.40 from an MU (having been repaired from a previous operation with another squadron). It's first Operational flight was on the morning of 15.08.40 and was flown by SLt Blake during which he damaged a German Bomber. In a further operation in the afternoon, Blake again flew R6991 and downed two BF109s. During this operation R6991 was damaged and force landed at Foulness. R6991 did not serve with 19 Sqn again. So this is my interpretation of how R6991 looked at around 1400 on 15.08.40.. [/url] Another view of the 242 Sqn Hurricanes of SLt Cork (LE*K) and SLt Gardner (LE*V). [/url] Thanks for looking..4 points
-
Here is a couple of pic's with the roof on, will glue this on once I have painted inside cap, would the colour be the same Olive Drab or do I go with grey?? Went back to the boom and added the light up on the top and then added the plate to show operator the angle of boom when raising up. Added the pointer and received some primer from AK and primed the man crane body, had a couple of runs which I think was due to thinning the paint to much. Well that's it for now, Regards Richard4 points
-
Stars are now sorted out with a blast of Olive Drab base, Further weathering will sort out any rough areas. Cheers Dan4 points
-
Hello, Been a while since I last posted (flu, work, more flu,etc) and apologies for the lack of WIP for this one. It all happened so fast... I got this for a tenner at the Huddersfield Show, remembering a rather fine build of this by Mike Grant I'd seen. Not saying I've approached that level here, but was inspired to break a habit and actually do a biplane - and have a go at rigging too! This is a great kit, simple, well-designed and sharply detailed. I matched a mix of Revell acrylics to an old Tamiya IJAAF light grey pot, kit decals (good, but a bit thick) and elastic thread and light swearing for the rigging. Not as hard as I thought it might be after all. The base is part of the stand that comes with the 1/32 Revell FW-190 (another steal at the Hudds Show), and various scatters and grass clumps. Dusty, isn't it, I've just realised! Welcome all constructive comments, Take care, Matt4 points
-
Thanks again for your support guys - it is appreciated Rodders, to be honest I haven't even thought about the engine yet but I'll probably try to add some extra detail to the Airfix parts (rather than starting again from scratch). The PE fret will be of no help as it contains no parts for the engine, nor the rotorhead. Should be fun though. Big fanfares now as I have fixed the vacformed canopy in place It was surprisingly easy in fact. Fortunately, the cabin's rear bulkhead 'spoons' very nicely into the curves of the canopy, so as a first stage I stuck the two parts together using 5-minute epoxy (thanks to Nigel's build thread for reminding me that this is really useful stuff!). I scratched the canopy surface first, to help the bond. The part of the canopy that I have glued, is in reality metal and so will be painted over in due course. Once the glue had hardened, I glued the bulkhead into the fuselage (again using a blob of epoxy), and voila! The canopy is firmly fixed to the fuselage without any need to try to glue its edge down. I will need to seal the canopy edge (I'll run some thinned PVA into the joint), but this is not required to provide any strength. Result! Cheers Cliff4 points
-
Thanks Cookie - that worked for me too! Thanks for the tip (see below) Thanks Chris, I think you're right (of course). I recommend the Lifecolor - non-smelly, great coverage straight out of the pot and the colours look right... why wouldn't you? Up early this morning so had a bit of time to Micromesh the glossy bits and spray the effected areas with another coat of thinned varnish. Good enough for me! Treated myself by ripping off the masking and fitting the props: Untitled by Ced Bufton, on Flickr Italeri: Untitled by Ced Bufton, on Flickr Airfix: Untitled by Ced Bufton, on Flickr I just need to fit the rear view mirrors and the bottom and spine lights. And the nav lights. I'm going to try the Kristal Klear for those and don't want to rush it so it'll have to wait until I'm back from Cornwall.4 points
-
hope you enjoy these Andy3 points
-
1/32 Sopwith Triplane. Correcting the Roden Kit With the Wingnut Wings SopwithTriplane kit having long since sold out, the only game in town is the Roden offering. Hannants had them on special offer recently, so I was tempted and purchased one. There is one major problem with the kit however, and that is that the fuselage is too short by about 6 mm. I believe it was Rowan Broadbent of Pheon Decals, John Adams of Aeroclub, and Brian Fawcet who originally brought this to attention, and Brian offers his own resin fuselage correction set. Here If you have a Roden kit and want to fix it, Brians correction set can be heartily recommended. However, I decided to have go at fixing it myself with some old fashioned modelling, using what I had available so as to keep the overall cost down. Firstly I sawed the fuselage in half where the rear decking starts, then cut a strip of 40 thou plasticard 6mm wide. This was cut into lengths for the side and bottom of each fuselage half, and inserted where the cut was made. I set them standing proud of the outside surface to give a little sanding room to bring them down flush. Using 40 thou gave a good strong bond as well. The trick here is to do the fuselage halves with the locating holes first (I think it was left side). Lay it on a flat surface when the inserts are first attached, to get a nice straight fuselage half and let it set solidly over night.The next day do the other half with the locating pegs on, and align it on the by now strong other side, to get a perfectly straight fuselage. This left the cockpit decking too short, but fortunately Roden supply two, one for the single gun and one for the twin gun option. I simply cut a 6mm section off one and joined it to the rear of the other, sanding it flush later. I am not 100% certain that the extra length is in the cockpit decking (rather than the rear fabric decking) but I think so, based on studying photographs and plans. Perhaps Triplane experts can throw some light on this? Annoyingly Roden do not supply any decals for the instrument panel, so I sourced some from the spares box. Having built Wingnut Wings Sopwith Snipe with the 'late' four point Sutton harness, I had a spare etched brass lap type seatbelt which was perfect for the triplane, as again Roden do not supply this. The forward of the two filler caps on the decking need to be filled in and relocated further aft. I simply drilled a hole in the new location and carefully cut one from the spare decking and cemented it in. Before; Having cut the fuselage, there was now a section of fuselge lacing missing on the starboard side. I scraped and sanded off what was there, and replaced it with some Eduard 1/48 etched lacing that I had in stock. Although 1/48, one of the patterns matched perfectly with what was on the kit before I removed it. (Note relocated filler cap) The undercarriage legs do not have much of a contact point where they meet the fuselage, so i decided to fit them while all was still bare plastic for the sake of getting a good strong join all around. Note also that there was a bit of sink marking in the area between the lower wings, as well as other areas where white Milliput has been used to fill in and smooth things up. With Halfords grey primer from a rattle can sprayed on, all was looking encouraging. One real oddity I only spotted after priming was that the underside of the top wing had lots of pinholes in, like resin castings sometimes do. A bit of Milliput sorted that out, but it is a new one on me in injection moulded plastic. Painting is under way, I decided to fit the struts to the middle wings as a bit of filling was needed around them, and paint everything up as a series of sub assemblies. I hope this helps anyone out there contemplating building one of these. They are not to Wingnut Wings Standard, but do build into nice models. The 6 mm extension may not sound like much, but to me it makes a big difference to the look of the model and is well worth doing. Get the wings on and rig it next! Cheers John3 points
-
Hopefully this is not too much of a stretch, but it IS a Corsair Single Type Group Build, and it IS April Fool's Day so I thought that someone might enjoy this seldom seen Corsair variants. The Corsair produced by PZL under license. Zygmunt Pulawski directed "many improvements" to be made to the basic Corsair design. The Corsair "Assender", influenced by the Curtiss response to USAAC Proposal R-40C. And finally the "GeeBee" Corsair as built by Zatford Granville during his (very brief) stay at Vought. Happy April Fool's Day! Greg in OK3 points
-
Hi there, this is my brandnew 1/72nd scale Dornier Do 217 K-1 + DFS 228 Mistel. Kits: Do 217 K-1: The Do 217 family of Italeri goes back to the mid-70s and is almost 40 years old. Almost no cockpit- and undercarriagedetails, narrow-chested engines, a too narrow rear fuselage and raised and false engravings featuring this model. Positiv to mention are the thick but still perfectly transparent clear parts. 2011 Italeri revised the carriage and cockpit parts with a so called "historic upgrade". DFS 228: Huma is an unfortunately no longer existing German manufacturer of plastic models. The DFS 228 belonged to the late kits of Huma. Besides the good shape reproducing the fine cockpit details are remarkable. This model: It shows a Dornier Do 217 K-1 and a DFS 228 as ready to take off mistletoe. The Dornier carrier is the third prototype of the Dornier K series: "K-3". This aircraft was not used in combat, but rather as a carrier for experimental aircraft. In this role, the Do 217 carrying the DFS 228 and Me 328 - both photographically known - and possibly more experimental aircraft and bodies. The Deutsche Forschungsanstalt für Segelflug - DFS (German Research Institute for Gliding) had received the mandate from RLM to develop a rocket-propelled high altitude reconnaissance aircraft. The DFS 228 should reach a height of about 23,000 meters, having previously placed from the Do 217 carrier aircraft at approximately 8,000 m and clicked out there. The rest did the built in Walter rocket engine (identical to the Me 163 engine). Thereafter, the DFS 228 flew in soaring to a height of about 16,000 meters and was brought back to 23,000 m by the rocket engine. With changing pushing and gliding phases, the DFS 228 should have about 2,000 km range. In the misteltoe configuration with the Dornier Do 217 K-1, some original images of the piggyback aircraft standing and rolling are obtained. The DFS 228 was also flown, but probably only as glider without the rocket engine. Construction: In addition to two BMW 801 from a Hasegawa Ju 88, I use the Italeri historic upgrade Do 217 M-1 kit for this model. Scratch were built: - recessed engravings and cockpit back armor - widened rear fuselage - landing light and pitot tube - position lights - several antennae - opened Cockpitdoor - DFS 228 carring frame and many other small parts. Painting and Weathering: The kit was painted with Gunze Colors. RLM 72/73 (Dornier top) and RLM 05 (DFS 228) were homemade mixtures. Weathering in brief: Preshading, lightened base color, Gunze mud on exposed areas with airbrush, Tamiya Smoke for traces of oil and gas plume, various oil colors for dirt and wear. Dornier Cockpit Parts: Dornier Do 217 K-1 Flugversuchsträger: DFS 228 Höhenaufklärer: Dornier Do 217 K-1 + DFS 228 Mistel: Hope you like this model. Criticism, notes, and comments are gladly welcome. Best regards. Kai3 points
-
Sopwith 2F1 Camel, Tondern Raid 1918 - Eduard 1/48 I bought this kit last March, and it sat on the shelf until September when I decided to assemble the Bentley engine. After I assembled the engine I put the contents back in the box and the kit sat on the shelf for another 4 months while I worked on the Meng M2A3. This January I pulled the kit out again and decided to finish it. This was my first biplane so I wasn't quite sure what to expect...it ended up being one of the most challenging modeling projects I've ever undertaken. The kit is well detailed and the most accurate of the 1/48 Camels, but there are some major fit issues with the cowl and struts. The decals included with the kit provide some beautiful marking options...albeit the checkers of Captain Bernard Arthur Smart's aircraft are tricky to apply to say the least. There is lots of photo etch and a few resin parts included in the kit so no aftermarket should be required. I started by assembling the cockpit. There is a nice photo etch seat and seat belts. The decals for the gauges on the panel went down nicely with some Micro Sol. If you desire, you can add some rigging in the cockpit. Unfortunately, almost all cockpit detail will be hidden once you seal it up and secure the top wing. After cementing the fuselage halves and filling the seams, I painted, decaled, and futured the cowl. The wooden part of the fuselage was created with enamel Model Master Burnt Sienna over Tamiya Wooden Deck Tan. Burnt sienna was applied by streaking it with a brush to make it look like the red brown wood described in the Windock Sopwith 2F1 Datafile. This was sealed in Tamiya Clear Orange to impart a varnished look. Then the tedious part began: drilling holes for rigging. I studied the Windsock datafile for a few weeks and the brought out the #80 drill bit. I then broke the #80 drill bit...and broke another #80 drill bit. Three drill bits later I had drilled all of the holes. The upped wing surfaces and fuselage were painted in Mr. Color Lacquer 121 thinned with Tamiya lacquer thinner. The paint went down smoothly but I wouldn't use lacquers again...the fumes made me a little high. The lower surfaces were painted in Mr. Hobby H-85 Sail Color (I'm more of a Tamiya acrylic person but these paints were the the right mix out of the bottle) The most difficult problem was aligning the top wing...the stage of the build where many modeler's Camels have ended up in the trash can. Thankfully I had read some reviews and knew about the reversed cabane strut instruction error. But this knowledge still didn't spare me the pain of trying to do a job that would give an octopus trouble. After the top was secured and was strait enough to be passable, I started the rigging. I used some Americana quilting thread that I "found" in a cabinet. Once the wing rigging was done I smoothed out the entry and exit holes and touched up on the paint. The areas that would be decaled were were sprayed with future to prevent silvering and the decals went down without a fuss...although I did use quite a bit of micro sol on the rudder and elevator decals. The tail surfaces were rigged, (no stretched sprue for me) and I began work on the bomb rack. The bombs are resin and photo etch and each fin had to be glued individually. The bombs were painted Tamiya Dark Yellow and Model Master flat black. The wheel rims were painted using the Eduard express mask included and weathered with oil paints. After the final control surface rigging was secure the model was finished. Overall its a good kit and I'm pleased with how it turned out...but I think I'm done with biplanes for a while.3 points
-
Little further on here. Canopy on and masked, and wings dry fitted at the moment, so it is looking good Everything is going together nicely3 points
-
I have been working on the probe assembly all day, first I used some solder repelling stainless steel fret to get the fin on the centre line of the probe rod: For the upper part of the probe I cut out a base plate from the same heavy gauge brass sheet and then closed off the ends of some 0.6mm tube with some solder: This next bit was the trickiest operation of the day, after several failed attempts including losing the base plate and having to make another one, I ended up having to pin the base plate in position with the stainless steel fret like this: I used 145C melting solder for those to stop the shaped solder at the ends from remelting. After a bit of cleaning up this is what I got compared to the kit part: This was my set up for joining the two sub-assemblies, this time with 70C white metal solder: The final job was to attach the arrow parts using this Heath Robinson set up: Here is it after some minor clean up and degreasing with cellulose thinners, compared to the kit parts: I placed the arrow head a little further forward as that seems to better match my references. The next job was the A frame, starting with a blind hole in the windscreen frame and some 0.4mm rod: I left the upper leg oversized so that the angle could be fine tuned: The brace was a doddle compared to the probe and was soon finished off with the cross piece: After a bit more tweaking I got this which I think looks pretty good: Those can now join the big queue of parts ready for some paint. Bye for now, Nigel3 points
-
Update on the dio. The exterior filler was fine once I'd got the mix sorted, and once set was painted with 2 coats of Tamiya flat earth as a base colour. The path/track is covered with some flock material I got off an online auction site and the ground under the bushes is covered with dried peppermint tea leaves that SWMBO drinks while the opposite ground is covered with dried Dill I "found not being currently used" in the kitchen cupboard. The bushes are made from some lichen I found in the New Forest a few weeks ago dipped in PVA and sprinkled with various herbs and stuff. I'm not sure if I'm going to keep them or try building some from scratch using Badder's technique he described in his Lost in France build. The grass tufts are from a grass mat I got off the same online auction site which has been dry brushed with Tamiya khaki to darken it as the original green was a bit pants, as can be seen in those I've left unaltered to show the difference. I'm trying to make some longer grass using the technique Badder describes above but with no success at the minute. I've put one of the figures to show scale/size (not very big), though he isn't secured as yet so I can play about with positioning of him and the others. Once that's been done I will take off the formwork and put on a smarter looking surround with a small brass plaque with the date and location.3 points
-
Thank you John and Stix for looking in . John i have looked at the list of G/B's for this year and cant see an opertunity for you to get yours started so you will need to sneek it into the 109 G/B next year.(only post front view pictures) Stix thanks for the suden influx of likes . Before i found out they were from you for my past posts i thought i must have made a significant single post somewhere. The bird is now finished I did not use a gun sight as the guns had been removed so thought that the gun sight would have served no purpose and of course been 12v not the 24 v the aircraft had been converted to. no radio wire used as the aircraft had had its radio removed. Canopy was a ob as the kit which i had bought from a member of this site a couple of years agodidnt come with the transparent sprue so i had no canopy , screen . morse light or landing light. The seller had included a squadron vac canopy but it wasnt desighned for the tamiya kit. All this i found out during construction. Used Micro Kristal Klear to make lights . The canopy wasnt a fantastic fit but with some fettling and squeezing looks ok . I now have no fear of yellow nd am pleased with the look of the finished model. Will post in the gallery at a later date when the base has been madeand the figures painted.3 points
-
Thank you lads!! Dan suggested the rbm kit for that spade handle. It came today its nice, but i am going to assemble the new gun - the casting is intact. I've just had to buy it twice................................. Carbines are nicely done too. Funny looking weapon though I must say. Just on with a bit of green stuff for a bag to hang from the rail. wiring on that bottom shelf now all painted, so avionics complete as far as I can (granby shelf still to do). loading bay area paint touched up, so its time to crack the other side now whilst I wait for my fire extinguishers to turn up. I am going to look at Bill's suggestion re that door as I think its a nice touch3 points
-
Heaven fforbid, had the Blues at that time actually tried to fly one of these...ahem...aircraft they would be with real angels wearing and or flying in white...with real wings, imagine them doing the 270 degree roll inverted to upright,,,some spectator on the ground would have been served two very large flapjacks for breakfast, or lunch as the case may have been. Ya know there is a possibility that some of these actually had some test flights and had been mistaken for UFO..think about it, they're close enough and odd shaped aircraft were seen all that often .3 points
-
P-47D-28-RA (Eduard 1:48) WIP is HERE if you are interested Cheers Nigel3 points


.thumb.JPG.ca9d91d3c605f2ca36aeec8f5a1b648a.JPG)


This leaderboard is set to London/GMT+01:00