
Leaderboard


Popular Content
Showing content with the highest reputation on 28/03/16 in all areas
-
Hello gentlemen, I am little too late for the entry to Vietnam II Group Build, but I've done my best and here's the result. WIP can be seen here. Kit is Eduard's Good Evening Da Nang limited edition (Academy kit, Brassin wheels, nozzles, Zoom cockpit, masks, Furball / Cartograf decals) and I've used following aftermarket goods: Eduard F-4C upgrade set Eduard F-4C air brakes Eduard M117 bomb early Eduard F-4C Stencils Eduard Remove Before Flight Super Fabric Aerobonus Wing Pylons (US Navy version) Aerobonus Triple Ejector Rack Aerobonus Multiple Ejector Rack Aires Auxiliary Air Intakes Aires USAF/USMC Land Based Wooden Wheel Chock HGW Wet Transfer Stencils Hypersonic Models A/C Air Scoops Hypersonic Models Unslotted Stabilator Hypersonic Models Martin-Baker Mk. H-5 ejection seats Master Pitot Tube (short nose versions) XMM Air Intakes Paints used: Mr. Paint, Gunze Mr. Color30 points
-
Matchbox Wessex built OOB with Tamiya paints Wessex completed-5619 by Simon, on Flickr Wessex completed-5616 by Simon, on Flickr Wessex completed-5614 by Simon, on Flickr Wessex completed-5613 by Simon, on Flickr16 points
-
Hello, I just finished these three models, I hope you like them. I'll present them in order of their kills. First up, an F-4B in VF-21 markings, deployed on the USS Midway in 1965. Sundown 102 shot down a MiG-17 using an AIM-7 on June 17 1965, while on a BarCap mission. Crew consisted of Lt. Jack Batson Jr. and LCDR Robert Doremus. Hasegawa kit, IPMS USA 2011 Nationals decals were used, along with kit decals and Microscale roundels. Outer wing pylons are from Hypersonic Models. Loadout based on a photo of a VF-21 plane on that cruise. Next up, an F-8E in VF-162 markings, deployed on the USS Oriskany in 1966. Superheat 210 shot down a MiG-21 using an AIM-9 on October 9 1966, while on a TarCap mission. Pilot was Cdr. Dick Bellinger. Academy kit, IPMS USA 2011 Nationals decals were used on this one as well, along with kit decals, Microscale roundels and tailstripes. Loadout is based on the artwork in the decal instructions. And finally, an F-4J in rather famous markings, but slightly different. A VF-96 jet as deployed on the USS Constellation on its 1971/72 cruise. This is the unit in which Driscoll and Cunningham achieved ace status by shooting down 5 Vietnamese planes. Usually you see builds of Showtime 100, which they used to get their 5th kill and were shot down in, but I built Showtime 106. This one shot down two MiG-17's on May 10 1972, while crewed by Lt. Michael Connelly and Lt. Thomas Blonski, both with AIM-9's. Hasegawa kit, Wolfpak decals, kit decals and Microscale roundels. Outer wing pylons are again from Hypersonic Models. Loadout is a normal air to air loadout, with only 2 AIM-9D's, as they were in short supply sometimes during those days. Thanks for watching.16 points
-
Hi again everybody! Here is my second black and white airplane – Hurricane Mk.I in the colours of 87th Squadron in the autumn of 1939 in France. On 10th November 1939 this particular machine (L1619, squadron code LK-P) was flown by Plt Off Horatio Dunn. He chased a Luftwaffe reconnaissance aircraft but went too far from the airbase and ran out of fuel. Dunn made an emergency landing near Aalbeke in Belgium. He was caught by the Belgian police and imprisoned but managed to escape from the Belgian prison on 27th November and returned to his base. The Hurricane was interned by the Belgians as well, however its fate is not known. The German aircraft that Dunn chased (Do-17P) incurred some damage and crash-landed near Stuttgart killing all crew. The link to a photo of L1619 after landing in Belguim Airfix kit is very well known and truly nice to build. The only substantial issue I had was with the wing. It seems that the upper and lower parts have different dihedral The upper part is correct while the lower part has dihedral in excess. I cut joint tabs and pressed the two parts to match dihedral to the upper part. This resulted in a lower side being 1 mm longer than the upper one on both ends. I simply sanded excessive plastic. Also some surgery was needed to properly insert landing lights. To make things prettier I used Eduard’s PE for the cockpit, resin wheels and exhausts. Paints are same as for my Defiant - Hobby Color for the camo and Vallejo for almost everything else. Decals are by Xtradecal + stencils by Aviaeology. And here the two black-and-white RAF warriors together: Thanks for looking! Hope you enjoy Dennis16 points
-
Ok, here we go. First model I've dared post on here. All criticism, whether brickbats or bouquets, received in good part. Cheers, Steve13 points
-
Hello! I've got this kit asa bitrhday present to 18th from a friend, so I was must do it right. There were such things on the "to do list" like replace an intake hole, create a landing light, etc. First I started it went wrong, so its a semi-demolished model. I bought the Airwaves PE shiets but sadly I seen these were much more expensive than useful. The parts were often oversized, but a lot of thing were duplicated. Musch details are made after the Eduard pro-pack guide. First step: Adding details: The grills are simply not fit. Lot of sanding and scribeing. A little of pre-shading: Also, antennas are on: Warning! Painting guides give by Italeri are fictive. Looking up photos aout the exact plane took prety long. Done: Finally I openned the cockpit. Placed in a company: The real thing: Camuflage colours are from the Model Master II line, stencils are printed by a guy. I made a lot os faults during the work, but I tried to dont show them. I duno, what else should I say, any questins are wellcome11 points
-
Here is my creation made from an old( possibly late seventies, early eighties ) Hasegawa TA4J in the Blue Angels colours. With this being a Blue Angels TA4J no real weathering was required as these planes were kept immaculate so that bit was easy, xtracrylix paints were used and I found these to be nice to work with, better than Humbrol in my opinion, Blue Angel Blue and Yellow being used. The tips of the flying surfaces were sprayed which helped later on. As is normal with my builds I always miss something and that was the chrome strip up the front of the vertical stabiliser, so this was applied using Alclhad II Chrome as was all other shinny bits but on removing the masking it pulled off the number 7 on each side, this was sorted by knocking up 2 number 7's from the unused yellow wingtip decals. The only additions were a Little Cars lens for the landing light and Albion Alloys tube for the refuelling probe. If I am pleased about one part of the build it is the chrome paint on the air intakes, fiddly but worth it. Hope you like it. Having just posted these pics I have noticed two little issues, missing blade antenna under nose and a paint chip, easily sorted though. DOH.10 points
-
Easter weekend and managed to finish the interior. I mainly used Mr. Paint and Vallejo paints. I'm quite happy with how this interior turned out. I used Clearfix for the bullet proof glass but it looks like it has gone bad in the bottle and the glass didn't turn out as nice as I had hoped. A strange halo of the black undercoat started to come through just behind the pilot seat where the seatbelts are attached to the wall. Must be some sort of reaction to the final clear coat. Thanks for looking. As always, comments & feedback are appreciated.10 points
-
Britannia Royal Naval College Air Experience Flight - 1957 This one has been a lot more difficult than I expected or its size suggests, but it is finished at last and photographed on this bright and sunny Spring/Easter morning! It's the recent 1/72 Airfix kit, with a set of home compiled decals for one of the four ex-RAF-ex-Civil aircraft that the RN bought in 1956 for use as flying acquaint aircraft. This one lived at Dartmouth until it was written off on 16/8/1962 after a crash on take off from Anges in the Pays de la Loire (sounds like a nice flying jolly to France was being had by someone at the time - fortunately no casualties!) This is a very impressive little kit with some superb fine detail. Mine was the civil version, with bright red and silver scheme out the box; another issue has WW2 camouflage and yet another starter kit has bright yellow trainer colours. However, despite its generally excellent fit and well thought out layout, it is not the easiest of builds, mainly due to the fragility of some parts, especially the wing struts. The main issue is the extra supporting structure that keeps the interplane struts at the right angle as you assemble the kit. These are an excellent idea and Airfix intend that you cut them off after assembly. making them suitably thin to help you with this. However the struts themselves are also very thin and I know I am not the only one who has has issues removing the unwanted parts afterward. I broke three of the struts trying to shave the helping parts off before giving up. Nice idea Airfix, but one that may cause more heartache than help for many modellers. The other surprising issue is that Airfix have provided the anti-spin strakes as separate parts, requiring you to cut out the upper fuselage and insert the new ones. This is really quite a fiddly task and difficult to tidy up afterward. A much better idea would have been to provide both versions as inserts; the excellent level of fit of the rest of the kit suggests that this would have been entirely feasible and certainly a lot easier for the builder than cut and shut. Rigging is lycra thread and just about drove me nuts. I normally enjoy threading biplanes and this is a fairly simple one, but on this occasion it seems my superglue has passed its sell by date and wouldn't stick to anything except my fingers. Much cursing and chuntering later it was finished, but not as neatly as I had hoped. Recommended for those with patience and a light touch!! FredT9 points
-
This is my SM.79T conversion from Italeri kit with the Pavlas conversion set.9 points
-
Kit manufacture: Trumpeter # 02840 Scale: 1/48 Type: North American F-100 F Super Sabre Extras used: OOB Paints and colours used: Various Tamiya's for the cockpit,and tyres. Vallejo Metal Colors everywhere else Well, Trumpeter have turned out a little gem with this kit, and any faults with it are purely my own making. Loved also working with the Vallejo Metal Color range. Really forgiving to work with,and can handle so much abuse once cured Small admission to make... I accidentally threw out the clear sprue, which had some parts on, so there are no nav lights on the wingtips, and there are also two glazed areas parallel with the rear of the nose wheel bay, these got a dollop of PVA... still drying in the picture... I built this for a SIG on another modelling forum... Please be gentle with me..9 points
-
Hi guys Its been a while since I finished my Scratch built front end of a B17G....and I always enjoy building a kit in between scratch building...and this kit was a pleasure to build! I just love these chunky old radial engine machines...they just look so powerful!....maybe too powerful as I believe the pilots had to change their underwear every time they landed the Shoki due to the high speed spec required for this aircraft .....hence the small thin main wings...which then in turn required very high landing speeds!! .......bless them! I built this Ki44 OOTB...with no added extras!....and it all went together like a dream.... Here are some photos........... Thanks for looking in Lads ...until the next time Fozzy8 points
-
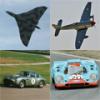
Hi . I ve not posted for a while , but i ve been viewing the forum pages to keep up to date with everyone . We are about to decorate the room where my display cabinet is , so it had to be emptied to move it and so here are all my rally car models gathered together . The ultimate parc ferme of 90's and early 00's rally cars . Hope you like , Gary .7 points
-
Hi everyone, my first post in the afv section, so a quick introduction. I returned to modelling after a 30 year break and for Christmas I had the airfix 1/24 typhoon which has been posted on here. The main focus from now on will be armour so I picked up a discontinued ( I think) Achillies by afv club on the Internet. Part of my reason for not coming back to the hobby was the incredible standard of weathering that is now possible, but having looked into it more I thought I'd give it a go using some of the amazing weathering products available. This is the part I enjoy the most and this model is my test bed. I have used ultimate dark dirt, various washes and streaking products some oil paint and lastly I have just received Ak dirt and dust deposits, which I would highly recommend. Anyway here are the photos...... http://i411.photobucket.com/albums/pp192/apackham/Mobile%20Uploads/8E7816FB-E7C2-4C3D-B7FE-810A234BDD43_zpsig83v Sorry, my photography leaves something to be desired.6 points
-
Here is the latest off the workbench at Modelair. A bit of a joint effort here. John Darlington built the 1/24 Airfix Typhoon around 12 months ago. The customer came back and requested we build a diorama for it. So with the advice of some of our regular customers I set to and put together this rather wet airfield diorama. The figures are modified from the Tamiya 1/24 rally mechanics set. I scratch built the tool bag, from a tissue and diluted PVA glue. The mud is sculpted from a putty product called 'Das', which worked really well. To achieve the wet look I've used Tamiya acrylic X22 gloss clear. There's plenty to improve on, but the customer is happy, which is the main thing.6 points
-
My entry for the Corsair STGB - the very nice but sometimes tricky Special Hobby F2G Super Corsair. Built as a F2G-1 Bureau Number 88454 of the NATC in 1946. Replaced the undersized kit prop with an Obscureco resin one of the correct 14' diameter and used a True Details F4U-4 cockpit. Used the flaps off a redundant Tamiya F4U-1A to show drooped flaps. Sawed out the extra tail trim and dropped the ailerons too. Replacement resin wheels fitted on a mixture of kit and Tamiya legs. Exhausts done using 2mm hypodermic needles. Kit decals used and very nice they were. Finished in Lifecolor paints. Thanks for looking and all comments welcomed!6 points
-
Exactly how you imagined I would look? Well that is strange indeed. I wouldn't have imagined anyone could look like that. Funny how you do get a sort of mental picture of others on the forum though perhaps no stranger than the way you picture the characters in a novel. Anyway I had a fairly lazy weekend but I did get most of the remaining parts fitted with the exception of the pitot tube and the wheels. The Coffman Starter bulge on the right hand side of the engine went pinging off into the distance when I removed it from the sprue and remains missing at this point: Luckily it is included (but not needed) in the Mk.Ib kit I bought the other day, so I carefully removed that one and fitted it... ... and this afternoon I applied the primer; Xtracolor Matt Base Coat Light Gull Grey - I'm getting a bit low on this now and it's been out of stock for some time: Cheers, Stew6 points
-
After adding a few more rivet runs I finished off masking the glazing and all was ready for some primer: Note the corrections I have had to make to the Eduard masking on the side windows. Primer applied: While that was hardening up I made a start on assembling the pylons and their weapons: Of the numerous weapon options available I am going for the missile launcher and gun as they seem the most common. Note the backwards orientation of the gun, more on that later. A surprising amount of fettling was required to get the pylons together. The gun barrels are obvious candidates for replacement with some metal tube, they measured between 0.6 and 0.7mm in diameter: They were best cut off before assembly, I looked at 0.5, 0.6 and 0.7mm tube and thought that 0.6 looked about the best option: By now the primer was dry so I gave it the once-over. Inevitably there were a few issues, but not too many, some Squadron white was used in a few areas: This next bit made me chuckle. Sensibly the mountings for the gun onto the pylon were idiot proofed, unfortunately they had misinterpreted the design on the gun and had it pointing backwards: That might be good for deterring attacks from behind but is not correct. It was fairly simply fixed but drilling out the smaller mounting hole with a 1.2mm drill: That threw up another problem, the rearward mounting boss is too high (it doesn't work the other way round either obviously). The fix was to cut down the rear boss to this I think that better equates to reality: The front of the missile launcher needed to be drilled out, one down 19 more to go: Here is the first one completed: I've now officially had enough of drilling for today, I'll do the other one tomorrow. The seven inner ones were much quicker than the outer ones as the plastic there is much thinner: I hope you liked that, bye for now, Nigel6 points
-
Afternoon all!! So a little more work on the 'Box No1 The jet efflux pipes are painted, joined and prove to be a snap fit into rear of the nacelles, locating into a recess at the forward end in the bulkhead, and a good size lug at the rear. The actual jet exhaust parts are a separate piece that is added later - and they are 1 piece so there's no seam line to remove where it will be visible. Dont forget to open the holes for the wing tanks if you want them; or to add parts C24 & 23, the outer engine mounts too!! With these inserted and the landing light in the lower port wing in place ( I backed it with foil to give a really shiny reflector), the wing tops can be glued in place. MY ADVICE: Take your time - the parts are a good fit, but you will be rewarded by gluing the tops in in stages. I started at the forward inner leading edge as shown here: I then moved along the leading edge gluing in sections, plus the internal mating surfaces of the engine bays. Then I did the trailing edges, again starting at the wing root heading outwards. The rear nacelles fit tightly over the efflux pipes, but with some steady careful glue application you will get a pretty clean join... DONT FORGET: there are two internal ridges beneath each airbrake bay - these should join and touch when the wing halves are glued. See below I did them last, wiggling a brush full of Plastic Weld in between them and then using a clothes peg to hold the parts together till the glue set. I can't see a way to join the nacelles without loosing the recessed panel lines when you sand out the joint ( unless you are REALLY careful) - so be prepared for a little making good in this area. In general the wings are a good fit- when you consider all the bits that have gone inside them. Cheers Jonners6 points
-
'Course! A very good post outlines the issues here. Slightly too short, vertical fin a bit weird, fuselage slightly shallow. The kit looks slightly too delicate as a result, IMO. Speaking of! Some touch-up to do, but coming along rather well at the moment.6 points
-
I have not got a great deal done today, just adding a few more details such as this 0.4mm probe on the underside: I decided I was not happy with the squadron light I had added - the ones from the kit aren't particularly realistic but mine looked too different from them so I shaped a new one from stretched sprue and removed my original: Here it is in place: I had just put most of the tools away from that when I realised there should be another one here so I made and added it: Then I spotted that there should be some little actuator rods between the tail and the rudders. These were tricky blighters to get into position, it the end I resorted to this Blu Tack fixturing method: Hmm, looks like that filler has shrunk, I'll see what it looks like under some primer. Here they are both done: Finally I made these triangular steps out of some scrap PE: I was a bit leery of adding those at this stage but its surprising how strong they are, hopefully they will survive intact. All I think I've got to do now before some primer is to mask up the cockpit and side windows. Bye for now, Nigel6 points
-
A very productive last couple of days... The fuselage has had some further fettling with more filling and sanding, and has also had a few coats of filler primer with some sanding in between each coat to rid the surface of any minor imperfections. So, here's where the project stands now: So I'm now at a stage where I can start to think about the wings and stabilisers - I think I'm going to have a crack at the inner wing sections initially as these, being identical to the Lancaster, mean it'll be a nice and simple job of using the ID Models parts... in theory, anyway. Until next time, Tom6 points
-
Hi All Thought I would share some photos of a recently finished model which had the unusual difference for me of being a What-If inspired aircraft. I should really do more of these RFI posts as they are nice to show off work, and in this case could possibly offer some ideas about different schemes to try than the usual, but for the most part I simply forget to do so! Here goes with a back story - amazing how you can get carried away writing these! SAAB JAS 41A "Falk" No. 255, Flygvapnet (Swedish Air Force), 1994 During the 1980's, the Flygvapnet (Swedish Air Force) required a replacement for the JAS 37 Viggen, and SAAB began work on the next in line of Swedish home-developed aircraft in the form of the JAS 39 Gripen. Development of the new multi-role fighter however was problematic, with major issues arising around the aircraft's stability and flight control systems. The severity of these issues was confirmed when after having already created much concern amongst officials and taken much longer than projected to be ready for test flights, the prototype crashed in 1989. The loss of the prototype brought the Gripen project to a standstill, and whilst SAAB assured that the project could be brought back on track with the construction of a new prototype, the Swedish authorities demanded that work on the new fighter was to be shelved on the grounds of spiralling development costs and the urgent need of replacements for the Flygvapnet's ageing fighter fleet. The still very real threat posed by the Soviet Union also contributed to the decision, especially as the formidable Sukhoi SU 27 Flanker was then entering widespread service in the East. Acknowledging that a new home-developed fighter would not be ready for service with the Flygvapnet until the mid to late 1990's at the very earliest, the Swedish authorities saw no other option but to look towards buying a foreign existing fighter "off the shelf" as a stop-gap in order to re-equip squadrons as soon as possible. Submitting a request to procure 120 fighter aircraft, Sweden shortlisted the General Dynamics F 16 Falcon, McDonnell Douglas F/A-18 Hornet and Dassault Mirage 2000 for consideration. With the Scandinavian neighbours of Norway and Denmark already using the F 16 Falcon successfully, in Autumn 1990, the Swedish authorities selected the Falcon as best suited to their requirements. The fighters would be assembled locally by SAAB as the JAS 41A "Falk"; and with production put at high priority, the first Swedish built aircraft was flown in 1992. In common with the RNoAF F 16's they were equipped with tailcone braking parachutes for landing in icy conditions, however minor modifications were made by installing Swedish electronics and systems in order for the aircraft to be compatible with Swedish armament already available. Deliveries for operational conversion within the Flygvapnet's squadrons began in late 1992, and the aircraft was declared fully operational by summer 1994. The last of the JAS 41A fighters rolled off the production line in 1999. With the crisis of urgently acquiring a new fighter over, and the JAS 41A "Falk" comfortably settling into Flygvapnet service, in 2006 the Swedish authorities decided to resume development of the Gripen programme, and SAAB restarted the project, improving on all areas where the original prototype had failed whilst making use of the latest technological advancements. Designated JAS 43, the Gripen II first flew in 2012 and is expected to enter service by autumn 2016, serving alongside the JAS 41A until the "Falk" fleet is withdrawn starting from 2020. Model is the AMT 1/72nd General Dynamics F 16A Falcon taken from the Thunderbirds display set, brush painted in a scheme using Humbrol colours resembling that of the Gripens we know in service today. Hope you like the model, and all comments welcome! Daniel5 points
-
Finished today.... 1/72 scale Revell Sdkfz 7, lost the decals, so...... "unknown unit, Gothic Line, Italy" [/url] ATB Sean5 points
-
This is Academy's P-51B kit done as Major McWherter's 'Hoo Flung Dung/City of Paris' from the 382nd FS, 363rd FG, 9th AF. I found the decals for this Mustang and it had to be made! thanks Mike5 points
-
Hi all, here's my completed Type IIB u-boat, with hopefully some subtle weathering. The handrail is scratch built, 0.5mm rod with 2lb fishing line, the rigging is fishing line again with fishing weights. Apart from tamiya rust weathering powder the remainder was done with enamels and a hairystick, as was the paint job. Anyone contemplating this kit, please be aware ICM do not provide enough parts for the two gun configuration, the kit is missing 2 handwheels, 2 shoulder rests and mount for shoulder rests. When contacted they confirmed there omission, fortunately a good friend passed me his revell incarnation from which i used the bits required. The title on the base had to be handwritten as the decal provided completely disintergrated on immersion. Before anyone says, i know some of the insulators (fishing weights) dont line up properly, if they move when youre closing them, youre buggered unless you want to re rig it and try again LOL All the best Chris5 points
-
Happy Easter Started this on Friday, finished Sunday Quick, fun build, bit scrappy but I enjoyed myself Main paint is Tamiya Neutral Grey, Olive Drab and Gloss, after decalling MIG satin varnish to finish with Vallejo wash for control surfaces Brief WIP here: https://twitter.com/search?f=tweets&vertical=default&q=eggy%20P-40&src=typd Hope you enjoy, more of my models here: http://blog.cjhm.net/ and here: https://twitter.com/cjhm_models/5 points
-
Thanks for the kind comments guys Been doing a bit of assembly work today All given a flash Tamiya primer Flash cone left off cos I have this mad idea I might take a cast of the gun. Anyone know any good info sights on casting. Sights and ammo still to go Thanks for looking in Kev5 points
-
Hoping to bring this to the BM table at Cosford this weeked, so A little more work on the base today in the form of the diamond nine formation. A hawk shape was traced from a 3 view drawing and 9 copies made arranged in formation with Silhouette Studio then reduced and cut out on the Silhouette cutter on to Tamiya masking sheet. A spray of Alclad Chrome, Good job the base was already gloss black eh! And....voilà Just hope Mish lets me put it on the table now. CT5 points
-
Hi guys! Heller kit AS 350 B1 is not that bad, but the version I built (b3), has many differences, so I had to build from scratch many details: both WSPS, new skids, four doors, new cockpit, exhaust, new main and tail rotors, both wipers, some tarps and many pitot tubes, cables and antennas. Painted & wheathering with Humbrol enamels. Cheers, Orlando5 points
-
AH-1G Cobra 8th Cavalry, 3rd Squadron, D-Troops US Army based in Meinz-Finthen Germany 1973, Special Hobby kit 1/72 Ettore5 points
-
finished model.. Fitting of the kit is simply outstanding. Flaps, air brakes, rudder and elevator are as separate parts and can be glued in various positions. Also, nose bay could be open, as both canopies. Wing structure behind flaps is from etched parts. Enjoy!5 points
-
Thanks Darby, There is no question that this is not going to be any where near where I wanted it to be when I started, but it is still a huge improvement over the basic kit. I'm more concerned at this point at having it accurate to the shape and dimensions of the real thing than any individual aircraft. The paint issues and subsequent change of scheme have left it with no underwing shadow details and a blue rather than clear underwing finish, but I'll live with that. I got the undercarriage rigged today, attached all the flight control surfaces and the coolant header tank, applied the wing decals, then made a start on the observer's Parabellum. I also made and attached the windows and pilot's windscreen, and did a little more work on the exhaust. Getting close now.... Ian5 points
-
Just a little info on Hampden serial number P4403; On the night of 12/13 August 1940 eleven Hampdens of 49 Squadron from RAF Scampton were detailed for operations against the Dortmund-Ems Canal. Two aircraft failed to locate the target, four carried out diversionary attacks whilst the remaining five attacked a viaduct on the canal near Munster where it crossed the river Ems. Flt Lt Pitcairn-Hill DFC made the first attack from 100 feet, being badly mauled by flak gunners as he did so. The 2nd and 3rd aircraft were both shot down whilst the fourth piloted by Pilot officer Matthews made a successful attack but had an engine put out of action in the process. He returned to Scampton on one engine. Flt Lt "Babe" Learoyd in P4403 made the final attack, suffering the full blast of flak and was almost blinded by searchlights as he roared in from 150 feet to release his bombs, then banked away to take stock of the damage. Although P4403 had been hit repeatedly, the engines were still going strong. The main problem was the hydraulic system and Babe was able to fly back to Scampton where he circled until it became daylight before making a safe belly landing without the use of landing gear or flaps. For his actions this night Learoyd received a Victoria Cross. The canal was also put out of action for 10 days. Learoyd continued flying operationally, later commanding 44 Squadron on Avro Lancasters, and survived the war. P4403 was repaired but met its end after an overshot landing returning from a mine laying operation near Lorient. The crew were unhurt.5 points
-
They also found a secret squadron of GR4 TSR2's on the moon yesterday being flown by the Clangers! hey ho.5 points
-
I had this old kit lying around for some time now. I am not an expert at ship modelling at all. Som I built this one up quickly out of the box and wanted to see, if I could freehand paint this one with a airbrush without doing any complicated masking. So I gave it an overall coat of Pazergrau and sprayed all vertical sufaces with a lighter grey. I used a piece of cardboard to get some emphasis on the weld lines of the hull. The waterline was done with masking tape though. Details brush painted.4 points
-
Revell 1:32 Spitfire Mk.IIa (Backdated to Mk.Ia) QV-K P9386 19 Sqn Pilot S/L Brian Lane and F/L Walter Lawson Kit: Revell 1:32 Spitfire Mk.IIa Decals: EagleCal EC#157 Paint: AK Interactive Sundries: Mig AMMO Washes, Tamiya Weathering System, HGW Harness, Aires cockpit PE & Wheels, Barracuda Oil Cooler, Top Notch Camo Masks WIP Thread: LINK I'm really impressed with this kit, Revell have done us proud for the cost. Okay I have thrown a few extra at it that tripped the price but I'm really happy with the way she turned out. My first time using camo masks and I really must thank fellow BM'er Sean_M who supplied me with the masks and quite a bit of help in using them. I really can recommend them, so much easier than Whitetac 'worms'. The EagleCal decals were on the thick side and need a few coats of Mr Mark Softener to get them to pull down. I hope it was worth the wait and thanks for looking.4 points
-
Hello, this is my 1/72 Schatton Daimler Benz DB4500 w/ resin cargo from Blackdog. Painted with Gunze/Mr.Hobby acrylics. Thanks for looking! Happy easter Weekend! cheers from Vienna, Roman4 points
-
My entry for the Helicopter GB - Italeri's OH-13 finished as a US Coast Guard machine. Good little kit with minimal decals. I had to finish it without doors after a disaster withy a missing piece being eventually run over by my office chair wheels but I don't think the model suffers for it.4 points
-
Hi Greg and thank you. Yes the decals have settled reasonably well, although they are, as ever with Tamiya decals, quite thick. As Humbrol Decalfix seems to sometimes make the Pledge go a bit matt where it's applied, I've only used it on the surface of those decals which have to go over any raised/lower surface detail. I was quite pleased with how well even the clear areas of the stencils settled with just water. Wherever possible I cut away the clear carrier film from the bigger decals (see below). I don't polish the Pledge - as I apply it by brush I tend to get a smooth shiny coat on the first application. Yeah, no problem.....though it could be a couple of years before I've got the time available - got a few planned builds in the way! Thank you. Thank you Nigel. Hope you had a good, long weekend! Hi Rich. Yes they do cover a lot a large area of the wing!! Thank you and ..........see below!Well yet more hours were spent on this one today. First off I thought I'd include a photo showing what some of the decals look like when I've cut them away from the clear, carrier film: ..........and all the decals are on! I'm hoping I might get this finished tomorrow. Comments and suggestions welcome. Kind regards, Stix4 points
-
Got in the garage today - temp not ideal but got the airbrush out. Got some Barley grey 'mottle' over the base the thinned further to mist over the bottom of the wings/tail planes....can see a bit of tonal variation, airbrush did spit (which can be seen on the pic) a bit even on a lower pressure - have to say Mr Color paints don't like lower pressures in my limited experience. Hopefully the gloss coat will cover that up a bit! Next will need to mask off the wings/tail planes leaving the leading edges and try to mottle again a bit more with the MSG before again thinning further to mist over the top. This will include the tanks, rails etc. Have ordered a Master Pitot as mine was sadly broken in the box!! Also need to get the Royal Navy/Sqn Decals on the tail so I can then 'paint over', see I can achieve that effect.4 points
-
A family christening and overindulgence on the buffet put a stop to any work over the weekend so grabbed some catch-up time this morning. First problem was building the auxiliary fuel tank that was added to the rear cockpit to increase endurance on the Taranto mission. There seem to be very few contemporaneous photos around of said tank but from those I was able to find it seemed that the tank was flat at one end, with a curved end fitting into the for'ard part of the rear cockpit. In order to fabricate the curved end I heated a piece of plasticard gently over a candle until it began to 'wilt', and quickly draped it over a plastic bead (scavenged from an old flounder rig for shore fishing..). I guess a ball bearing or similar would also work. This was then cut down and mated with a closed cylinder I built from card and tubing, a little filler and sanding, some masking tape straps and it was ready to be installed: The rear cockpit is only going to be detailed enough in those regions to be visible once the fuselage is closed, so I've really only built in some structure around the two seating areas and seat/flooring for the TAG. One thing that became apparent was due to the crude mounting for the rear Lewis/Vickers gun in the Matchbox model, the rear area where it can be recessed into the fuselage is incorrectly scaled. After carving back the fuselage a little with a scalpel I started to build a better mounting for the gun.You can see the kit original alongside my effort rendered from fuse wire and CA. I also drilled and added a more secure means of attaching the gun to fit onto the upright arm of the mounting. . I'll close up the fuselage tomorrow and fill/sand, prior to turning my attention to the dreaded wings/rigging part of the build. Tony4 points
-
More work has been done on the Panther during the last week: Hope you like it!4 points
-
One more picture:4 points
-
Well the last couple of days have been very frustrating! Had decided to try the Chipping medium but as mentioned that was a complete fail and wasted day! And to continue on with that theme the painting hasn’t gone to plan either, there was a real risk for a while it would be shelved on the bottom shelf of doom! Ok what have I been up to…..sorry this will be photo heavy! Well after the chipping medium fail the whole plane, more or less, was coated in YZC…..lust like in the factory! Then some work with some very sticky tape to produce some chips. Then instead of the chipping medium I decided to use the “salt” method….bad idea! First coat on was LifeColor Sky Grey, then a misting of very weak Tamiya Lt. Grey to break up the flatness. Next up a bit of pre-shading and on with LifeColor Sea Grey. Again for some reason I tried to match the camouflage pattern rather then painting the complete upper surfaces…this would come back to haunt me! Next was the masking up for the Olive Drab…at this stage I found out their were some serious issues with the patterns on the painting guide!! Would fix that later. I had to use Gunze Acrylic instead of the Lifecolor as for some reason it was very watery and went on wet! Once those masks were off the real issues became very apparent! The area around the salt reacted with the paint and produced spots where the salt was, more so with the Gunze Acrylic! I really didn’t know what to do, I didn’t really want to strip it back and for a while, as mentioned, it was destined for the shelf of doom! But after a good think about it I decided to continue on and use the build for an experiment for other things I wanted to try. One of which was to paint on the roundels. For the finish I had been hoping for they needed to be painted, so I made up some masks. Once the paint was done I started the weathering, firstly by removing the dried salt. Then buffing the entire model to knock back the “clean” finish and to wear a wee bit of the paint away. Amazingly the “spots” seemed to fade and I started to get the finish I was after! This is very close to the look I was after. Quite a bit of paint lifted in the areas that didn’t have the ZYC undercoat, but that’s some simple touching up. Plus the chipping is a bit much in some areas and I have also found a couple of areas in the camouflage that need to be fixed up as well. These are all very minor issues and I’ll fix as I continue with the weathering process. So this is how she looks at the moment…..after the unwanted dramas and wasted time I’m actually quite happy with her. that silver/aluminium will be touched up, thats a really simple job. So once the touch-ups are done a coat of clear and the final decals will go on along with the panel lining. Then the matt coat and final weathering!4 points
-
Eritrean Su-27 from Eduard - Academy on steroids ..... but added some scratch and: Nozzle - Aires, weapons, wheels - Eduard, ladder - NorthStar and wheel bay from Wolpack.4 points
-
Despite my weird and weak little noodle arms, I have strong hands and am the official jar-opener here in Hedgehog Manor -- when I put a lid on, it stays on, if it knows what's good for it. It's a very pleasant kit to build, though some of the assembly process was clearly dreamed up by a guy whose last job was thinking of ways to kill James Bond.4 points
-
Good evening friends, sending the last update of the model. I think without many words, the images speak for themselves ...by4 points
-
Kit and Scale: 1/48 Special Hobby Goodyear F2G Super Corsair Built as: F2G-1 BuNo 88454 of the NATC 1946 Built Using: Kit decals, Lifecolor paints, Obscureco prop, True Details resin cockpit, Czech Master wheels, Montex canopy masks. Tamiya F4U wreck donated the flaps and some undercarriage parts. Build thread: http://www.britmodeller.com/forums/index.php?/topic/234997112-148-special-hobby-f2g-finished4 points
-
Hi everyone! I didn't post here long time ago, but it doesn't mean I don't have some progress! Here are some photos, first ones made after airbrushed the primary (Humbrol #1), last two ones after the painting! But still lot to do! Thanks for watching, cheers!! Matyi from Hungary4 points


.thumb.jpg.3c5b41eb004e624ff9bdf837868ecbb6.jpg)


This leaderboard is set to London/GMT+01:00