Leaderboard
Popular Content
Showing content with the highest reputation on 17/03/16 in all areas
-
Fellow Modellers, Finally had some time to photograph the first finished example of a series Westlands Wessex helicopters.. As extras are added the Cobra cockpit and interior. Almost completely empty with just a few seats . Thanks to Mr. Evans from Whirlybird I was able to add the extra long range fuel tank to the port side. This little gem adds so much importance to the model. It will be accompanied in a diorama by Bedford Tactical Refueller and some figurines. Excellent decals from L Decals Studio and the box decals from Italeri. The FOD cover is constructed from MiliPut. RBF tags are from Eduard. Paints as usual from the Xtra Color range. It represents XS484, 771, RNAS Culdrose 1984. I would like to thank all the forum modellers that contributed to answer all my questions. As for example, the discussion about the yellow rotor blade Next, the RAF version. Regards,28 points
-
As those of you who know me in the real world are aware, I lost my girlfriend a couple of years ago. Pilots name aircraft after their girlfriends, so I’ve been wanting to build a plane with her name as the nose art for a long time now. Try as I might though, I just couldn’t locate any aircraft named Anne, so I made up a fictitious one. The squadron codes are her initials, and the aircraft code is my first initial. I’ve been too busy for modelling for quite some time now, and this is the first model I’ve completed in 14 months, so it’s quite fitting that I should unveil it on what would have been her birthday today. It’s the Revell (ex Monogram) 1/48 B-26A Marauder, which puts up a fight all the way as those of you who have attempted it will know - probably why you don't see many of them built. It’s had a total rescribe, scratchbuilt wheel well bulkheads, scratchbuilt landing and navigation lights and resin aftermarket wheels were added. The paint was Tamiya, and I’m quite proud of the fact that all the demarcations are freehanded with the airbrush, with no masking at all on the wiggly bits. Weathering was done with pastels, airbrush and panel line wash, and the final matt coat was Humbrol from a spray can. First, the walkaround shots: And then the flyaround shots: And one final one of the name: RIP, Gorgeous... Dean21 points
-
I usually refrain from posting this kind of `blasphemy` here and stick in the `what if` thread, but I think this one turned out ok and worthy to be put on the `premier` thread. TSR.2 GR.3 2 Squadron RAF Bruggen 1979 1/72 Airfix kit, base from Coastal Kits and stand ordered off Evilbay. Thanks for looking.21 points
-
Hi folks: A small tribute build to Captain Roscoe Brown via the excellent Tamiya kit. I've been in contact with Roscoe, who responded very kindly and it's a pleasure to finish 'Bunnie' / 'Miss Kentucky State', as it's been on my modelling bucket list for a long time. The kit sidewalls finished off with BarracudaCals cockpit decals. As a side note, the P-51D on display at Hendon RAF Museum is, it seems, broadly accepted as a fine quality restoration of the marque and in its natural metal finish guise, also has wings coated in aluminium lacquer, akin to that used in wartime. My enquiries into the factory process involved (after puttying the panel joints) one or two sprayed applications of DuPont Light Grey primer. This was then overcoated with an aluminium lacquer in the ratio of eight ounces of aluminium paste to a gallon of clear lacquer or varnish. It seems the aluminium in this mix reacted vigorously with oxygen and became aluminium oxide, a greyish material which accounts (in tandem with the grey primer beneath) for the Mustang wings at Hendon being overtly grey in tone, rather than the solid silver or aluminium normally used to portray this feature on models. Depending on whether the lacquer was new or aged, therefore gives modellers scope for a more silvery grey, evolving to the darker grey of the Hendon Mustang. The build seen here can be considered somewhere between the two. Given the grey bias of the Hendon Mustang, a concoction of Tamiya XF-19 Sky Grey (one part), Tamiya X-32 Titanium Silver (three parts), Tamiya XF-2 Flat White (one part) and Tamiya X-22 Clear (two parts) were mixed and sprayed over the appropriate parts of the wing. This gave a tone commensurate with the Hendon paint, while leaving a gentle satin finish, that was later glossed with more X-22 to more closely match the museum Mustang. I had some dialogue with Dana Bell over this before settling on the m/o above, who kindly advised the following - "Most of the Mustang's aluminum skin was Alclad - an aluminum alloy coated with a thin layer of pure aluminum. The aluminum coating would fix any corrosion to the surface, preventing the oxygen from migrating into the alloy core. The wings, however, were puttied to reduce friction drag, and looked like heck unless given a finish coat. On camouflaged Mustangs, there was no problem. But on uncamouflaged Mustangs, the wings needed to be painted silver for appearances' sake. I'm attaching a shot of one of the Tuskegee P-51Bs to show how well your model matches reality." The main gear doors awaiting finishing. The build is more particularly set out in the Airfix Model World 'USAAF Special' out tomorrow, Thursday 17 March along with a range of other builds, history pieces by Dana and other great content. Happy days. Steve11 points
-
11 points
-
At last, I can finally say that I have rescued a model from the Shelf of Doom. And it was taking up a lot of space on that shelf. I imagine most of us 1:72nd types have owned the Monogram 1:72 B-36 at some point in our lives, though many may have succumbed to the impossible size of it and sold it down the river. I decided (long around 1998 or so) to get one built. Well, you can see how well that went, given that it is just crossing the finish line 18 years later. It has spent most of that time in an assembled but unpainted state. But then about 4 years ago I decided on something a little unusual. Why not finish the B-36 by turning it into the world's largest whif? The thought of building something that most wouldn't build because of its size into something that most wouldn't do because it is a non-real-world fantasy was perversely appealing. I gave what markings to use some long thought and rejecting the idea of both a Russian version and a Fed Ex version (I'm going to use that idea elsewhere, someday), I finally settled on what had been an early concept, a WW2 RAF Bomber Command type. Without the jet pods, it almost is one in any case. Painting came in stages, but I had all the upper surfaces done when I ran into the Great Mojo Drought of 2014-2015. It languished for what seemed like ages, but when I was trying to restart the modelling mojo after this winter's surgeries, I thought that might be just the ticket. Nothing out of the ordinary done to the kit other than deleting the jet engines, though I did use decals from the sheet that was produced for our 1992 IPMS-Nationals here in Seattle. Now that is some deep stash diving. "Cream of the Crop" was actually a B-29 from the 19th BG in Korea. I do have one horror story, and it came at the very end of the process (not uncommon, alas). I used Cutting Edge masks on the canopies. They stick very well and don't lift like the old grey vinyl Eduard masks have a tendency to do. Well, I've learned just how well they do stick. I couldn't get them off the model. I admit that they have been on there for far longer than recommended (like maybe 8 or 9 years) but they were terribly difficult to raise. I first tried a toothpick, my usual tool for removing canopy masking, but they just broke. Then I used an Xacto knife point to try and raise a corner so each pane could be peeled off. And it broke the Xacto point! Almost every pane has a scratch on it and there was still a lot of adhesive left behind. That was why I had to make a special store run for WD-40, which, though a silicon degreaser, does an outstanding job of cleaning up residue and making canopies shiny. There still are numerous scratches, but I am not up for polishing individual panels on something like a B-36! That was a hellacious, interminable job with no good outcome. So I finally shrugged, then went out and took some photos on the famous wood panelled airstrip here in the capitol city of 72 Land. I did search around on the net, and while there are other whif B-36s out there, most use the 1:144 scale kit, not 1:72. But I'm not the only loon; I found a fellow here on Britmodeller who had done a B-36 cropduster for a fantasy group build. Now that is thinking outside the box. I don't know what the point of spraying pesticide would be - just the sound of that thing flying low over the field would scare the bejeezus out of any bug within a five mile radius. This is completed aircraft #446 (#10 for the year), finished in February of 2016.11 points
-
Hi all. This model was build 2 years ago. It was my first model using acrylic paints, I bought the kit just to test the paint, so it was build oob. It took me one day to build. And a couple more days to paint and finish. Just a tiny bit of filler was needed. The model was painted with Gunze paints. I can't remember the wash I used. I did some post shading with Tamiya smoke but that was not as easy to control as the methods I used later. Kit decals were used like many people before and after me used as well. The dolours just look great on this model in my opinion. Thank you for watching. René11 points
-
This is my attempt at this kit. Built completely out of box with no extras, except this is my first attempt at airbrushing. So all comments and suggestions as usual very welcome.11 points
-
This is the Tamiya 1/72 P-47D Thunderbolt (Razorback) done as Lt Paul Conger's 'Hollywood High Hatter' from the 61st FS, 56th FG. I've only added Eduard seatbelts and the decals come from the Skymodels Thunderbolt decal sheet, painted with Vallejo Model Air paints. thanks Mike10 points
-
RAF BE2c, Western Front circa late 1915- Spring 1916. Build thread http://www.britmodeller.com/forums/index.php?/topic/234998293-airfix172-raf-be2c/ Regards, Steve8 points
-
Good morning My second build for this Gb is a P 47D-28 flown by Kenneth Dahlberg a 14.5 kills ace of the 354 Fighter Group in december 1944 . https://en.wikipedia.org/wiki/Kenneth_H._Dahlberg Tamiya 1/72 kit Humbrol Metalcote brushpainted Build thread Decals by Skymodels Build thread http://www.britmodeller.com/forums/index.php?/topic/234996673-capt-kenneth-dahlberg-bubbletop-353-fs-354-fg-dec-1944/ Thanks for looking Patrice7 points
-
Good morning Number One for this Gb P47D-21 Thunderbolt "Penrod and Sam" flown by Capt Robert Johnson of the 61 Fs 56Fg https://en.wikipedia.org/wiki/Robert_S._Johnson Tamiya 1/72 kit Humbrol Metalcote brushpainted Build thread http://www.britmodeller.com/forums/index.php?/topic/234996671-capt-robert-johnson-61-fs-56fg-penrod-and-sam/ Patrice7 points
-
Thanks gents I'm very impressed with the kit so far, for moulding and fit of parts. E-models are doing them for about £11.50 post free and Oxonians for £9.50 plus £3.50-odd for the postage, so if you are planning to get more than one (or more than one of the kit variants) then Oxonians would be the best bet. I started the cockpit yesterday and drilled out the harness slot in the seat: This was then painted reddish-brown with a darker brownish-red padded back, or vice versa: The seat is nicely done and includes the scraped-out bottom bit for the pilot's dingy pack. I then attached the seat to the armour plate/bulkhead parts: KP provide transfers for the instrument panel (two apparently identical ones for some reason, both of which were sadly off-register) and for the seat harness, but I have a stockpile of Eduard Micro-fabric harness so will be using one of these: ... this was fitted without issues: I used the instrument panel decal anyway, on the grounds that no-one is going to look inside to see if the instruments are readable and if they do they will not be able to see anyway. I did the detail painting on the cockpit sidewals, nearly all black acrylics so it didn't take long: ... and then came the first indication that this kit does have a short-run heritage, as you have to make up your own blanks for the exhaust opening from plastic card. I've got plenty and it was an easy enough thing to do, but a less well-equipped modeller might find it annoying to have to do this, especially if they didn't have any plastic card since none was provided with the kit. It didn't bug me, but be aware you will need some if you are planning on building one of these kits. I got the internal parts joined, I did cut off the reflector gunsight glass plate and replaced it with a bit of acetate, because I was too lazy to polish out the mould seam on the kit part and it was a bit thick, though who am I to talk? ... and finally I fitted the parts to the inside of the fuselage. The fit was a bit vague so I have pegged the halves together to ensure everything sets where I want it to. One thing I forgot to mention - there are some really nice touches to this kit such as the different wheels, wireless masts, propellers, spinners and cannon-blisters for different variants but the one that made me swoon with pleasure was the choice between the gubbins that goes directly behind the pilot's head armour, either the lumpy one for the early Spits or the dual-cylinder voltage regulator from the Mk.V - both are about the size of a pinhead but distinct in their own right, I just didn't expect to find the option in an injection-moulded kit, as well as the rectangular or circular rear-view mirrors... Cheers, Stew7 points
-
7 points
-
My first RFI on here for some time. I'm enjoying scratchbuilding variants of the Falke and other kreiger universe machines. Mostly because I'm cheap, and have boxes of spare parts! I do have the real kits but somehow this is more satisfiying. Basic kits were a Revell 1/24th Ferrari and a pair of RAH-66 Comanches. In the last shots you can see the xmas baubles used for the anti-grav units, the 'intakes' for these are halves of missiles. All other bits are random spares. Scale will be about 1/35th. Anyway, comments etc are welcome. Main view, I moved the main anti-gravs to the rear to aid maneuverability a smaller one would be in the bulbous nosepiece. The 'engine' is part of a Shuttle booster rocket with added greeblies. (Including 1/35th binoculars) Close up of the nose. The guns are the original tail lights with added tube. The Comanche fans would aid in combat. Underside. The rocket tubes are homebuilt, the NLG 'foot' is from an old FROG Blenheim while the strut is from a motorbike kit. Those exhausts to the rear are quickboost for a Ju87. Better shot of the tubes and exhausts. The 'intakes' for the anti grav units are halves of a missile from a Typhoon. In the raw. Parts origins obvious now eh? Thanks for looking. Pete6 points
-
Hi everybody; how about some progress report? Here we go: masking prior to spraying white int he U/C bays: I don't want no overspray and here's how they came out: I used Lifecolor Matt White thinned with Future; I think I get much better control using only Future to thin Lifecolor paints for airbrushing - as opposed to what I did for the Light Grey coat, where I also added some water to the mix. Will see with the upper camo. The aux air doors interior was airbrushed Tamiya Flat Black, just to give a dark shade to an area that will be almost invisible when the doors are mounted. Some close up shots of the bays: More bits where sprayed white: front U/C bay doors ... ... wheel struts, TERs ... ... exhaust pipes inner side (that was tricky )... ... gun pod pylon Bays and all other white bits have also received a protective Future coat. So, before starting to mask the bottom side for spraying upper camo, I began preparing the two opening canopies by masking them and sealing the masks with a light Future coat, by brush: Tamiya Curving tape comes in very handy for this task, and refining with a razor blade helps too. Now both canopies have their own handle Next step will be adding the PEs from the Airwaves fret, then spraying a black coat on top of them (still have to decide if I want to mask the inner side and spray that black as well ). That's it for the day, comments welcome Ciao6 points
-
Hi all, here is my version of the lovely PE-2 kit from Zvezda. It is a very detailed kit and the fit is just fantastic The only part where I have to use any filler is the insert on the wing front , but that maybe just me. It was a joy to build it. The model was painted with Gunze acrylics and washed with AK and diluted oil paints. Pictures are taken by Hartdeco I hope you like it.5 points
-
Hello there, here are some progress pictures of the Kinetic Su-33 kit. I've tried to fit the Aires cockpit inside, because I wasn't satisifed with the instrument panel, with its position to be exact - it is far to deep inside the pit. It's not something that bothered me that much - but since I had aires cockpit I decided to use it. But oh man, a far far more work was required than I anticipated. But when I made the cut - there was no turning back. Would I do it again? Hell NO, loud and clear. Here are picutures and tnx for watching! Cheers!5 points
-
This is Revell's kit of the beautiful Hunter. I added a resin cockpit by True Details, and she was painted with Xtracolor enamels. Enough has been said about the kit, it is a lovely kit of the mighty Hunter. post a picture print screen windows 7 upload png image hosting over 5mb image upload no resize image upload no registration The kit's cockpit is a beautifully detailed piece, but I had the chance to add a resin replacement by True Details: print screen windows xp pic upload pictures upload image hosting over 10mb Thanks for looking5 points
-
I have one in front of me and it does contain the alternative ailerons, canopies and intakes. It is a beautiful kit. I am working on a metal u/c leg set. John5 points
-
5 points
-
Heheh, thanks for the kind comments. A career in make-up beckons, and perhaps it will benefit the next time I dress up as Frank'n'Furter :D I had some more free time today so thought I would get into the painting before I try and chicken out. I sprayed the bodysuit and metal parts with a couple of coats of Alclad black primer as mentioned above, and cut it back a little with a Wave sanding stick. Then the metal areas got two coats of Tamiya gloss black which I polished a little. It's not a great finish but hopefully it benefits the metal bits: The metal paint is Alclad Polished Brass with highlights of Pale Burnt Metal and a bit of Sepia to shade it. I need to let it cure hard because I'm going to have to mask over it to finish the bodysuit. It might seem an odd paint order (and it is!) but I wanted to polish the black while I was still at a point that I could wash off the polish residue. If I'd then painted the suit and masked the metal I'd have probably lost the effect of the polish from overspray. So I got to do two lots of masking of the same thing - woo-hoo Have just had a stiff drink so I might start some face painting tonight! Cheers, Will5 points
-
Unlike me, cos I was at Staxton telling Lightnings where to go over the North Sea, Mrs F was at Neatishead. She got to tell Phantoms what to do! She will be an alumnus of, and have studied under, 'Auntie Joan' (the single most awsome lady Gp Capt I ever met). God help any man who even tries to piddle her off! You really do not want to piddle off Fighter Controllers, we a can be really nasty!5 points
-
Roland C.II 1:32 Wingnut Wings Ever since building the 1:72 Airfix kit as a kid I have liked this aeroplane, with its streamlined shape and 'face'. The real aeroplane was built with the fuselage in 2 halves, just like a plastic kit, which was then fitted over the interior framework to give a very light and strong unit. So it should have a visible join line top and bottom! (The join actually had a strip of fabric doped along it). As is usual with Wingnut Wings the kit was a total pleasure to build from start to finish. Of the 5 colour schemes offered, I had to go with this one as it is the very same that Airfix offered all those years ago. The anemometer on the wing of this aircraft had a canvas and wire fishy fairing attached! Remember the Airfix dogfight Double with the Roland and RE.8? You can do it in 1:32 now! Thanks for looking, John4 points
-
Hello all, If it’s not too late, I would like to join this GB (which will be my first). I will do the Tamiya 1/72 F4U-1D Corsair: It will simply be built as one of the two carrier-based options out of the box. I hope to display it in flight, but the PJ Productions pilot is yet to arrive… At least I now know how to use Photobucket. Looking forward to the GB. I just hope my modelling (and photography) skills will be up to muster. Regards, David4 points
-
Its finished at last! Its taken a month and around 120 ish hours to complete , mainly because i kept adding scratchbuilt details. I added under fuselage ID lights made from the clear lens of an LED chopped up just above the electrode , painted silver and inserted into a hole. The landing lights had reflectors made using the old plug molding method. I also plug molded the recess parts that go in the nacelles abone the UC legs. The cockpit has a new navigators back armour plate with the fuel control panel added. I used resin wheels from Barracuda which are excellent. The nose guns have been replaced by the Master brass ones. Its the first time i have used these and they are gorgeous. If you add one thing to this kit , these guns should be it. Moving on to the merlin. I added the Automatic Boost Control unit from scratch. This is quite a large unit that is missed from most if not all Merlin engine models. It sits on the top of the supercharger. I added some control linkages. On the rear of the cylider heads i added the compressor to one and the RPM cable to the other. The rest is as it comes from the box with the exeption of HGW belts and good old Airscale compass and drift meter decals. Oh yes i also reshaped the props and spinners a bit!4 points
-
The last thing I had to get done before I could do a spot of airbrushing was to mask up the inside of the glazing. I have the Eduard masks for the outside but had to make my own for the inside: There then followed a fairly major airbrushing session where I got these paints, in this order, applied to all these parts: While the paint was drying I started on another little job of adding some more "pipes in a hole" to the sides of the engine cover. Despite drilling a 1mm pilot hole when I drilled it out with a 1.8mm drill this piece popped off: My fix for this involved the above Dymo tape and some superglue filler: The talc catalyses the superglue (probably because it contains water) and it sets in seconds so I soon had it all cleaned up and re-drilled the hole a tad higher up: The external pipes still sit quite low so I had to provide a bit of relief to the roof area, taking care not to go right through: I also sanded a fair bit off the bottom of the external pipes just to be sure, here are the assembled internals: Here is the external effect: That seems like a good place to stop so its bye for now, Nigel4 points
-
Few update pictures. Now to the seat rails and other details. Also, front cover will be changed since one from the Aires set is for Su-27 which is also a different part.4 points
-
First time for playing with AK interactive Panelliner 2071 Brown and Green Camo.. sold!! left side done.. right side.. finished..4 points
-
I'd be really happy with the Hawker Hind / Hart family! Or any of the Glosters...4 points
-
Today I finally have some free time back at the bench dining table to work on the Spitfire. I have been detail painting the cockpit and currently waiting for the gloss varnish to dry so I can crack on with the washes etc... A lot of the details are washed out in the pictures due to the gloss and light reflecting. IMAG0215 by Mark Inman, on Flickr IMAG0216 by Mark Inman, on Flickr IMAG0219 by Mark Inman, on Flickr IMAG0220 by Mark Inman, on Flickr4 points
-
4 points
-
An oldie but a goodie ... New research has uncovered the heaviest element yet known to science. The new element is Governmentium (Gv). It has one neutron, 25 assistant neutrons, 88 deputy neutrons and 198 assistant deputy neutrons, giving it an atomic mass of 312. These 312 particles are held together by forces called morons, which are surrounded by vast quantities of lefton-like particles called peons. Since Governmentium has no electrons or protons, it is inert. However, it can be detected, because it impedes every reaction with which it comes into contact. A tiny amount of Governmentium can cause a reaction normally taking less than a second to take from four days to four years to complete. Governmentium has a normal half-life of 2- 6 years. It does not decay but instead undergoes a reorganisation in which a portion of the assistant neutrons and deputy neutrons exchange places. In fact, Governmentium's mass will actually increase over time, since each reorganisation will cause more morons to become neutrons, forming isodopes. This characteristic of moron promotion leads some scientists to believe that Governmentium is formed whenever morons reach a critical concentration. This hypothetical quantity is referred to as critical morass. When catalysed with money, Governmentium becomes Administratium, an element that radiates just as much energy as Governmentium since it has half as many peons but twice as many morons. All of the money is consumed in the exchange, and no other by-products are produced.4 points
-
Hello, Italeri will release a new MB339A in 2016. I think this will be the nice Frems Kit, I build about 3 years ago. Here some pictures of this nice model kit. Build it just OOB.4 points
-
4 points
-
Inspired by Steve's recent build of the Matchbox Siskin here: http://www.britmodeller.com/forums/index.php?/topic/234999027-matchbox-siskin/ I decided to get to grips with another Matchbox veteran, the Fairey Swordfish. I'm going to keep to the 824 Squadron/Taranto version, though as the model's quite old I'm a little concerned at the quality of the decals supplied; they look somewhat parchment-like. Anyway...the clarity of form on the engine is good and sharp for such a vintage mould: I'd followed the Swordfish walkaround on this forum for some of the engine detailing: Fuselage mated and aircrew installed: And then a test mating of the upper and lower wing elements: At which point I discovered that the aged plastic had become hard and brittle enough to make drilling holes for the rigging so tricky that I managed to snap the micro-drill bit. [cue choice oaths...] Then a spot of inspiration...recalling the teenage exuberance of making bullet holes in Airfix dogfight doubles with a heated needle filched from the parental sewing kit back in the 70s, I left the snapped drill bit in the vice and simply heated it over a candle to make the holes with the heated bit: Surely an act of medieval barbarity to the precise and methodological modellers amongst us but surprisingly effective; all wings readied for rigging in 10 mins of heating and piercing. I reckon only a bit of minor sanding or filing will be required to make good. More as it develops..hopefully over the weekend, Tony3 points
-
Some time ago I posted this topic with some very bad pictures of it. My dear friend Hartdeco came to the rescue and shot some super photo's Thanks mate. Anyway this Phantom was build on commission and was build OOB with the exception of the seta belts wich I made from lead foil and also some RBF tags were included I hope you like it3 points
-
I've managed to get a bit more time on this, the fuel lines took some effort, a coat of paint is next before it gets too cluttered.3 points
-
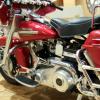
This was a project which I completed in October last year. Had an amazing time building this kit and have a couple more in progress now and hope to post these soon. For the full build pics of this kit I have a thread here http://www.britmodeller.com/forums/index.php?/topic/234999282-tamiya-16-harley-flh-classic/?p=2299163 ] Thanks for looking3 points
-
Here she is wearing a base coat of SDW colour, which went on very smoothly and dried to a very fine covering. Next up is some lightening of the base colour, after which I'm going to attempt some camouflage in green and red brown. I've included the optional rockets that I picked up, and will put them in a small dio with her in the end, all being well.3 points
-
Started by applying some Halfords grey primer to the crew and then realised, do I really want to blindly follow Tamiya's colour suggestions for the uniform? I shall be doing some research on uniforms used in the european and eastern theatre and will hold fire until I am sure. Any hints and tips would be very welcome. In the meantime I turned my attention to the chassis. I took the wheels off (thank you Tamiya for the rubber grommets) and realised they looked too new. After attacking them with some abrasives they looked nicely used and I repaired the paint using XF-85 Rubber Black. They will get weathered and muddied later. On to the chassis and I wanted the exhaust to look used and rusty so I dabbed and stippled some Mr Surfacer 500 all over it (well, the bits I could reach anyway). When it was dry I found the effect to be too rough so I carefully smoothed it a little using a small paintbrush dipped in acetone. Once dry I got to work with the Vallejo rust set trying to get some tonal variation in there. Followed this up with some repair work to the chassis base paint. I then applied a slightly rusty wash strategically around the leaf springs and anywhere I thought it likely rust would form followed by a very thin wash of XF-1 Flat Black. Comments, suggestions and tips always welcome. Thank you for looking3 points
-
I only wish they were less mundane. Work nonsense, basically; it's accounts & annual report time, and since I'm chief exec that tends to cram my in-tray a tad. I did spend a day on a Scale Modelling Now workshop a couple of weeks ago, with the most excellent Ian Ruscoe walking us through making convincing seascapes. Really good (reading about these things is great, but there is nothing like standing next to someone who really knows what he's doing and watching him do it). The Crisp-o-version won't see the light of day for a while yet, but it has given me loads of ideas. There were aircraft & armour sessions, too (in parallel, not series, so no idea what they did). Otherwise, I haven't sat at my workbench in ages - since before I went to Malta. Not for lack of desire, I assure you. (And at least I wasn't swanning around with two planks strapped to my feet!)3 points
-
Aux tank definitely fitted for Taranto - they all flew without TAGs, to give room for the tank. It took them a couple of hours just to get there (& presumably the same back), and you can be sure they'd have wanted every ounce of fuel; there is no worse feeling than looking for a carrier in the dark with one eye fixed on your fuel gauge. I know this from personal experience, and that was in peacetime!3 points
-
Netting added using plaited cord plus addition of stores container and paddles ( thanks Fraser) Thanks for looking in Kev3 points
-
Hi Stix, nope not had a chance in the last few weeks. Family members returning from overseas trips, beginning of teaching for the year and my research group is currently being very productive - so lots of editing of papers and meeting with my students. Add to that its been VERY hot at weekends makes it a bit hard to get to the bench. My son is very much back to normal - no scars of any kind thankfully :-). Thanks for the thoughts. Hoping to get something done this weekend as I need to pull out a Spitfire/Seafire kit for the Edgar Brooks Group Build. Cheers Simon3 points
-
I hope you enjoyed ' Happy Valley ' we recorded it and watched it last night for a little light relief. Wrong! I do like the series but found this one a little too unremittingly gloomy, oh well, back to ' The West Wing ' we recently bought the box set of the whole thing. The Spitfire is looking good. Cheers John3 points
-
I kind of took a 'mutli-media' approach to masking the TSS. The Kiwi's scheme is a little simpler. Post paint shop. The masking fluid technique worked in that it preserved the YZC, but it was difficult to remove without taking more paint than intended. The NS Sea Blue was lightened considerably before spraying since the demarcation between it and the Intermediate blue is almost indiscernible in some reference pics.3 points
-
Nice potential for some conversions here. Apart from the 2 seat cockpit with hump and canopy which you have all the options laid out for and potential to improve on Kinetics F-16A tailbase shape, PWMP perhaps? There are a couple of other points no one has yet mentioned, although you may have considered them yourselves. Both aircraft began their lives with the light weight landing gear but later on got the Heavyweight gear w/ bulged doors, page 79 in the below link. So a check of the photos from the period you are interested in will pay off https://www.nasa.gov/sites/default/files/atoms/files/elegance_in_flight.pdf Ship 2, the 2 seater was GE powered throughout its life. It was orignally build as a single seater but after its crash was put to use as the basis for Ship 2, a new 2 seater front fuselage was built for it and it continued to be GE powered (with the attendant GE nozzle) page 77 above link. As opposed to Ship 1's P&W engine and nozzle. I believe it would have had the NSI intake at that point (MCID had yet to be developed) but from '85 was fitted with the LNSI (Large Normal Shock Inlet) this was a unique inlet for this aircraft. Maybe it was a step in development to the MCID intake that was later fitted to the GE powered Vipers from 1986. I do not believe the MCID was ever fitted. Lastly the Kinetic kit only includes the standard pitot but the aircraft in fact wore the longer test pitot with the 4 extra vanes. All open for discussion happy to be shown more info and/or corrections Regards Marcus3 points
-
A change is as good as a rest............ Firstly this little baby to take my mind off the Blenheim; Judge Banana courtesy of RetroSF models And this labour of love. This is a semi-scale model scratch built from memory by my dad of his old ship. Its been in storage for 23 years now and is showing the dust and some damage from wear and tear over-time. The model is just over 1.5m in length! The intention is to clean it, repair it, re-rig it and get it out on display where it belongs. But what these things have done, and a forced lapse from the modelling table, is made me want to finish this problem child..... Tonight some more filler application; The light application on the underside :-) The top. Including the fairing in of the canopy where the hacking to the cockpit module had caused a misalignment. The wing roots were a tight fit. It was a pity there was a ridge that had to be faired in as well. After the putty has dried it will be sanded down and the panel lines re-scribed. The build will continue from there. Judge Banana will provide the light relief should my mojo start to suffer. Onwards and upwards.3 points
-
Progress, actual progress!! Having got the seats and the cockpit to a standard I am happy with (not perfect but as I said earlier very little will be visible later) I did a trial fit to see how it would fit to the fuselage half and I must say it fitted very well. Before I could fit the cockpit in place I had to add the side glazings which also meant that I had to give them a coat of klear beforehand, having done this (and letting them dry for a day) I gave the edges of the glazing a coat of black with a marker pen, this is a trick I picked up from somewhere which hides the sort of silvering effect that you get if you just glue them in place without having done it. Here are a couple of pictures of how the cockpit looks in place.... And here is one from the outside showing one of the side glazings in place.... Not the best of photos unfortunately but it shows the lack of "silvering" around the glazing. Having made this amount of progress I decided to join the fuselage halves together as I am not painting the interior of the main cabin as the side door and tail ramp are going to be closed. A dry fit showed no problems so out came the glue again and within around 10 minutes both fuselages were closed up and now look like this.... The joint isn't too bad at all, it will require some cleaning up but there is absolutely no need for any filler (apart from a couple of "dings" in the plastic where the parts were removed from their sprues) which for a kit of this age is pretty damn good. There is a chance that I will lose some of the raised rivet detail where I need to clean up the joint (as I have done on some of the sub-assemblies) and I will probably replicate this by either making a recessed rivet mark with a pin or making a black spot on the surface before I apply paint, here is a close up of the joint on the top of the fuselage.... Well that's the state of play as of now, I will start cleaning up the fuselages tomorrow. As usual thanks for looking in and all comments and criticisms are gratefully received. Craig.3 points
This leaderboard is set to London/GMT+01:00

