
Leaderboard


Popular Content
Showing content with the highest reputation on 27/12/15 in all areas
-
Hello! Here's one of my kitl. It consists of two sets. The main part is Hasegawa kit, The weapons, landing gears and decals from Italeri kit. The cockpit is Ne Omega, wheels- Eduard. Weathering- oil dots and pigments, salt dots. Scratches and chipped paint - salt dots.25 points
-
Hello! The model is easy and pleasant in the assembly. In the assembly used a of photo-etching set, wheels, ejection seat and bombs from other kit Paint- Tamiya and hobby Color. Weathering- oil dots and pigments, salt dots. Scratches and chipped paint - salt dots.17 points
-
Hi, Hawker Hector - the number fourth (of planned five) belonging to my "mass production" of Hart family. The only one known combat scheme from 613 Squadron, May 1940, France. Finally this is almost OOB work. Besides resin wheels from AZ Hart B4 (cause I like the rivets on them), some small scratch additions (edit: like gun sight or second air intake on top on engine) and small modification of painting scheme - I do not belive in code white letters (see photo of "Hart Family" Mushroom book on p. 99 where letters are darker than white on roundel). I do not belived in white undersurface and stabilizers - so I propose bottom like on photos below. The grey letters come from Techmod Fairey Battle set no 7212. R is from GR, Z and X from NZ-x. I still fighting with some silvering of decals, thou I would like to show it already. Comments welcome Regards and post-Xmass greetings to all. Jerzy-Wojtek15 points
-
Hello modellers, Today I would like to show my Italeri B-58A. Convair´s B-58 has been one of the backbones of western nuclear deterrence in the sixties and because of it´s performance, regarded by many as the successor of the B-52. Ironically it only served about ten years in the Strategic Air Command until phased out because of high operating costs and changes in air war doctrines. Nevertheless it set several speed records and won for example the Bendix Trophy. The new release of the Italeri kit includes a very nice decal sheet for several of these record setters. B-58s were never used conventionally, although there were some plans to use it in Vietnam. I built this model about twenty years ago and refurbished it recently to present here on BM. Restauration consisted of a partly repaint, removing nacelles and undercarriage. As the undercarriage, especially the nose landing gear, is a flaw of the Italeri kit, I decided to add some details to it, using metal pins from LEDs and scratchbuilt some better landing lights. Also replaced the small windows with clear styrene as the original parts had been spoiled with glue. Paints used were Revell Airbrush Enamels consisting of aluminium, steel and silver and also Humbrol polished aluminium. After reprinting some of the missing decals, added a wash and sealed with Emsal floor finish. BTW: Found out that gift ribbon is very good for navigation lights Hope you like the B-58 Mario15 points
-
Merry Christmas to all B.M. members and their family Final build of the year for me and quite a productive one with this making number 14 Cant go into too much details as this will feature in a future issue of SAM, so only posting a few teaser shots for you. Aircraft depicted is from the Slovakian Air force and uses the kit Decals. Finished with Gunze and Tamiya paints. Weathering was kept to a minimum as reference photos seem to suggest a clean appearance of these airframes even after retirement. Seems there might be a problem with some not being able to see the photo's just in case here are the direct links, http://imageshack.com/a/img903/811/kwOpHe.jpg http://imageshack.com/a/img908/7597/FuFcSy.jpg As usual comments welcome, Thanks for Looking Rick G.12 points
-
Probably my last completion of 2015. Built straight from the box and painted with Tamiya acrylics. The finish is Alclad Satin klear. Decalling was a bit of a marathon with so many decals even though it's only 1/72. Required the use of softener though and for this i used the Micro Scale offerings which performed really well. Hope you like. Thanks for looking12 points
-
Hi everybody. I finished this one a while ago. Proud to say it was published in Meng Air modeller no.62. Enjoy the pics and Happy new year to all of you. (Photos taken by my friend Aleš D.)10 points
-
Hello again. Second AFV RFI in a day from me. Something's wrong!! TAKOMs eagerly awaited Chieftain was a fun build. The only thing that annoyed me were the overly bit, thick, tough and intrusive sprue gates. The modifications I made to this kit were electrical wire added to the headlights and horn, spotlight friction handle removed and replaced with a brass spoked one, and the wading gear attachment removed and replaced with more accurate U shaped channel around the hull. I have also removed the moulded-on handle to the spotlight and replaced it with a strip of brass etch. The light also has an electrical lead. Little Car headlights have been used front and rear. All the grab handles have been replaced with fuse wire. Painted masking strip has been added to the barrel blanket to represent the loose ends of the retaining straps. Weathering has been kept to a minimum as photos of these tanks in Berlin were kept pretty clean. Used mainly on the streets, I have not seen any evidence of them being dirtied uop from off road use. But I know next to nothing about tanks and I am sure I will be proved wrong.10 points
-
Here my last build in 2015. Airfix new Hurricane MK.I in 1:48. Just a nice Kit. Add Brassin exhausts and tyres and some Eduard etched parts. Decals are out of the Box.10 points
-
My theme this year was very similar to all my years OOB (poorly)10 points
-
Hey, everyone, Quite a broad range of subjects this year; armour, aircraft, SF, gaming, even maritime which is a first for me. So, in no particular order... Mil Mi-4 Hound - HobbyBoss 1/72 Polikarpov I-16 Type 24 - Eduard 1/48 Mig-15 - Eduard 1/72 2S3 Akatsiya SPG - Trumpeter 1/35 SS-23 Spider - HobbyBoss 1/35 (wip here) Krupp 21cm Morser - Takom 1/35 Mk.A Whippet (Red Army) - Takom 1/35 Mk.A Whippet (White Army) - Meng 1/35 Abandoned Vorne - HobbyBoss 1/35 (wip here) Chieftain Mk.5 BATUS - Takom 1/35 Seehund XXVII B5 Midget Submarine - Bronco 1/35 Champion of Pestilence - Avatars of War 28mm Arthyen of Carn Maen - Mierce Miniatures 28mm Sydonian Dragoon - Games Workshop 28mm Ma.K. LUM-168 Camel - Hasegawa 1/20 T-70 X-Wing (Ralph McQuarrie Concept Scheme) - Bandai 1/72 (wip here) R2-D2 - Bandai 1/12 (wip here) U9-C4 (The Clone Wars) - Bandai 1/12 (wip here) T-47 Snowspeeder - Bandai 1/48 (wip here) Aratech 74-Z Speederbike - Bandai 1/12 (wip here) Imperial AT-ST Walker - Bandai 1/48 (wip here) Thanks for looking Andy8 points
-
Hello All, My last completion of 2015 (unless I get very lucky indeed!), garnished with a figure from the Revell RAF aircrew set: It's a nice "not-quite-new-Airfix" kit, bought for pennies on Ebay and mostly finished in a weekend, with some final touches this morning. I closed up the undercarriage well, added some cameras (sprue), opened up exhausts and inlets, added wing tip lights, removed the fabric effect from the trim tabs, and made some new lower camera windows using a film of Clearfix. I also ran a wash of acrylic putty over all the panel lines except the engine covers just to tone them down a bit. Paint is brushed Humbrol 230 acrylic with some Hu64 to add some fading and patchiness. I wanted a wartime example with "B" type roundels and used generic Xtradecal roundels and a hand-painted serial number. The one I wanted to do originally didn't have a pressurised cabin, so I ended up doing a very late war Benson wing example from a photo in the Morgan and Shacklady tome. I used the smaller wheels from the kit (which are not mentioned in the instructions) too. I also ummed and ahhhed a lot over adding stencils, but decided in the end to keep it clean. Thanks for looking, Adrian8 points
-
Cheers Col, the Christmas holiday has speeded things up, although the new painting technique is something I want to use more often, its yet another thing I've learned to slow the build rate down! Got some of the fiddly bits on today. Only the turrets to do. The rear turret that comes with the conversion is quite narrow, so I'm going to have a go at crash forming a replacement. I made a former of the right size, so I'll see how that goes tomorrow. I'll get some pics tomorrow of these bits to show you what I mean. In the mean time, she's now sat on her own boots with the wings glued on...8 points
-
Managed to get plenty of time at the bench today, so weathering done and masks off!8 points
-
My latest AFV project - newest Russian tank, shown on the Victory Day Parade on 9 May 2015.7 points
-
Well another year ends, 2015 was a year of many first's for me as a modeller, my first Phantom kit and even model vehicles, I will let the photos speak for them selves. All the best for 2016 Rick G. First of the bench the Airfix 1/48th scale Gnat in Jan Followed by another Airfix offering this time the 1/72nd scale Harrier GR1 Feb also saw the completion of my first none aircraft kit the 1/48th Tamiya Fuel truck Next in April saw another non aircraft type the Tamiya Tilly in 1/48th Next again in April was Kinetic's new Mirage III April was a busy month with an Airfix 1/48th Mk1 Hurricane also being completed Kinetic's 1/48th AMK came off the bench in May June and my First ever F-4 kit was the Hase 1/48th F-4J in RAF markings August and another F-4J this time Academy's new 1/72nd scale kit September and another Airfix kit in the 1/72nd scale Swift October and another 1/72nd scale Airfix offering the Wildcat October again with the Trumpeter 1/48th Scale Sea Hornet November saw the TAmiya 1/72nd scale Zero another first in kit form for me December finsihing off the year with the AMK L-29 On refelction not a bad year and who would have thought a decade ago I would have had this many new airfix kits! they seem to have had a fair share of my modelling ££'s this year Thats if from me, Hope you all have a wonderful 2016, Rick G7 points
-
The last completed model of 2015. Represented as an F-84F from 311 squadron of the Royal Neterlands Air Force. The model is completed with the massive 450 gallon fuel tanks. The Royal Neterlands Air Force acquired a total of 180 F-84F Thunderstreaks. The kit is from Hobby Boss, the decals came from Dutch Decal F-84F Thunderstreak (48052) and colors used are from Vallejo Dark Sea Green (71.053), P.R.U Blue (71.109) and Dark Green (71.012). Thanks for looking. Jan Remco7 points
-
May I show you my latest build. It's the 1:48th Eduard Me 109E-1 in the JG 52 markings from the kit. The figures are ICM drawn from their two sets of Luftwaffe ground-crew. I've added some extra pipe work to the engine and a few oil drums etc. from a Tamiya set. Base is a Wilko's picture frame with evidence of my Costa coffee habit used for the deck work... Sorry things are a bit dusty in some of the pictures - the flock is still a bit fresh! Best wishes, Matthew7 points
-
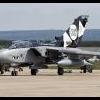
Having recently returned to modelling after many years my first couple of builds were of nice clean shiny display aircraft (Red Arrows Hawk and Yellowjacks Gnat). I thought it was time to get out of my comfort zone and tackle something a bit more 'operational', so picked up Academy's new 1/72 F-4J. 20151227_Acad_72_F-4J-4.jpg by Simon Bradshaw, on Flickr Build pretty much OOB, except that the loadout is amended to reflect what the aircraft was carrying on its final mission on 10th May 1972, when Cunningham and Driscoll became the US Navy's only aces of the Vietnam War. Changes from the basic kit were as follows: - 6 x iron bombs replaced with 4 x Rockeye CBU (Eduard) - No wing tanks, just pylons - 2 rather than 4 x AIM-7E Sparrow, carried in rear wells The pylon was moulded as part of the wing tank, but it was easy to use a scriber to part it free. I also added seat upper handles by using the parts left over from the Airfix Gnat after I'd used the cockpit detailing set on that. Pitot tubes are metal tubing because the original ones, moulded onto the fin, are very easily knocked off. (Ahem.) 20151227_Acad_72_F-4J-11.jpg by Simon Bradshaw, on Flickr Despite being sold as 'snap together' the kit is very detailed, with nice fine engraved lines and a comprehensive decal sheet (although the registration on mine wasn't too great). Nonetheless it was a bit of a learning curve for me in terms of trying to do a 'proper' build and both the bare metal areas and the canopy could have been a lot better. I also wish I'd had the chance to read the build article on this kit in the latest Airfix Model World as there are some very useful hints and tips there I could have done with! 20151227_Acad_72_F-4J-15.jpg by Simon Bradshaw, on Flickr This was my first attempt at pre-shading and weathering and I'm tolerably happy with the outcome. Photos seem to show that the original aircraft didn't have excessive panel delineation anyway although the wings could have come out better; the lines could probably have done with deepening a bit first. I also probably underdid the dirt on the underside, but I thought better to be cautious than go overboard. I'd certainly recommend this kit. You could put it together quickly without painting or glue and with the supplied stickers and get an OK desk model of a Phantom, but it's very amenable to traditional modelling as well. There's a minor error in the instructions but it's pretty obvious as you'll wonder why you have bits of the cockpit left over. I found a corrected version of the manual here and there don't seem to be any other errors other than that sometimes the wrong sprue is referred to (albeit with the right part number and again it's very obvious what the mistake is). The decal guide is very comprehensive but printed rather small and some of the smaller decals are little more than dots on it with not much clue as to which way up they go. Also, Academy seem less forthcoming than, say, Airfix as to information on painting detail parts and if I built this again I'd try to get hold of a decent photo-reference book. 20151227_Acad_72_F-4J-8.jpg by Simon Bradshaw, on Flickr Overall though a nice kit and despite the 'snap-together' description it's definitely a proper model kit and not a toy. I'm more than a bit tempted to get another, learn from my experience this time round, and do it as an F-4J(UK).6 points
-
Just finished a 1/24th scale model of an S.M.Hudson 60 foot modern leisure narrowboat. Made essentially of thin ply with brass, aluminium and styrene detailing. Measured off the real boat. Painted with specially matched Hiro paints which are superb in every way and well recommended. Cheers, Martin6 points
-
Been quite nice to go back and review this year. Don't know about anyone else, but I think I've made real progress with my builds this year. I've also very much enjoyed seeing everyone's builds and taking inspiration from the outstanding skills displayed on here on a daily basis. This is such a welcoming place and its great that everyone works so hard to keep it that way. 10 on the scorecard this year. Finished this very early January so I guess it counts. Falklands Dogfight Double Airfix Defiant, because you had to this year. Got a couple of cheap Spitfires in a sale. A couple of cheap kits and a stand I had lying around. My favourite build of this year, 1/48 Spitfire that I dirtied up big style. And finally a quickie I threw together for my nephew. Sadly lost the pitot and I'm putting it up here with out a replacement so I can meet the deadline. It comes from a story I was telling him. Back in the 80s and early 90s when there was a big exercise on at RAF Leuchars we used to get some of these up from Valley to fly point defence against anything that slipped the net. One afternoon my geography class was interrupted by a Hawk intercepting a US Navy Corsair over the school playing field. Best class ever. Onwards and upwards for next year! Thanks for anyone who has supported me or offered advice or just left something on here from years ago offering tips.6 points
-
Hello! it's one of the simplest models in my life. Assembly is easy - pour glue into the box. the hardest part of this kit is application of decals. Paint- Tamiya and hobby Color. Weathering- oil dots and pigments.6 points
-
Hi Brit Modellers as usual, lack of time reduced my work a little; 1 Mustang Mk III Tamiya was under work almost a year RFI 2. Mustang P51 D ICM cost me some nerves RFI 3. Hurricane Mk 1 Airfix sheer pleasure to build RFI All 1:486 points
-
Hello! It is another my kit. In the assembly did not have any problems. The model is very high quality and pleasant. Painting- MR Hobby paint, heat-resistant panels- Super metallic MR hobby. Weathering- oil dots and tamiyas pigment.6 points
-
I have a soft spot for Grumman's cats. From the cute Wildcat, to the butch Hellcat and all the way to the flashy Tomcat, I think the company has built some of the best looking fighter aircraft in history. Over the summer I started a double-build of the venerable Hasegawa kits of both these planes. It's taken quite some time to finish them, but here they are. Both kits are built straight out of the box, apart from the Sidewinders, which come from the Hasegawa Weapons Set III. Colors are Gunze acrylics and Tamiya white primer. In particular the Tiger is really a candidate for a new tooling, it has raised panel lines, most of which disappear after you have taken care of the fuselage seams. Apart from that it goes together very well, I only needed some filler on the intakes, which are a slightly dubious fit. The main landing gear is a bit of a vague fit, but doable with some trail and error. The decals had yellowed but I was lucky to get another set from a fellow BM-er. Unfortunately no aftermarket decals are available for this kit. It's decidedly underrepresented by both kit manufacturers and aftermarket companies. The Cougar is slightly newer and has the traditional Hasegawa panel lines, very fine, a bit too fine on the underside, I struggled to get the wash to adhere to them. This kit also needed some filler around the intakes and the rear wing to fuselage joint, which requires quite a lot of filler to smooth out. Apart from that, it's an easy build. This was also an older boxing and in this case the decals had both yellowed and cracked. The Cougar also isn't a popular aftermarket subject, but PrintScale do a nice sheet with some Panthers and Cougars, which I used. I believe Sword do a modern tooling of the Cougar but as far as I'm aware not the fighter version. I'm very happy to have these lovely 50s cats in my collection. Hopefully we'll get some modern toolings of both, which will be the perfect excuse to build some more of them.5 points
-
A little something I finished earlier this Fall, but struggled with since Spring of 2014. Lost interest for awhile, then ran into many problems during the paint phase. Basic kit is the ancient FROG double offering of the Spit XIV with V-1 and the special 'double stand' to display them. The Buzz was somewhat heavily modified, as what FROG offered did not match drawings of the production/armed V-1's (more the unarmed prototypes) and had some shape errors especially around the pulse jet. The Spittie was not modified much other than scratching up a pit (populated with an Airfix Johnnie) with a vac'd canopy replacement, rescribing the entire airframe, and substituting the molded exhausts for a donated spare set from I believe a newer Airfix Spitfire XIX. Paints for both were Vallejo throughout. And with a little bit of prop action haha The biggest struggles were with paint and the decals. The Spit was painted THREE TIMES. First time I used the color call-outs that Vallejo gave with their 16-bottle RAF set....these, aside from the Dark Green and Sky, were dismally inaccurate. I'm mostly satisfied with my final mix of Ocean Grey, but still don't think it is 'correct'. The kit decals were a chore to use this time, unlike with a FROG Javelin I built a few years ago, and I did end up having to create masks to spray the Sky codes on the fuselage as the first one piece code/roundel/code decal I tried to apply strenuously objected to working whatsoever though I did manage to save the actual roundel. By the time I got to weathering, I had just about reached my wits end and only wanted it to be over, so stuck with a simple wing root chipping exercise and an oil wash/filter session. While most certainly not a very accurate rendition of a Spitfire, IMHO it still looks good and has the cachet of being a good old nostalgia build. Not completely unhappy with the outcome, but not overjoyed either. Cheers, and Happy Holidays! Erik the H in sunny Florida5 points
-
Hello all Not only my first RFi, but my first AFV WIP (http://www.britmodeller.com/forums/index.php?/topic/234978946-as90-from-a-complete-tank-novice-paint-on/) Any constructive comments gratefully received as AFVs are not my normal subject. Thanks5 points
-
Hi everybody; I hope you all had a great Christmas! After some very interesting posts about seats, pins and other "real" things (thanks everybody for that, I'll never get tired of saying so ), here we go with a bit of a progress report about the model. I airbrushed the interior color, FS36231, using the corresponding Lifecolor pot, plus a bit of Matt White for scale effect. That was used as a base coat; I then sprayed over it the same mix with the addition of a smear of Light Blue, as all the F4 interiors I've seen in pictures have that kind of nuance under a direct light. Both mixes were thinned using Future Then I airbrushed some Matt Black (again, Lifecolor thinned with Future) on the seats parts and canopy sills and then started the detail painting job by brush; I've only painted the Matt Black areas so far: Still lots to do here. In between painting stages, I started working on the boarding ladder: first off, I printed and taped the template to a wood block: then put some nails in it to help bending the steel rods (paper clips, exactly the right diameter for the job): Then with a cutting disc and my Dremel, I sawed the short end at 45° and attached the corresponding "hooks" with CA. I'll let them harden before refining them. More tomorrow, hopefully. Ciao5 points
-
5 points
-
the first part of the decal. Meanwhile, top side5 points
-
s'been pretty quiet on BM for the last couple of days - must be summat goin' on somewhere. Special occasion or something no doubt. Cracking on with the houchin.... or more like cracking up because of it! This little brake assembly cost me about two or three hours of my life! I know it's not right but it really is the best I could achieve given the relative finger to PE ratio. I must have had to redo the thing 5 or 6 times. (I HATE SUPERGLUE - I really do) - after this debacle I am definitely going to look into UV curing adhesive - it can't be any worse than ca. Although it's not absolutely correct, I believe once it's all painted up and in position it should be passable (remembering that the Wessex is supposed to be the focus of attention). I did scratch a couple of parts on top of the houchin. When I tried fitting the fuel filler cap (?) on top, it interfered with the center light fitting so I made one from a couple of pieces of styrene rod. I also replaced the kit exhausty thing with some brass rod/tube. To be honest, I couldn't determine which of the white metal parts was supposed to be the one to use - just my own ineptness - so I scratched one instead. Everything together now. I'm not sure if I should have added the cable tray at this point - getting the paint down into the angled recess behind the lid will be a challenge without the paint pooling and running. It may have been wiser to paint it separately then add it later. I did think about cutting off the top of the lights and crash molding some the same way I did the BIM's but decided to stick with the kit parts after debating the issue with myself for a few minutes. The toggle clamps have been a continuing nightmare. I keep knocking them off when handling it. - To the point that I am now missing a couple (used up all the spares now) Xmas morning was spent getting to this point. Alclad primer - I have to say that I do like the alclad primer. I love the fact that you can just shake and use - none of this thinning and getting the right consistency phaffing about. For some reason the primer decided to act up on the houchin itself. The other parts were fine, no problem whatsoever, but the finish on the houchin was pretty awful. I assume it was down to my prep work - I cleaned the houchin with acetone, dried it all off and brushed it clean, but the paint seemed to go on really really rough. So much so that I tried to clean it up with micromesh - did the best I could then had to prime it again. It still wasn't perfect (or even all that good) but I did the best I could getting rid of the worst of the roughness but the thing is so fragile (toggle clamps!) that I could only do so much without causing more damage. I mentioned a few posts ago that I thought it might be a good idea to try and weather this with some paint chipping etc. As I discovered just how fragile it was while handling it, I had to seriously reconsider whether I should attempt such a feat. I went back and forth... yes... no.... NO!... maybe... before finally arriving at a reluctant yes. If I don't do it now, I'll probably never try it so what the hell! So, the whole caboodle was given a base coat of yellow enamel. This was the only yellow enamel I had and while I thought it was just a tad too dark, in the end I think it will do the job. As I have reconsidered the paint chipping, and studied a few photo's I think I am going to attempt a really fine, hopefully subtle effect in a few select areas. The chosen method will be salt weathering - mainly because I have the necessary materials in-house. I have a test mule all yellowed up to trial on. Wish me luck.... One question - the paint I have used here is yellow matt enamel - should I clear coat that before salting ? or will it be okay to proceed without a protective layer ? oh, and any idea how long to leave the humbrol enamel before I attempt anything ? I assume a few days at least ?5 points
-
Hi my Friends...This is my first work post here in Britmodeller. Good kit a very easy assembly....I used paints of Gunze and Humbrol.. I hope you like.4 points
-
Hiya Folks, I`ve not posted for a while but here is my latest effort,........a B-17F which was among six E & F variants transferred from Stateside training duties with the USAAF to the Royal Canadian Air Force who used them as Mail Plane`s by 168 (Heavy Transport) Sqn RCAF based at Rockcliffe, Ontario to carry Canadian Forces mail and other urgent supplies on behald of the RCAF Overseas Air Mail Service between Canada, the UK, Gibraltar, the Azores,North Africa and Italy. The B-17`s began to arrive in Canada during December 1943 and the first trans Atlantic sorties were to have been flown by 9202 & 9204 on the 14th December 1943 carrying Christmas mail to the UK but both aircraft went u/s. Fortress 9204 flew the inaugural sortie to the UK next day on the 15th December 1943 but only just made it to the coast of Northern Ireland as the long range `Tokyo Tanks' in the outer wings had been disconnected by the USAAF and the Canadian`s did not have time to check these out properly as they were being pushed by higher authorities to get the mail overseas before Christmas! The subject of this model, 9202 made the second flight to the UK on the 22nd December 1943 and it must be mentioned that many of the crews from 168 (HT) Sqn RCAF were highly experienced Canadian veterans of Bomber Command undertaking a break from operations! The subject of this model was B-17F-30-DL, 42-3160 which received the RCAF serial 9202 and after flying its initial sorties wearing a patched up Olive Drab and Neutral Grey scheme this was later removed in favour of a nice shiny bare metal finish. Unfortunately it was lost post war with all of its 5 man crew when it crashed in Germany on 4.11.45 while flying Penicillin and other medical supplies from Canada to Warsaw. Here is the model, built from the Academy 1/72nd scale kit with some modifications including blanked off turrets, gun mounting framework in the nose glazing and a set of wheels from an old Hasegawa B-17G and the air intakes in the wing leading edges were opened up. Most of the decals came from the excellent DK Decals Commonwealth Fortresses sheet but the fin flashes were larger and came from the spares box, as did the smaller upper wing roundels and the wing walk markings; The Canadian Fortresses featured a floored over bomb bay and the crew were all concentrated on the flight deck with the navigator and wireless operator situated behind the pilots, although until all of them were standardised with an astrodome in the old mid upper gun position the navifator would use the astrodome in the nose, an area which was usually stacked with mail bags! Here are some mail bags made from painted Milliput ready to fit into the nose alongside a section of painted plastic rod which was used to construct the framework for the deleted twin gun nose mounting;A pair of windows were also cut into the nose of the model alongside the astrodome while the single window towards the front of the upper nose was covered over and painted using darker Olive Drab as per the real aircraft; Here is the finished model; Hopefully this model should appear in a magazine article sometime soon along with a historical feature on the RCAF Fortresses containing lots of rare period photos, I enjoyed building and researching this model so much that I`ve started another depicting the same aircraft in its later bare metal finish, although I`m a bit stuck as to how I`m going to depict the larger mail bag sortie tally and the 168 (HT) Sqn insignia which was usually applied to the nose of the silver Fortresses! Merry Christmas everybody and all the best for 2016, Cheers Tony4 points
-
Hi guys! it's nice to be with you all second year. Here is what I have done. This year was good for me and I hope that was good for you as well. I saw here a lot of great builds. Cheers 1. Avro Lancaster Mk3 Revell 1/72 2 Boulton Paul Defiant 1/72 Airfix 3 Pz Kpfw III Ausf J 1/35 Dragon 4 Pz Kpfw II Ausf G 1/35 Tamiya 5 Hawker Hurricane mk1 1/48 Airfix 6 Pz Kpfw I Ausf B 1/35 Revell 7 Mig 21MF Eduard 1/48 Ok So it is not many builds but I was enjoying them all cheers and Happy New Year!! Pawel4 points
-
Now the hurly-burly of Xmas is out the way, I managed to sneak a couple of hours at the bench. Some chipping added with silver enamel paint, and softened with a stiff brush... A very thin oil wash, applied with a thin brush and left for half an hour before wiping off... And she has her legs on at last.. That's all for now, hopefully I'll get the canopy on and a flay coat done tomorrow.. Thanks for looking, Steve4 points
-
It must be Xmas or something... someone left me a present on the doorstep.... I wonder what it can be ? oh ho.... it's one of these! Yup my display case finally arrived. btw, that's not a pint mug sitting by the case - that's a liter mug ! (yes, they even spell litre differently over here) Same thing in slightly better lighting. I'm not taking the cling film wrapping off the clear polycarbonate until the last moment because every minute speck of dust for miles around is going to think Xmas has come early and they're going to get attracted, get in there, and multiply, propagate, procreate, and any other ate they can think of. However I had to unwrap the base so I can trim the pans down to size. In the photo above, the case isn't sitting correctly because of the cling film. - It actually sits down on the flange that you see around the base - that'll stop the dust getting in. hmmmnnnn... shiny! For those wondering, the inside dimensions of the case are 18" x 18" (450mm x 450mm in new money) by about 9" (225mm) tall. Time to do some trimming.... all done! Well, so much for the dark grey portions! When I think about it, the case would have needed at least another 6 inches towards the rear to include any decent portion of the dark grey - and it's already hmmnnn shall we say... fairly large., and I don't have anywhere to put it yet. Ignore the crappy edges that you can see. Originally it was about 1+ inches thick so I had to reduce the thickness. Well, I didn't have to, but thought it would look better. The plan is to use aluminum "U" channel around the edges to finish off the display. I went out and bought some last night from the local DIY store, but as is always the case, it got all scratched up in the store so I picked the best one and tried polishing it up with wire wool but I wasn't happy with the result. So, I bought some satin anodized aluminum on line last night and will use that to complete the edges. Oh, the houchin got a clear coat today, but it looks exactly the same as it did yesterday so wasn't worth taking any photo's. Well, it looks like I can't do any more on the Wessex/Houchin today so I can start getting my head around that train again!4 points
-
" Those steps inside the wheelhouse look like they need the Longshanks treatment! " Martin given the time of year I feel my reply should be............... Oh no it doesn't !! Just to keep you quiet Kev4 points
-
I know right...? My ability to just be there and take pictures.... Mayhap I lost my calling...4 points
-
Probably not the best place to have posted this but I couldn't find another spot!!! After some great times on here, I've just posted my 5000th post, what a milestone! What I'd like to do is thanks everyone who has responded to my post be it negaive or posative. I've enjoyed the banter and hopefully, I'll be around for a lot more. Thanks to Amin and the Mods for their help and question answering to my proposed GB threads. where would we be without them???? Thanks everyone for some great times and to all the new aquaintances I've made. OK, though I'm not going anywhere... Colin4 points
-
Hello! here's one of my model for today. The model is easy and pleasant in the assembly. There is only one problem you need to put a lot of load on the nose. The center of gravity is shifted far back. Therefore, it is necessary to load a lot. All other problems in the assembly are related to my inattention. In the assembly used a of photo-etching set/ Paint- tamiya.3 points
-
As I am building a car door Tiffy in 1/48, I thought some bubble canopy Typhoons will be a nice addition. Build two and three for this GB are therefor two 1/72 Typhoons with D-day markings (or what's left of it). The first of the duo is Typhoon Mk.IB PR-M from No.609 Squadron operated from Thorney Island on 6 June 1944. It is interesting that in the Osprey book it has the serial MR131 and on the Xtradecal sheet MR130 - what is correct? Unfortunately the only picture I found is of rather poor quality - but better than nothing. But it shows that the D-day stripes are crudely painted on by brush or broom! I will use the Brengun kit for MR131. It is the late type boxing, but the plastic also contains a three bladed prop and short chord Typhoon tail plane which is correct for MR131. This will be a OOB build as I build in 1/72 scale mainly to show camouflage and marking variations using the markings from Xtradecal 179. The second in the duo is a late production Tiffy Mk.IB MN716 F3-A from No.438 Squadron (RCAF) operated from Eindhoven during mid-October 1944 There is an excellent picture available for this aircraft. The Airfix kit will provide the parts for this build - a four bladed prop and the Tempest large tail plane. I also build it OOB with decals from Aviaeology 143 Wing decal sheet. I started this kit two years ago, but very little was done on it. It will be interesting to see how the Brengun and Airfix kit compare. Cheers, Peter3 points
-
1374 This is my very first WIP post I've ever attempted so please forgive any and all errors. Also I can't seem to get Flickr working here so I've opened a photobucket account as the instructions are very clear (they need to be for me!) in the FAQ section. I've had this vinyl figure sitting in its box for ages but as I've just seen Ep VII and I don't have any of the nice shiny new Bandai kits I thought I give him a go. Now I've never worked with vinyl before but I jumped straight in and after a bath (for him) I started trimming the excess away. Using heat (a hair dryer) really softens the material and speeds up the cutting, in fact there is so little resistance when its hot I found I had to be ever so careful so I didn't go crazy and chop the entire arm off! Here he is taped together (without the capes) just to see how he looks The level of detail has really blown me away. The only blemish in the entire kit is that the cape chain and lightsaber have done a runner Now the chain should be a straight forward replacement but it looks like I may have to scratch build the lightsaber and I've never done anything like that before. The idea is a bit intimidating but I am looking forward to the challenge That's all for this evening, I hope you all had a splendid Christmas Davros aka Mechanised Dwarf3 points
-
Imagine growing up close by to a busy airfield and all your life you wanted to be a pilot. School holidays were just crammed of leaving the house in the morning and taking sandwiches and binoculars to watch your free airshow everyday. Then one day in the early 80's the beeb airs a series called "Fighter Pilot" and your absolutely beside yourself with excitement and anticipation; nothing else matters. The series finishes and you have all the incentive you need for school and the road ahead to become a pilot.......... That story was me and all through my childhood years and into adulthood I remember the programe and even the theme tune, alas the dream didn't turn out and it still niggles me today. I've been model making since I can remember and I like to think hopefully I've got better over the years and manage to fire out some decent blobs of plastic. So the old VHS has been converted to DVD and I've got my reference material and the original book from 1981, still in decent condition despite house moves etc... the spark has happened and at SMW 2012 my shopping list was the Heritage JP3, the Aeroclub JP5, 2 x Italieri Hawks and old faithful Airfix Buccaneer, along with some aftermarket support as I wanted this to be a goodun. I couldn't get hold of John's JP5 but discovered this FLY JP5 and the project has begun. As the New Year came and went the project bench is cleared for the run of 5 kits which I'm now against the deadline as we've decided to move house; so I have to get this done. I watched this DVD & the youtube clips for hours getting this right so I'm sure I've bumped up the viewing figures on his posts . I've modelled the actual aircraft that the John McCrea was shown flying or passing the tests in. There is no footage of the JP5 & McCrea so settled for Martin Oxborrow's aircraft . The JP3 at Linton-on-ouse: http://www.britmodeller.com/forums/index.php?/topic/234935514-jet-provost-mk3a/?hl=speedy#entry1251285 The JP5 at Linton-on-ouse: http://www.britmodeller.com/forums/index.php?/topic/234935706-jet-provost-mk5a-linton-on-ouse-1980/?hl=speedy#entry1253453 The Hawk at Valley: http://www.britmodeller.com/forums/index.php?/topic/234936448-hawk-4-fts-raf-valley-1980/?hl=speedy#entry1265046 The Hawk at Brawdy: http://www.britmodeller.com/forums/index.php?/topic/234938901-raf-hawk-234-sqn-1980-brawdy/?hl=speedy#entry1297715 The Buccaneer at Laarbruch: http://www.britmodeller.com/forums/index.php?/topic/234938078-raf-buccaneer-15-sqn-laarbruch-1981/page-2?hl=speedy#entry1288452 So now I have completed the line up and I'm pretty pleased with all of them and collectively it does look good, to the extent if I finished modelling now I'd be pleased. So a couple of photo's as a collection: So there it is. A BIG thank you to Dr Evil & Selwyn for your help along the way and I've been invited to display them in the Salisbury model shop for a bit, lastly if they ever get to discover this the likes of John McCrea, Martin Oxborrow, Robbie Lowe. Steve.3 points
-
Not a bad year's output for me considering that I scored a big fat zero last year First off was my BoB Airfix Spitfire I in 1/72. No problems with assembly (I've just started my third!) other than the tight fit of the canopy. Finished as a 610 Sqn machine courtesy of Eagles Cal (yes the tail flash is meant to be undersized and backwards) Next in order was my WHIFFED FRADU Sabre GA.7 using Academy's excellent 1/48 offering. Markings are all from the spares box and the 'Double Diamond' logo is from a scrap red transfer (1/32 Revell Mirage!) Finally here is my KUTA Airfix Hurricane I in 1/72. Markings are out of the box. Lovely kit and I'll definitely build another (when they do a tin wing one) To the above 'should' have been the 1/72 Mosquito from the French Fancy group build, but that's now in the KUTA build so maybe January 2016 for that one? Thanks for looking. Happy New Year. Trevor3 points
-
quick photo, more with words tomorrow. john3 points
-
Can you imagine the disappointment in the Ranks of 613 squadron...... First you get sent to France with the Hawker Hind, "oh but it's ok guys they are going to send us some more up to date machines....." Here you go boys, you lucky devils, you are being given the exciting opportunity to use the......Hawker Hector ! Is someone taking the complete p*ss ! Ok boys we admit the Hector wasn't as modern as you may have been hoping for so we are giving you something bang up to date, cutting edge.... Gentlemen the Westland Lysander ! Im going to volunteer for the Artic convoys, there is a higher survival rate !3 points
-
Thank you Gents for comments and likes. "Trauma after doing Azur Vildebeest" - this is still ahead of me.... EDIT: The decals were not bad themselvs, I thought that they are very thin and I skip painting gloss under them - so mostly my fault... Few more shots:3 points
-
Low flying? Nope, never happens. Any flying which appears to be low is merely a figment of the observer's imagination, or can be put down to optical distortion of the atmosphere. https://www.youtube.com/watch?v=o6m5KkcKJmk3 points


This leaderboard is set to London/GMT+01:00