Leaderboard
Popular Content
Showing content with the highest reputation on 19/09/15 in all areas
-
I fell in love with photos of Qatar’s beautiful Exocet-armed Sea King/Commandos in the late, lamented World Air Power Journal back during the Gulf War years. I waited patiently, hoping that some aftermarket company would produce suitable decals, but that never happened. Eventually, with the proliferation of good online photos, I found an image clear enough to use to reproduce the Arabic inscription used on the tails of Qatar Emiri Air Force’s Commandos and Gazelle helicopters. This done, I was able to make up and print my own decals on my PC. Chosen aircraft for my depiction was the oft-photographed QA33 (c/n WA922), one of (8) Commando Mk. 3s acquired by Qatar for the anti-shipping role, fitted to carry Exocet missiles. These aircraft serve with QEAF’s No. 8 Anti-Surface Vessel Squadron, operating from Doha. I tapped Revell’s popular 1/72 kit of the Sea King Mark 41 with Skua missiles as the basis for the project. The kit offered the necessary options for the required fuselage windows and many additional pieces like the intake filter and 6-blade tail rotor. I removed the molded-in floatation bags from the kit sponsons, then scratchbuilt the smaller “thumbtack”-style pop-out emergency floats and sponson-mounted sensor domes. [For a more complete account of the various changes to the kit, check out the build log here.] The Exocet missiles came from Italeri’s venerable NATO/US Aircraft Armament set, with scratchbuilt launchers and mountings. Paints for the attractive QEAF camouflage scheme are all Tamiya acrylics, mixed by eye (with more than a bit of trial and error involved). Drybrushing and weathering with Testors “square bottle” enamels, and artists oils. All decals home-made with the exception of the “dotted line” markings around the main entry and side fuselage door windows, which were borrowed from an old Model Decal modern German AF sheet. Really a fun project, and very satisfying to have it done after so many years. I hope you enjoy the photos. Special thanks to members MarkdipXV711, Rodders154 and andyf117, whose great work on these forums provided major inspiration for this project. Thanks also to all who followed along on the build.26 points
-
My F4U-1A Corsair - NZ5272 / NZ5307 - RNZAF Tamiya 1/32 HGW seatbelts Hataka paints Eduard brassin Xtradecal Barracuda cockpit decal20 points
-
Good Day Me 323 D-1 Gigant 1/72(Italery 0104 ).My old dream to make this monster. It's old kit from 90s,was taken from E-bay. Kit (on my mind) content like from 2 different makers.On side perfect fabric structure on the wings,guns,wheels,engine,canopy,cargo space On another side completely empty cockpit,terrible part jointing,aileron with huge pulling-down and etc.Tons of Mr Surfacer was spent))). Camo for Tunisia operation:RLM 70,71,65 and 79 spots on top - I'm not find confirmation about this camo scheme,but can be). Normal camo 70/71/65 for Me 323 and I think during Africa operation can be added 79 spots in field. Construction - aaaaaa,nightmare - putty,polishing,putty,polishing and again and again. Painting - one thing after two layers of paint fabric structure disapear,I'm cry.Aileron levers,intake air pipes selfmade. Weathering - washes,pastels. Finito)))19 points
-
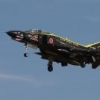
hi all, Here is my latest model. It's a 1/48 Hasegawa RF-4EJ Kai Phantom of 501 Hikotai based at Hyakuri air base in October 2004. The model is standard Hasegawa fare but includes a Wolfpack JASDF update set, Aires cockpit, Steel Beach intake covers, Aires wheel wells, Hypersonic resin tail fins, Aires exhausts, Quickboost blow in door details, Eduard brass, Airdoc pylons and finally Wheeliant wheels. The LOROP pod on the centreline is from the kit . As you can imagine, it took a fair bit of work to get that lot in but i got there in the end. The sharkmouth is masked and sprayed as are the eyes but the rest of the decals are from the kit plus a few numbers from the spares box. Hope you like it Andy13 points
-
Pretty nasty plastic, clunky and mis-shapen, but the resin and photo etch that came with it weren't bad at all and helped make it an ok build in the end. Prefered the look of the full lower fin so decided not to use the horrible front undercarriage and quite nice resin dolly, which meant I'd have to make a stand too. Opened up the airbrakes and scratched the bits needed for the isnide and plumbed the tanks while i was at it. Only bought aftermarket was the decal set for the tanks. DSC01244 by omgpainful, on Flickr12 points
-
Hi all, Thought I`d show some photo`s of my latest effort; Italeris reboxing of the AMT 1/48 P-40 N Done in the markings of Netherlands East Indies, 120th Squadron, Merauke around 1944 Which makes a change from the usual USAF, Australian and New Zealand markings but still fits with my Pacific Themed collection Made a few improvements to the kit including; boxing in the wheel wells fully, added retraction links and brakepipes,...... ... breather on fuel tank, transparent gun sight, fuel vents and aerials on underside rear fuselage...... and usual seat belts, bead gunsight and some canopy rails. Hope you enjoy, Thanks for looking Cheers Russ11 points
-
Hi All, Here are a few pics of the JP's playmate the excellent 1/48 Gnat from Airfix. No problems at all putting it together and I have another one put away! Paints are Revell Aqua 99 aluminium and 25 Luminous Orange both thinned with water and a dash of Flow Improver. Hope you like this one as much as the nice comments on the JP! yours MODeller11 points
-
Latest completion.... 1/72 scale Italeri Jagdtiger plus some scratch built stuff. Moving on to something green next as a break from all the resent Dark Yellow... ATB Sean10 points
-
Eduard's D-13 with Quickboost air intake and exhausts pipes.10 points
-
Happy to have finished my ninth aerobatic kit of the year. This Hobbyboss kit is pretty good for how cheap it is. However, painting brought several drawbacks, especially with the masking. The "Sheffield Pale Gold" was created from Gold and Polished Brass (1/2 respectively) both Model Master, sealed with Humbrol Clear Gloss Varnish. Decals utilized were Leading Edge. Cheers, Orlando.9 points
-
8 points
-
This was part of the P-38 GB which I didn't get finished in time. She's not perfect but she is finally done. Progress thread was created here.7 points
-
Hello This is my latest models that i made in the last few months. I hope you liked! Trumpeter Soviet B-4 Howitzer HobbyBoss Soviet T-35 Heavy Tank Dragon Japanese Type 2 KA-MI Mirror Models + LZ Models Canadian Otter MK.I Miniart U.S. Caterpilar D7 Italeri German Sdkfz.231 (6 Rad) Amusing Models German Neubaufahrzeug Heavy Tank Italeri U.S. M4 Serman Calliope Miniart British AEC MK.I Hobbyboss Soviet T-28 Medium Tank Mirage Polish "Kubus" Academy U.S. M3 Lee Medium Tank Takom Skoda PA-II FineMolds Japanese Type 95 HA-GO Tamiya U.S. M5 Stuart Hobbyboss Soviet BA-10 Tamiya Japanese Toyota AB Staff Car Miniart Soviet SU-76 Howitzer Bronco British Paras in Willy's ICM French Panhard 178 Merit British X-Craft Midget Submarine7 points
-
Also known as "it's amazing what you can do when you've got time on your hands" Having recently been confined to barracks due to a minor heart attack (and recently discovering that my consultancy contract was not being renewed) means I've had the last 4 weeks to thin the stash a little. This is the first fruit of all that free time, the Tamiya 1/32 F-16 CJ. Built out of the box, painted with a mix of Vallejo and Tamiya paints. Left side view Right side view Cockpit view Low level shot. The radar. Pictures taken on my iPad and I do realise I've still got to paint the pitot. Thanks for looking7 points
-
Hiya Folks, I`ve Finally finished my 601 Sqn Hurricane Mk.I, using the new Airfix kit, Xtradecal decals and it was brush painted using Humbrol enamels and Polly Scale Acrylics, here is the build thread over on the B of B Group Build http://www.britmodel...er-almost-done/ and here is the model ; The rear view mirror was scratch built from plastic card and the bead sight on the upper cowling was a piece of guitar wire,. cheers Tony7 points
-
I would like to show you all my latest production. Pz.kpfw I in 1/35. I bought it as used on ebay for 3 quid. Some of wheels was allready glued together. I did this model straight OOB the only thing that I had to chaned was mg barels they are from RB Model. and I have added air recognition flag from Reality in scale. For weathering i have used mig and AK products plus some humbrol pigments. wip is here http://www.britmodeller.com/forums/index.php?/topic/234987396-pzkpfwi-ausf-b-sdkfz101-135-revell-italieri/ This build was a big fun. Let me know what you think about it and have a nice day. Cheers And one with his mate's6 points
-
Hello friends Since i shown many of the kits here i would like to share this pictures with you. This is the result of my participation in the Maceda 2015 Model Contest (North of Portugal). 1/48 Bronze - Alpha Jet Silver - Mitsubish Zero Gold - Fairey Swordfish 1/72 Bronze - F-100D Super Sabre Silver - F-18F Gold - Panavia Tornado Best aircraft on the Show - Panavia Tornado AK-Interactive Award - Panavia Tornado Tiger Meet Award - Panavia Tornado Best in show - Panavia Tornado Meanwhile i had time to give a workshop too. Thank you for looking Kind regards Vitor Costa6 points
-
ANother recent quick build.(well, done a few weks ago in between 'other issues'). Hasegawa kit and Techmod for the decals. I had a go at improving the look of the overly heavy 'sagging' of the fabric that Hasegawa did with this 1/72nd kit and their /48th version! I smeared some Plasto( yuck but it does the job) and then sanded off in the hope of leaving some ribbing and representation of the Hurricanes fabric rear fuselage. The other slight change I did was to replace the prop with the DH type and found one in my spare props box that came fom an early AZ kit! Hope it works for you! I kept any weathering to the minimum on this build hence its 'clean' look. Cheers. (PS: Thanks to Vonkeyvong for selling me the kit)6 points
-
Its got to be, I hope its my recipe. Ah, beat me to it, so it is. Good. I think helicopters make good modelling subjects because they don't need to be that aerodynamically tidy so tend to have lots of twiddly bits (as I call them) that can be added and the generally large glazing shows off the interiors well. I have been doing quite a bit of research on the sand filter and now have lots of photos. I even found a manufacturers promotional literature with a good photo of it. Here are some more: https://upload.wikimedia.org/wikipedia/commons/0/0a/French_SA341F2_Gazelle_helicopter_in_Saudi_Arabia_during_Operation_Desert_Shield.jpg (click on to expand) http://www.airliners.net/photo/Morocco---Air/Aerospatiale-SA-342L-Gazelle/1678445/M/ http://1.bp.blogspot.com/-ry9U46-fZO4/U535oVyElHI/AAAAAAAAMPU/VFMYbBjZoGQ/s1600/image27.jpg I also found this artwork of an Iraqi machine of the right vintage: I hope you can see it. If not here is a link. I don't like relying on artwork but it checks out against every reference - it does made me doubt the validity of the green camo colour though... I opened up one of the holes for the missile rails and did a bit of clean up on one and then spotted this nasty sink mark: I'm now thinking they would be better scratch built. Getting back to the sand filter I mocked up the engine: The fit and quality of the thing is not that great and it will need a lot of cleaning up: I made a to scale drawing of what I thought the filter should look like: It will replace that conical inlet part. I then went looking in the spares box for suitable materials: I thought the ancient blue Airfix Spitfire wheel could be a good starting point. But checking things again I realized that was too small so did another drawing and found this wheel instead: I think I can still use this length of tube for the bottom part and the axle of the wheel will make a good representation of the parallel sided connection to the rotor head: I used a 12mm punch to create a partial disc: With that glued on the wheel I could use it as a guide to cut the wheel at an angle: Tidied up on some wet and dry I glued a second smaller disc to the back face: It now looks about the right thickness. My plan is to back fill it with Milliput and then sand to the correct profile. Sorry its not much progress but I have been busy on my new house, hopefully there will be more tomorrow. Bye for now, Nigel6 points
-
While the iconic Boeing 747 is rapidly disappearing from our skies, its still an impressive subject to model. KLM still has a sizeable fleet of 747s which it is currently repainting into its updated livery introduced in 2014. This new KLM scheme is simply an adaptation of its previous livery with a wavy line around the nose and a white underside instead of light grey. This is the Dragon kit. It normally has a high price tag as it come with a visible interior with huge detail. But having got hold of one quite cheaply I opted to fill and paint over all the clear panels to produce a standard 747-400 model. I think it is quite a good representation of the 747-400 and even comes with a set of passenger steps. The kit does have some issues - particularly the tail fin, flap fairings and gear doors - which I've tried to fix. The interior still has to be fitted to ensure the fuselage is rigid enough to support the weight of the wings. With no decals yet on the market for this new scheme, I've had to improvise. The KLM logos are from Draw Decal, 747 detail from Flying Colours with the cheatlines and other logos being home made. KLM blue and Boeing grey paints are from Xtracolour. Thanks for looking Tim6 points
-
Ta-da! Finally got everything together to my liking. Added the final details (and reattached a few that suffered some small-scale impacts). Here we go: I have to confess it came out better than I would have expected, really pleased with the results. More photos here, with a Doha Air Base background. Thanks to all who have endured the build. It's always a bit more fun to have supportive souls both challenging and encouraging.6 points
-
Not a newly completed build but with so many subs being posted I just had to. The PE set is the GMM Gearing set - additional doors, hatches and rails from the Flyhawk generic sets. 20mm twin mounts are compiled from a number of PE sources and some scratch items. 5" barrels are from L'Arsenal. It's a good kit but still has had many tweaks.5 points
-
Hi I hope you enjoy these pictures from the Duxford show today. The show was interrupted by the air ambulance landing on the airfield to attend a vehicle accident on the M11. A really good show in beautiful weather to a sell-out crowd. Thanks for looking.5 points
-
Avro Vulcan B2 35 Sqn RAF Scampton GWH Vulcan B2 straight from the box with Fundekals squadron badges. Nice easy build, only 9 more to go!5 points
-
Evening All, Thought id share one of my photos of G-BJST on its ferry flight from Clacton to Duxford in some rather miserable conditions... Its now due to based at Duxford operating pleasure flights with classic wings. This is my first attempt at air 2 air, so C&C's are welcome! Private North American T-6H Harvard IVM G-BJST by Bradley Bygrave, on Flickr Regards Bradley5 points
-
Model OOB with Eduard PE added. Painted Tamiya XF-52 / XF-73 / White. Shaded lightened base colors and the white filter at finish. Argentinian camo - 21/05/1982 - San Carlos bay, area of the Falkland Islands, during reconnaissance fly Lt. Crippa together A-4 attacks by Zuni rockets (Lau-10) British frigate HMS Argonaut. Despite the obvious signs "shoot down", the ship ended up only on eliminating him from the fight due to damage. Feel free to gallery5 points
-
Bücker Bü-133 Jungmeister Warszawa - Poland 1939. Heller 1/72, decals make for me my friend ADAMSKY.5 points
-
Thank you for such a wonderful note - it is exactly this sort of thing that makes modelling and embedding myself in the history of aircraft so rewarding. What a sight they must have been... ..managed to get a few more hours at the bench, so here goes with some more metal bashing.. ..I set myself goals to move through the stages needed to get a bird like this done - "make the nacelles, so you can skin the wing", "sort the landing gear geometry out so you can detail the nacelles", "skin the lower wings so you can build the nacelle internals" - I have to discipline myself to do these steps so there is some order to the approach and things don't clash with each other.. ..the current goal is to get the lower wings skinned so I can get the nacelle structure built, so I thought as it is the lower wing just go for it in one big sheet.. ..I marked out rivets, panels and use colours to tell myself whether to rivet from the back (so domed rivets) or stop points so I don't rivet through a panel etc.. restoration photos are great for this as you can see panel & rivet details - unfortunately it is much more difficult with a Dark Blue GSB F7F sitting in a hangar which is what most of my reference is - but I think this is near enough... ..then after at least an hour's work the panel is fully detailed - here is the template being peeled off.. ..I also masked and wire woolled the roof of the U/C bay as the litho plate has a sort of coating I am not sure will take paint, so I stripped it down & will metal prime it.. ..I will be cheating as this will need to pretend to be the wing top skin, as I don't want to go chopping the wing about ..and fixed it in place.. ..another little challenge on some of the top wing skinning are some vents in what is the U/C bay roof - they literally are just holes I think to maybe let hot air created by the engine out of the U/C bay.. I cut some thin slits in the panel and tried making a shaped punch to indent them, after experimenting I had to make a female part to stop the vent mishaping or becoming too big - better to find that out on a test part than a panel you just spent time on.. ..they turned out ok though.. ..and thats it - stage complete - the undersides are done and I can start on the U/C bays... ..and to give a sense of scale, here it is with a 1/32 Sea Fury - the only other model I have completed since I re-started in 2010... ahem... TTFN Peter5 points
-
There's no going back now. Cheers, Bill PS. I only measured once. Living on the edge, baby.5 points
-
My first attempt at a vignette- Spitfire 1a of No. 92 (East India) Squadron at RAF Biggin Hill, November 1940 Spitfire is by Airfix, Austin 8 is by ACE, figures are by Airfix, base is home made (all in 1/72)4 points
-
Hello and thanks for your interest in this topic. This is my interpretation of "White 70" from Stab/Schlachtgeschwader 10, which was one of the last defenders of Vienna in spring 1945. The unit operated from various aifields in Czechia, attacking Russian tank columns approaching the Austrian border. In the closing weeks of the war, the remains of the unit were withdrawn to the Austrian airfields of Bad Vöslau, Markersdorf, Hörsching, Wels and Zeltweg. (source: http://www.ww2.dk/air/attack/sg10.htm). Do the markings look familiar to you? Yes, they're the same as in the new 1/32 Revell kit. The decals I used come from Techmod. I managed to break up one of the "70" due to mishandling them and found replacement on an old Aeromaster sheet. Color callouts for this machine vary considerably; Revell suggests RLM83/75, Techmod calls for RLM74/75, while the Aeromaster sheet identifies the colors as RLM81/83. I went with Revell's suggestion. The kit is Airfix F-8; photo-etch pieces from Brengun. Pitot tube is a metal piece from Master Model. The bomb load comes from the kit, 4x 50kg Bombs plus a AB250 Abwurfbehälter (a cluster bomb containing butterflies). Painted with acrylics from the Gunze/Mr.Hobby range. Photographs: Wolfgang Rabel, IGM Cars & Bikes4 points
-
Hello, may I show you the new AZ Model Bf-109 G10 kit. I first saw it at Modelbrno back in June, where I bought three boxings. All of them are labeled as "WNF/Diana", indicating the factory who built them (Wiener Neustädter Flugzeugwerke in Austria and Diana in Czechia). These models are a little different to those assembled at Erla or Regensburg plants. I was lulled into (false) safety by having built a number of AZ's G-6 kits, which were easy to build. That's not the case with the G-10 as I learned the hard way (my first attempt went into the bin). The reason is the oversized cockpit floor that needs to be reduced in width considerably. Once you've figured out the issue, work commences as usual. The model represents "Rosemarie", a machine of II/JG52 that operated from Czech airfields at the end of the war. I found one photograph of the original: The model was painted with acrylics from the Gunze/Mr.Hobby range. Photographs: Wolfgang Rabel, IGM Cars & Bikes Here's the cockpit office, refined with etch from Brengun: And on to the model ... Photo-etch antennas, seatbelts, scissor links and flaps from Brengun. Pitot tube by Master Model. Decals from the box. With kind regards from Vienna, Roman4 points
-
You're Cleared in Hot - Tim's work here is done. Declaring completion and signing off But still armed and dangerous . Unfortunatley showing signs of heat distortion underneath - where I tried to rush paint curing under a lamp. That's my ticket to hell sealed . As atonement I'm about to start an F8 Crusader.4 points
-
That's good news! I'm looking forward to seeing them. Hi Alistair and thank you. This is the first time I've tried using a small flat brush for the pre-shading and I was pleased I had done. It seemed to work better than a normal brush. What I do with the displaying of these will depend on how much time I get - I'm not the fastest at building these things! I have a couple of ideas - I just need to leave myself some time. Hi Nick. Thank you for your comments. A couple of the reasons I've not bothered with an airbrush (apart from the cost) are things like the of amount of effort they appear to take to look after them and how quickly things could go wrong when using them. Thank you Julian - it surprises me sometimes too!!.........and doesn't always happen on the first go! Thank you Homerlovesbeer.Only one photo today but it covers about 4 hours worth of work, four or five layers of thinned Humbrol Dark Earth and the windscreen and rear canopy frames painted with Humbrol's U.S. Dark Green: Next I need to paint the green camouflage areas with U.S. Dark Green. Comments and suggestions welcome. Kind regards, Stix4 points
-
The Xtrakit is a re-boxing of the Matchbox night-fighter meteor in a single colour with new decals. This kit eats filler and has taken me quite a while to build with plenty of sanding sessions! However, I'm very happy with the final result. Paints are Tamiya XF-83 Medium Sea Gray and Gunze H330 Dark Green. This is my British first jet since reading James Hamilton-Paterson's Empire of the Clouds, but certainly won't be the last. The stash is bursting with Cold War British jets. I've got an original Matchbox issue of the same kit in the stash which I hope to get started on in a few months with the upcoming Meteor group build. With a Modeldecal sheet and some Airwaves PE I should be able to build a nice NF14. With my winter project complete it's time to focus on my current group build entries!4 points
-
4 points
-
Ced, good to hear mine won't be the Blenheims in this GB. Ozzy I'm hoping it will be better, I know all the mistakes I made on the IVF. Biggles, I remember the Frog kits when I was kid,with their white boxes and green Frog logo. I've not made as much progress as I would have liked this week, due to work and family commitments, along with trying to finish off the Mk IVF. However I have managed to get the wing spars and wheel bay supports together and a coat of primer and pre-shade on. Unlike the Mk IVF I didn't bother filling the ejector pin marks in the roof wheel bays, as they can't be seen anyway. The flaps and wheel covers have been cleaned up, and the backs of the flaps had the sink marks filled and sanded. I also assembled the cockpit and added PE belts as per the Mk IVF, all of which received a coat of primer and pre-shade. I also started building the engine cowlings trying a different approach to the Mk IVF in attempt to improve the fit. Let's just say it hasn't been entirely successful, with gaps to be filled. As you can see the engines are together, as are the main wheels. The little tid bits on cocktail sticks are the 25lb bombs from the Mk IVF which I still haven't got around to finishing! Tomorrow should see the interior green on, and some of the detail painting of the interior started. Karl4 points
-
Mk. A Whippet Takom 1/35 I've just finished this, Takom's new Whippet. It's finished as A322, one of the Whippets supplied to the White army during the Russian civil war, then captured by the Reds in 1920 and put into service with the 1st Tank Detachment in Ekaterinodar, before seeing action against Polish positions at Stolpshch. It's a lovely kit with very nice surface detail and great parts fit. No interior which is a shame as the rear door can be posed open. It'll be interesting to see how it stacks up against the Meng version when it's released. I suspect the Meng one might have the edge and might well be slightly cheaper. Thanks for looking Andy3 points
-
Hello All, Been quiet of late but here is a recent offering the Fly 1/48 JP which was a pleasure to make and adds another splash of colour to my collection. Those that know me will note this one is not a Ripple! but a Boscombe Down one should eventually appear! I apologise for the finger trouble, not put a post up for ages! Hope you like it, yours MODeller3 points
-
Hi there, this build is a Revell C17A Globemaster in Qatar colours. I built this at the same time as the Qatar Dreamliner as I had the paint. It was a decent kit, however the decals were of very poor quality and very brittle. The section underneath the tail took an absolute age to get right. Hope you like it.3 points
-
Cheers Bernd. Well, decals have finally found their way onto the 109. I had a day off on Tuesday, and spent over three hours getting them on. A newly aquired box set of Glen Campbell lps got me through, came with 7 lps, I'd listened to five and half records before I was done. My original intention was to use the last of the Almark decals, but one of the crosses folded upon itself, and as I using the blue cowling pennant for Wick's aircraft, I went with the Airfix decals for the majority of the markings. The duck(?) motif and kill markings are from a Superscale sheet, with the swastikas and some stencils being the only decals used form the Almark sheet. As was the case with the other 109, I manged to get the aerial off in one piece, but managed to break it when trying to clean off a bit of sprue gate. I'll make another from vac form left overs. It will be most likely that the next time this is updated, this will be finished, and a start made on the dio. Sean3 points
-
Tim's Airfix Cessna O-2 Forward Air Controler. http://www.britmodeller.com/forums/index.php?/topic/234988101-tims-cessna-fac/3 points
-
19/9 update: After an excellent break away from everything at the "Zwarte Boer" near Ermelo, (excellent food, excellent wine, forests, wild boar and venison), I am back at the bench today. The extended wingtips have been added, (making the bird even bigger to store). I think I'll leave the flaps drooped, (not sure if this is accurate but it always appeals to me). I have started work on the engine nacelles. Eduard has provided some nice PE frames so that should look good on the belly of the beast. cheers,3 points
-
Finished today, a really quick build - made quicker when I dropped it and cracked the canopy, dislodged the Instrument panel and seat and lost the gunsight. Eduard's 1/48th P-39 from the MTO Dual Combo, this time as an Italian co-belligerent airforce. Really fun kit, as long as you don't drop it :-) Peter3 points
-
Hello, Slow progress recently I'm afraid as we've all had heavy colds. However, did get the exhausts done, which helps the plane start to look more complete. The kit parts are OK, some flash but also quite a few sink marks to fill and sand. Here they are 'raw': ...and done. I looked at a lot of pics of originals, and settled for a dark grey metal as this airframe was fairly new, and will add soot later with pastels. Weather's been kind in the last few days, so took some pics outside. Must remember to dust! I've tested one kit decal out - goes on fairly well, but needed the last of my MicroSol and a hot wet piece of kitchen roll to really get it settled into the surface detail. More MicroSol ordered! Also, the main undercarriage is on - a little wobbly, but expect the supporting struts and doors will help. More soon hopefully, Take care, Matt3 points
-
Been gluing plastic! Everything goes together very nicely, which was why I was so surprised to find one of the cowling halves bent out of shape quite badly. Attempted to bend it back but was starting to get stress lines on it. Luckily this is a Dual Combo kit and I just stole the piece from the other kit. I wont miss it as although there are two complete kits in the box, you have to build one F6F-3 (Mk.I) and one F6F-5 (Mk.II). I'm doing mine with just rockets stubs, so I fashioned some of those out of some Evergreen stock. Drilled out gun barrels, the longer one will be chopped off and replaced with the 20mm cannon barrel later. Drilled out the exhaust stacks, only a little as a tricky angle to drill far. Chopped out the wing tip lights and will make my own, I really wish companies would supply wingtip lights, this kit has all the switches in the cockpit would it be too much of a stretch! I had a idea of doing a slightly new (to me) method and I thought if I made a basic mould of the wingtip and then smash cast it with heated clear sprue. Unfortunately I thought of this after I had chopped out the lights but luckily this being a Dual Combo came to the rescue again and I clipped together the extra wing and made an impression of it in some Magic Sculpt. Then gently heated some clear sprue and shoved it in, then using a razor saw cut off the clear wingtip. Will still require some finessing but should be a little easier than carving it from a block of sprue. Cheers Segan3 points
-
Success has many parents but failure is an orphan. Hindsight allows us to see the errors in planning, some of these may have been noted at the time, but there was certainly an eagerness to mount the operation and quickly that encouraged risks to be taken. All of the 'mistakes' identified since then simply make the participants achievements all the more remarkable. I agree that 'It never snows....' is a very good read and a balance to some equally good writing from the Allied perspective.3 points
-
Thanks very much guys. I do hope the canopy comes out okay. Will you be joining in this GB Craig? A break from the interior today; Thought I'd have go at the rotors. below are the Mach 2 rotor hub pieces. They weren't as bad as I remembered; some nice details, but a lot a flash and some bits look a tad oversize. So after some fettling we come from this ^ to this v trimmed and sanded off the flash and cut off the little actuator things that are on the side of each blade grip ( Not sure if they are dampers or part of the pitch control). I'll replace these with plastic rod later on. I also had a go at the rotor blades. The kit parts were quite thick so needed thinned down although I think they may need a little more thinning. I also gave them all a slight droop. I trimmed of the blade roots from the kit parts, drilled a hole in the end of each and inserted a 1mm diameter, length of brass rod. The reason being that again I thought the kit parts were a little thick, but the brass will also add a some strength to probably the weakest point on any helicopter kit. cheers Aaron3 points
-
Finally finished my 601 Sqn Hurricane Mk.I, using the new Airfix kit, Xtradecal decals and it was brush painted using Humbrol enamels and Polly Scale Acrylics, here is the build thread http://www.britmodeller.com/forums/index.php?/topic/234985225-airfix-148th-hurricane-mkip3675-uf-s-601sqnwith-the-red-flash-and-coloured-spinner-almost-done/ and here is the model ; cheers Tony3 points
-
Airfix Spitfire 1/72 Scale (new tool) Build thread http://www.britmodeller.com/forums/index.php?/topic/234985396-spitfire-i-dw-o-610-squadron-completed/?p=2045725 Trevor3 points
This leaderboard is set to London/GMT+01:00




.thumb.jpg.d17ff607fc7e89ed057e63fcb6f2a888.jpg)

.thumb.jpg.3c5b41eb004e624ff9bdf837868ecbb6.jpg)

