
Leaderboard


Popular Content
Showing content with the highest reputation on 07/06/15 in all areas
-
Triumph's Tamiya 1/48th Avro Lancaster Bomber Lovely Lou made by Ian Collis ''Lovely Lou'' - XH-L. ME545. Service: 218 Squadron. Fate: Scrapped on 25th April 1950. Kit has the full interior PE detail set, resin guns and correct ''Lovely Lou'' decals also many if not all the kit's errors have been addressed. and theres a lot of pictures26 points
-
Good Evening, Seem to have been on a bit of a roll at the moment, and have finished a couple of Battle of Britain subjects, my normal builds being fast jets. Airfix new release 1/72 kits are simply beautiful, and after completing a Spit Mk.1 that had languished on the shelf for 5 years, I realised I hadn't ever built a Hurricane to a reasonable standard so thought I'd give there Mk.1 a go. Here's the finished article, the first couple of pics were taken before I'd added the antenna wire. Decals are Xtradecal. Thanks for taking a peek, all feedback good or bad most welcome, Eng21 points
-
Triumph's Revell 1/48 B-17G Flying Fortress Chow Hound made by Ian Collis with resin guns and wheels, also the kit's errors have been addressed15 points
-
Few pics of another model finished in June - Tamiya 1:48 Spitfire Mk I. I've added Eduard photo-etched zoom and resin exhaust originally dedicated to new Airfix Mk I/V. Decals from Aeromaster set 48-679 BoB Spitfires 1940. Model painted with Gunze / Tamiya acrylics, weathered with AK and MiG oils, tamiya sticks and metallic pencils. Thanks for watching.14 points
-
Good Evening, I thought I had posted pics of this build already but I haven't. Latest release of the Airfix 1/72 Mk.1 Spit that I had originally started to hand paint about 5 years before it hit the skids and ended up on the shelf o' doom! For whatever reason I ressurected it a few weeks ago, rubbed it back a bit with a worn Scotchbrite pad and re-sprayed it using Tamiya paints (I adore spraying these, a real pleasure to work with!). Markings are out of the box and the weathering is pastels. Photo's were from my iPhone and I think I've inadvertently had one of the effects selected at the time but here you go anyway - Thanks for looking, all feedback, good and bad welcome, Eng13 points
-
This is an old 1/35 T-34/76 from Tamiya + New Connections T-34 Flakpanzer resin conversion + track links from Maquette.13 points
-
Hello ! It's my first post (and the topic of course) on this forum. At first i want to apologize for my English, i'm only 15 years old and i still learning . This is my newst model, I finish it on Wednesday i know this model has got some mistakes, but at least i think he is so good for me. I hope you will enjoy !12 points
-
The first of the two DH2s is now finished and in the cabinet. One kit less in the stash. Built with some added details and painted in Model Master enamels, all decals are from the spares box. The control horns are scratched and all rigging is .005 Ethicon stainless. The wheels are also from the spares box. The prop is from the Eduard DH2 kit.12 points
-
My first build in many many years away from the hobby. All comments are welcome.10 points
-
Hiya Folks, Many people assume that the Bolingbroke was simply a Blenheim Mk.IV which was built in Canada but there is a lot more to the story than that! It would take a whole book to explain the Bolingbroke story but in a nutshell Bristol in the UK were building the Blenheim Mk.I bomber while Fairchild in Canada were building a derivative known as the Bolingbroke as a maritime reconnaissance aircraft to serve with the RAF, RCAF and RAAF. The most distinctive part of the design was the longer nose with a scalloped upper glazed area which gave the Navigator much more room to work in as well as a chart table and Bristol in the UK liked this so much that they introduced it onto the Blenheim to result in the Blenheim Mk.IV. The rear fuselage of the Bolingbroke also housed a fourth crew member in the form of a dedicated Wireless Operator rather than the combined WOP/Air Gunner in the Blenheim (who had his radios mounted behind the turret) and he was given a circular window at his position in front of the turret. Development of the Bolingbroke took longer than expected so the RAF and RAAF left the project (both ordering Hudson`s from the USA instead while the RAF also ordered more Anson`s) but the RCAF stuck with it. Due to its maritime role the Bolingbroke also had a dinghy mounted within a lengthened engine nacelle and as a cold weather oil system was also fitted to cope with the harsh Canadian conditions this caused the other nacelle to be slightly bigger than that of the Blenheim too. Another modification made for the cold weather was rubber de icing boots fitted to the wing, tail and fin leading edges and the exhausts had tubes fitted to the front, (which should be removed from the Airfix kit if building a Blenheim!). So that is the basic explanation,....Ever since I watched the film `Son of Lassie' I have always fancied building a model of a Canadian Bolingbroke as this film features the type (plus Ventura`s and Kittyhawks) in glorious Technicolour and although the film itself is a bit ropey, the aircraft shots are superb, with RCAF Patricia Bay doubling as `Somewhere in Scotland'. The white `sea scheme' on the type has always interested me and as it will fit in nicely along side my white RCAF Digby and Ventura I went ahead with this having been sent some amazing reference photos,.....and for anybody who wishes to look at the Work In Progress thread including a view of the real subject aircraft, here it is; http://www.britmodeller.com/forums/index.php?/topic/234979317-airfix-blenheim-mkiv-into-a-rcaf-bolingbroke-mkiv-conversion-finished/ Onto the model,......here it is,.....built to represent Bolingbroke Mk.IV, 9140/P (ex 115 (BR) Sqn RCAF) serving with Western Air Command at RCAF Patricia Bay in 1943; DSCF4903 by Tony OToole, on Flickr DSCF4906 by Tony OToole, on Flickr DSCF4904 by Tony OToole, on Flickr DSCF4901 by Tony OToole, on Flickr DSCF4898 by Tony OToole, on Flickr DSCF4896 by Tony OToole, on Flickr The white was applied using a Tamiya rattle can but the upper surfaces were brush painted using Aeromaster Dark Slate Grey and Tamiya Dark Grey acrylics while the decals were a combination of spares box and DK Models from their excellent Blenheim/Bolingbroke sheet. I`m a bit disappointed with the twin Browning turret guns from my spares box which were added to replace the incorrect twin Vickers K Guns so I`m looking out for a better set, Hope you like it,..ad a very big thank you to Jim Bates, Terry Higgins and, Carl Vincent for all of their help. Cheers, Tony PS- The clear DF loop cover which was distictive to most Bolingbrokes was made from a pair of clear bulges from an old Matchbox Mossie kit fitted together and mounted upon an old brass radio blade antennae. PPS- I meant to say that the clear bubbles on the cockpit side windows were grafted on from vacuformed items supplied with an old MPM Blenheim kit as the Airfix kit does not supply these in the kit for some reason! Edit; As requested,...here is an underside view; DSCF4970 by Tony OToole, on Flickr9 points
-
Original issue of VISTA 1/72 Firey FULMAR Mk.1 build from the box paint XTRACOLOR . By: P.k9 points
-
Here is my latest completion the Revell 1/72 F16B completed as a Norwegian Arctic Tiger F16BM, I swapped the ejection seats for Quickboost items and added the Astra Decals vinyl re-inforcement plates and finished it off with the Model Alliance Arctic Tigers Pt 2 decal sheet. I will at some point get some AMRAAMs to put on the wing tip launchers Not my best build but I enjoyed it. C + C welcome Willy8 points
-
I'm on a WW1 vac kit roll lately, I jumped right into this one after finishing the Joystick's Albatros C.1 last month. This kit was also from Joystick and went together really nicely. I scratched the entire interior as well as all the struts, landing gear and the gun ring. Lots of fun! Hope you like the old crate! -Dan8 points
-
The double sided tape had not reacted with the paint but it was difficult to remove leaving a sticky residue as indicated: I swabbed that off with some white spirit which didn't affect the paint. Thanks to those who gave me the warning as that saved a lot of work. I am not going to unmask the engines tonight as a close inspection showed that they needed another coat of RLM 75. There were many layers of masking to remove but this is what it looked like with them all off: It looks OK in these shots but there are lots of issues. One of the worst was this reaction with the masking on the underside: That and a few other areas are going to need retouching - I need to have a think about all of this. For my dinner I cooked a sirloin steak and chips with chilli butter and grilled chestnut mushrooms: Very nice. Bye for now, Nigel8 points
-
Hi Folks, inspired by a visit to MCAS Yuma a few years ago and after having watched VMFT-401 'Snipers' at Yuma I decided to go for an F-5. The kit is the AFV ROCAF boxing with the platypus nose, so I elected to use Fightertown decals 'Adversary Ghosts' and make one in the colours of VFC-13 'Saints'. Its a lovely kit with very crisp detail. The kit was finished with enamels as Xtracolour make the darker blue and the rest were Humbrol.7 points
-
Hi, Completing posts of my French archive shelf - Bloch MB 200. Well - have to tell this. She was ugly. She was perhaps even more than ugly... But the bombers from early 1930 all were ugly - Dornier Do Y, Boulton Paul Sidestrand, HP Heyefors, etc.. - they all looks very strange today. The model was scratch converted from Kovozavody Prostejov kit of licence-build in Czecholovakia Bloch 200, named there Avia MB 200 (or Aero MB 200, since small amount was also produced by Aero, main production was in Avia). The main difference between original Bloch and licence one Avia MB 200 is no nose - Avia has just a sloped nose, whereas original Bloch MB 200 has a step nose - initially flat, then sloped. There are some differences in engines as well. I was tying to catch all differeces and made them properly. Here are drawings for Aero MB 200 http://www.cs-letectvi.cz/letadla/aero-mb-200 And here for MB 200 http://richard.ferriere.free.fr/3vues/bloch200_3v.jpg My Bloch 200 is in markings of Vichy AF in Syria, unknown (at least for me) unit, about 1940-42. She was used for transport purposes, and due to general regulation with Germans she had removed all MG from turrets. I made this model some 10 years ago. Comments welcome and I hope you will like her despite her ugly design cheers Jerzy-Wojtek Here she is:7 points
-
My second attempt at the Airfix Hurri, Mostly OOB but added Eduard fabric belts, ez-line aerial and AML wheels VYC1 by jongwinnett, on Flickr VYC2 by jongwinnett, on Flickr WIP here7 points
-
Latest finish. Italeri's re-pop of the the Occidental 1/48 T-6, finished as a US Navy SNJ-5. Great little kit, this one. Can Highly recommend. Hand brushed with Revell Aquacolours (y)6 points
-
Hi , spray painted with Tamiya Paints . Forgotten how to post using photo bucket ,the way i managed these photos is not the way i remember .6 points
-
VYC3 by jongwinnett, on Flickr VYC4 by jongwinnett, on Flickr VYC5 by jongwinnett, on Flickr6 points
-
Thanks PC, made me LoL Well I've spent almost all of today messing around with the transfers and stencils and they're all on now, as far as I can see. The scheme is not that accurate IMHO, the transfers for the two schemes are mixed up on the sheet and some things are just infuriating, like the transfers on the wheels. Obviously they should be applied before assembly so I just cut one in half and stuck it up the wheel: I'm going to tease you, sorry. Not intentional but Belle's on her back with the bomb doors drying and I forgot to take some pics first: I'm going to leave her there while the transfers dry, then fitting the bomb sight, chair, guns and nose prior to the matt coat tomorrow. If all goes well I'll post some shots of that before the RFI - nearly there!6 points
-
Isn't it. Fully decorated its quite a colourful beast. (Setting solutions still at work when photos taken, so ignore wrinkles!) Untitled by jongwinnett, on Flickr Untitled by jongwinnett, on Flickr Untitled by jongwinnett, on Flickr The exhausts got my usual Revell steel, with anthracite wash, and burnished on Humbrol dark earth powder. Exhausts by jongwinnett, on Flickr Unusually for modern Airfix, I got a little silvering with the decals, I think its mostly disappeared under the final gloss coat but I'll need to double check. Canopy masked and interior green undercoat drying, wing lights silvered on the rear ready to be applied.6 points
-
AMT USS Enterprise Bridge The build thread is here: http://www.britmodeller.com/forums/index.php?/topic/234977491-uss-enterprise-bridge/ It was actually quite difficult to photograph as the complete ring of consoles meant I couldn't get the camera as low as I'd have liked. A frustrating build at times but I'm chuffed with the result.6 points
-
That sort of fell by the wayside long ago. Mrs. P refuses to allow me to turn on the light to get dressed in the morning, as it would disturb her beauty sleep, so I don't even bother folding it anymore, I just leave it in baskets in the basement. Yes, I don't think this is a great arrangement either. In truth, my avatar isn't Madeleine, as she's too well-mannered ever to hiss, unlike her owner, apparently. Today I did lots of activities in my guise as superhero Husbandman, who wastes his life trimming bushes to precise specifications, mowing the lawn, buying an endless procession of doughnuts, etc., but I found a little time to put the gear together and the props and tailwheels on. My photos are especially poor today because of weird lighting conditions in the grotto (the sun was out): A photo of A58-617 reveals I (and the decal instructions) have put her eyes too far back, but I'm not sure if the other pair of eyes I have will match these and thus if it's worth fixing. I watched part of Amazon.com's The Man in the High Tower series today; I am not a huge fan of these "what if the Nazis won?" type things (though have read SS-GB and Fatherland), but was so surprised to see they made it that I had to give it a peek. Incidentally, a book I highly recommend is The World Hitler Never Made: Alternate History and the Memory of Nazism, by Gavriel David Rosenfeld, which is absolutely fascinating. Anyhow, some notes on the show: 1. I liked that they made a point to have people drinking Fanta. 2. If you've read the book, you know there's a novel-within-the-novel called The Grasshopper Lies Heavy, where the Allies have won the war. In the show, it's a banned film(!), which gives me the vague hope that if the series continues, the denouement will be a Normandy Beach-style assault from our universe to the TV one, though I suspect not. 3. The Nazi-fied Times Square was a cheap gimmick, but still a chillingly effective one. Gave me the willies. 4. I think I'm going to have to build some Allied Super-Science-type stuff soon.6 points
-
Hi there, I must first apologize to my fellow modellers who know me as a fanatic air-enthusiast... What on Earth am I doing in this forum corner? Well, to cut straight to the chase, after finishing my latest build ( UC-64A Norseman http://www.britmodeller.com/forums/index.php?/topic/234977555-noorduyn-uc-64a-norseman-matchbox-172-walkaround/ ) I decided to put it on its base along with "something else" other than the well-worn figures, barrels, Jeeps, pets etc. A bicycle sounded like an original idea so after a brief and disappointing reviewing of all the available kit options I decided to scratch built one :5 points
-
Hi, From mine deep archive of French airplanes - three old Hellers: Amiot 143, Breguet 693 and Bloch 174.... I made them many years ago - Amiot comes from my school years (I think I made it in 1976 or 1975), Bloch 174 and Breguet 693 are from 1992 and 1993. Before posting them I just washed them and added as usually fresh coat of Vallejo Matt varnish, which apparently is a rather satin, not complete matt. Amiot 143c is in markings of GB II/38, France 1940: Breguet 693 is in markings of training unit of Regia Aeronautica, Oran, March 1943. She wear overpainted Vichy markings, the machine belonged before to Gr 1/51. There was an mistake in ilalian markings (not mine, but in 1943 ) - The fasces on wings are not mirror-symmetric, but all one direction. Bloch 174 is in markings of GR II/33 1e Esc., Tunis, Ai-Aouina, 1941-2, pilot Sgt. Joannic (decals from drawer, some hand painting like pilot name or emblems on tails): Comments welcome Regards Jerzy-Wojtek5 points
-
VYC10 by jongwinnett, on Flickr VYC11 by jongwinnett, on Flickr VYC12 by jongwinnett, on Flickr VYC13 by jongwinnett, on Flickr5 points
-
Thanks PC - I'm calling it 'poetic licence' Thanks Jon - nice link, nice 'stang and my, that 'Sundown' is a pretty girl isn't she? I am easily confused by avatars... If you want to use Alclad you need an AB, and a mask, and a spray booth. I like the AK finish as it's a bit 'dirtier'. Rattle can H11 on my Vamp was good too. But the Alclad is smoooottthhhh. I am typing this because I need some coffee and a 'vape' due to Revell. They are the devil incarnate. It's bad enough giving me a sheet full of things that I can hardly can't read, but spot the 'deliberate mistake': Now, I know that Belle is American and that the US spell things differently sometimes, but even I know they don't spell 'No Step' as 'Glycol'. Of course I'd carefully applied the tiny thing before I noticed. I then myopically searched the sheet and found a yellow 'No Step' (#77) and stuck that on. My iPhone won't focus but here's the ball turret finished: Luckily there are no #43 stencils on Belle that I can see (yes, I know, but I've looked several times) so I hope that's the last problem. I'm using Stew's 'pointy brush for stencils' tip and that's helping a lot (thanks Stew) but it doesn't help holding the small part in one hand*, picking up the transfer in the other hand and then using your other hand to brush the stencil on. I did hold the brush in my teeth but that was not a huge success. Picking up the stencil with very pointy tweezers seems to be the method. When I've stopped growling, I'll do the rest. * Oi! That doesn't get a score, I do not have a small part, fnaar fnaar5 points
-
Whilst all this is probably true, it ignores the effect the series of defeats in Norway and France had. Whether the invasion was possible or not, a significant proportion of the British population believed it possible. And the fears of parachuting nuns etc, whilst looking laughable today, were no less real. Britain believed it was fighting for survival and the skies over Southern Britain became the battlefield.5 points
-
Gear on! Flat coat tomorrow and unmasking, and then done, I think.5 points
-
Sneak attack by tony_inkster, on Flickr Vulcan B.2 XH558 by tony_inkster, on Flickr Vulcan B.2 XH558 by tony_inkster, on Flickr Air Ambulance by tony_inkster, on Flickr Rolls Royce Spitfire by tony_inkster, on Flickr Bristol Blenheim Mk.I L6739 by tony_inkster, on Flickr Bristol Blenheim Mk.I L6739 by tony_inkster, on Flickr Bristol Blenheim Mk.I L6739 by tony_inkster, on Flickr4 points
-
Got as far as a preliminary coat of primer to check where there is still work to do on the joins. Pretty pleased with most of the stuff down the spine and the re-scribing, but still a fair way to go with the front of the booms and above the intakes. It's amazing; to the naked eye I thought the intake tops, especially, were pretty much ready, but under a layer of Mr Tamiya's finest white gloop, a lot shows up! Incidentally, visible on the right of the picture is the new Tamiya masking tape which comes with a wide layer of polythene attached (it's folded up about 4 times on the reel, so the actual area covered is at least 8" once unfolded). Recommended, and it will save on a lot of wide maskers).4 points
-
4 points
-
Done as captured by the Africa Korps4 points
-
That's because I'd had my Frosties they're Grrrrrrrrrrrrrrrrrrrrrrrrreat4 points
-
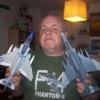
Thanks Nigel (and I hope you get your paint sorted - I'm sure you will) Today's job, starting soon: Lots of transfers. They're not all for Belle's scheme, but there's still a lot. Notice my usual lazy approach - I'll leave the masking on so I don't have to re-do it for the Matt coat. And after that I'll tear it off and fit the other bits. I don't think I've mentioned this before but Belle has two escorts: (I know this probably never happened but it's my ceiling, so there.) They've been patiently waiting in this box for Belle and one of them needs its transfers too. I bought these to try NMF for my Lightning. Left hand = Alclad on an Airfix, Right hand AK True Metal on a Tamiya. Right, time to get some warm water. I may be gone some time.4 points
-
Three more scenes on small bases. The first is on a board 6 x 4.5 inches o/a This one is just under 6 x just under 7 inches - a bit could be easily trimmed off the ends to make it 6x6 This one is in a 6x8 frame cos thats what I had handy, it could easily be made 6x64 points
-
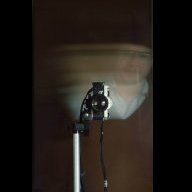
Tail rotors, main rotors etc.. turned out just fine and were tidied up and given a coat of gloss to seal the decals in. The model is almost ready for its weathering .... The few hours I had free today were spent trying to replicate this.. The active sonar body, obviously I won't be able to make an exact replica however I did manage to fashion the copper coloured "snub or snubber ring ??" if that's what it is called.I'm sure the real thing had some sort of rubberised tape wrapped round it, not sure if it was the colour above, I thought it was more black. Maybe just dirty. I made my version from some copper wire, wrapped round a tube and cut and glued to size. I then used the nose radome from the German 1:72 Revell Sea King Mk 41 kit to cut/sand into shape of the sonar body base, which you can see jutting out from the centre of the sonar well above. I attached this to some polystyrene and covered it with some masking tape and painted it. The sonar body was then simply pushed onto the protruding stub that was shown earlier on in the build. This makes it very secure, which is why I left the nub on the model. This is what I ended up with, which I think were properly weathered and dark dirt wash applied, should give a fair representation of what I want to achieve. I'm sure the copper coloured wire will tone down somewhat as the wash etc. is applied. It's the little things that take time and especially the scratch building side of things but on the other hand, it does make the model unique to me4 points
-
Hi there, I am back with a less glamorous build -than the larger scales, the new kits and the aftermarket products can provide- but still beautiful and interesting (I hope). I used the old Matchbox kit with a few modifications/improvements and a lot of nostalgia though I couldn't resist using after market products from "Radial Engines & Wheels 72", "Barracuda Studios" and "LM Decals". It is my 118th build and my 82nd in 1/72nd. It took me 9.5 months to build, from May 2014 to February 2015.3 points
-
Model: Moebius Models Iron Man Mk. VI (0922) Scale: 1:8 Hey guys! Finished this earlier in the year but only now getting around to posting it. I enjoyed the build over all but the seams were a killer!! I'm happy with the result after all the pain though Any questions just fire away! Thanks for looking! Vinny3 points
-
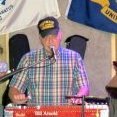
After many years of building plastic kits it has been a totally new experience and a pleasure to be involved in the restoration of a life size example of one of my favourite aircraft. WT722 has been with Classic Air Force at Newquay for while, stuck outside and rather neglected it was decided to repaint her in the colours she wore during the 1970s. The departure of Classic Air Force from Newquay has been well documented, the remaining aircraft will form part of a new museum at Newquay. WT722 will be kept under cover along with the Harrier GR3 and another airframe in a HAS which will be open to visitors. The VC10, BAC111, Varsity, Canberra, Sea Devon etc will be parked on the disused runway. January, removal of old markings. All the old markings were measured and photographed prior to removal: Further preparation and application of primer was carried out in HAS5. Due to uncertainties with the future location of the museum we vacated HAS5 and moved back to 404 Hangar in April: April 28th, back in 404 Hangar and the first coat of Light Aircraft Grey: Masking: This is where we are at the moment, the fuselage roundels were masked and sprayed during the last couple of weeks. Wing roundels, codes, serials, stencils all planned for the next few weeks.3 points
-
The build has been started 1 year ago in D-day GB, finally finished with little delay. Quite simple and enjoyable kit, I've added Quickboost seat and exhaust stubs. Painted with various Tamiya and Gunze colors, weathered with AK and MiG oils, tamiya sticks and silver pencil. PRoJ of 609 sqn, Torney Island, 6th June 1944, 71 years later... Please feel free to comment. Thanks for watching. As a bonus - 2 pics with ancient Academy 1/72 Typhoon finished 12 years ago. Good opportunity to compare how MM authentic see the RAF colours.3 points
-
i just visited National Museum of the United States Air Force in Dayton Ohio , http://www.nationalmuseum.af.mil/ OMG its a Aircraft junkie fix .. There a few helicopters . There are so many first planes ww1 , ww2 . cold war and modern planes and jets I have some many photos Here is just couple for tonight . Enjoy Here Green Jolly3 points
-
VYC6 by jongwinnett, on Flickr VYC8 by jongwinnett, on Flickr VYC9 by jongwinnett, on Flickr3 points
-
Good evening Azmodel 1/72 Spitfire Mk XVI Squadron 340 "Ile de France" 1945 Built thred here : http://www.britmodeller.com/forums/index.php?/topic/234981605-spitfire-mk-xvi-squadron-340-ile-de-france-1945/ Patrice3 points
-
Hi, boys. Looks like I'm done with assembling. Here's how it looks. I did turret's extension and put the primer on. Right fender. Left one. I've spent several hours on this tool box. I managed to lost one of the buckles. It's so tiny it's nowhere to be found. Eduard should actually think about putting some extra parts on their sprues. It's my first time to use PE parts on this scale. There it is. Whole thing. Now I see the tool boxes are a little skewed. OK, time to bring on the paints. Enjoy Dawid3 points
-
You're correct, as the 332nd FG was with the 15th Air Force in Italy, rather than the 8th Air Force in the UK with the Belle. But my word do those Mustangs look nice. It really was lucky, for marketing purposes, that the 332nd had those solid red tails, wasn't it? The 31st FG (my favourite USAAF fighter group) had rather garish red candy stripes. "The Candy Stripers" wouldn't play as well, I daresay.3 points
-
And that war continues to affect; two WW2 bombs to be controlled detonated today in Calais, so ferry services are disrupted till its done. Hope everyone involved stays safe and well.3 points
-
Hi Buster - glad the decanting went well - let us know how it sprays (what sort of paint was it?) I finally found some masking mojo and spent a long, long time masking off the de-icing boots. I know our younger readers may be wondering why I bothered, but I haven't had a steady hand for some time now, especially for small jobs like this with long edges (there's a score there somewhere...) There are guide lines on the fin but that's it - none on any of the LEs. Odd. So here she is masked and unmasked, with boots: So, left to do now: Fitting the small parts, including all those guns Bomb bay doors Klear Transfers and weathering (a bit) Matt coat There will be progress tomorrow (after I've mown the lawn) but that's it for tonight. Thanks for looking.3 points


This leaderboard is set to London/GMT+01:00