Leaderboard
Popular Content
Showing content with the highest reputation on 25/03/15 in all areas
-
My Hawker Typhoon 1/24 Airfix British Rocket RP-3 - Master Seat Belts - HGW Paints - Hataka Wheels - Eduard Mask - MAKETAR Radiators - RB Productions31 points
-
Another build I finished recently, using Wolfpack's cockpit, Aires' exhaust and Kasl's radome. Painted with Humbrol, Gunze and Lifecolor. Hope you like it!11 points
-
Dear fellow modellers, I would like to present my recently completed model Tamiya 1/48 scale Mustang MkIII. She was flown by S/Ldr Egeniusz Horbaczewski from 315 Sqdn. RAF August 1944, plane PK-G FB387. Additional parts used: Eduard 1/48 P-51 placards (FE198) decals: Techmod (48002) paints used: Tamiya acrylics, (the grey is my own mixture based on Du Ponit colour) The Kit - no problem with parts fitting, I committed few errors here and there, but overall I am happy with the outcome. Enjoy Seb Ps. All comments are welcome Background (from WIKI) Eugeniusz Horbaczewski (28 September 1917 - 18 August 1944) was a Polish fighter pilot, a flying ace of World War II, also known as "Dziubek" (literally is the diminutive of 'the beak' in Polish). According to official lists, Horbaczewski was the third highest scoring Polish fighter ace, with 16.5 confirmed kills (16 individual and one shared) and one probable kill. He was awarded several decorations, among others Virtuti Militari IV class (posthumously) and V class, four times Polish Cross of Valour, Distinguished Service Order (posthumously) and Distinguished Flying Cross (twice). that is all folks10 points
-
Nightmare, I always hate it when they show the faces of relatives waiting at the airport, I think they should be left alone and not bothered by cameras. Similarly images of bodies and even personal belongings should not be shown. I am just thinking of the relatives, every time something bad happens the press turn up to make money from it.9 points
-
This example was made OOB and according to the box instructions represents VR943, coded as 232 O, serving with 802 Squadron while aboard H.M.S. Ocean. This information agrees with Profile Publications Number 126 which appears to be the basis for the kit decals and further identifies this aircraft as the one flown by Lt. Carmichael when downing a MiG-15 in August, 1952. A second source, Warpaint Number 16, shows VR943, coded as 105 R, serving with 801 Squadron aboard H.M.S. Glory in 1951. However, according to what we must consider to be the bible in this area, Fleet Air Arm Fixed- Wing Aircraft Since 1946, VR943 led a rather mundane life marred by a series of minor prangs and repairs, with no service aboard either Ocean or Glory ever being mentioned. Notwithstanding the conflicting data, Frog's Sea Fury is a fine one that serves as a basis for as little or as much work as one wishes to invest.8 points
-
Imperial AT-ST Walker Bandai 1/48 So, here it is. The finished Chicken Walker, stress cracks and all. Thanks to all who followed the wip and for those who didn't it can be found here http://www.britmodeller.com/forums/index.php?/topic/234978365-at-st-bandai-148/ This isn't meant to represent Tempest Scout 2, the AT-ST that Chewie commandeered (with the help of Widdle and Wunka) but the big furball gatecrashed the photo shoot Enjoy the shots Thanks for looking Andy7 points
-
Hi everyone, Here's my rendition of Trumpeter kit as a Hun of the Turkish Air Force in 1:48 scale, which I last year built for the 40th anniversary of the Cyprus war. Kit comes with some shortcomings but definitely is buildable with smooth surface details and nice assembly. Not many things added, just some scratch building of the panels inside the flaps, cockpit and some work on main gear well doors, which Trumpeter gives as closed. Happy modelling...7 points
-
Hi there, this is my Hughes OH-6A by AMP just completed. A lot of interior & exterior self-made improvements, resin parts by CMK, Tailboom (Maurizio Di Terlizzi), Quickboost and Tarmac. A special thanks to Joseph Osborn of Fireball Modelworks for nice decals sheet and support for painting. Cheers, Alessandro Rome (Italy)7 points
-
Some slow progress on my Lancastrian, finally I've made some resin copy of the windows, interior arrangements and seats. I'm planning to make in the near future some complete copy of this conversion with BOAC or ALITALIA decals so if someone are interested, please drop me a message. Sebastiano7 points
-
Bought out of curiosity when I saw it at my local model shop of choice.It was my first ever multi media kit I built,as I usually doing plastic kits.So this was quite an experience and experiment for me.Its not perfect but I am surprised that I managed to complete it. Even this multi media kit has few parts compared to plastic moulded kits, its a time consuming build and its surely not for starters. The kit is not without its flaws,the biggest one is probably that ist about 2,5 cm too long.I found it out while applying the decals. I ordered a Cubana decal set from F-DCAL,rescaled from 1/144 and originally made for the Zvezda kit. As all IL-62 versions have the same fuselage length,so I thought thats not going to be a problem with the fit...wrong. Luckily I made a copy upfront so I could cut out the missing sections a fit them in. The other flaws are minor in comparison and can be corrected with only little work. All obstacles aside the HPH IL-62 is a very impressive and beautiful model kit and can be recommended for all modellers of airliners...with enough space to place it after completion. I am still looking for a proper place for mine... I chose the Cubana livery as I saw this many times at the Euro Airport in Basle,Switzerland,were I live. During the early 90's the Cubana IL-62 was a frequent visitor there and the build of it brought back many good memories from that time. Enjoy.. Here for once with "something else" as size comparison... The Matchbox Twin Otter is also 1/72 (Its the only other finished model kit I have in that size.A Heller Boeing 707 is still waiting in the stash)6 points
-
During riveting, which is an activity performed before making weathering, but after the imposition of decals, I completely dropped off 111 polish squadron emblem - ((. But this is What If. That's why I made up stories just that it was a botched sticker. Such rationalization invention. Well, unfortunately busted, -))6 points
-
Ok, everyone. I completely forgot I started this WIP here. Sorry...it's a lot to keep up with multiple forums, Facebook, etc, and find time to actually work on these things. I finished the engines up. They are weathered with products from Ammo by Mig (again I love that stuff beyond belief). After those were done work moved to the cockpit. Ammo Airfield Dust set used here. Some Eduard belts, but the rest is OOB. Then moved on to aft fuselage assemblies. I get asked sometimes "why waste time if it won't be seen?" Well, it's not a waste of time for me. I paid for the kit, so I don't mind getting the extra mileage out of doing these parts up. Also, I'll always have the photos as proof it's there. Thanks for checking in.6 points
-
This is the first model built by my 7,5 years old son Gustaw without my "manual assistance". I was only an advisor and photographer here. The PZL P.11c is a symbol of Polish aviation fighting against Germans in September 1939. The number 5 from 111 Eskadra Mysliwska (Fighter Squadron) was probably flown by the squadron's commander, cpt. Gustaw Sidorowicz (my son's namesake, therefore preferred in markings selection). The plane was shot down on the first day of war and Sidorowicz was wounded. After his recovery he escaped from a hospital already being occupied by Germans and continued fighting with Polish resistance forces. The kit is old but simple MasterCraft. Pilot from Airfix Hurricane. Decals - Techmod.5 points
-
5 points
-
Hi people I finally finished this too, even if the work has not given me breath; this kit is an Hasegawa 1/72 and since I am fond of the Mediterranean war theater, here this plane inSolenzara air base Corsica during 1944 Pretty much the front pin UP: MMR Margaret Mary Rustin With base..... Next kit will be another 1/72 scale: an English Electric Lightning F.2A of Airfix I'm genuinely embarrassed when I enter the forum, but believe me it's an hard work at the airport and the "Boss" hammering me with new assignments, excuse me, but I would really like to share more with regard Ettore4 points
-
Afternoon all, Thought I'd delve into the archives once more and share some images from the two RAF shows. First up was Cosford, which was a typically varied affair, although a bit too similar to previous years for my liking. Photographically, it was hard work, with overcast conditions prevailing for much of the day, so not the greatest set of shtos in the world... Cosford_2014_020 by Shaun Schofield, on Flickr Cosford_2014_041 by Shaun Schofield, on Flickr Cosford_2014_010 by Shaun Schofield, on Flickr Cosford_2014_014 by Shaun Schofield, on Flickr Cosford_2014_019 by Shaun Schofield, on Flickr Cosford_2014_027 by Shaun Schofield, on Flickr Cosford_2014_040 by Shaun Schofield, on Flickr Cosford_2014_045 by Shaun Schofield, on Flickr Waddington a few weeks later was far more enjoyable, with the Swedish historics the runaway highlights from a top show all round. I attended the Friday arrivals, shooting largely from outside the base before returning for the Saturday showday. Waddo2014_Fri_070 by Shaun Schofield, on Flickr Waddo2014_Fri_001 by Shaun Schofield, on Flickr Waddo2014_Fri_008 by Shaun Schofield, on Flickr Waddo2014_Fri_023 by Shaun Schofield, on Flickr Waddo2014_Fri_049 by Shaun Schofield, on Flickr Waddo2014_Fri_064 by Shaun Schofield, on Flickr Waddo2014_Fri_037 by Shaun Schofield, on Flickr Waddo2014_Fri_060 by Shaun Schofield, on Flickr Waddo2014_Fri_076 by Shaun Schofield, on Flickr Waddo2014_Fri_031 by Shaun Schofield, on Flickr Waddo2014_Sat_074 by Shaun Schofield, on Flickr Waddo2014_Sat_053 by Shaun Schofield, on Flickr Waddo2014_Sat_076 by Shaun Schofield, on Flickr Waddo2014_Sat_013 by Shaun Schofield, on Flickr Waddo2014_Sat_015 by Shaun Schofield, on Flickr Waddo2014_Sat_026 by Shaun Schofield, on Flickr Waddo2014_Sat_046 by Shaun Schofield, on Flickr Waddo2014_Sat_057 by Shaun Schofield, on Flickr Waddo2014_Sat_049 by Shaun Schofield, on Flickr Waddo2014_Sat_065 by Shaun Schofield, on Flickr Thanks for looking, Shaun4 points
-
I tend to have quite a few builds on the go at any one time, so suddenly, I find I have a number all being completed on the same day. Below are three of the seven rolling off the lines this week. All 1/144 Carvair - ( Roden kit and Classic-Airlines decals ). I believe this puppy could transport up to five cars plus a complement of passengers at a time - difficult to picture a souped up DC-4 being capable, but apparently so. With something else - Faster and quieter, but leave your cars at home. The Guyana Airways Tu-154. I know, the nerve, not operating British aircraft. Zvezda kit and classic-Airlines decals. With something else. Does Linhas Aereas de Mocambique not somehow sound English? The old Portuguese East Africa province of Mozambique is the only country to be a member of the Commonwealth that had never been in the Empire The Air Rhodesia DC-3 ( Minicraft kit and Classic-Airlines decals ) The "with something else" Her big sister, the Boeing 720 And as a forthcoming attraction - coming soon to a RFI near you. Hope you enjoyed the nostalgia tour ( and Mitchem, if it seems I am copying your idea of the Air Rhodesia fleet, it is because I am ) Cheers, Mike4 points
-
Background: The Yahagi was the second of four Agano class light cruisers build for the Imperial Japanese Navy. She was laid down during November 1941 by Sabeso Naval Arsenal, and launched in the October of 1942. The main armament was six 6-inch carried in three twin turrets and the top speed was 35 knots; two float planes were carried. Yahagi was present at the battles of the Philippine Sea, Leyte Gulf, and Battle off Samar. In 1945 Yahagi was attacked by waves of Allied aircraft and sunk with the loss of 445 crewmen. The kit: The model is from Tamiya's 1/700 waterline series and was completed using a mixture of spare photoetch (mostly from various White Ensign Models sets), plus some minor scratch-built details. The hull was painted with Tamiya XF-53 Neutral Grey, and the deck with XF-64 Red Brown. The rigging was accomplished using Uschi rigging thread (.003mm). A log of the build can be found in the Work in Progress section: http://www.britmodeller.com/forums/index.php?/topic/234975349-1700-light-cruiser-yahagi/ I had a good time building this model and look forward to doing more IJN subjects in the future; another Agano class ship but in 1/350 is on my wish-list. Thanks for looking, and any comments or questions are most welcome. Regards, Ross.4 points
-
evening ladies - thanks for stopping by so after spending some time hanging around the 'pit and getting part way there, I thought it a good idea to get back to the fuselage and get it in some sort of shape where it is actually worth dropping a cockpit into... ..spent some time filling dinks & seams and got it into basic primer - the finish is quite rough as I have to spray it outside - no matter though, it will clean up... ..now up close and personal the F7F is smooth riveted at the front and dome rivets at the back, also the airframe I am modelling has some great contrasting natural metal toning where this is going to be really important to the finish - here is N7654C... ..and here you can see the overlapping panels, quilting, rivets and surface texture typical of the rear fuselage which is where I thought I would start... ..I had always been a bit worried about how I would scribe & rivet at this stage - the subsurface is not really like injection plastic so may not take the pressure, or lead to chipping when I hit filler etc. I also thought about maybe going for resin rivets, but on an NMF bird the tests I have done with Alclad mean it is really hard to get rid of the carrier film (you can see it through foiling too..).. ..at this size & scale it would be hard to get right... ..anyways I thought I would throw some panels on and see what it looked like... started with the plans and marked some out... ..they can be seen more clearly here... ...not happy - it looks too clean, too uniform and not really what I am after... ..then I had my Alan Clark moment and remembered his method of skinning in lithoplate or pewter - beautiful, real, textured and quite mind blowing to look at... ..that was it - I have some 6 thou plate on order, I have some experience of working brass sheet, I have tools and motivation - why not do it - afterall the saying goes there is more than one way to skin a Cat right? ..the next post will hopefully be a start on the process, or a graceful exit and back to looking at getting the effects in other ways... until next time... Peter4 points
-
Oh well as expected the first attempt at casting from a two piece mould crashed and fizzled out Must follow CT's advice, no point having an experienced hand aboard then ignoring him... fun trying though Adding ridiculous little vents and tube underneath where no one is going to know if they're missing Doh... The Jaguar has these little streamlined vent plates under the engines,( Airfix no attempt at them, Hasegawa no attempt at them and Italeri DID put them on in the wrong place) SO I removed the wrong ones from the Italeri one and made three sets for the fleet cut a length of Evergreen at a slant, drill holes then cut away the tapered tail Glue on, walk away I'm going to fit the practice bomb carrier to the GR3 So I'm working on one of these A little more later this evening, ciao4 points
-
Great to see more photos even if the photographer was so excited that it caused bad camera shake ! The wing ribbing looks to be well done. As for the bomb aimers panel well I'm sure someone will sort that out fairly quickly. Hopefully I'll be receiving an early pre release for review and build for AMW so will be able to see more clearly exactly what if anything needs sorting out. I'm particularly looking forward to this one (or two) as I'd like to see if the DB productions Mks.2 & 3 resin set I have can easily be adapted to fit. Now as mentioned all we need is a decent Hampden, (or Harrow !)......4 points
-
Thanks folks! I really like the Evangelion comparison, I hadn't thought of that angle but it's rather appealing. The white glue for fixing the coal has dried up so I can show what that looks like: I like that it adds some sharpness. I did some tests making a tow cable to put on the rear deck but it didn't work that well, I will try it a different way instead. I also finished the tripod base - it looks a bit bland here for some reason, I thought it was attractive in real life. I used alcohol to wet the scatter, and Klear to set it - with a heat gun it was all done and dry enough to varnish in about half an hour - pretty cool. Cheers, Will4 points
-
Progress .. he has arms, and his jacket has tails. I'm not sure about his left arm (it seems stiff) so I may change that. The hat and axe are loose, and there is still modelling work still to do Now, I need to think about which unit he belongs to ... Do I go for the more usual blue uniform of a French chasseur A green uniform representing Régiment de la Tour d’Auvergne,1er Régiment Etranger A yellow uniforn with red facings (Bataillon du Prince de Neufchatel) The latter two were merceinary units "integral to the French Army during Napoleon's reign"4 points
-
Well, after watching Andy's build with great interest, my kit finally made it to the bottom of the world! (Adelaide, South Australia). What I wasn't prepared for however was just how good a kit this one really is! I must say, hats off to the engineering department at Bandai for I have never built a model quite like this one, and I've been modelling for 41 years. The quality of plastic is first rate. Not too soft, not too hard. Very easy to work with. The parts breakdown is VERY cleaver and fits together without glue very well. I'm one of those fussy modellers that has to have everything perfect (which is probably why I finish so few models) So I was very surprised at just how quickly I was getting the parts off the sprues, cleaned up and ready. Here's where I was at after an hour and a half. All parts were lightly glued with Tamiya extra thin cement. Building this kit is so hassle free that I keep thinking I'm doing something wrong! About three hours into the build I'd gotten the head all off the sprues, cleaned up and dry fitted/pushed together. Next it was time to pull the head apart and tackle those seats. First, remove the locating slots for the pilots...... Then clean up the area.............. And make some seat cushions from plastic card. Job done in about 15 minutes. The only issue I've come across so far is a very slight gap at the front of the head. So here is where I'm at three and a half hours into the build. I'm very impressed with how things are going. For anybody who is suffering from, or has suffered from AMS (advanced modellers syndrome) this is the model for you! Next it is time to prime and paint the cockpit and mid section and try and decide on a camouflage scheme for it. At the moment I have 20 different schemes drawn up with more on the way! http://www.britmodeller.com/forums/index.php?/topic/234978670-star-wars-at-st-camouflage-schemes/ Cheers Richard.3 points
-
So my Ta152 whiffer is done. The C-11 variant was proposed but never built, so no matter what markings I chose they would have been speculative - I decided to have some fun with it. Scheme is based on the Bf109G-6AS birds of JG 1. I also made a lot of corrections and alterations along the way. WIP thread here: http://www.britmodeller.com/forums/index.php?/topic/234975094-148-hobbyboss-ta-152-c-11-what-if/ Aires cockpit tub TMD resin seat Quickboost corrected cowl Quickboost corrected spinner/prop Quickboost exhaust Quickboost pitot tube Tamiya canopy and headrest Tamiya morane antenna Tamiya boarding step Dragon wheels with air fill line added Tail wheel shortened Main gear leg angle corrected Gun camera added from drilled out plastic rod Brake lines added from copper wire Morane and FuG antennae replaced with copper wire DF loop made replaced with a staple Gear position indicators made from wire Wing root gun bay door hinges added from spares box Resin cowl gun barrels from spares box Hypo tubing used for wing root gun barrels Riveted with RB Productions RivetR Mini Uschi rigging line for aerial antenna wire Miracle Paint Masks for markings EagleCals for stencils Painted with AK-Interactive and Tamiya acrylics Weathered with AMMO of Mig Jimenez washes Probably some other stuff I forgot, but anyway - on to the pics!3 points
-
Hello, Just have finished this and I'd like to share with you. First as usual, couple things about the kit. i was really really surprised when I first open the box. First glance on some pieces, mainly the fuselage and the cabin and only thing I could say was "wow!". The "wow" factor ended couple steps later. Don't get me wrong, most of the kitis really amazing. Great detail, a lot of rivets and nice panel lines, but when I get to the engine cowling I was shocked. I've looked on different websites to see if real Lynx has this section completely flat, as on this kit.. Well it still looked good. then I went to fitting the main canopy and beautiful 1mm gap appeared! I've managed to fill it with some putty, but I don't really like surprises like this. I don't mind some gaps, but this one was way too big. Other disappointment was engine intake cover which should be a mesh, but in the kit is made with clear plastic. I scratch build it with some old PE leftovers. The kit gives you couple options of the aircraft to build. I decided to build anti-piracy Danish version. I kind like it I must say. I've installed an internal light to lighten up the cabin a bit. It was just a try before my general and main project for this year and it worked fine. Ok, no more talking, there come the pictures: Thanks! Bart3 points
-
this is a rather small but exciting update (for me anyway). I was messing about in SolidWorks with the tail wheel casting - my plan was to develop it as sheet metal so I could use that template to cut sheet styrene to make my own version when I had one of my (seemingly more frequent) 'doh moments.... what about all this new fangled 3D printing nonsense that everyone is talking about ? A quick bit of googling found wads of companies offering the service so I thought - what have I got to lose? So, a bit more development in SolidWorks got me to this point I then uploaded the model to Shapeways and knock me sideways with a feather..... it was going to cost me all of $1.68 to get printed... okay I had postage on top of that but $1.68 ??? In the end I went for Ultra Frosted Detail - the highest detailing plastic offered and it was just over $5 for that, but it still seemed a bit of a bargain, so in went the credit card details and a week later I had this in my hands.... I couldn't believe the level of detail, it really was very, very good. It's hard to see from that photo above so I gave it a quick squirt of primer - and you can see that they have really managed to capture the detail in the printing process very well indeed. It's a bit grainy but that's only to be expected with the medium. A little bit of clean up and a coat or two of primer and paint should make this a very presentable part. Another (out of focus) shot shows that I even got the mounting flanges for the rear shock in place. I did consider adding the shock as well, but if my dimensions were just slightly out, then it would have looked wrong - and not fitted.... yes, I am going to scratch the rear shock! And here's how it would look in situ. Compare that to the kit version! I have to say that I am very impressed. I wish I had thought of 3D printing during my Dauphin (and earlier) builds as it would have made some things much, much simpler. Of course, after I got this one printed, I examined the rear casting a lot closer in photo's and realized that I got a few detail incorrect. So I have now revamped it to this version. I still need to do some checking as to how it's going to fit on to the kit, and I may have to raise the attachment points slightly higher to make it sit right. But, overall I am rather excited at this new direction. I know some people don't consider 3D printing as scratching, however, I consider it as yet another tool to take advantage of. Sometimes you choose styrene, sometimes ally can and sometimes 3D printing - and as costs come down I think that many more modelers will be taking advantage of the technology. Even current pricing structures are very very affordable. I am currently waiting on the oleos being delivered. I am not sure how that is going to turn out since the oleos are tubular and the printing method may work against me here, but we'll see. I am also going for printing in steel this time around - should be interesting! At that price it was worth experimenting. I am also considering printing the aerials as the kit versions are rather pathetic. ... and don't even mention the beetleback!3 points
-
Course, I'm missing work and modelling and all - but the Lakes have their compensations: Taken from Haystacks - looking towards Buttermere. Just after a C130 meandered up the valley Debs Captain sipping coffee and munching a sarnie no doubt..........3 points
-
My newest project - MiG-29 9-12A, Polish Air Force, 22nd Air Force Base, Malbork This model has been built from MiG-29 9-12 Early Type kit, manufactured by Great Wall Hobby, aftermarket parts used:; - Eduard's BigEd for MiG-29 9-13 (BIG4995) - Master pitot tube (AM-48-060) - Eduard's resin exhaust nozzles for MiG-29 (648044) - Caracal Models' decals for polish MiG-29 bort number 56 (exploitation markings used only) (CD48030) - IPMS Świdnica White Eagle 41 ELT Malbork 1990-2013 decals (bort numbers) - Various parts from Eduard's MIG-29A an MiG-21MF kit to upgrade this model to the same version as the real aircraft. Painted with Gunze C series paints. Feel free to leave your comment. Sorry for any language mistakes. Greetings from Poland3 points
-
I saw some references to this 'copter and a request to find this kit on the forum today, so I thought I would throw this up for inspection> Special Hobby 's 1/72 Hiller UH-12: A little bug-ger (!) of a kit , only cause its so small. Tiny kits sometimes have mold shift and such was the case here , I built the skids from brass: The bubble was problematic as well , clear parts bieng a little muddy: Other wise well worth the effort: Also the resin cockpit backing in no way matches the top half of the bubble, you will see the angle difference between the cockpit interior back and the rear wall in the second pic,the other problem with the mouldings. Super fun and a great result can be achieved , now all ya gotta do is find the kit!3 points
-
Oh no not again,......I hate it when people compare the Tiffy and P-47 to try and determine which was the best Allied close support fighter of WW2, like a willy waving competition which always ends up pitting Brits against Yanks,.......especially when we all know that it was the Hurricane!! Cheers Tony3 points
-
This is the best I can do; the pin (or "pintle" as Supermarine have it) is set at an angle, which sends the leg backwards, as well as outwards, as it retracts. When the leg was pushed forward, in the universal wing of the Vc and others, they simply fitted a wedge of metal between the spar and the pintle, which did the job:-3 points
-
Hi Luis, Yes, I had this pleasure as I know JWM since his birthday 55 years ago - he's my (younger) brother We shared the room for 14 years and our 72nd scale (earlier also 1/100 and 1/144) aircraft collection was displayed in common cabinet. Then each of us moved out and now we live some 20 miles apart. His collection is much bigger than mine, but I also like aircraft modelling. BTW what do you call the "old planes"? Cheers Mike3 points
-
Hello all again. After a long gap I have been able to get only a bit done to Dreadnought. I have fitted most (possibly all) of the ships boats and attendant etchwork. The falls and access ladders for the boats on the main davits were fun, I could not figure out from my references where the ladders went, so I fitted them in what I thought was the most natural position. I had fitted the rudders way back in February, (see last photo in my previous post). I seriously thought about doing that then as they would be prone to being knocked off. Guess what? Yep, I need to attach them again. This time they are staying off until further notice. I am hoping the same does not happen to the mast and spars! I managed to get some 27 links per inch chain for the anchor chain, I need to get that sprayed (rattlecan) to hide the brass colour. I have some photographs of Dreadnought where they show a very light colour for parts of the chain, and a darker section too. I am thinking of going for a pale grey and a greyish black for the chain. If anyone thinks that is wrong, can you please let me know? I will be doing that at the weekend. Once the chains are on, the railings can be started. Again, only a small update, my apologies. All the best, Ray3 points
-
I've been watching Britmodeller from the sides for quite some time now, and finally decided to take the plunge and get a log in. The new Italeri Stirling is one model I've been really looking forward to building. Upon opening the box I did what everyone else did, and gasped at the panel lines. However rather than putting it back on the stash, I decided that I wanted a Stirling in the cabinet and started to build. There aren't many bad things to say about the kit, and believe it or not, once paint is on, the panel lines are actually quite bearable. The kit fits together very well, with the exceptions I found to be, the nacelles to engine assembly- However there's a good chance that was me rather than the kit, and the rear gun turret glass to floor join- once again there's a chance it could well be me. The only other problem I had was the join line down the fuselage sunk on me after I'd sanded it, which was very frustrating, nothing like a bit of Milliput to fix sink problems though, thank goodness. The model is totally out of box. The photoetch once annealed was really nice to use, and the decals conformed really nicely. The topsides are painted using Xtracolour, as I really like the RAF colours they do, and the undersides are painted using several tones of dark blues, browns and dark greys. The flat top coat is very thinned down Wattyl estapol, which is a timber varnish purchased from hardware stores. One product I've really enjoyed using is the Mig 'Fresh oil' weathering paint. I've used it for the oil streaks going across the wings, I've also put it on the tops of the tyres and landing gear legs, then streaked it using air from the airbrush to 'push' the paint around. Final weathering was completed using chalk pastels, followed by paint chipping with a bit of grey and silver, which I've found in 1/72 takes away the starkness of chipping done in silver only- thanks John Darlington for this top tip. Overall a really enjoyable build, and it's so nice to see the great British heavies being re tooled. I look forward to Airfix's Whitley and Shackleton later on this year, which I'm sure won't sit in my stash too long once I have them. Regards, Alan2 points
-
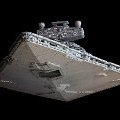
Here are the pictures of the long awaited ISD. I actually finished this colossal item 4 weeks ago. Just haven't had time to get any photos done. Ideally i'd use a decent SLR with a proper back drop sheet. The last details to go were the vertical antennas on the deflector shield tops. The MF & BR still need final paint and detailing. so i will finish these this week. Weighs in at 23Ibs here goes:2 points
-
Almost there. As you can see I have added a fair amount since my last update. The metal U/C is definitely better than the kit U/C for the model to stand upon, but when I tried to sand the wheels so that they had flattish spots on them I did find that the U/C did tend to buckle. With this in mind I will have to be careful with the model when transporting it to shows. I have also added the bombs to the wings, which I am pleased to say give the aircraft that little bit of character. All that I have to add now is the canopy and the big fuel tank, which have been painted and varnished. Some pictures. Any comments are very welcome.2 points
-
Thanks Chaps, Some more done, not a lot but more detail painting. the pioneer tools need more work on the metal work and wood. Cheers Dan2 points
-
Definitely. From the outside the 111 was horribly noisy, which is the only reason it didn't go on in service longer. Shame as it was a highly competent little aeroplane. For the passenger though, being ahead of the engines in the 111 makes things much quieter, versus the experience of having waves of turbulent air from the props smashing into the fuselage sides,2 points
-
The things that I don't think I can do I steer clear of ....but without blowing my own trumpet I have been doing this sort of thing for many years and I find that most of it is down to time and patience ...and practice! ...cheers2 points
-
Anyway, here's an update: if you closely, you can see the wood flight deck just showing though the rear windscreen from this angle. Using well thinned paint kept the tiny holes from clogging: remember our lonely stern deck searchlight? ...added hatch covers Cheers, Tim2 points
-
As promised a rough drawing of the bomb bay showing the dimension I used. Please note these are NOT accurate scale measurements but are rounded up dimensions that looked correct to my eye using various reference photos. The side view height dimensions were dictated by the depth of the kit top fuselage half, this may vary from kit to kit. I think that's enough of the disclaimers! Regards, gazza l2 points
-
So this undercarriage mix-up is due to loose terminology introducing confusion? Don't talk about left wing and right wing - use port and starboard which implicitly refer to the flight axis. Then you don't have to worry about whether it is right way up or upside down, or whether you are viewing it from the front or the back.2 points
-
2 points
-
Okay a productive four hours after getting home from work has got me this far Even got the lower wing and fuselage drilled ready for the rigging. More during the week2 points
-
Hi all. Long time no posting. Sorry about that. The great apathy monster struck. Anyhow a quick update. Upper wings drilled, and lower wings attached to fuselage. Next the tail-planes fitted and also the radiator glued onto the upper wing. Hope to have a bit more done tomorrow. Simon and Rose.2 points
-
Hello folks. Well here is a bit more to add. First of all the lower wings drilled, ready for fitting. The good lady Rose was busy, the first time she has drilled free hand instead of the pre marked holes. Next the fuselage holes.... WelI did mine first, and as you can see, I have some holes to fill Her Ladyship on the other hand.... Enough said... So the next thing to do will be fix the wings on, but not before I fill the extra holes. Airfix, please next time put the full rigging plans, including the hole plans. Catch up soon. Simon and a smug Rose.2 points
This leaderboard is set to London/GMT+01:00























.thumb.jpg.ba34a9f6ddce411193946dbdcc7b5fe8.jpg)

