
Leaderboard


Popular Content
Showing content with the highest reputation on 22/02/15 in all areas
-
Airfix 1/72 Hawk almost OOB with an LED in the nose, Painted with Humbrol 238 Red Arrows red. Stand is an acylic rod finished in Alclad and the base was painted with Humbrol gloss black and houses the battery. Only aftermarket is a Master Models pitot probe. Work in progress thread Thanks for looking CT25 points
-
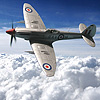
Here is my first take on the Airfix Spitfire Mk.1. WIP here: 1 by jongwinnett, on Flickr 2 by jongwinnett, on Flickr 3 by jongwinnett, on Flickr 4 by jongwinnett, on Flickr 5 by jongwinnett, on Flickr 6 by jongwinnett, on Flickr 7 by jongwinnett, on Flickr 8 by jongwinnett, on Flickr 9 by jongwinnett, on Flickr 10 by jongwinnett, on Flickr 11 by jongwinnett, on Flickr16 points
-
Fokker F.27, Air Anglia Welsh Models 1:144 Vacform The F.27 was Fokkers very successful entry to the twin turboprop regional airliner market, first flying in 1955. Very few remain in service,, but it had a long and varied career with a wide range of operators The Welsh Models vacform is one of my favourite kits, this one being my third to be completed. The Air Angliadecals come with the kit and are designed & produced by Twosix decals and performed beautifully. There is no white printing on them so the 'Air Anglia' titles are clear printed in the black area. The bottom of the fuselage then needs painting in black. I scratch built my own props from sprue runners for the spinners and 10 thou sheet for the props. And finally 'with something else', more F.27's! Thanks for looking, John15 points
-
After a long slow-down in my modelling activity due to other pressures my lovely wife gave me this kit, Special Hobby's re-boxing of the Classic Airframes kit, for Christmas. Inspired by a Grumman Duck build article in SAM last summer, I decided to try my hand at a diorama for the first time. After all, a seaplane sat on wheels always looks a little odd, in my opinion... The kit is well described elsewhere and the tribulations of the struts and rigging severely tested my patience! That said, I'm pretty pleased with how it turned out. I used shade variations to try to get a slightly worn look to the camo and the whole plane was washed with a mix of black and payne's grey oil paints. I used sewing elastic for the rigging and one of my daughter's hairs for the arial wire. The downed airman is in a K Type dinghy made from Fimo, wine bottle foil and tissue paper. The figures are an Airfix pilot and Eduard aircrew. The latter had some pretty drastic surgery to make their knees bend far enough, but filler is a wonderful healer! The rope is embroidery thread set with thinned PVA. The guy in the dinghy looks like he might be about to fall out, but he'll be pretty desperate to catch that rope and get back on board a plane... The base is made with foamboard and plaster of paris. I sealed the plaster with a thick coat of PVA and painted it with acrylics. One unexpected effect was that some of the acrylic paint 'split' as it dried to leave tiny flecks of white in the water which look better than anything I could have produced with a brush. The whole thing had a few coats of future to make it look wet. Once the plane had been set in place, the gaps were filled with modelling clay and the painting touched up. I brushed gloss varnish onto the sides of the plane, but was a little wary of getting too carried away... Let me know what you think!15 points
-
Sorry for the late replies guys, just catching up with the thread.....yes I know I started it lol! Great pictures, thanks for those. I caught up with Glenn at Huddersfield last weekend and he has intentions to do the larger dome and also the rear turret too. Having faffed about with the Falcon vac part, I may just use the kit part for now and replaced it when these become available (It's got a good tolerance fit, so won't need gluing). So that's good news for anyone wanting to do a variant with the larger dome, especially as Glenn also has some lovely decals to suit these too (I'll take some pictures of them this week). Hi Jonny, No I'm not, I'm going for the small variant, just been busy recently and not had much time / desire for modelling, especially as it was the making stage, hate that bit! I got a 100Sqn logo decal from TonyOT and can probably get most of the nose art together from spare decals if I decide to use them, but my intention is now committed to an aircraft of 100 Sqn based at RAF Tengah conducting bombing missions loaded with 500lbers in 1950. The only thing I can't currently solve without getting one printed is the text 'The Burra Hornet' on the nose in front of the bomb tally, but I really want it to be RF476 flown by CO of the squadron Danny O'Brien. Got some more done yesterday, the MSG grey is now on and I'm prepping all the small parts that will be black so I can do all the spraying in one go. That's unusual organisation for me! Next job - mask the MSG areas off. Cheers Neil13 points
-
Hello Here is one of my builds, finished in 2014. Wing folding I finished both wing folds! It was painfully long. Do not try to repeat it . P.S. This was a HobbyBoss kit with Vector correction and Aires wing folds Hope you like it12 points
-
Westland Wyvern S.4 No. 830 Squadron FAA H.M.S Eagle, Suez Campaign 1956, Operation Buccaneer Frog 1/72 kit (~45 years old) Built pretty much OOB, sanded off and rescribed most of the raised panel lines, drilled out the exhausts and replaced with modified "drinking straws, boxed in the undercart openings. Drilled out the fuselage "camera ports" (?) and created windows with Klearfix. Overall fit was excellent, and original decals performed flawlessly, although had to double up the wing roundels as they were somewhat translucent. Painted entirely with Humbrol paints (Sky, EDSG) and final Vallejo Model Air matt coat. Thoroughly enjoyable build.10 points
-
Finishing off that Typhoon a couple of weeks ago reminded me that I had a completed Academy Tempest sitting somewhere at the back of the garage. I dug it out and gave it a clean (and stuck the few bits that had fallen off). Actually built it about 8 or 9 years ago. I think it was one of the first models I completed with brush painted Tamiya acrylics. Completed out of the box as the aircraft of Wing Commander E.D. Mackie, OC 122 Wing, Fassberg, May 1945. Thanks for looking.10 points
-
This is Roseplane's resin kit of a Spad A.2 with quite a bit replaced or enhanced by parts from the excellent PART photoetch set made for the Airmodel kit. I chose the markings carried by "S-31" which was the only French machine known to have downed an enemy aircraft when it was flown by Corporals Sabatier and Funk-Brentano on May 17, 1916, while on the strength of N-73 Squadron. Thanks for looking! -Dan10 points
-
Is the first time that i'm with you and i want to show you one of my last works waiting to do something new. Thise model was painted and shadowed with Gunze color and hel of watercolor pencils, I dont use oil or pre-shading technique. The roundel insigna ald code NL-L are painted by using mash maded by a friend of my.9 points
-
A busy little diorama in 1:350 scale, inspired mainly from reading through my copy of Osprey's 'Corsair aces of world war 2' along with other books and videos of the Solomons and other South Pacific campaigns. This was partly a bit of practice with 1:350 aircraft and vehicles for ship modelling, but I'm also a big diorama fan, so enjoyed making this little one up to add a bit of variety, and to try to capture a bit of the feel of the South Pacific campaign. Six Corsairs, 3 x GMC 2.5 ton trucks (truck, water and fuel tanker), 2 x 3/4 ton Dodges, 2 x Jeeps, a Diamaond T Wrecker, and a Ford and a Plymouth sedan staff car, and 16 Marines. Officers on lower left discussing the day's mission. A couple of the aircraft receiving attention in preperation for a later mission. And a couple of close ups -9 points
-
Here is my Italeri Stirling Theres a build thread here http://www.britmodeller.com/forums/index.php?/topic/234965440-italeri-stirling/ Its taken a few months to build it but some of that was Xmas, waiting for decals and building other things, so I m not worried about the delay! The Bushwacker is a not well known but not unknown subject either. A profile based on a photo exists and, even better, some pictures and some history /] Glider towing and parachute dropping Stirlings had a secondary role as bombers, retaining their wing bomb cells and at least some fuselage racks. it appears they were used for occasions other than Main Force raids such as minelaying and diversionary bombing. Apart from the obvious Bushwacker connotations there is no other documentary evidence that LJ995 was flown by an Australian crew and I have been unable to trace Flight Sergeant Halford, referred to below. I hope someone sees this and adds the missing pieces. I found the Italeri kit a pleasure to build with enough detail to satisfy the modeller without any issues that would deter them. The surface finish is a big improvement on their Sunderland - a bit of Mr Surfacer to tone down the panel lines gave a result that I liked. The nose art was printed on decal film and strips of decal film were used to represent the perspex joins in the nose. Most of the decals were from the kit but the codes were from an Xtradecal sheet and the serial home-made. Instead of No Step, the wing root signs read Do Not Tread Here and are visible in many Stirling pictures once you look for them The exhaust staining is quite characteristic of Stirlings The circumstances of its demise are recorded in a book on Rivenhall airfield. Locals were permitted to cross the runway at night, controlled by lights. One night, there came a local farmer The only photograph I have found of LJ995 shows it standing on a cold, wintry looking airfield, presumably Rivenhall or one of its satellites. That may be a trolley acc behind one of the wheels and surely the dark pile is the canvas many ground crews put over the wheels to stop oil dripping on to them. x8 points
-
Having seen Fatboydim's RFI post of the Tamiya Meteor and Doodlebug I recently became fetishistic about a 1:72 flying bomb / Spitfire tipping pair, documented here. I had very little luck finding a 1:72 V1 until, at the Fleet Air Arm model show yesterday I found this: When I suggested doing a WIP Procopius posted "I hope you do, especially if you build the Spitfire XIV; it's one of those kits that "everyone knows", so we never see it being built.". So here you go. A few starter photos to edit in Photobucket while listening to the Arcers omnibus so I'll post this and come back soon.8 points
-
Finally its done. That was probably the most demanding build I ever did so far. A lot of correction work was needed to turn this piece of plastic into at least a half decent airliner model.Way out of proportions like the too short fuselage and the way too big wingspan and other size discrepancies as well as a very brittle plastic gave me more than once nightmares. The tail is also very badly warped.I couldn't correct it,but if its looked from the side its not noticeable. The instruction sheet was no help to the build,so if there are errors I appologize. I added some details to make it more lively as the kit is very basic.It may be not completely true to the original but it helps to make it look more interesting. The doors for example are wrong in shape but I couldn't find anything else to fit in my spare parts box.It looks good enough though. The polished parts on the engines were done with bare metal foil to add some structure to the rather dull looking engines.The cabin windows were filled with Micro Scale's Kristal Klear and the cockpit windows are from a TU-104 decal set that I ordered for my other ongoing VEB build.The TU-104 in 1980's Aeroflot markings.The set provided two cockpit windows so this was a great help. But after all these obstacles were overcome,it turned into the elegant airliner the TU-114 is. As the VEB kit is the only plastic moulded kit available,or better,was available of the TU-114,its anyway a very nice addition to my collection of vintage airliners and its a great addition to my ever growing VEB airliner fleet. Dispite its many flaws I am happy to have taken the task of building it but its also very likely to be my only one VEB TU-114 as I wont have the nerves of building another one. So now here she is...enjoy the russian lady8 points
-
Hiya everyone. I was still putting the finishing touches on this representation of the Gladiator at 9pm Friday evening ready for the Yeovilton show on the Saturday morning; hence the finished photo's not appearing till today. A bit of an oddity this one as it is wearing the later Day Fighter Scheme of Ocean Grey/Dark Green over Medium Sea Grey. Painted as usual by brush but using Tamiya acrylic Ocean Grey as I couldn't locate my tinlet of Humbrol 106 (looks like my carpet monster's appetite has grown again :shock: ) Markings were from a combination of a Revell sheet for the Hurricane IIc for the national markings and a Printscale sheet for the unit codes and registration. Hope she passes muster: Gloster Gladiator II, N2309 'B' of 1401 Met Flight RAF Coastal Command, RAF Bircham Newton 1941 Regards Tom8 points
-
Ah thanks Duncan, I thought that looked exceptionally nice to have simply come out of a bottle like that - funnily enough I recently ordered some of the lacquer Mr Colors from Hong Kong for the Eduard Avia B.534 (which requires "Khaki Green" for the uppersurfaces, a name so vague that I thought I ought to get their recommended paint for it rather than try to imagine what in my collection of paints might match it - and of course you can't just order one bottle of paint...) Anyway as a corollary to that I have now ordered some of the Mr Hobby Aqueous RLM acrylics from Models R Go so I hope to have better luck with those. MG, thanks, your post was most amusing and as a result it didn't suffer from not being helpful - or rather coming a little too late to be helpful. Being a beast of a rather impetuous nature I had already set out upon a scheme to alter the camouflage as best as I could with an brushed overpaint of Phoenix Precision Enamels - this has been successfully achieved and will be left to dry for a while now: I feel very much better about that. I think given the overall lack of success I have had with the Hataka paints I will leave them at this point, they may well be the very best quality paints and precisely colour-matched, there is a strong possibility that all the problems I had with them were self-created, but whatever, I am not of a mind to keep on with them until one of us breaks. For Dornier 2 I will try the AK Interactive acrylics and see how I get on with those (but still keep my Phoenix Precision enamels in reserve) but for the time being I will most likely press on with Dornier 1, as it should be ready for a coat of Klear tomorrow prior to decalling Cheers, Stew8 points
-
I built 2 or 3 of these man many moons ago, so since getting back into modelling I fancied another go. I remember now what was so frustrating about it. I always struggled to get the ratlines not to look too saggy, I thought I'd come up with a solution this time, it worked to a certain extent, but not 100% to my liking. The other problem this time was the locating points of the masts snapping off rather too easily resulting in them not quite sitting right. I also lost a few bits along the way, not least of which is the rudder!!! The rigging also doesn't lie in a realistic way, but hey ho. Anyway for a kit that's probably nearly as old as me it's a reasonable model of the Victory. Thanks for looking. BB7 points
-
Quick update before dinner time. This was my masking set up for the fin: Looking much better with a new coat of black: Masking removed and gloss applied: I got the decals on the main gear doors: I then continued with the decals on the main craft. This was one decal but I thought it was better split: This is the current state of affairs:7 points
-
This is the 1.144 Revell kit and 8A Decals. The kit is superb, the decals are great too - they look crisp and they go on really nicely, but the red/white/green stripe seems to have been wrongly sized which eventually puts doors and windows in the wrong place. If you start decalling from the back (as I did), the stripe doesn't meet at the nose as a continuous all-round line. However, if you start at the front, the wide stripe goes up the fuselage to meet the fin far too early. That's my experience anyway, but then I might have simply done the whole thing wrong. Oh well; it looks nice anyhow.6 points
-
So here is my second finished kit after 25 years out, Tamiya's 1/48th P-51B dressed as Don Gentile's "Shangri-La"; there are PE seatbelts in there plus replacement exhausts again, and another Eagle Cal set for the markings as the Tammy ones disintegrated into a zillion pieces - probably just as well as their red was too dark and the chequerboard was inverted - red squares where there should be white, and vice versa. There are a couple of other issues if you are building this kit: the propeller should be the paddle-bladed type, not the cuffed as supplied (and used, I wasn't too bothered!), and the drop-tanks are also wrong, all pictures of Shangri-La show her with the tear-drop type. Pictures also show the main undercarriage doors firmly closed on the ground, so I followed suit here. Curiously she appears to have worn both exhaust styles at various times. A few more techniques learnt along the way, including using a pencil for panel lines, and Tamiya weathering powders.6 points
-
Hasegawa 1/72 F-16B and F-16CJ (the HTS pods being converted into a Pave Penny Pod). The AGM-65 Mavericks are the excellent resin offerings from modern-hobbies.com. Aircraft and weapon decals sourced mainly from the excellent Wolfpak decal range http://millcreekconsultants.com/WP72-13.html).... Cheers, Haydn.6 points
-
Hello all. It has been a very disjointed session of building this last fortnight. I was stuck with the mainmast platform. No matter how I fitted and trimmed it, it would not sit straight and true. I ended up with this: The platform is a bit nose up, port side down, but I fitted the upper mainmast true - at least according to plumb bob and steel rule it is true anyway. I eventually used Glu'N'Glaze to fit the platform, then CA to fix it for good. I am still not sure where the problem was, but I think it was with the etch starfish supports and the angled legs. I apologise for the quality of this pic, but hopefully it shows that it is aligned okay. I have also got the torpedo shelves fitted, again these went on with G'N'G, which I find is great for attaching etch where no strain is applied later. I did run a thin bead of CA on the underside later just in case. The ledges are just in the 'pick up point' when I work on the ship. This is also why there is only one net boom in place. I fitted that one, then thought about the consequences of fitting the rest too early... I have given the shelves a first coat of grey, but they do need another. Brass is not that easy to cover by brush painting even after a primer coat. One area that has gone quite well is the crane rigging This also brings up another area where my mind is going into overdrive - how to fit the three lifeboats to the underside of the boat gantry. I have some etched davits which will look good, or the Zvezda plastic rods which would be much more secure. Oh yes, and when to fit - will they wobble around if I use the etch and fall off when I continue the build? Rhetorical questions only. Of course, if planning was my speciality, I would have drilled holes into the gantry in preparation and it would have been easy, but it is not! Note too that I also neglected to ensure that the stand Zvezda supply fitted the cutouts that needed opening very early in the build, so I either need to try and ream out the holes without destroying my work, or think of another way to put her on a base. I am thinking maybe of a block of wood and some short square section block to make it look like a dry dock type setting. And there is still the cage aerial rigging too... Thanks for looking, and with luck there will be more progress soon. All the best, Ray6 points
-
In truth, it's much easier to get the lacquers here than it is the acrylics. You forgot Rule 1 of the United States, it's always easier to get something that's bad for you.6 points
-
A couple other pics of a recent finisher. Hasegawa P-40E. Build etc in the Curtiss P-40 GB.6 points
-
Hello Friends, greetings again from Argentina. I wanted to share with you two models of Me-109s (an F2 and G6) which recently ended. What is special is that they are painted with new acrylic paints which produces a Chilean colleague (Richard Ordenes Gomez), the quality is outstanding. The name of the paintings is K4. They are particularly suitable for airbrush and can be used directly from the container (similar to Vallejo). Personally I think they are as good as Tamiya and Vallejo. This friend also produces all types of complements (pigments, fixer for decals, effects, washes, etc.). If you wish to have contact with him here I leave the email [email protected]. The picture quality is not very good but I used to have an idea. Regards. Walter5 points
-
Latest of the bench is a bit different for me. Saw this kit at a show and thought ..... that's different. Any way it's the RS Models offereing in 1/48. A very basic kit, a bit like a very early CA. It fits where it touches and just loves filler. Only 2 were ever made. It would have been interesting to see how it would have developed. Comments are always welcome. Thanks for looking Dick5 points
-
Hello Folks, I've been busy building the Peterborough Scale Model Clubs website, and now this is up and running, I can now make some models again. Please be kind, and no its not a helicopter!5 points
-
This small classic pre-war fighter model was partially assembled a long time ago, patiently waiting to be finished in my "forgotten affairs locker". So finally it is completed. Model was built almost out of the box, - I only have added motor valves pushing rods (almost invisible), drilled out manifold inlets (barely visible) and made suporting rods for wheels fenders. As painting scheme was choosed 1st Sentai commander Toshio Kato craft during Khalkhin-Gol (Nomonhan) incident, with its funny fat non-standard wheels to fight muddy condition of Khalkhin-Gol area frontline airfields. I've decided not to use ICM decals because of strange wine-red color of Hinomaru insignia on it. So all insignia, stripes and markings were done with masking tape and self-made stencils.5 points
-
Presumably there must have been some way of lowering them separately (i.e. independently) for maintenance; lowering the outer flaps with the wings folded would have resulted in an expensive crumpling noise. But I take your point; same with the main undercarriage doors; they closed up again after the main wheels had lowered, but could be lowered on deck to provide access to the undercarriage bays. Like lots of aircraft, the doors also drooped when hydraulic pressure bled off; the FAW2 at the FAA Museum has its main doors tied up with rope! (I checked yesterday - I assume there has been no hydraulic pressure on that beastie for about 40 years. Last time I went the tyres were flat, too, so I was glad to see someone had fixed that yesterday.). The Museum officially depresses me nowadays (not really - I love it!), because both the Lynx and the Sea King airframes that are there appear in my log book (as does the Gazelle which is in the reserve collection). I am officially a museum piece.5 points
-
When I bought this kit, I purchased the Eduard "Big Ed" set, which contains masks, cockpit stuff and other detailing PE. One of the sets is called "Sea Vixen folded wing, landing flaps". Without really thinking about it, because of the title, I guess I must have assumed it only had details for the flaps if the wing was folded... and I am building this aircraft with spread wings. But that's nonsense, if you give it more than a nano-second of thought; the Vixen, like most Naval aircraft, had some pretty major flap action going on in order to try to get the landing speed as low as possible - but there's no way the flaps would be deployed when the wings were folded, is there? You'd just damage the things. Anyway, a couple of days ago I finally appreciated this Earth-shattering example of the Bleedin' Obvious, and broke open the Eduard set. It meant I had to do some retrospective removal of Airfix's detail inside the (already built) inner wings, but thanks to the rather excellent chisels I bought at Yeovilton yesterday, that wasn't too bad. First a reminder of what the pre-chiselling flap bays looked like (old pic from when I was fixing the lower boom): Then post chisel work today (don't panic, the PE flaps cover up those gouge marks!): Then the outer wings, before and after (removing the detail much easier on the un-assembled parts, which serves me right!): I am experimenting with Gator glue (another new purchase, though not from VL), and it seems to work nicely with PE - good grip, but some time to get the thing manoeuvred into position). Anyway, as with most PE work, it's intricate and needs patience; I reckon this is going to take me several sessions - there are three flaps per wing. The first one (port wing, outer flap, as it happens) is pretty much done, and I certainly think it is an improvement - first a shot with just the upper wing part in use (unforgiving, as close-ups always seem to be!): ...and then with the wing taped in position to check that it all fits together: Finally, since I have had to remove the out wings from their sprue in order to do this flap malarkey, I just had to see what she looks like with wings in place (this was done before I started flapping about). This is a really excellent kit (conversion or not) - I can see why people said it was such a step forward on Airfix's part; the fit is very good indeed. This is with nothing other than gravity holding the wings in place; the hinges will me much neater once the wings are properly fitted. But what a beautiful aircraft; one of the great wing forms, in my opinion - and so much prettier without the extended tanks of the FAW2. More soon. Crisp5 points
-
]5 points
-
A little update. Following advice about dry fitting, I have spent a bit of time over the weekend tidying up after cutting out the flaps, ailerons and gun covers. Fit of the flap inserts is pretty good, but notice the gap for the ailerons is being forced open by the resin flap inserts. The rear of the flap insert has a block which I thought was there to aid alignment, but looks like i'll have to cut/file that off. The resin gun bay fits nicely (to my inexperienced eyes!), but I have to decide how to clean the area up. Do I file away the resin block itself, so I can push the resin gun bay up to be flush with the wing, then fill & sand the gaps, or do I sand the wing surface to be flush with the gun bay then fill & sand? I used Revell' Plasto' to fill the fabric effect area behind and in front of the gun bay - I didn't like it at all! Horrid smell and it goes stringy very quickly. Sanded that off then used Vallejo 'Masilla Plastica'. MUCH better to use and sand! I then brushed on some Mr.Surfacer 500 and sanded back - much better finish than the Revell Plasto. I guess though there will be modellers that get on fine with it as we all have our own preferences with products! Thats it for now. I must admit to feeling a little nervous at all this stuff new to me. Hoping at some point I don't get overwhelmed and my skill runs out! Off to work :-(5 points
-
Patience mon brave. (See sprue shots below) Back of the box: The first picture in this thread shows that the box was sealed in what looked like the original plastic - good news. Notice the '3-40' in pencil here on the left, written through a tear in the cover. Doesn't match the £9 sticker on the back - bad news. But this is a 'rare' kit and I had to have it (see V1 fetish notes above). Not very happy with the 'colour painting guide', especially for the V1. Found a useful link on BM (of course) here so I may need some help choosing the right colours. Or I can just use the guide that came with my Vallejo sets (ha ha, lol etc, sometimes I just think funny things (quote from "Arthur")). I may suffer some 'analysis paralysis' on this: already spent loads of think time last night about printing photos, rescaling and cutting masks... or free hand? Hmmm. Obviously I'm going for the 'Punjab' Squadron scheme as that was in Belgium and the other is Hong Kong. Is 'Punjab' in Belgium? Methinks not. Did they have V1s in Hong Kong? Ditto. Not going for historical accuracy then. The model. Concentrate Ced. Firstly the 'Skybase' - this may be what Low Flyer was asking about (but there's another stand too!!) You can stick this on the wall (there's a sticky pad provided) but I think I'll pass. Instructions: i don't think this is going to be too hard (famous last words). Step 1 is building the V1 (yeessss!) and step 9 is the stand assembly (this one Low Flyer?). There's also, on the back, '10 Top Model Tips': 1 - Paint the pilot on the sprue (OK) 2 - Cut the tyres off the sprue 3 - Don't use lots of cement 4 - Find a matchbox from somewhere 5 - Use masking tape for the stripes (what stripes?!) 6 - Use a pin to drop stuff in the prop 7 - Tweezers, got it 8 - Pencil in the camo - Aha! So that's the top tip. Throw away those masks guys 9 - Cut your brushes up for stippling 10 - Um, er, something to do with decals. This is not going to replace BM for advice and guidance, is it. OK, here are the four main sprues: You can see that the V1 (yeeesss!) and the stand take up most room. Surface detail looks nice on the wings but pretty basic elsewhere. What were you expecting? And the pilot has no cockpit detail to look at but he's small anyway. Tiny in fact. Are the Airfix ones to scale, or the Frog? Perhaps that's why Stew Dapple is having a squash in his Do17s? And this was also in the box: Not a very good focus (sorry) - it's only an iPhone and I kept wretching. There are two options for the canopies - bad and worse? Once I clean this up we'll have some more thinks. OK, let's build a V1!5 points
-
Not sure if anyone's read post 1 so I won't edit it... don't want you to miss any of this drivel. First the now obligatory pics of my 'workspace'. it's actually a room in the house we used to call 'the Office'. I have a small business and work from home so a mixed environment. Zoom in on the build station. You can see here how the last year or so has progressed and that the shopping (and BM browsing) has probably taken more of my time than the actual modelling. Lots of stuff here: - Swann Morton scalpels, two size 3 retractables with 10a (general slicing) and No 6 blades (canopy masking) and a size 4 No 23 blade for bigger stuff - Paint storage rack for the Humbrols. I naturally gravitated to these from genetic conditioning - Tamiya extra thin and Humbrol liquid poly and precision poly. And the old stuff in the tubes (mainly for sticking pilots down now - I like the 'wiggle') and SuperGlue. - loads of brushes. Still deciding on my favourites. This is where 'the real work' happens (ignore the joystick, I haven't used that for ages), overseen by the Germans. Especially the Stuka bombing my current efforts. And the spraying station: Loads of stuff to write about this, mostly thanking Paul at Modelling Tools for all his help. Note the Vallejo presence. It's the marketing. I now know that the really nicely packaged sets (I have RAF WWII and Luftwaffe WWII) contain probably 3 or 4 useful colours and others that I'll probably never use. Ah well, I can pretend I'll use them for testing. Do you want some personal history too? I went to the battle of Britain memorial in June 2013 and, by luck, they had an open day, including the Airfix team. "I used to enjoy that" I thought. And the rest is history. Bought the BoB flight starter set (see top right of ceiling). Joined BM in September '13 and only done one WIP before, here. I really enjoy 1/72 modelling, all aircraft and mostly WWII. I really enjoy BM too and the advice and experience is, IMHO, unrivalled. (What a creep). Right, Archers over. Obviously he wasn't going to leave Brookfield, we all knew that. But Kenton's spent his share already. There's going to be tears. Where was I. Ah, a model. Better start another post methinks.5 points
-
Hello All, In an exercise in sheer perversity, here's the old tool Airfix Gladiator from 1957, upgraded a bit and using the spare canopy from the new tool Airfix Gladiator. I only bought this kit to get the 72 Squadron decals, but then got waylaid into building this as "Hope": It was quite fun, but ultimately you know that there is a much better kit out there (next to this one on my bench!) and so it's ultimately an exercise in frustration. Now to finish the new one! Thanks for looking, Adrian4 points
-
P-47D-3 Thunderbolt 42-22637/38 "Daring Dottie III", 348 Fighter Group, 341 Fighter Squadron USAAF, Finschhafen, New Guinea, march 1944. Pilot: Capt. John T. Moore (7 victories). Kit: Tamiya (1/72). Decals: AviPrint.4 points
-
The last day of our trip to Japan took us to Hyakuri - the weather was kind, and it was a nice way to finish. Hope you like the pics and thanks for looking in.4 points
-
Curtiss P-40B American Volunteer Group 'Flying Tigers' 3rd Pursuit Squadron 'Hells Angels' White 68 P1069 flow by Flt Ldr Charles Older, Burma 1942 Kit: Airfix 1:72 Pain:t Valajo, Weathering: Tamiya, Decals: Mix of kit and Kits World Build: HERE4 points
-
Hello modellers, Second post today with some older aircraft from the Korean war era. Both models were made in 1997 when Airfix re-released the old Shooting Star. This kit was well known to me - being one of the first ever finished models from my childhood days. Although not as great as I had in memory, the parts went together well and the decals made no problems. Built the P-80C out of the box but sanded the landing gear doors thinner, improved the air brakes and added some gun barrels from sprue. The Hasegawa F-9 Panther is completely out of the box. Found it a very nice little kit but unfortunately hard to find in the shops. Nevertheless have also Hasegawa´s swept wing Cougar in the stash. Both models were painted with Revell enamels. I hope you like the models Mario4 points
-
I've been at this boaty thing for nearly a year and have finally finished it, no thanks to work commitments. Not a maritime modeller at all and more into the tracked vehicles but Inspired by other posts in this section, absolutely love them now…… However I'm no maritime expert and have taken a lot of time and viewed other models to finish this one. I have based the colour scheme on the 9th u-foltille out of Hamburg (please correct me if I'm wrong) but haven't based it on any particular boat. loved this model as the weathering was very challenging and loved every minute of it. Will try and post some more closer photos soon….. All comments welcome and onto the next floaty thing, looking at a Japanese Submarine next………. [/url[/url[/url4 points
-
We stand hesitantly before the precipice, gentle reader! (Other readers available.) All of the aircraft have their cockpits closed up (complete with gunsights, which I almost invariably forget, your Sauron-like eyes have made me a more conscientious modeller) and masked. I painted the head armor for all three with Tamiya Red Brown, as the Finemolds instructions suggest using Gunze Red Brown with RLM 66 center padding or whatever it is. The profiles on the Xtradecal sheet omit the radio masts on the F-4 and E-7, and in my innocence, I almost believed them. Amazingly, I actually own some 109 references (which I only just remembered this morning), and so I consulted Squadrion's 109 in Action Part 2 for the Fs, and the Roy Cross and Gerald Scarborough Bf 109 Versions B-E, published, I note, a year after the introduction of decimal currency in the UK. Personally, I preferred the old twenty shillings to the pound system. I'm weighing whether or not I care enough to lay down an RLM02 or 66 coat over the canopies before primering; on one hand, it will look more "authentic", but on the other, I've had a bad run of paint chipping with masks recently, and I believe this is because how many layers of paint and future I've been putting over them. Now my thinking is that in a perfect world, I would only put one coat of paint on a mask and then remove the masks as soon as possible afterwards. But I'm not interested in buying two or three masks to a plane. In any case, aside from that, I also have to add the radio masks. I used both white glue ("Micro Krystal Clear") and Perfect Plastic Putty to blend in the canopies, which fit quite well on the Finemolds and "reasonably" well on the ICM kit. Happily, and no doubt a lethal blow to those who would claim the ICM kit is little more than a monkeyed-with copy of the Tamiya 109E, the mask made by Eduard for the Tamiya kit fits perfectly. So I think we can lay that canard to rest. 109E-7 109F-2 109F-4 You will note my masking is not the best. I'm a big believer in the TLAR method of getting through life. I also work from the principle that a yet to be discovered big flaw will likely hide innumerable smaller ones. ("The fox knows many secrets, but the hedgehog knows a single mighty one" -- Archilochus)4 points
-
I wouldn't worry too much about the decals. It's been my experience, having once had to try to train a former U.S. Marine, that (1) they can't read very well, (2) don't much understand what they can read, and (3) don't much appreciate your efforts in trying to help.4 points
-
10 by jongwinnett, on Flickr4 points
-
Ah, OK. All Brits - the one you're querying is a Airfix Short Stirling (A07002). My US area is yet to be started. Another look (full details in my scalemates here): From the left - Trumpeter Wellington. Trying to instal the Eduard PE bomb bay in this nearly finished off my modelling career, document here. - Airfix Victoria Cross set (Hamden, Hurricane, Fairy Battle and Blenheim) with a 'vintage' Lizzie underneath. This had awful decals and trying to make new ones drove me mad. - Airfix Spit Mk1 (new tool) - lovely build - The Stirling - Airfix BBMF (A50116 old set); my first three models this time around and - last but not least, Airfix Mossie.4 points
-
You know the warning "Beware of Blast" should always be in lo vis, lo contrast markings; helps reduce the marine population by only keeping the ones smart enough to know they should stay away from the business end of a turbo prop. This build is looking so good, I think it has even surpassed my eggplane build of the Osprey!!4 points
-
Curtiss P-40E/ Kittyhawk Mk1A, AK759/ FZ-R of 94 Squadron. Pilot: Sgt. 'Eddie' Edwards RCAF, Gasr el Arid, Libya, March 1942. Eddie Edwards was the third highest ranking Ace on the P-40 with 12 kills, and several shared and probables. The red /white checks led the Germans to believe that they were in combat with Polish Curtiss fighters! Hasegawa 1/72nd scale kit, Sky Models decals, various acrylic materials for the finish. Reference used, Osprey Aircraft of the Aces No.38: Tomahawk and Kittyhawk Aces of the RAF and Commonwealth. Build thread: http://www.britmodeller.com/forums/index.php?/topic/234975398-next-one-p-40e-kittyhawk-mk1a/4 points
-
Just a quick build of a $5.00 kit painted with acrylics and some aftermarket decals. Thanks for looking. Mark3 points
-
What? Don't be absurd. I'm sure everyone in this country is like me, deep down. In any case, I've sprayed the Alclad primer: As always, nothing quite goes exactly the way we wish it would: while a seam should exist forward of the firewall on the 109 (for the engine cover split open not unlike the gull-wing doors on a DeLorean, albeit in this case a DeLorean that only takes you to the Dark Ages), it shouldn't be present (or at least not visible) behind the firewall, and despite some puttying earlier, it definitely is on both 109Fs. So we have to fix that, and as usual, I say we, but I'm the one who has to do all the work. Additionally, the primer on the 109E-7 didn't go on very well, coming out rather grainy and pebbly, so I'll need to sand that down as well. Once we fix that, we can do the RLM02 wheel wells and paint the exhaust stacks, then a little masking, and the tummy colours. Though 109s are really too evil to have tummies, so maybe belly colour is more apropos.3 points
-
Quick zoom in for you: Clockwise from top left: - Frog Gloster Whittle E28/39 Pioneer (another show purchase. Probably won't buy anymore 'vintage' models as they're often disappointing compared to new tools) - Airfix TSR2 - Airfix Lightning F.2A (first real NMF with Alclad and AK metal) - Airfix Whirlwind WIP, paused for this trail - box for the Skytrain in my D Day set (WIP here) - two P-51s in here waiting for the Memphis Belle in my stash (scary). I used these for the NMF tests for the F.2A, posted here. The first three are just waiting to go on the ceiling.3 points
-
**Update** - Additional Equipment Part Two. Been working the finishing touches today. Progressed the light and indicators. Used Tamiya clear orange and red and also painted the backs of the lenses with aluminum metalizer. Then got the lenses glued into the headlights and touched up with Tamiya X-1 where required. Now with the rear lights fitted. Now with front head lights and indicators fitted (just make the out behind the shroud). Just need to apply some weathering to blend in with the rest of the model.3 points


.thumb.jpg.ba34a9f6ddce411193946dbdcc7b5fe8.jpg)

.thumb.JPG.3498f40362ff13ebfc4b2e45abbd545e.JPG)


This leaderboard is set to London/GMT+01:00