Leaderboard
Popular Content
Showing content with the highest reputation on 23/12/14 in all areas
-
It's my B-24J Liberator MK.VI special version for Special Duty Squadrons. GR-V from 1586th Special Duty Flight (Polish) later 301 Special Duty Squadron (Polish) in Brindisi Italy 1944/45. Merry Christmass!18 points
-
This is Italeri's venerable old kit. I scribed the panel lines, added some masking tape seat belts, paper sun shades, and replaced the exhausts with short lengths of aluminium tube. Paints used were Humbrol enamels. The kit went together with no problems, really great fitting kit. Decals are from the kit. image upload no compression adult image host images upload photo uploading image url upload adult picture hosting photo share picture share upload png upload images free free image hosting Thanks for looking17 points
-
Hi All! Tamiya's 1:48 Beaufighter Mk.X: Essentially an out of the box build but with Model Alliance decals. Made to represent NE429, a 489 (New Zealand) Squadron aircraft operating out of RAF Dallachy in 1944. As usual for a Tamiya kit, it was a dream to build with no filling required at all and minimal sanding. Paints were a mix of Xtracolor, Testors and Alcad II for the metally bits. The YAGI antenna was fabricated using aerial spares, provided by the kit, cut to shape and aligned with a guitar string. I hope you'z like it! I think it's my best build yet. Woof woof. ~M~16 points
-
Greek Air Force PZL-24. 1/48 kit by Mirage. The roundels' blue should have been darker. These ones look like more Argentine than Greek. I always have found the PZL really ugly. But, you know, I have a maternal instinct...11 points
-
I used my trusty spirit burner to melt an end stop on the plastic tubes for the cockpit, much easier and more secure than trying to tie knots: This is what they looked like threaded through: I then secured them with a blob of Gorilla superglue: I did manage to get some BMF straps on the fire extinguisher: It was a bit of a fiddle but not too bad once I worked out the best way to hold it. Here it is glued in place: Well that's me done until after Christmas. Happy Christmas to all Britmodellers and their families from AA and myself: Bye for now, Nigel9 points
-
Yes Blackadder seems to have a quote for all occasions. Pictures as promised, although in real terms there hasn't been a huge step forward I always think the model is almost there once it's standing on it's own feet. I often wonder if this is because I mainly worked in second line servicing in the RAF and the aircraft were always up on "sticks" until nearly the end of the servicing so I still associate them standing on the ground as being nearly finished? And here is one showing the type of masking used to mask off the anti-dazzle panel on the nose. Quite simply a disc of masking tape 10mm diameter which is the smallest diameter my cutter adjusts down to (so it's a happy coincidence that it's the exact size needed). I haven't got round to masking off and spraying the chrome on the intake ring yet, I think I will leave it until the very end of the build so that I don't risk rubbing the paint off during handling. I guess it's time to experiment with making a cover for the canopy. Duncan B9 points
-
Thanks chaps, I cut the yellow handle off its bit of fret and then spent ages trying to get it to go where I wanted it to: I was reasonably happy with its final resting place, I just have to make sure I don't now knock it off as it will never be seen again. I got the detail painting done on the fire extinguisher using Alclad "Chrome": I then had a devil of a game of getting the fire extinguisher to sit properly on its bracket: I did have the idea of adding BMF straps like in the reference picture: But I think that may just be pushing it too far for my skill levels. I will have a think and maybe try in the morning. Bye for now, Nigel9 points
-
This is the fine 1/72 Mig 21 “Battle Damage” reboxed by Lindberg. The original kit was produced by IMC in the 1960s. Its trick feature was that you could build the kit with molded “battle damage”. I needed a quick fix for building something so did this in a weekend. The build process is here http://www.britmodeller.com/forums/index.php?/topic/234973002-mig-21-battle-damage;-a-weekend-build/. I only did this kit to play with the battle damage feature. There was not any considerations to how accurate a kit this is, what needed to be done to correct it; the sole purpose was to play with painting the battle damage and having fun. Here are the results If you want to revisit the days when you just brought a kit home to get it built and play with it in the same afternoon, this is the kit for you. It was a blast. As always, all comments are welcome.8 points
-
A really quickie, assembled in a hour (seriously and that's going slowly) and then painted over the last weekend to check my airbrush and see if these MrColor RLM colors would work for my current WIP as I'm having new Humbrol RLM paints issues: Not sure about the accuracy but I don't think these V2 had time to get weathered; When most of the USAAF and Bomber Command is pummelling your factory/country, the paint scheme was whatever you could slop (albeit with straight Teutonic lines) on the pointy little buggers: 3 calendar days from start to finish in total, now that's satisfying! Have a goodly Crimbo one and all.8 points
-
Should this be in armour? Should this be in Marine? Should this be in Aircraft? I plumped for the latter as it's aircraft related but feel free to move it mods. I needed a little diversion while other models dried etc so I broke out the Verlinden 48th USN Mule. Sadly this was warped, miss-moulded and bits were broken but I ignored all that and went with the flow. I like these vehicles, they have character. It's quite a big sucker, see last pic for scale, alongside the Humbrol tin and a Verlinden 72 mule which was done years ago. You can also get it in 32nd but it'd make an interesting model in its own right in 24th. Unlikely but hey, I can wish ...7 points
-
This is my last project for the year and another commissioned project, I have been at this for around 8 weeks, it always surprises me just how long it takes to build small scale kits. The Blackbirds I built were 1/72 but they are much bigger in size so were easier to handle and manage. In comparison a 1/72 F-16 is tiny, well tiny for me anyway. I did start a WIP for this project but I just did not have time to continue it, this is the beginning and will give some idea as to what the plan was. WIP. http://www.britmodeller.com/forums/index.php?/topic/234967735-172-hasegawa-yf-16-and-yf-16ccv-part-1-wip/ The initial commission was just for the YF-16 AND YF-16CCV Prototypes but we soon realised we could extend the project out to the F-16FSD, F-16/79 and the F-16XL. I started with the YF-16 and YF-16CCV, these are the same Hasegawa kits, both kits have been fitted with the Aires resin gear bays, ESCAPAC Seats, Aires F-16 resin cockpit tub, Aires Burner and Vingtors F-16 Prototypes Decals. There are a few other minor modifications but that is essentially it. The biggest challenge was grafting in a donor cockpit/canopy frame, in the standard kit it is all moulded as one with a small clear part to represent the canopy. In order to have the canopy up I need to graft over the frame from an F-16A. The canopy hinge points have also been changed to match the Prototypes, you will see that they are different to the F-16FSD. The prototypes also had a split nose gear door so I tweaked the resin and kit parts to suit. With the resin work done I could complete the YF-16. The YF-16CCV was built in the same way as the YF-16, the only trouble I had here was the very old decals. We had planned to use some of Vingtors decals here too as we wanted all the relevant walkway decals and standard markings. There are no specific decals supplied in Vingtors decals to suit the CCV tail, this is where the problems began. The original sets had yellowed I had left them in the sun as usual to bleach them but basically they fell apart on the backing paper. Fortunately the client had two more sets and these were from slightly newer kits, they are still yellowed but they went on easy enough. I doubled up the decal on both sides as single tail decal was to thin and allowed the red to show through as a slightly pink shade. Once I applied the duplicate over the top this was resolved. It’s a shame about the tail decal but I have noted that Hasegawa are to rerelease the F-16CCV kit soon so when the time comes we will sacrifice a new kit to get a nice tail with clean white decals. The F-16FSD is the Production F-16A, it was modified with Aires resin gear bays, Stencil S-III Seats, Aires resin cockpit tub, Aires Burner and Vingtors F-16 Prototypes Decals. On face value they looks similar to the Prototypes but if you have a closer look you will see a number of variations. All Three Initial Prototypes. The F-16/79 is a bit of a story on its own but basically it is a modified F-16B using a J79 Engine to get around Jimmy Carters arms proliferation polices in 1977. Basically it was all a bit of a waste of time due to policy changes but the end result was a slightly different F-16. Among the modifications was the mating of the engine to the fuselage-mounted gearbox in the F-16. This problem was solved by adding a transfer gearbox to the power plant. The result of this was an extension of the fuselage by 18 inches (46 cm) at the rear of the airframe before the exhaust, I have scratch built the extension. The intake was also heavily modified, I have scratch built the extended lip, the sides also taper in slightly. Other additions are the Aires resin gear bays, Stencil S-III Seats, Detail Model F-16B resin cockpit tub, Aires Burner and Vingtors F-16 Prototypes Decals. As always there are a few other minor modifications but that is essentially it. Lastly the F-16XL, this is pretty much OOB apart from the Aires Resin Burners and the additional decals used to apply the walkways and re fuel port. There are virtually no useful decals in the standard kit so it was handy to have an abundance of spares. I wanted to graft a canopy frame here too but the profile is wrong and it just could not be done, the same for the gear bays. For an old kit it has not turned out to bad and I am quite happy with the end result, it will be interesting to see how the new 1/48 Skunk Models kit shapes up. The obligatory Tamiya paint pot for scale. I will not start anything else this year, the next commission is the 1/48 Kitty Hawk MIG-25, this is looking to be another build that will need a lot of work, still pondering that. End of year review to follow after Christmas, on that note I wish you all a Merry Christmas and Happy New Year. Danny www.modelmasteruk.com7 points
-
I'm still refining my techniques for natural metal finishes but now I think I'm in a position to finally start putting the stickers on.6 points
-
This is #5 completed model off my shelves of doom. In October I decided I would try to eliminate my shelf of doom kits and complete every single one of them regardless of the reason why they were put on doom status. The kit is the very wonderful 1/32 Hasegawa P-47. It goes together wonderfully well, has great detail and is a joy to build. So why was it relegated to the shelf of doom? A bit of history is in order. First though, here is the box art. Several years ago SWMBO was kind enough to purchase an air compressor and an Iwata Eclipse air brush for me. In addition, she bought me this kit. (I had asked for a 1/24 Vintage P-47, but she got this one as “Aren’t they both the same plane?” Got to love her.) I put this kit together, got it ready for painting. The red nose and tail was painted as was the black areas for the invasion stripes. I taped up the plane to begin to spray the bottom colour and realized I really didn’t have the skills to do the camo scheme on the box art. So, the kit was set aside so I could practice air brush skills on some other kits and not really muck this one up. Instead, I mucked up some other kits with just one colour schemes, put the air brush aside and went back to hairy stick painting for the next couple of years. This year, I began, in earnest, to try to force myself to use the air brush. This kit was prominent on the shelf of doom due to its size and all of the tape still on it after these few years. I still don’t have the skills to do this camo scheme justice, but you gots to start somewhere, you know. Off came the old tape, on went some new tape and the battle with this kit to complete it can be viewed here http://www.britmodeller.com/forums/index.php?/topic/234972146-shelf-of-doom-5-hasegawa-132-p-47;-decals-started/. For now, here is the outcome. And here it is in its new resting place with friends I am quite pleased with the outcome of this foray into my learning curve with the air brush. It went fairly well. I have another one of these in the stash and will not hesitate to build it. This is a great kit. As always, all comments are welcome.5 points
-
Bit of an update. Still got decals to put on and regretting using the kit roundels. I think the upper ones are too large and too blue, but I just want to get it off the bench now. Lessons learned and all that. Thanks to John (Nimrod54) for sending me some tail emblems as the kit ones are far too big.5 points
-
Thanks for the offer Ex-FAAWAFU, I think I have all I need,the only thing I am short of,if you have any spare,are the decals,but I suspect these are universally useful and you might need them for your project. This will move along pretty swiftly-the work on the fuselage took a couple of days,on and off,but I can't say what most of the bits were-just plastic card fashioned to resemble the photos I had. Merlin 5 by plastichacker, on Flickr Merlin 6 by plastichacker, on Flickr Merlin 7 by plastichacker, on Flickr Merlin 8 by plastichacker, on Flickr mtd5 points
-
My first build for this GB will be a 1/72 Kfir of the air force of Ecuador. This Latin American country received the first Kfir C.2s in 1981 and these aircrafts were used with success in the 1995 war with Peru, when one of them also scored a victory against a Peruvian A-37. Ecuador has since upgraded their Kfir to the CE standard, similar to the C.10 if not higher. I will however build a C.2 wearing the original green/green over light grey scheme. The kit I'll be using is this: How many will be wondering what manufacturer this is ? You're excused if you are since this is not really a big name... S Seminar is a Korean company that made a small number of kits. This in particular is simply a clone of the Hasegawa kit. Not too bad overall but lacks in finesse somewhat compared to the original Japanese kit. As with most clones of this type, it's main attractiveness is the price, I paid £6 for this only last year. The plan is to rescribe the raised panel lines, add a resin seat, replace the exhaust and detail the wheel wells a bit. I don't plan on adding too much here, the paint scheme is the main reason for building this one. Decals will likely come from my own laser printer, hopefully there should not be too much work to do on them4 points
-
Hi all, I don't know if this should be here but the Mods can/will move if this is not appropriate. Started building this years ago and in between other stuff modelling and life its been slow to get this far, however by putting it on here I hope I will find the time and motivation to get it completed. As you can see this is the Accurate Armour 1/35 LCT Mk4. My plan is to put it onto a base and tell a story of British troops embarking on the 4th of June 1944. With the addition of Italieri Dockside, Accurate Armour RN Hard slipway I aim to dress this with Resicast's AVRE's, Carpet layers, Box Bridge, Crabs and a complete Troop of 13th 18th Hussars, a LCM and possibly a LCVP or LCA. In addition to this a proportional amount of suitable figures. Anyway the story so far in pics; Sub assemblies built and brought together for painting and pre-shade. In paint but the decals are to come. Decals on so here comes the weathering. I am looking to represent a ship being used for about a year in continuous operations of training in the Moray Firth with 3rd Division prior to the embarkation for D-Day. As you may see the dock has sprung out of nowhere and a start has been made on the mass of figures. Also 13/18th tanks are taking shape with a BARV sitting on the deck for storage. To give a scale that is a pot of Humbrol paint on the front of the BARV. Layout possibilities are starting to take my time, I'm also checking what did go in on the first waves. Anyway hope you enjoyed my build so far. I promise to post 'when' things move on. Cheers the Woo.4 points
-
Here is the last one for this year, the Admiral's Wild Weasel. The kit is the 1/48 Hobby Boss F/A-18D. The model has a couple of issues. For example the fitting is not that good, panellines misplaced and some important details missing. The Eduard BigEd on the other hand fixed a lot of the details and Wolfpack provided the folded wings. On this model I use the salt weathering technique for the first time, not completely to my satisfaction, but it wasn't that difficult either. The base was scratch build with tie-down pods by Flight-line. The tractor comes from Kinetic. Marry Christmass everybody!4 points
-
Cheers guys. John, Tamiya XF-81 with an over spray lightened with white to give some tonal variation. Trying to get it done before Xmas day as the family need the dining room table back!4 points
-
4 points
-
Hi folks,just a quick update: finished the undersides of both aircraft but ran out of paint for the US aircraft after priming,here,s the RN version with it,s top coat on partly glossed and with a few decals on which I thought best to replace with spares apart from the tail marking and codes etc where I have to use the kits.many thanks for your interest.4 points
-
So the ointment is working, then?4 points
-
4 points
-
4 points
-
I had big plans for this year...some cracking GB's lined up and BIG plans for all of them...then we decided that it would be nice to move house, reduce the mortgage and render ourselves unto the vagaries of the English conveyancing system. All started OK and an offer was made and accepted within 6 days...packing away of model stuff started in anticipation of a move 6-8 weeks later. 8 weeks later, buyer pulled out after signing contract Process re-started and eventually after nearly 17 weeks, we moved. With work to do before modelling I reckon all-in-all I lost about half the year. The other story is this was the year I nearly built more non-flying things than flying things signalled by a move into 1/35 and 1/350 subs. Anyway, enough blether...here is all in order of completion...I did 21 in all - about 2/3rds of the previous year's. First up, my annual egg-plane fetish - SR-71 MiG-15 AH-6 Space shuttle P-51 The Airfix Icons of London - Lifeguard Trumpeter looking a little startled :-) (I put it down to inexperience in figures) Coldstream Guardsman Beefeater The next lot were ALL for the excellent Less than a Tenner GB - first up - 1/48 Testors 'Ike' in racing dio 1/48 Hobbycraft P-59A in USN garb 1/48 Testors Travel Air Mystery Ship 1/350 Hobbyboss Type IX-B 1/35 Tamiya 'Pink Panther' LR 1/350 Hobbyboss Type IX-C Next up - Training Types GB - 1/48 Kinetic T-45A 1/48 Kinetic KAI T-50 One for me - 1/48 Special Hobby Gloster E28/39 For the Korean GB - 1/48 Tamiya F-84G For me - 1/35 Kubelwagen in DAK colours 1/35 Mirage Hobby Polish Armoured Car 1934/11 1/35 Mirage Hobby Polish Ford TFc armoured car3 points
-
I don't usually keep records of what and when but have decided to make it a habit for next year. Going by dates of my pics on the PC, these are builds completed in 2014. Some of these were serious KUTA material. I think the XJ220 had been 90% complete for about 3 years! I also built 3 WW1 aircraft for a fellow IPMS Fenland member's memorial display. Sadly, these were not photographed. Not in chronological order but keeping to genre, more or less, here they are. Airfix 1/48 Spitfire PR.XIX Trumpeter 1/48 Whirlwind Airfix 1/48 TSR.2 built for the Spalding model club 'What if' competition night. (it won) Airfix 1/48 Spitfire MkI Airfix 1/48 Seafire FR.46, FR.47 and F.XVII 'triple build'. I juggled all three on the bench at the same time! Miniart 1/16 Hermann Goering figure, built for a WW1 Memorial display Some cars now, my principle modelling genre. AMT 1/25 Lotus 29. I built both Dan Gurney and Jim Clark cars from the 63 Indy 500. Tamiya Toyota Supra and Hasegawa Mazda Le Mans for the IPMS F1 & Motorsport display at the Nat's (50 years of Japanese Motorsport) A pair of Fujimi Porsche 917's The Gunston car has decals form BVH in Germany. The 1970 LM winner is pretty much OOB. 1/24 Cooper T.51 resin kit from Fernando Pinto Modellos in Portugal. Turned out to be a tribute to Jack Brabham. Merit 1/24 Connaught B type. Pretty much only the top and bottom half of the body was saved. Oh, and the seat! Completed as the Rob Walker owned car. 1/24 Lola T.70 by Roaring Replicars (Richie Griffiths) I did a WIP on this but realised today that I forgot to post in RFI - Doh!! 1/24 Revell Shelby Cobra 'scene' with figures from the kit, Ken Miles and Caroll Shelby. A 1/12 driver figure to go with an upcoming Lotus 49 build - Tasman Series - squint and pretend this is Jim Clark.... Another Fernando Pinto kit, this time the Porsche 804 driven by Dan Gurney. 1/24 resin kit. Tamiya 1/24 Jaguar XJ220. Finally finished after spending a few years on the shelf of doom... Revell Mustang Fastback built for the IPMS Car & Motorcycle SIG 50 Years of Mustang at the Nat's. Finally for this year, my li'l Mini Cooper Britax racer.... Probably one of my most prolific years since childhood, I have had a lot of fun with my modelling this year Thanks for looking. Steve.3 points
-
Hello, At the end of 2013 a new magazine appeared on Polish market to celebrate 75th anniversary of Defense War in Poland, 1939. It is called "Wrzesien 1939" ("September 1939") with subtitle "First to Fight". Recently number 19 was issued. Every issue consists of thin magazine and a box with a plastic model in 72nd scale. 15 issues had vehicles in the box and last 4 were issued with set of soldiers figures. I'm generally interested in aviation, but I decided to collect the series (they cost just about 6 USD each) and here are the first 7 models I managed to complete. Group shots: Individual shots - I'm putting just one or two pictures of each vehicle to keep the topic smaller. You can see more if you click the photos. Polish tankette TKS: In the series there are also other variants available: TKS with 20 mm cannon, earlier model TK-3 and artillery tractor C2P. PzKpfw I Ausf A and PzKpfw III Ausf E: In the series also PzKpfw IB, IIC, IID tanks and SdKfz 265 command vehicle were issued. Renault FT-17 "Irena". I have changed the painting scheme to depict the vehicle from 1st Tank Battalion. Lvov (then Poland, now Ukraine), late 1920: Fiat 621L of 10th Cavalry Brigade evacuated to Hungary, September 19th, 1939. Two models of Fiat 621 were issued. Basically the same kit, just AA gun was added in the second kit. Two Wz.34 armored cars with different armament, side walls and camouflage style: The kits are simple (they are designed for wargaming) but very well molded. No fitting problems and nice result when finished even without modifications.3 points
-
An average - 5 builds for me in 2014. But with all these new kits coming out I really need to up the build rate to eat into the stash. First off - Steggy - A Tamiya Stegosaurus, which my first go at vegetation. Next was the 1/48 Airfix Lightning F1A Then, after a 6 month odyssey - A 1/48 Hasegawa F/A-18A Hornet. A couple of quick builds followed to make up the numbers - First was 1/48 Eduard/Airfix Spitfire Mk 22 And to close out the year a 1/48 Tamiya 190A8, built in 2 weeks.3 points
-
Hi all, After a little gentle persuasion from Claudius here is one of my earlier builds which has not been shown on here before. It seems Claudius and I (and I am sure a few more of you) share an interest in the war surrounding the Mediterranean during WWII. Claudius has asked me to inflict some of my builds on the theme on you, so here we go with the first one... This is Revell's boxing of Hasegawa's excellent Henschel Hs-129 finished in the markings of the aircraft flown by Staffelkapitan Oblt. Bruno Meyer of 4.(Pz)/Sch.G2. This aircraft was later captured at Castel Benito. I hope that you all like it, all criticisms and points of view are welcome.3 points
-
This is the best place I can think of for asking this question... Whats this from? Excuse the sanding down, I had plans for it... You may just be able to make out the "Electronique M Dassault" marking inside along with the multi-pin plug. Its currently employed as a rather potent subwoofer, as you do, Im just curious as to what it may be from. Any ideas?3 points
-
Something British at last! Not-so-famous-but-very-interesting-anyway long-range FAA fighter Fairey Fulmar. Fought epic battles with Regia Aeronautica S-79s in the Mediterranean skies. 1/48 Special Hobby if I am not mistaken. Always loved FAA liveries.3 points
-
The Avro Shackleton has a big place in my heart, and for very big reasons. You'll have noted my Avatar is even a picture of a shack Ever since I was a young kid of 8, I was captivated by the Shackleton, my grand father served on the aircraft for many of his years as a navigator/ signaller, His living room was full of framed Shackleton pictures and artwork, he was based in the RAF at St Mawgan (which is how we came to be in cornwall), and also in squadrons all over the world inc 205 squadron in Singapore. He told me many a stories, about flights to Egypt, to the middle east and how a restored shack came to be stuck in the Sahara, in the early 90s, which is still there I remember a story he told me about a SAR mission in the far east to find a missing Shackleton that unfortunately went down in the Indian ocean, or south china sea, They eventually found the area the plane went down after a local fisherman wrote the words B205 on the beach with sand. We lost my grand father in 2010 and after we cleared everything out I found his log books which are now in my hands, a few pages I'll share with you. His flight logs, a picture of the shack he flew on and a picture of B205 written in sand on a beach. http://www.westbriton.co.uk/servicemen-mark-50th-anniversary-air-crash/story-11459592-detail/story.html I have been wanting and waiting to build a shackleton for him for many years, and so wanted to before he passed away, when i was a teenager I built him a revell boxing from a frog kit man years ago, but that was when my skills were poor and it was a complete mess, I have been waiting for a state of the art Shackleton model for a very long time, if anything but to give me closure on losing not only my grandfather, but a friend and the person whom inspired my interest in aircraft. Thank you Airfix and thanks everyone for reading. I'll be building a dam load more than 13 points
-
Thanks a lot guys. I've always said that being a bit mad and crazy makes a lot of things easier in life. I finally worked up some courage and went to work with a few different washes to bring out the weld beads and get some life into the still very toy like thing. I decided I had made enough at this point. The exact content in the four periscopes is still highly classified even 46 years after the battle, and watching the documentary film reveals very little. I had to work with what little is known and apply some artistic license. Now the whole known crew is on board. Gloss, flat or something in between, that has been a question for some time. I think that gloss is unlikely and I still want to kill the bath tub toy, so I decided to try a flat coat. It looked good enough to make me remove the window masking for what is hopefully the last time. Not much left to do now.3 points
-
This is gradually crawling along to a conclusion. I have fitted the tailplanes, not wanting to trust a butt join I decided to use some pieces of micro tubing to get a positive fit. The undecarriage legs and doors have been fitted. Today I have added a couple of struts from the nose leg to the nose undercarriage door and aerials to the nose, canopy and aft of the cockpit. The carpet monster has also had another meal having devoured the little box shape that appears to be on one side of the forward canopy, I managed to lose this while bending it to shape. Tailplanes fitted using micro-tubing for a positive location. Aerials fitted. Next up is to paint the aerials, fit the canopy and try and do something to tidy up the anti-glare panel.3 points
-
I think we do all need to chill out, but at the same time I don't there's anything wrong with calling a spade a spade ( can you still say that?), and conversely - its your spade so dig with it how you like. My often stated view is that I think customers deserve better from manufacturers who churn out inaccurate models, knowing that for many if it "looks like" something it will do. I simply believe that we as customers deserve more than this rather condescending attitude. But if the manufacturer doesn't actually care - then there's little we can do - other than wail and moan of course. Which is what I'll carry on doing until someone there listens or Hell freezes over. I do realise I have more chance of catching Old Nick with a pair of ice skates though- alas!! Jonners3 points
-
23/12 update: After dropping Gustav on the floor and doing some repairs work proceeded with the decals which on day 3 is rather mind numbing work To have some fun I fitted the leading edge spoilers and added some smoke marks from the exhausts There are three places with distinct silvering, (which I take as a major insult ) Have to fix that.3 points
-
Not much to report, been working on the Sword T5. Have masked off in prep for the LAG on the fuel tank and under the wings and tail planes - then it will be another m ask, MSG to the rear of the tank. Then more masks and the main Barley grey on! Then the red - some way to go, with not much time left. Will be a push but will try to complete. Got the decals on the Redtops as I was decaling the T5: Gonna have to get out in the garage and get that AirBrush to work!3 points
-
Today's work - first off, lots of masking tape.... Then spraying xtracrylics - still don't like these paints :-) Then unmasked, touch up, and spray a coat of klear over the top Peter3 points
-
okay, we've got the toilet seat, the fire extinguisher and the seat belts. Three items every man should have in their chunderbox - now, just where does the toilet roll holder go ?3 points
-
Hello guys! Some news wiht the wing roots. Avec cutting and filling spaces: Fabrics are made with fine scribed plastic card: In order to depict something like that: primeportal Setting the fabrics: And done: The movable parts will be dismountable in order to allow the wings to be dismantled too: And a coat of tamiya white: I also spent a few hours on the ejector: I reworked the scribed line by filling them with alclad primer dispensed by a syringe. After some sanding and minor scribing I added some rivet lines: Bye!! Romain3 points
-
Bill, they're terrific, I really like the dust on the coal wagon, very effective where it isn't anymore after the sack has gone! I wish I'd remembered to go back & have a look at it when you mentioned them at SMW, will definitely have a gander next time! I know you say you can't do a dio with them now, but how about just a small base with a bit of street & the front wall of one of those fantastic old pubs as a backscene? With a tired old Clydesdale pulling the coal wagon, that would look superb! Really nice work there mate! keith3 points
-
Trumpeter kit with WEM photo etched details. Enjoy the pictures.3 points
-
Not wanting to cause Rick any undue consternation, and messing up his list on page one, I have changed my mind. After a chat, and a stash raid, I have decided to build....... the Lady. This ones for you, Rick.3 points
-
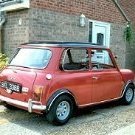
Latest finish for me and probably my last for 2014, Tamiya 1/24 Mini Cooper S converted to MkII spec (apart from larger rear window) Britax campaigned 2 (Class cars driven by Gordon Spice and Steve Neal and finished 5th overall in the championship. This has long been one of my favourite racing Mini's and, thanks to Rich Middleton who made the decals for me, I've finally been able to add it to my collection. To convert the car to MkII spec I used the rear lights from a diecast model, front grille from the Fujimi kit, the badges were scratch made from plasticard and wire. Paint is Halfords Fiat Broom Yellow and general gloss Black. Side windows were replaced with clear sheet as the kit parts are very thick and my kit had mould marks in one side. The model is not highly detailed as I decided to glue the bonnet shut, this made it easier to use the Fujimi grille. Anyway, my goal has been achieved and I am more than happy to have this little racer in my display cabinet. Thanks for looking. Steve.2 points
-
2 points
-
2 points
-
The kit's wheel wells are the best rendition of this area in any Bf109 kit I've seen,apart from the magnificent 1/48 Zvezda Friedrichs !They're only surpassed by Radu Brinzan's brass jewels which I'm currently using on a Hasegawa WIP and that I'll use as reference to further detail the Revell UC bays!To the ones that would try their hands at Radu's UC wells on this kit I'd say that it can be done if you measure three hundred times and cut once! Ciao by now Manu2 points
This leaderboard is set to London/GMT+01:00

















.thumb.jpg.76f12b87ce9ca9929c9aabdcf8f9d2dd.jpg)


