
Leaderboard


Popular Content
Showing content with the highest reputation on 27/10/14 in all areas
-
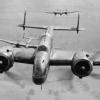
Here is my latest completion, it is the Finemolds 1/72 Messerschmitt Me 410B-1/U4, well that's what it says on the box anyway. The colour profile of it in the Yellow Series book on the Me 410 states that it is a A-1/U4. Built mostly OOB but with replacement aerials and pitot made out of fuse wire, brass tube and guitar string. The gun barrel is the Finemolds turned brass version. The fit of the fuselage halves and the engine nacelles weren't up to Finemold's normal standards, in fact the fuselage halves looked like they had been mastered by 2 different people in 2 different factories and the engine nacelles are well known to be oversized. Painted using Mr Hobby paints which normally work very well but I had a bit of "orange peel" appear and had to respray some parts. Decals are a mix of the kit's and from the spares box to make up the serial number and the small codes. This model took quite a long time to complete as my enthusiasm for it would wane at every step so it had many visits to the shelf of doom but I got there in the end. I didn't use my normal method for masking the canopy so it's a bit rough and the aerial is at an odd angle where it joins the fin but I just wanted to get it finished finally.14 points
-
one year passed.......better kits waitting.......14 points
-
Back in March of this year I was in the middle of some practice builds to get my limited skills ready to build a 1/48 Eduard Mk.IXc, Spitfire. One of the practice kits I purchased was this 1/48 Mk.XVI from Revell - the first 1/48 kit I'd ever attempted. Before I'd started it Dreamcatcher began to build the very same kit and luckily he posted his build in the WIP section. This turned out to be brilliant because, once I'd started mine, it became like our own mini-group build with expert advice from numerous other Britmodellers. Miggers was especially helpful - he provided both Dreamcatcher and me with loads of information plus tips and tricks to help make this kit the best it could be. Thank you Miggers. I'd planned from the start that I'd build it with the engine on show so I purchased some Revell ground crew figures and made up a small base to display it on. The WIP for my Mk.XVI can be found here: http://www.britmodeller.com/forums/index.php?/topic/234959827-another-revell-icm-148-mkxvi-spitfire-base-and-ground-crew-finished/ Dreamcatcher's excellent WIP can be found here: http://www.britmodeller.com/forums/index.php?/topic/234959134-spitfire-mkxvi-revell-icm-molds-148/#entry1602360 Dreamcatcher's RFI for his brilliant Mk.XVI can be found here:http://www.britmodeller.com/forums/index.php?/topic/234969551-revell-spitfire-mkxvi-icm-molds-148/ And here is my Mk.XVI: All comments and suggestions welcome. How my Eduard Mk.IXc turned out can be seen here:http://www.britmodeller.com/forums/index.php?/topic/234967960-eduard-spitfire-lfmkixc-ml135-yod-no401-squadron-as-flown-by-jerry-billing-on-7th-june-1944-b-w-photos-added/ Kind regards, Stix10 points
-
I was offered this kit very cheaply and decided to have a go at redoing its slightly thin engine. Like Topsy it just growed from there. Some after market etch inside the cabin includes the floor and rear wall and the instrument and switch panels. Nothing else from the AIrwaves Wasp/Scout set was used, ah, except the seat belts on the scratch built seats. The missile launchers and missiles were scratch built and thanks to Steve (worm) I had lots of information to get the details right from. All the clear parts have been remade as Airfix didn't make all the bulgey out bits that the real machine had. The WIP is here http://www.britmodeller.com/forums/index.php?/topic/234964193-airfix-scout-ah1/ Here is the Scout, good stuff courtesy of Steve and others, mistakes were all mine. I was told there should always be a money shot Apologies for the crappulous nature of the pictures, I'm not much of a photographer either .9 points
-
When the X-35 program turned into the F-35, the X-35B was bought for use by the Empire Test Pilots School, to enable training of prospective test pilots on 5th gen and STOVL aircraft. Panda 1/48 X-35B. Strangely, although you get all the relevant doors and intakes/exhausts, the rear nozzle only comes in aft position. I cut and repositioned it to suit.8 points
-
Hi, A second Ju-86 of my shelf. Together with high altitude recce version (Ju 86 R1, which I posted recently) I did also much smaller conversion of civil Z-2 into Z-7 converted then into bomber in South Africa. Depicted "647" was one of such machines. She served in 12 Sq of SAAF, Ethiopia 1941 acting against Italians, I guess. There are discrepencies in sources on top wing roundls ("A1" or "B" - I have chosen A1 roundels, since on some poor quality photos those marks has some bright fragments which can be interpreted as sight of white form A1 mark. Now there is a conversion by Kora, but I did it in 2002, and those days I did not know if there was any ready conversion, so it own work. The nose symbol is hand painting on decal, other decals are from a drawer. Brush painting. Please enjoy and comments are welcome Regards Jerzy-Wojtek6 points
-
Hi everybody, Here is my new Suchoi T 49 from AMODEL, again a tricky kit, difficult to put together, but the result was worth the challenge : look at the plane !!! Putting the air intakes together was the hardest part of the kit, they must fit very nicely and be absolutely symetrical. A side view : We can recognize the SU-9 except for the long nose : View from the front : astonishing design !!! And a last pic showing the little family, from top to bottom : SU-11, T-49, SU-9U and SU-9 A bientot, Critics and comments always welcome Pierre6 points
-
Hi here comes my first article, here on Britmodeller.The chosen subject is my Hasegawa P-40E.It is one of my favorite aircraft and like so much other WW II fighter types a must.The Hasegawa P-40 don t fall together, if you follow the instructions you run into very serious fit problems at the rear fuselage and aft of the canopy.I created completed fuselage halfs and close after this the fuselage, the gaps on the spine are better and easier to fill. There are also fit problems with the wing guns. After this it is a trouble free build and the completed kit look razor sharp like the real thing. For the markings i choose the plane from Robert L. Scott, commander of the 23rd FG in China. I found some interersting pictures on the net and the plane looks relative well maintained, for a combat aircraft. My preshading works only on the underside and i made a black wash only on the access panels. If you look at an aircraft in a “1/48 distance” you won t see much of the panel lines, so i left them untouched. The gun sight came from a PE sheet from Extra – Tech ( german gunsights !! ) The antennas are stretched sprues. The kit was done around spring 2014 and it is still my newest 1/48 plane. The decals came from a Sky Models sheet, printed by Cartograph. They worked very well, beside a fitting problem with the sharkmouth.There is also a picture with an earlier build Hasegawa P-40N, you can t have too much P-40s I hope the sizes of the pictures are o.K, hope you like it Bernd6 points
-
Hey everyone, after some time i had just a bit of time to work on some kits again, so i decided to pick Airfix 1/72 P-40C and build it straight OOB. Only additions are rivets, wires on U/C and antena wires, which i managed to break like 10 times during taking the shots and my nerves were not strong enough in the end, so the wires are left a bit loose.. At first i wanted realy quick build, so the cockpit was quickly painted, washed and thats all.. As i changed my mind during the build and wanted to play a bit with the surface, the result is, the cockpit is now quite shiny compared to rest of the build. Well, happens. Also i managed to break one of the gun barrels during weathering Few shots from the build (there was no WIP this time on BM, because i did not have that much time) - i was using the hairspray technique, so silver base, hairspray, zinc chromate yellow primer (mix of ZCY + drop of green, both gunze), chipping where i wanted some later chips straight down to the bare metal. Next step was sealing all this with coat of varnish - do not do the same mistake as me and do NOT chose gloss varnish.. the next layer of hairspray/chipping fluid wont hold good enough on it and you llhave problems with spraying the next paint layers.. However, once the varnish was on and dried, i did apply layer of mig/ammo chipping fluid, followed with the camo paints - grey and green gunze (green was mix of US interrior green, RAF green and drop of ZCY), brown tamiya (mix of redbrown and dark yellow), airbrushed free hand, only the bottom/top line was done using tamiya tape, as i ran out of blue-tac. After that i did the chipping, using scalpel, brush and for the rivets enhancing i used waterproof sandpaper, pushing very gently on it. I then sealed this all with gloss varnish, for the next steps. Weathering was done as usualy, wash (top medium brown, bottom storm grey, both from ammo RAF PLW set), very gentle oil paints fading, to not destroy the chipping and next i did try pigments to give it dusty look (mix of dust, sand and earth pigments), mig dust fluid for the white-ish mark on fuselage behind cockpit (under the fuel caps), fresh oil leaks by ammo and brown/black oil paints for touches here and there. Exhaust staining is done by black and grey pigments. Exhausts weathering was done in few steps - metal base, followed by few washes of warious rust colours, next some brown and grey pigments dusting. I was not happy with that, so i gently drybrushed some dark steel paint here and there. Still not where i wanted to be, but i did not want to screwit even more Few images from the build here then - the next shots are after the paint job, before weathering. And here she is finished. I m sorry, the photos are a bit blurry and dark, i cannt make better with phone.. guess i ll have to write letter to Santa as the xmass are comming... As i said, one gun barrel was broken during weathering and the antenna wire is a bit loose, because i repeaired it so many times, the heat did not want to strain it anymore Thanks for watching guys and any tips or comments are welcome6 points
-
Hi, this is the first time I post something in the RFI. Not just because I seldom finish anything but because I was building this when I signed up for Britmodeller and simply could not enter a German subject as a first contribution I am not sure if some WIP pics are OK in the RFI section so I am sorry if it is not... The interior was detailed with aluminum foil in which the corrugation from the plastic parts were pressed - as the interior fuselage was perfectly plain. The kit seat was replaced with a spare Barracuda Albatross seat on which the corrugtion was simply painted on.: Fitting wise there were a few but nasty gaps around the wing to fuselage and on some fuselage seams. But I found it pretty easy to fill these with streched sprue: Paints were custom mixed (to match the Methuen colours given in Windsock Datafile) and demarcation done with BluTac on the corrugation: Decals are the most rigid stuff intended to put on a model I ever saw. I tested everything including heat and pressure untill the plastic almost gave way - not so the decals. I really whished there would be some aftermarket decals. All Balkenkreuze were either masked and painted or (on the fuselage) the clear carrier film was painted over after the decals had dried. The decals for the text on the fuselage sides were the most difficult ones and as you see there is still a lot of silvering. The final clear coat was mixed as per instruction with IPA (the stuff you do not get in a Pub) but dried with an obvious white. After the first shock I though it does not look too bad - could be calked out paint (which is unlikely) or so: Hope you like it. Rene6 points
-
Hi, my name is Bernd and i have a Britmodeller account since yesterday active, so here is my first AFV on this forum. Revells Challenger is a very nice kit to build, fit is good and no real problems, except mine were discovered. The “baskets” around the turret were replaced with photo etched parts from Extra Tech. Here comes the injected plastic moulding technique to its end. That was VERY fiddly, it didn t help, that the assembled turret falls out of my hand during detailing, this was a moment the heart stands still for a second. The front baskets suffered a highly visible dent, so we have combat damage:-) The tracks are built from the usual single links/length tracks systhem. It is always exciting to close them, and see they get together (works not every time) The green was sprayed on, the black paint was hand brushed with thin layers of black, a dark wash a lot of dry brushing followed on. A major set back were the decals, the “SFOR” markings were black, should be white,i didn t find Royal Army markings, so the side skirts were sprayed with a lot of dirt/n/mud making the missing markings nearly invisible(hope so). Is there a decal producer outthere, who makes British Army stuff?? I hope you like it. Bernd5 points
-
Hello everyone, here is a montage I made there a year and a half. Still Hasegawa model I begin to know by heart. I leave make you appreciate. thank you to you didier5 points
-
No time to sit at the modelling bench this last week, so I pulled a bit of maintenance on a couple of old favourites. Completed these 9 years or so ago just as I made the move to brush painted Tamiya acrylics. They are the Airfix Spitfire VIIIc (I think this the old Otaki kit?) completed straight out of the box and the Academy XIVe with markings from Aeromaster (Last of the Legend Pt 2). Apologies for the nots so great photos, was in a bit of hurry. Thanks for looking.5 points
-
Hi guys, thanks for all of the kind words, as always, very much appreciated. Ha ha, I don't know who's beating who Roger. Every time I pick the model up and check a reference I find something new to contemplate and cogitate on Hi Rene, I imagine the 1/48th kit will be nice. Good luck with the GB. Any idea as to which racer you will model? Given it's size, this aeroplane would be an ideal candidate for 1/32nd scale (or even 1/24th scale....are you listening Airfix? ) Hi Tomoshenko, many thanks for the generous comments. If I'd have realised what was involved before I started I probably would n't have opened the box but I'm commited now (or should be perhaps?) so I'd better try to see it through. If Airfix ever release a new tool I'll probably build another. Hi Karl, thanks for stopping by and adding your support, much appreciated. I'd love to be happy to build out of the box but many times I find myself tinkering. The thing is, if the kit does n't look like the full sized bird then I'm not keen on having it in the cabinet. Whether this one ends up looking like the full sized item remains to be seen. Those horrible gaping holes in the front of the engine nacelles took some thinking about. In the end there was nothing else for it but to dive in. Adopting a strategy of a bit at a time I started by enlarging the uppermost hole. I filled these using discs punched out of plastic extrusion (Evergreen strip). I filed an oval recess into the leading edge of the right hand side of the engine cover cowling in readiness for re-shaping using green stuff. A vertical centre spar was filed to shape and inserted. Next, I cut out a rectangular section of the left hand sidewall on the leading edge of the lower hole. I then boxed this in using plastic sheet. It's a bit rough at the moment but once the glue has set I'll smooth this out a bit. Here's a comparison with the original kit part. (Is it my imagination or is the nacelle on the right of the image laughing at me...?) I also took the time to re-shape the right hand side a tad. Again, comparison with the existing shape shows a subtle but noticable change. It feels as though I've made some progress at least. There is still plenty to do around the engine nacelles before I get to the undercarriage. Talking of the undercarriage, the kit wheels and tyres look a bit odd. Does anyone have any ideas for possible replacements please? Until next time,.... Cheers.5 points
-
In the early fifties the Soviet Union was attempting to develop an integrated intercept system. After a couple of false starts, due mainly to the lack of a suitable engine, the MiG I-3U appeared. According to the description in the kit this first flew in 1956 and testing took place during 1956 and 1958. However according to the book 'MiG - Fifty years of secret aircraft design' by Belyakov and Marmain there were continual problems with the engine and the project was terminated before it flew. I probably would not have bought the kit had I known this but I only discovered it several years later. I have fascination with the ‘Heavy MiGs’ that appeared in the 50’s and early 60’s so when I saw this kit was available I had to have one. I was positively excited when it arrived to find that there are plans to produce kits of the rest of the series. Be still my beating heart…. As they say, ‘be careful what you wish for…’ there is a warning on the box about it being a limited production item and the instructions warn that it is designed for experienced modellers. Presumably those with their analyst’s home phone number or a resident nurse. There is something of the curate’s egg about this one as initial impressions were quite favourable. The surface detail is good and the main parts fit together without too much trouble. I didn’t like the way the top and bottom of the wings fitted together as there is an ugly joint along the top surface where it meets the flap section, which is part of the lower surface. Fitting the wings to the fuselage required some carving to get them at the same angle of incidence, the same dihedral and the same fore aft position. I got so concerned with the first two that I didn’t get the last one right. Fitting the cockpit and nose cone was a nightmare, requiring much carving to get them to fit. This is complicated by the nose cone NOT BEING IN THE CENTRE OF THE INTAKE. Guess who failed to notice this until it became obvious that something was very wrong but fortunately before too much had been cut away and glue applied. The instructions would have you assemble the cockpit, nose cone and nose landing gear in one piece and fit them to the fuselage. I couldn’t do this and had to cut away a lot of cockpit sidewall to get it in such a position that the pilot’s seat was sufficiently high enough for him to see out. Nothing was said about nose weight but there is plenty of room for it around and aft of the cockpit. The rest went together without much trouble but I did replace the monstrous pitot tubes with ones made from tube as I couldn’t see them surviving in their original form. According to photos there should be small fins fitted to them but I didn’t think that my fumble fingers were up to anything that delicate. The finish is mainly Alclad aluminium over matt black acrylic with various panels in different shades to try to avoid that ‘aluminium tube’ look. I had some problems with the decals. The instructions call for the under wing ones to be put on back to front. The ones for the fin looked a bit too big and were replaced with ones from the spares box. These used a different shade of red so I replaced the lot. I also had one of the originals break up so take care if you use them. There are a couple of boo-boos. The air intakes around the rear fuselage are not correct and the finish is a bit rough in places. My excuse is that I rather hurried through the build after being afflicted by ‘getonefinished-itis’ after a rather frustrating time with a number of other projects grinding to a halt. I hope you find this of interest. Any comments, positive or negative, are welcome as they may help someone else. John4 points
-
After multiple setbacks, un-cooperative decals and the joy that is Xtracolor enamel, here is Pilot Officer Abdul's mount, the lesser-spotted-not-sand-camo Spitfire ixc from the truly ‘orrible 1/72 Airfix kit (WIP here): Port Starboard Front: A touch heavy on the panel wash but all ended well if not exactly an IPMS show winner. The Begemot printed decals were truly terrifying as they actually decompose when using Microscale or Gunze solutions, it turns out you need near boiling water. My first ever finished model worked much better with OOB decals and Mr Softer. Had a bit of nastiness inside the canopy from when I stuffed it with it blutac while I masked. Also a lot of chipping when I removed the BMF masking, should have done the new scalpel blade releasing thing. Now some fun stuff: Teeny tiny nav lights made from 0.3mm stretched clear sprue and Tamiya clear. Even teenier rear light! A pointless scratched mirror with 1 mm BMF chrome reflector, note how 1mm thick canopy perfectly hides all the scratch building I lovingly did in the WIP. Over scale but fine looking but twangy Ezline aerial, yes it actually does go twang when you pluck it. Loved using Rustall to do the exhausts: So what have I learnt? Good modelling takes practise and patience: You don’t get be Mish or Nigey Heath overnight. Everything is fixable, even if you have to fix the fix. Xtracolor is nothing to be frightened of. Modelling is a hoot compared to abseiling or playing a blues gig in a pub full of well lubricated punters who have good throwing arms. And the most important thing , keep going till you finish: As Ray from Plastic Pastimes said to me on Friday, “there are no bad kits, only lazy modellers”. He also said a lot of other things which would lead to me being arrested if I tried to repeat them here. And finally, one of those lovingly Photoshopped-to-near-death beauty shots before I embark on my next wee styrene adventure; Good night and good riddance.4 points
-
Hey guys, some of you already said Hi in the welcome forum and so here I am presenting, as promised, my modelling comeback after probably more than a decade. Back then I basically never used putty or anything special when I modelled my airplanes, often painting canopy lines free-hand with a brush. In other words, I was young and had no idea... Long story short, I tried ALOT of new things and failed miserably!!! But it was learning by doing and the most important thing: I finished it (certainly not a good finish though) First time I tried: sanding something off (it worked, but it's still visible) using 10 year old Tamiya putty and then NOT sanding it off enough (wing joints) masking canopy with tamiya tape and scalpel (well...the colours were probably 20 years old and way too thick and crappy) using humbrol spray cans (no airbrush at the moment) using clear coats (and then the wrong ones so the decals silvered ... :-S) and so on... viewer discretion advised (at the last picture. you can see all the putty) Anyway...here she is. The next one will be way better!! I promise...I read these forums. I read magazines...it will get better4 points
-
This is my interpretation of the Hobby Boss FM-1 Wildcat it's finished as an FAA 882 Squadron machine operating off HMS Searcher in the Mediterranean, summer 1944. Apart from difficulties with the undercarriage it's been a very enjoyable build. The issue with the kit is the somewhat vague drawings in the instructions which gave me problems with the undercarriage as some parts wouldn't fit. I then had to resort to dismantling and trimming in places that wouldn't show. Never the less all in all I think it looks the part and I've tried to replicate the freehand demarcation between lower surface and upper surface colours that seem to be so typical of the FAA. Hope you like it. Mike4 points
-
I wanted to do a subtle weathering for this build but due to the instructions not telling you that you can't build the engine if you want the engine covers on it took a bit of fiddling and filling to get them to fit and unfortunately that's not a strong point for me so to try and hide the errors I heavily weathered it Feel free to to comment/criticise:)4 points
-
Hi everyone ! This is my last completed model . The italeri kit is not that good but it gives a good model if you spent some time on it . Painted with AKAN ( the two greys ) and Gunze ( for the green ) . Weathering with artists oils . Hope you like it !!! PA260181 by nionios_v, on Flickr PA260184 by nionios_v, on Flickr PA260183 by nionios_v, on Flickr PA260180 by nionios_v, on Flickr PA260177 by nionios_v, on Flickr PA260176 by nionios_v, on Flickr PA260175 by nionios_v, on Flickr PA260191 by nionios_v, on Flickr PA260188 by nionios_v, on Flickr PA260185 by nionios_v, on Flickr4 points
-
Day two of Nomore Shelfspace's posting blizzard. This is probably my best aircraft model, a Convair XFY-1 Pogo from the KP kit. This a/c was a VTOL concept designed to provide the fleet with a point interceptor that could be carried aboard a warship using only a helicopter type landing pad. In practice it was difficult to land and overpowered with its twin YT-40 turboprop engine! The pilots seat swivelled to give a better position for take off and landing. Despite some positive results the project was terminated in 1955. One example survives. This is actually the second Pogo I did - the first one was the KP kit built straight from the box. Then I bought the Naval Fighters Number 27 monograph... which proved the kit was only accurate in outline, more or less. So I got another one and started rebuilding it. Mods include totally new cockpit, reshaped spinner, re-scribed panel breaks, new air intake under the fuselage and a scratchbuilt lower landing gear structure - the fairing over this was removed for test flights. One material I used for this was Alteco, a cyano putty made by mixing slow-setting superglue and a white powder - it's Japanese and I no longer have any, but it was good for filling/rescribing because it was fairly thin in consistency, making it easy to apply to flat surfaces, and didn't crumble when worked on, although like all putties it needed a primer coat/sand before painting. I think the paint was straightforward Humbrol sliver, could be wrong - it was made over ten years ago! Decals were half kit, half from spares - the stars and bars on the sides were too big, as were the Convair logos - I had no Convair logos that were the right size so I hand painted them!!4 points
-
That's wot the inertial platform wos for wasn't it? To do the brainy Nav bit. Certainly the only brainy bit in my Jag cockpit was the Nav kit......And come to think about it - most of the Nav kit was probably buried somewhere else in the jet and not in the cockpit at all. So no brains in the cockpit! Anyways. I don't much like putting the transfers (oops I mean decals) on..... It's been slow going. Partly cos I don't like doing it, partly cos there seems to be lots of variations between JPs as to the details of the minor markings and I have to check everything twice, and partly cos the Airfix decals keep falling apart on me. The JP5 has black squares around the wing tank refuelling points thus: I hadn't noticed or planned for that and I realised that I'd scribed a couple of circles in the wings, relying on I can't remember wot, as a guide that were probably meant to be the refuelling caps - but were oversized and in the wrong place - and so I had to fill em thus: And then fabricate the refuelling caps. Drilled a hole in each wing in the correct spot: Glued in short length of rod - and trimmed and sanded it so it just stood slightly proud: The Airfix decals represented the refueling cap merely as a white circle. So they got punched out: Then primed the refuelling caps and a squirt of Alclad: And matters were replicated somewhat better: A drop of yellow umber oil paint will probably finally finish it off. This is where I'm up to with the 5. The 3 lags behind but will take less time as the CMR decals are pretty comprehensive: Steve4 points
-
RB.57B 52-1567. This Canberra was one of the ex ANG B.57 that were quickly reworked by Martin to bring them back up to the combat standard to replace combat losses. The ANG units that this and many of the other B.57’s were drawn from were mostly operating small numbers of RB.57B and C’s A brife history of 52-1567 follows: USAF 405th BS (38th BW) Nevada ANG 192nd TRS.Kentucky ANG 165th TRS.1965: USAF 8th BS Transferred to the South Vietnamese AF. 4/1966: Returned to the USAF.1969: USAF 8th TBS (405th TFW). 15/3/1969: Crashed after a dual flameout on approach to Phan Rang AB due to AAA damage Both crew OK. The build was meant to be a quick out of the box build of the Italeri B.57B but as it turned out it took me longer than planed due to real life getting in the way. The build such as it was can be found here, http://ipmscanberrasig.webs.com/apps/forums/topics/show/12991150-yellow-bird-rb-57b-italeri-b-57b- I've tried to capture the war worn look of the hand me down Canberra's passed to the RVAF. One thing that as come form the build has been an increase in my annoyance at the shape issues with the kit, but I guess I will have to live with them until some one comes to out rescue! Any road here she is! Thanks for looking John3 points
-
Finished at last, the Renault Estafette 800 kg high roof in 1/24 scale. This one is built using a quite rough resin body and chassis and two photo etched parts from Airtrax as the base. The body had more or lesser rework done to every area and detail and the high roof was 3D-printed from my own model. All parts are either scratched or made using modified base parts from a Quattroroute Dauphine, Heller 4CV, Tamiya A110 and Tamiya 2CV. All decals are from my own artwork and printing. It's built as it could have looked when used by the local Renault garage back in the early 60's. There is a build thread here. I hope you enjoy her.3 points
-
Hello ! It's time for me to publish some pictures of my last build, a 1:48 Spitfire Mk.XVI from Revell (ref.04661). The reproduced plane represent the Spitfire Mk.XVI serial TB247 - coded GW o W which belonged to the 340th RAF (Free)French Squadron near the end of 1945. This plane was piloted by Mister Jacques REMLINGER that i had the chance to meet many years ago. As there is no existing decals set to reproduce his plane, i had to create all the markings and to print them on water decal paper sheet. The genuine kit is designed to allows only two options : - All the engine cowl parts closed (and no engine in the plane) or - All the engine cowl parts removed and so, in this case... the plane is fitted with his Merlin engine. I was not satisfied with these choices, so i decided to modify many parts of the kit in the purpose of allowing the engine to be mounted in the plane's airframe AND to be able to be hidden behind a removable engine cowl pannel. The fate made that Plastix started to build the same Spitfire nearly at the same time. It's very nice to have another member building the same plane as the one you are building : This created a kind of positive emulation / challenge spirit thanks to which both of us had done his best to equal the work of the other builder and always in a friendly spirit. Thanks to Miggers that provided us a lot of very nice pictures of the Merlin, we could manage to do a lot of scratch work to improve the provided merlin that suffered a rather important lack of details, even if this Mk.XVI kit (a Revell roboxing of the ICM kit) is considerated as one of the best at this scale. THAT WAS WONDERFUL THANK YOU ONCE AGAIN MY FRIENDS FOR ALL THESE GOOD MOMENTS ! Well... Enough talking... This is the pictures : Engine cowl closed : Then Engine cowl opened : The underside of the Lady : And finally some pictures taken using a paper printed landscape i made from some IL2 Cliffs of Dovers Combat flight sim's mission editor screen shots: I hope you will enjoy as many as i enjoyed building this kit ! The W.I.P. of my Mk.XVI is available here : http://www.britmodeller.com/forums/index.php?/topic/234959134-spitfire-mkxvi-revell-icm-molds-148/ Plastix's excellent W.I.P. is available here : http://www.britmodeller.com/forums/index.php?/topic/234959827-another-revell-icm-148-mkxvi-spitfire-base-and-ground-crew-finished/ And the R.F.I. thread for his marvelous Spitfire Mk.XVI is available here : http://www.britmodeller.com/forums/index.php?/topic/234969553-another-148-revell-icm-mkxvi-spitfire/ Have a nice evening !3 points
-
My First Attempt at a modern fighter/trainer: Red Arrows Hawk This is my red arrows hawk it is an old airfix kit that my boyfriend had laying around with new decals. The kit was a good kit it went together well and the only problem I had was decalling this is the part i find the hardest in modelling and i still needed help with these in particular the underneath ones and the royal air force cheat line along the sides. The red that was stated in the instructions was not the right match i brush painted revell 34 which seems to be the closest match to the real thing and a gloss coat was put on to finish. Any tips are welcome.3 points
-
Hello Don't know how many Games Workshop hobbyists we have here but I thought I'd share this model I painted a while back (July this year). GW models have been my "bread and butter" when it comes to painting models since the early to mid 90's, although I don't claim to be any good at painting them (I've seen tons of other people's work on the interwebz which are far superior). This was the first GW model I had painted since 2009. The decal on the shoulder pad was printed by myself, I didn't have an original GW decal to hand and buying a sheet (only available from GW Forgeworld) just for one decal just wasn't worth the cost (=>£12!!!). I used mostly Vallejo Model Air paints, and airbrushed the undercoat (black) and the main blue coat but did use a couple of Citadel paints for the detail work. highlights were all brush painted. For an old not very well cast (by today's GW plastic/resin standards) model (which was painted once and has been stripped) I think it turned out rather well (as far as my painting skills go). I painted this model to use in Space Hulk hence the 30mm base and the base art is just a sticky label with a printed image taken from a Space Hulk board piece coated with Klear, I used scissors to trim the edge, in hindsight I should have turned it over and used a knife to trim it. Here's the pics, sorry about the lighting though, they do seem a bit dark, they looked OK when I first took them. and sorry about the blur on one or two of them (new to photographing models, don't really know how to get my camera set up right to eliminate the blur!) -3 points
-
Hi all, This is my first post of a completed model on Britmodeller so please be gentle with me! It is also my first time using photobucket so I apologise in advance if you get lots of copies of the same picture. This is Italeri's CH-47 built and painted as a CH-47J of the JASDF. I think the camouflage makes it look completely different, which is what attracted me to it in the first place. I hope you all like the end result.3 points
-
Small update. I have finally got all of the seams done on the fuselage and the wings. This took longer than I thought as I wanted to preserve as much of the surface detail as I could. There was one place on the fuselage that did not fit too well and took some care to fix. After I prime the kit, I’ll see how well I did on getting it fixed. Now I have to get these parts . . . To all merge together and fit like a glove around the engine and radiator assembly. I think the key here is to determine which one of these parts will be my reference to align all of the rest as the each part ties into another two. After looking at the kit, the instructions and the parts I think this assembly will be my focal point. It is the chin assembly that covers the radiator. Out of all of the parts, this one has the most positive location of where it should be situated. Hopefully, if I get this aligned correctly, the rest of the nose parts will just fall into place with no filler or fiddling necessary. And, soon after, the tooth fairy will pay me a visit and leave all the money she should have left when I was growing up and didn’t find under my pillow! As always, all comments are welcome.3 points
-
Hi All this was my build for the Mustang STGB ,But ran out of time so here she is . Thanks for looking ,Les (wellzy)3 points
-
My goodness, voting for this will probably be happening in the not too distant future.3 points
-
These are not models, they are works of art and should be in a gallery to show what real talent is, seriously, to me they are that good, and I am not talking about an unmade bed as being art either. Stunning Fritag and 1/72 toboot. When you work, do you hold your breath like these people that model a town inside the eye of a needle because your craftmanship is that crisp, particularly the panel lines? Gary.3 points
-
Got all the paint chips fixed and the LE sprayed black:3 points
-
Thanks, it will look much better when we get some paint on her! Absolutely. I even keep a big old magnifying glass on my bench. It helps finds errors in addition to allowing me to work with 1:72 scale photoetch, and of course, do battle with the carpet monster. You and me both, mate! I always start to rush things at this stage, because I really want to get to the painting and transfer stage (those are my favourite parts). I hate sanding and filling and sanding and filling... And it will even look more fantastic to the naked eyes of most of the folks I hang around with (they're even older than me, you know). Another reason to get some paint on her - primer and paint cover up a lot of this stuff that looks bad, but really isn't bad. Like this - I added the bomb aimer's picture window, and blended it into the fuselage. (I had to "bend" the clear plastic part into a slight "V" shape, the supplied part was too flat.) Here is how it came out: Looks odd, eh? But when I hold it up to the light, so that I get a grazing angle of incidence, it looks pretty smooth. So I think it will look OK once it's masked and then painted. I think I'll head back to the cockpit and add the remaining items, and then button up the canopy. I've painted the engines, too, but need to give them a wash to bring out some details. She's getting there! In order to match the configuration of the plane I'm building, I've had to change my choice of markings. Instead of my original idea, the model will be marked as A9-609, with nose art for "Snifter," a plane that made many anti-submarine patrols off the coast of Australia. The transfers will soon be on their way, coming all the way from Australia itself. Snifter was a popular cartoon dog in Oz during the war. Cheers, Bill3 points
-
Not sure if I posted pics of this one before. Its the Italeri kit and I built it back around the mid to late 1970s!!!!! Decals from generic sets by Microscale( now known as Superscale). A recent one from my deep storage built stash and due to go to another home soon as part of my thinning down of built models. C-47 CA-013: It had to undergo some essential repair to the undercart and that was no fun! Cyano refusing to grab after a few minutes or longer!! Cheers.3 points
-
Hi The build is in his final stage I made a little weathering. fews oils and exhaust traces were added The exhaust pipes received rust pigment. I drill a hole on top fuselage for the antenna. All flap were added. Main gear glued. I think finish this kit in two days.when I would bought kristal klear for replacing spot light missed The last pics before the conclusion.3 points
-
Guns. I wanted at first to use MiniWorld's marvels, but eventually used the ones from the kit that look pretty good too All the parts are in place. Just a few final touches are left to declare the model finished3 points
-
This started out as a quick build but I couldn't help myself and started to add details. I added a couple of resin stretchers to the side litters along with some tissue blankets. The cockpit had some bits and pieces added and I refined some other kit parts. The stars and bars on the tail boom were added to make it look more like the choppers from the film/T.V. series. upload pictures imgupload image hosting 12mb pictures upload picture sharing free photo hosting Thanks for looking2 points
-
Hi guys as I have promised, I post another my model. It's Jsu 122 from Dragon. This is one my old model but I like it because it's represent my change to build model kit. I hope like it. and wip http://michelangelosicilia.webnode.com/news/jsu-122-english-version-text/ Greetings Michelangelo Sicilia2 points
-
It's finished. Gave him a hand with the fiddly decals and painted the cockpit glass for him. J2 points
-
Hi, Fameus Yakovlev constructed series of light airplanes - a small UT1 which was mostly acrobatic/sport machine and UT-2 trainer, which then was seriously improved into UT-2M (swept leading edge, new tail and modified fuselage with elevated second cabin). About 50 UT-1 was impressed into army in 1942 in Crimea and Caucasus front and they were equiped with two ShKAS machine guns and 4 RS 82 rockets - it was named UT-1b. My models are: UT-1b - vacu (scratch modified) by Russian company Aviastend, Sgt. V.V.Prozor, unit: 46 ShAP, Black See Fleet, Caucasus, 1942 UT-2 - Polish injection model by Aga company, unit unknown UT-2M - scratch conversion of UT-2 model by Aga, as far as I remeber Deblin Polish Aviation School in early 1945 (I have to check it) The latest conversion was based on plans like that one, for example: http://www.samolotypolskie.pl/samoloty/1368/126/Jakowlew-UT-22 BTW - there is a vacu of this version by Russian Aviastend, but I did not know it before I made model. Anyway the conversion was nice to do and I am happy with it. In all machines the engines are improved by my with camshaft elemets and exhaust pipes etc... I hope you will enjoy them. A family photo: UT-1: UT-2: UT-2M Regards Jerzy-Wojtek2 points
-
Tony, you truly are a mine of useful information Thank you very much. Anyway, as small and in this case I really mean small. I've made a thing. I was looking at the pictures of the interior that you posted above and thought I could jazz up the rather bare kit offering, especially the turret whiich looks nothing like the real thing. So, without further ado....BEHOLD! So, it's a bit crap but I'm strangely proud of something that has taken me over three hours. You'll never be able to see it but I'LL know it's there and that's all that really matters. I've also added rome formers and stringers to the rear of the fuselage and added the ammunition drums for the Vicker's gun. But I dodn't bother taking pictures of that. So, that's it for now. TTFN all!2 points
-
Most of the landing gear interior detailing added Need to add some stuff on that blank looking back wall and ill be done i think.2 points
-
Test shot of the S-IVB and SLA parts, along with the Escape rocket body2 points
-
Because we can2 points
-
My thing about WW1 aircraft was lit when I first had a chance to see one up close. I couldn't believe the sheer flimsiness. The Aviators of that time went up in their "Kites," on close inspection you could not have a more apt description! Certainly they shared a lot the same construction techniques and materials. Then you couple this "Kite" with a rotary engine, of dubious reliability, Remember these engines didn't have a throttle, the engine was either full on or off controlled by a "blip switch" on the stick. You sat either on, or in close proximity to a tank full of petrol, and in flight you were treated to a copious covering of caster oil, which, looking on the positive side probably kept he pilots "regular," if not a little "aromatic" and if things went wrong you were on your own. My first thoughts when seeing a WW1 aircraft for the first time? 1.How anyone could (or want) get into the thing in the first place, (without damaging it, or themselves in the process!). 2. How anyone in their right mind would, of all things, actually go flying in it ! 3. On actually getting the thing in the air would then actually go looking for trouble! We all acknowledge that the BoB pilots were a special breed. The Pilots of the RFC and RNAS were not cut in the same mould, they made the mould, they were very special people. Selwyn2 points
-
http://forum.keypublishing.com/showthread.php?132423-The-Great-Texas-Buchon-Disposal-Neat-photos-and-article John2 points
-
More progres. I have finished the rivetting on the fuselage and continued with doing some more detaling of the gun turrets. The rear gun was woeful, so I have scratch built the canvas cover using papaer mache and styrene and added Eduard gun barrells to all the systems.2 points
-
Nigel, you're a machine, an assembly line, this is what, your 7th, 8th model this year (with all the thingies you added for Banana dio and Stilleto tow truck)? And it's already past halfway mark as far as I can tell...2 points
-
Glad to see you have picked up on my re-release. A little background info, I've re-released it as the 'operational' proposal refered to in documents uncovered at Kew by Paul Lucas dating from early 1956. There was a proposal to procure up to sixty Blue Jay Hunter F.MK.6 from the last production batch, sufficient to equip three squadrons. The documents review the options and potential shortage problems if it had gone ahead, in that there was insufficient production of AI-20, earmaked for Vulcan/Victor tail warning radar, and potential shortage of Blue Jay to equip the EE. P.1 and Saunders Roe P.177 then under development for service entry. For these reasons it did not go ahead. The set is the same as I did for the P.1109B prototype, except it lacks the straight leading edge parts, as these airframes would have later style dog tooth adopted on the Mk.6. I've included an F.6 tailpipe, so you can use the more easily available Revell FGA.9 base kit. Colin2 points


.thumb.jpg.158e2e086d45b8f96b7d93b8bee8dc21.jpg)


.thumb.JPG.3498f40362ff13ebfc4b2e45abbd545e.JPG)


This leaderboard is set to London/GMT+01:00