
Leaderboard


Popular Content
Showing content with the highest reputation on 25/09/14 in all areas
-
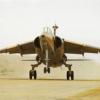
Hi! Here's my Tu-2. It's Hobby Boss' Easy Build kit. The model is painted using Tamiya paints and weathered with Flory wash,oils, pigments and a silver pencil. The kit has excellent fit, but sparse details. Any comments appreciated Best regards Rune Haugen Norway10 points
-
Recently completed for the D-Day group build. The particulars: kit: AFV Club 1/35 M3A3 (Stuart V) AM parts: Royal Model PE #342 Bronco T-16 workable track links crew figure: Ultracast conversion decals: Archer and home made/printed grass: Gaugemaster Historical background: Juno Beach sector, around the vicinity of Secqueville-en-Bessin, June 7th 1944. Morning found the flanks of the Canadian Scottish infantry under heavy fire from German snipers. The 6th Canadian Armoured Regiment, also known as the First Hussars, were on hand in the infantry support role. A Lieutenant W.E.P. Smith was given the task to head out in his Stuart to recon the area. In a buttoned down tank, it was difficult to spot the enemy, so the lieutenant threw open his turret hatch for a better view. With his upper body fully exposed, he was instantly hit by a sniper round in the arm, followed seconds later by another hitting the side of his helmet. Luckily, that one deflected upwards and out the top, causing no injury. His crew quickly rushed their wounded commander back to HQ. On arrival, he refused medical aid until he could fully relay the sniper positions he had seen just before being hit. For this act of bravery, plus several others during the advance inland, Smith was awarded the Military Cross. Subsequently, two more Stuart recon tanks were sent to the area Smith had last been. There, they helped the Canadian Scottish unit to ferret out the Germans. More than thirty snipers were either killed or captured, resulting in a welcomed respite in the rear area. WIP thread can be found here> regards, Jack9 points
-
New photos added Sept. 30 This is the Eduard Limited Edition kit. Zvesda plastic plus Eduard etch and decals. A full build article will appear in an upcoming Model Aircraft. Comments welcome. Thanks for looking. Bill B.9 points
-
Hi This is my latest build, I don't often do American stuff, but I've always wanted to do an A-10. The kit is Italeri, I did some work to sort out the square nose and replaced the fans with Quickboost alternatives. Thanks for looking Ian9 points
-
Jerry Billing was born in Canada in 1921 and in his late teens he was determined to become a fighter pilot. Initially joining the RCAF as an air-gunner in 1941, his persistence eventually saw him active as a Hurricane pilot and then, from 1942, a Spitfire pilot when he joined 19 Squadron. While with 19 Squadron he flew many different types of sorties in Mk.V Spitfires. Following action in Malta and some training of other pilots in the art of dog fighting, Jerry was sent to 401 Squadron in 1944, where he was assigned a Mk.IX Spitfire. On D-Day itself Jerry was on patrol over Gold Beach in ML135, but there wasn't any sign of the Luftwaffe. However, on the 7th June 1944, he was back in action again and downed a Ju88 and damaged two Fw190s. More information about Jerry Billing can be found here This is my first Eduard kit and it was built as part of the D-Day Group Build. Self indulgent bit - please skip ahead to the photos if easily bored! I've been working towards this kit for a while. A few years ago, when I got back into model kit building, I was mostly building bits and pieces including lunar landing modules, a space shuttle, a Batmobile and a big fire engine! Then, while searching online for possible next kits, I came across this Eduard Mk.IXc Spitfire kit. Wow! I was blown away by the detail and I loved the idea of the extra PE parts and paint masks. The only thing was; I hadn't ever built a 1/48 kit before and the last time I had built a plane kit (other than an Angel Interceptor) was when I was a kid. Also £28 for an aircraft kit seemed quite expensive! With my lack of experience I felt I would need to practice a bit first by building some smaller 1/72 Spitfires so that I didn't make a complete mess of the Eduard one. I built two Airfix and one Italeri 1/72 Spits and thoroughly enjoyed all of them. I then thought I ought to try my hand at a cheaper 1/48 Spitfire so I made the re-boxed ICM, Revell Mk.XVI, which turned out to be a fantastic project! And, as could be expected, even before building this kit, I was addicted to building Spitfires! So here we are! I used wanting to be part of the D-Day Group build as an excuse to finally buy the Eduard kit. I added a few scratch-built extras to the cockpit and it's all brush painted (hairy sticks!) with Humbrol and Revell paints. All-in-all a thoroughly enjoyable build. Mike's review of the kit itself can be found here The WIP for my build can be found here Finally (at last!) here are the photos - I'm afraid I took rather a lot and then couldn't decide which not to use! The next few were taken when it was almost finished but show some slightly different views to the ones above: Some photos of the cockpit before being buttoned up: I also learnt a lot from many people who contributed in the WIP and I'd like to take this opportunity to thank everyone who dropped by. Kind regards, Stix PS I think there's a couple more Spitfires calling out to be made! More soon...........6 points
-
Ahoy Chaps. I was intending on taking a bit of a hiatus from model makering and focus on playing with trains for a while. But I thought some form of WW1 Centenary tribute build would be in order. So here is my build of the Revell 1.28 Sopwith Camel, No. 10 Squadron, Royal Naval Air Service, Teteghem, France, March 1918 All brush painted with Revell acrylics, except for some Humbrol Acrylic Flesh and Tamiya Semi-Gloss clear. This is obviously an example with the rarely seen upsidedown axle modification, because I'm an idiot... A lot of flash, sink marks and holes that hadn't quite made it all the way through. The instructions were a touch vague in parts, in others I would argue just plain wrong... Fit was a bit troublesome with a lot of the parts thicker on one half than the other, so there are a few somewhat impressive joins on it... The worst part is probably the fit of the ribs into the wing, trying to work out where to remove the plastic. Anyhoo, it looks like an aeroplane, sort of..6 points
-
Ta Roger - not far off now - I hope.... Funny man............. Ho hum- didn't manage to get the Red on today. Now as far as the grey masked off - quick overspray of grey on the masking edges - then a mist of white to give a consistent base for the red. Red tomorrow hopefully.....5 points
-
That's a moulding error then. It should be on his shoulder.5 points
-
Hello Folks, I`ve been waiting for this kit for ages and thanks to Gary at MAM I received this 1/48th scale Revell Ventura Mk.II kit which I`ve finished in a scheme that I have been researching for years,.....as one of two Mk.II`s flown by 1575 (Special Duties) Flight from N.Africa for missions over S. France, Corsica and Italy. I`ve submitted the article to MAM so won`t give too much away, however I will say that it is a nice kit, the BP Type C turret is very nice, the masks provided in the kit are great but Revell forgot to add a new canopy with clear bulges in the roof and left hand side and have simply put the original canopy from the PV-1 kit in the box instead! My attempt at rectifying this was to carve a pair of blisters from the spare canopy left over from an Arba resin Blenheim kit and attach these instead,....but it is nowhere near perfect and it would be great if Revell did a new part or the aftermarket came to the rescue. Anyway,....here is the model; [/url] I do hope that this kit is imported into the UK soon as there are so many more that I want to build and Aviaology in Canada have just released a pair of sheets featuring some extremely interesting Ventura`s,....I want to build at least four of them! Hope you like it and thanks to Gary for the model,.....the full article will hopefully appear in MAM or SAMI magazines soon, Cheers Tony PS- I meant to add that this Ventura, AE881 failed to return from a Special Duties `Wireless' sortie to Italy during September 1943 and the crew are remembered on the RAF Memorial at Floriana in Malta as they have no known grave, I`d like to dedicate the model to them. PPS- Since sending the article off for printing I`ve been in contact with one of the surviving Ventura crew members from 624 (SD) Sqn called John Russell who confirms that; - The Ventura coded A was AE 881 and B was AE 948, although according to his logbook AE 881 was changed to X, in the middle of August 43. He doesn`t recall any squadron letters being applied,...just the individual code letters A & B. - No guns were fitted in the nose glazing. - He also recalls that the camouflage was all over grey, not black,...however the photo of the real AE881/A does prove otherwise. Maybe they were changed at a later date? - The Ventura`s were used for for ferrying SOE staff,mostly between Algiers and Tunis and some communication, between SOE operators on the ground using a specially installed set. - AE 881 must have landed at Palermo,Sicily to refuel on the night that it was lost with its crew, probably to extend its time over the target in Italy. All the best Tony4 points
-
Just finished this one as well. Its another subject that follows on from my DC-6 dealing with some of the aircraft I've flown in. This time its the Boeing 720, G-AZFB of Monarch Airlines in 1975. With a bunch of enthusiasts it took us from Luton to Hannover for the air show there on a day return trip in May 1975. The model is from the Roden 1/144 kit. It had to be the PAn Am boxing because it has the right engines for my build. Decals by 26Decals. The model had all its cabin and flight deck windows filled because I couldn't be certain the decal windows would line up and was right to do so. Kit goes together very well I thought and I particularly like the engines! The decals were good but somewhat translucent as they had a see through look when held up to the light and showed up any blemish on the model. The windshield portion had to be cut into separate pieces and applied individually to get the right look and arrangement. I tidied up the edges with silver decal stripe to improve the framing. The fin title was too big and Ray at 26 very kindly replaced them for me to an adjusted size and now they are perfect! (Cheers Ray!) The cheat lines fitted nicely but I opted to overpaint the yellow with Humbrol gloss yellow to improve the shade as it leant towards being a bit too much of a 'lemony ' shade! The usual appliance white for the top and Xtracrylix Light Aircraft grey for the rest and Humbrol metallic 132 I think it was for the metal areas. Enjoy:4 points
-
The Dragon kit of the Panzer IVE has everything in it you could possibly want to add to the kit. Turned metal barrel, etched parts, individual track links, Jerry cans, choice of parts to build different variations of the E. There is even a partial interior for the turret so posing it with hatches open gives you something to look at. Building the kit I only added the figure, some water bottles and a few other parts from the spares. The model was painted with Tamiya acrylics and weathered with various filters, washes, chips, scrapes and scuffs. The decals are also from the kit, which offers a number of options for Afrika Korps, and eastern front machines. forum image hosting picture host image hosting site over 5mb post images image hosting over 10mb image hosting above 5 mb image hosting without registration upload photo image hosting 30 mb how to take a screen shot imgurl imgupload Thanks for looking4 points
-
This is an attempt at the Douglas D-601 - F3D-3, which was an improved swept-wing version of the Skynight radar-equiped night fighter. In this case, it was done in a bid to avoid having this Matchbox model end up as parts in the spares box. I bought this one a long time ago and, years later, when I opened up the well-sealed box, I discovered it was missing many pieces, including the lower wings, landing gear and doors, the entire cockpit and several other parts. But, I did get an extra set of upper wing parts ........ so, with not much to lose, I decided that I would make an effort at building the interesting (but never completed) swept-wing edition of the Skyknight night-fighter. Naturally, pure chaos and comedy ensued ! I fashioned wings from the parts I had and they were then cut to produce the swept-wing. I had measured the angle carefully but I still needed some balsa-wood wedges (and toothpicks as wingspars) to get the proper look. I added sheet styrene extensions that were profiled to shape and used CA glue to reinforce the joints. The tail was done in a similar manner with sheet styrene additions and the vertical tail cut and then reversed before cementing back in place and then sanding to shape. Putty was applied at a number of places. Finally, the canopy was a real pain in the aft to install ! The real D-601 would have looked very good, almost like a smaller-size A-3 Skywarrior combined with a bit of the later A-6 Intruder. The swept-wing Skyknight was supposed to have more powerful J-46 turbojets, but Westinghouse couldn't get out of the woods with that engine (or the bigger J-40), so I'll imagine here in the pictures that it's 1956 - 1958 or so and this one has J-65 Sapphires or perhaps General Electric J-52's. Here's some snapshots of the F3D-3 flying about : Photo Series 9-23-14 016mod1XCZ by mikedetorrice, on Flickr Photo Series 9-23-14 001mod1XCZ by mikedetorrice, on Flickr Photo Series 9-23-14 005mod1XCZ by mikedetorrice, on Flickr Photo Series 9-23-14 007mod1XCZ by mikedetorrice, on Flickr Photo Series 9-23-14 009mod1XCZ by mikedetorrice, on Flickr Photo Series 9-23-14 010mod1XCZ by mikedetorrice, on Flickr Photo Series 9-23-14 011mod1 by mikedetorrice, on Flickr Photo Series 9-23-14 013mod1XCZ by mikedetorrice, on Flickr Photo Series 9-23-14 015mod1XCZ by mikedetorrice, on Flickr Mike4 points
-
Here's my latest effort: a Hawker Fury II in the markings of the Royal Yugoslav Air Force. The WIP thread is here: http://www.britmodeller.com/forums/index.php?/topic/234965995-yugoslav-hawker-fury-update-2109-decals-wheels-and-propeller/ The Fury was, of course, an iconic fighter of the 1930's RAF, but it also enjoyed some limited export success. The RYAF bought a batch of Mk I's (similar to the RAF's version), then a second batch of Mk II's. The first few of these were built by Hawkers, but the lion's share were licence-built in Yugoslavia, shared between two companies. The Fury II was distinguishable from the Mk I by the improved, streamlined radiator (similar to the Hurricane, with the supercharger inlet too), and the cantilever undercarriage very reminiscent of the Gladiator. The other big difference was the installation of a different model of the Rolls Royce Kestrel engine: this gave much more power and racked the Fury's maximum speed up a respectable 242 mph. The Yugoslavs also experimented with improving the firepower: a pair of extra machine guns could be fitted under the wings in fairings that were again reminiscent of those on the Gladiator. Despite all these improvements, by 1940 it was clear to all concerned that the Fury was woefully obsolete in the era of Hurricanes, Spitfires and Bf109's. Lacking enough more modern fighters, the RYAF had little choice but to deploy their remaining Furies when the invasion arrived in 1941. The extra machine guns were never used: presumably the effect on the already inadequate performance was too great. Many of the Furies were shot down in totally unequal fights with Bf 109's and 110's, although the Germans lost five fighters destroyed by brave Yugoslav pilots, all by ramming. The Furies fought on, strafing infantry columns, slowly retreating. Many damaged aircraft were destroyed by ground crews, but when the fighting ceased several were captured intact by the Germans and Italians. The Italians continued to fly at least one for a while, but interestingly none were passed onto the Croatian Air Force. Finally, here's the token sepia shot. Enjoy!4 points
-
The first thing I did today was contact Gary at Hannants, unfortunately he informed me that they had nothing smaller than 14mm in their exhaust range. Time for plan B; scratchbuilding the exhausts. Looking in my spares box I found these sections of old pen which were 11mm in diameter and just about right. Here they are compared to the Aires exhaust: I cut off and cleaned up two lengths, including removing the internal ribs. To simulate the internal texture I glued in some square plastic mesh: As the pen tube is polyethylene I first activated the surface with this Polyolefin Primer: Next I cut out some thick plasticard to make the spreader plate and glued that in: Now I could glue on the wings and tailplane (this is getting exciting!): Followed by the rear section of fuselage, first glued at the back: Then finished off like this: I got some use out of the Aires set by using the PE, cut out like this: This is how they look glued on: Temporarily bedded on some Blue Tac, this is how they look in place: I think the next step is to get some paint on things and get these assembled.4 points
-
Working from home today has - as was inevitable - led to a bit of skiving...... This time I thought I would listen to the advise of my betters and I oversprayed the masked edges with a light coat of white (believe me when I say it is white - despite it looking sort of grey and unhealthy in this photo ): And the JP 3 now has Humbrol 166 acrylic light aircraft grey wings and things: It's nice that the wings are all grey (save the tip tanks) on the 3 as it provides a contrast with the 5. Also means I didn't have the same need to mask a white circle on the wings for the roundels. Am out tonight - just pondering whether I will have time to mask and spray the red before then...... PS. I've read bad things about spraying humbrol acrylics (now - I wasn't aware of the problems when I first used it on my chippie) - but this went on ok with a 50/50 mix with Tamiya X20A thinner plus a few drops of acrylic flow enhancer. PPS. Just starting to feel comfortable using the Neo.4 points
-
Juno Beach, Stuart V, First Hussars Canada (6th Canadian Armoured Regiment). June 7, 1944 - Lt. Smith is wounded by sniper fire while searching out for hidden enemy in the Secqueville area. His brave actions would result in his awarding of the Military Cross. kit: AFV Club 1/35 M3A3 (Stuart V) AM parts: Royal Model PE #342 Bronco T-16 workable track links crew figure: Ultracast conversion decals: Archer and home made/printed grass: Gaugemaster Few more photos found at the Ready for Inspection. regards, Jack4 points
-
Thanks Houston, appreciated as ever.... Managed to finished the basic cockpit and everything's been put into the tub, nothing glued yet as I need to and a bit of plumbing first and be sure that it all fits ! You can't really see it but I fitted a 2.5mm green lens into the CRPMD binacle which gives a nice representation of the unit... Hopefully I'll get on with the undercarriage next and as usual there's a fair bit to cram in there.... .. The bulkhead behind the rear seat has some material covering it, (reminds me of plastic groundsheet material !), so I'll try and replicate this using either crushed aluminium foil or crumpled wt n dry paper. The climate control system tubes need tan/pink coloured hoses fitting too, I'll probably get hold of some 1mm perl hosing from Little-Cars at the next show.. GR4 from walkaround section..I assume the GR1A had the same... Cheers all, Melchie...4 points
-
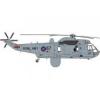
Although I did actually get the hi-vis decals for this before the end of the Korean War group build, life kept getting in the way, preventing me finishing it in time. So here she is, complete. It's the Dragon kit slightly modified to fit with her Korean war modifications and I used the Eduard etch set for the Gearing Class. I hope you like it,.3 points
-
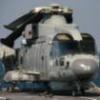
Finally completed another '101 after house move earlier this year! I think this is '101 number 30+ that I've now built. Depicts one of the two MCH-101's as used by the Japanese in Antarctic. Used the Italeri VH-71 kit as base model, added various aerials & 'lumps' from scratch. Decals from Max decals Antarctic Helicopters set. Hope you find of interest? Dave3 points
-
I have struggled over the last 20 odd years to make an AEW Gannet, Frog and Vac u form parts, Made bits and pieces. Last year, a spot of luck came my way and I ordered Alley Cats Resin AEW Gannet. I was capptivated when I opened the box, All that resin, wait ALL THAT RESIN!, Ah well I found a new glue to try out, So bang on to the job, cleaned up the radar ops section, played around with the fit a bit and came to the conclusion. Stop. Figure out how much weight to stuff in the nose to make this beast sit proper. Short answer. a lot. and lots of room for it under the cockpit and behind the prop mounting. Lots and lots and lots.. Fast forward about eight month and the cockpit is done, the paint work on the prop cover is going badly ( I painted it 8 times striped it 7), Final on that was very tiny strips of tape, carefully set side by side to get around the curves. 5 bloody minutes to paint. 2 hours to mask. Paints on the plane are xtra-colors, Testor's yellow, Decals are for Captain Winsors oriantaion rides for air intercepts, or so the instructions say. The Mk. IV Gannet it Revell Germany's issue Thanks for looking Glen3 points
-
Hello all, My latest creation which I wanted to share with you all. This is the 1:48 Hobby Boss F6F-5N Hellcat which I have made OOB to represent the F6F-5K mark. I believe I have carried this out correctly but I am sure someone will let me know if I have made an error The kit was great to build and went together really well. It was also very well detailed. The kit is cheap to pick up as well which makes it an attractive build. To add to this I used the Alley Cat Decals ACD48006 Post War Test F6F-5K Hellcats. These were painted in very attractive Day-glo colour schemes with often different coloured fins. I think the end result (in my un-biased) opinion is that the end build makes for a very attractive and different looking model. Painted using Halfords Day-Glo rattle can paint and all other paint is Acrylics brush painted. Anyway here are the photos: Thanks for looking, feel free to leave CC and comments. Tommy3 points
-
Thanks guys, I've made a start on the next phase. I did some chipping and scratching, mainly on the front and rear lower sections. I think there will be more, but I need to learn what I'm doing first. I applied the two decals, and then I went over all rivets and other surface details with a neutral wash. I think I just wanted to see what happened and get a little more feel for it. Those decals must be toned down as more weathering is added and everything is hopefully tied together. I think this will be a lot of work adding and removing stuff in layers to make it look like something.3 points
-
The white spreader plate could be seen through the exhausts so I gave that a quick brushed coat of matt black: Here is the outcome of my airbrushing session with primer applied followed by Alclad Burnt Iron on the exhausts and matt black to the fuselage part: When that was dry I mixed up a grey wash using some Vallejo white, matt varnish, Flory black wash and a little water. After a practice on the fins of a radial engine out of the spares box I applied that to the exhausts When that was dry I punched out some plugs from this semi rigid foam as part of the masking procedure: Those were used to fill the exhausts: I then cut out some masking tape discs using my compass cutter and applied those: Next I mixed up some black Milliput to form a bed for the exhausts: After a bit of superglue this is more of less how they looked before close up: Finally the last part of the fuselage gets glued on: While that hardens up I might have another play with the tractor.3 points
-
And they'd be right, I'm afraid! And it would be even more brilliant if the bloody lamp worked! I spent some time last night building the shelf and legs that support the radio gear, using sheet styrene and rods. The actual unit had two shelves (well, at least the one photo that I could find did), but from the point of view through the canopy, you'll really only be able to see the top shelf. So being generally of a lazy frame of mind, I only built one shelf. I hoped to post some photos, but I, um, didn't take any. I don't think I'll be able to do that tonight either, as I have to wine and dine a supplier (really, I dread this kind of thing unless, of course, the bloke knows something about Spitfires - wait a minute, the guy is Japanese. Maybe we can engage in some Zero-speak!). Friday night I have to pack because Saturday morning it's off on yet another holiday for a week. I need to go meet my new baby granddaughter in person! It's just not the same with Skype, you know? So I have to warn you that there may be a protracted delay in posting any updates to the Beaufort build. But the reasons are deemed acceptable, I suppose. Cheers for now, Bill (currently annoying fellow workers with "Odessey and Oracle" by the Zombies)3 points
-
Well it's taken all of an hour and there's progress! I've tried some quick stuff and it worked. Just put some water on the decal....added some MicroSet to the mix ....let it sit for a good while picked at the edges with a scalpel and here's what happened... Hard to see but started to lift off the top right of the N Got even more excited and continued to scratch away...gently.... nearly there.... Voila! I think it helped the decals hadn't been on for too long Anyway. Thanks to the support of the kind contributors on BM I think I have my enthusiasm and mojo back!! So...... (and particular thanks to Martin for this one).....I'm going to tackle these shocking decals with a paint touch up this weekend and see where we end up Chocks away!!! oh dear.......they are bad aren't they LOL Cheers!3 points
-
It has not actually been specifically stated that this "large new kit" will be 1/24 has it? The original posters words were "I am led to believe it will be 1/24". With all due respect, this is hardly ringing confirmation is it? It could just as easily be a misunderstanding or misinterpretation.Or it could even be Airfix having a little fun at our expense!. I would (personally) rather it WASN'T a 1/24 kit. There is plenty scope for choice but the large scale , in my view ,severely limits affordability. Much as I may like a 1/24 Mosquito or Typhoon, they are simply way too expensive. I'd rather they were half the size and one quarter the price. I have nothing against 1/24 per se. All of the original Airfix 1/24 kits can be picked up in their various guises for quite reasonable prices. I am personally content to acquire them gradually and be satisfied with that. They may no longer be of a quality comparable to more modern toolings but, the raw material is still there for good models to be built. I would rather rather see a halt to any further notion of expanding the 1/24 range and, Airfix's resources expended on smaller scale , more affordable items. This is of course just a personal perspective. I certainly do not ask or expect others to agree with me. "Large new kit" does of course cover a multitude of sins!! . I sincerely hope that this translates to "large new 1/72 kit" as, giving Airfix's penchant for surprises, I believe this could result in a VERY pleasant surprise indeed In any case, we will find out soon enough. Allan3 points
-
I have to say that there were times it seemed a mystery to me too. Generally when busting base height for the umtpy umphh time. Like Tim said - a supposedly simple manoeuvre which is deceptively hard to get right. It's hard to achieve and maintain the correct and steady rates of pitch and roll so that the whole thing feels and looks smooth whilst following the correct path through the sky. Have you ever tried to take a long steady bend in the road when driving by judging and setting just the right amount of turn on the wheel and then seeing if the car goes accurately around the bend with no or only minimal wheel movements? (or is that just me - oops?). Anyways think that in 3 dimensions whilst simultaneously pitching and rolling through 360 degrees. Ah now. That depends on whether you include time sat at the work bench staring idly into space or aimlessly staring at the TV, whether you include time spent c*cking things up and redoing things, whether you include time spent in such cackhanded work it has been erased from the memory etc etc. Quality time probably lots. Poor quality time probably lots more....... Ground-hog day on the red/white/grey masking. Spent a fairly miserable couple of hours last night masking off the white on the JP3. The fuselage colour division is crucial to the look and seems to consist mostly of gentle curves. Sat with photos, squadron print and Tamiya tape cut into long 1mm strips: The nose in particular was a right royal pain. I took the 1mm strips of tape forward to a panel line forward of the cockpit and then held that securely in place with a bigger tab of tap; and the used one even thinner length of tape to do the nose. I got it as close as I could into position and tapped it down lightly - and then use a blunted cocktail stick to tease the very forward, most curved section - as close as I could get to the right shape. And then secured it all in place and covered the rest of the white with more tape: I say it was a fairly miserable time - but actually it was quite satisfying. At least until it turns out to have been all wrong...... Nah. I'm very careful to only take photos from the photogenic angles.......... I should get to Telford on the Saturday tho'. Made it for the first 3 or 4 hours of the show for the last few years.3 points
-
Interesting, thanks for the information! I added a new layer of mud with dry pigments applied by brush while the tank was on its side. These were fixed with MIG fixer and the tide marks mostly blended out with enamel thinners while they were drying. I also fixed various bits and bobs and added some more metallic sheen to the track ridges, the gun barrels and a few other spots using MIG Dark Steel graphite powder. I finally took some pictures in daylight - looks so much better to my eyes. All the previous ones were taken under a daylight bulb. I did correct the WB, but the fluorescent tubes have gaps in their emission spectra so colours still look different. Daylight doesn't. I do think the splatter on the tracks could do with a bit of blending now I can see it in this much detail, but I'm wary of messing with it. Really will do stowage next. And I need to add some stains from the leaky bearing covers - these appear on quite a few photos. Also keen to totally rip off Mike's build and add some tatty lagging to the exhaust Will3 points
-
Aw guys you are making me shy I like what I'm doing, obviously some of you like it too but... Nigel my print set up is very primitive honest, the sheet you saw there is made on MS Word I imported the badge picture from the photograph of the side door on XT626 that Steve (worm) posted I think. Anyway it is out there on the net The picture is slightly canted from left to right as the front of the door is 'left' and back is 'right and down' with perspective I have downloaded the graphics program GIMP from the net, free of course This allows you to reshape the picture by pulling down and right to set the picture back square to the screen Save the job and reopen it in MS Word as Import Picture When it is in, click it and resize to what you want, very easy and the typeface/font for the RAF type serial letters is Arial as near as dammit Type the text you want, XT626 here, highlight it and set the size as 7 point, 8 point or 56 point, whatever you want Word doesn't have a 7 point option but if you type 7 into the text size box when highlighted it will force a smaller size on the text When I open my printer (bog standard canon i1900) there is a set of options in preferences that lets you play with the print options I added extra darkness and density and got really black looking text. Add high definition in the print quality job done Steve (Fritag) I cut the soft drinks can (have you TASTED Carlsberg lately?) with my Swann Morton knife with either number one or two blades. Scissors leave ragged edges I do use scissors if there are curves, then tidy up with a handy file I always cut onto a hard surface my workbench is a melamine kitchen worktop rescued from oblivion (No, not even I would use a six inch half round second cut for this job. I have found that its easy to shave the fraise off with the number two blade) Rodders ask me nicely and I'll build you one Purrups you should cast from it for both of us, licence like Steve (worm) I look forward to meeting you, any one else there too of course3 points
-
About 50/50. I extracted this part from the spares box to add some detail to the front wheel well: Here it is in the finished wheel well (the two sides are not symmetrical): I then rescribed the underside panels: And then did the top panel over the engines which proved tricky to photograph: Hopefully you get the idea. The resin on the tractor is quite hard now so I think I will have a look at that next.3 points
-
After asking a contact who has visibility of the actual painting specifications, the basic colour on all A400Ms is FS 36173 grey whether it's the prototypes or the French, German, Turkish or British production aircraft. The base primer is also specified as a yellow-brown colour. If the C-17 uses a black primer this may account for the two appearing as different tones. The colour call-outs in the 1/72 Revell kit were simply speculation that the French would specify a different scheme when their aircraft were delivered, like the disruptive scheme for the Luftwaffe. The new 1/144 kit uses the same grey for all three options. Curiously, the colours used for the RAF roundels are also FS numbers - 31105 red and 35056 blue instead of the equivalent British Standard shades. These are also used for those painted on the RAF's A330s. Incidentally, the Voyagers are painted BS381C: 637 Medium Sea Grey overall with the fuselage 'transport flash' and 'Royal Air Force' titles in FS 36173 grey. Hope this helps, Jonathan3 points
-
Another fun evening playing with LED's. I was going to use fibre optics for the bridge and the (Insert correct name here. I have no idea and i'm buggered if I can find out) below it, but I cant find the fibres. So LED's it is. Two for the bridge and one for the ?. And this is the result.3 points
-
Hello, Decided to try something different instead of posting photo's up and add a bit of commentary to them as well. As with Saturday, up until around 10:30ish the Remote Control aircraft were flying and providing entertainment for the already busy beach, with displays from the B-17, Heinkel, etc. IMG_8490 by J.R.Photo, on Flickr IMG_8499 by J.R.Photo, on Flickr IMG_8522 by J.R.Photo, on Flickr IMG_8532 by J.R.Photo, on Flickr IMG_8546 by J.R.Photo, on Flickr IMG_8555 by J.R.Photo, on Flickr IMG_8585 by J.R.Photo, on Flickr IMG_8591 by J.R.Photo, on Flickr At roughly 10:33 the DHFS AS.350BA Squirrel HT2 arrived bringing Red 10 in and five or so minutes later again departed back to Blackpool, which then saw ten or so light aircraft arrived on the beach, the highlight of this was the Slepcev Storch which came in low much to everyone's surprise then climbed out to position itself for a landing on the beach runway: IMG_8604 by J.R.Photo, on Flickr IMG_8615 by J.R.Photo, on Flickr IMG_8622 by J.R.Photo, on Flickr IMG_8625 by J.R.Photo, on Flickr IMG_8629 by J.R.Photo, on Flickr IMG_8632 by J.R.Photo, on Flickr IMG_8636 by J.R.Photo, on Flickr IMG_8644 by J.R.Photo, on Flickr IMG_8653 by J.R.Photo, on Flickr IMG_8684 by J.R.Photo, on Flickr The show was due to start at 12:00 with the Red Arrows, and to no surprise they arrived from the rear of the crowdline over Southport displaying the trademark Red, White & Blue smoke in "Big Battle" formation, and unlike Saturday's display in which they performed their flat display, they immediately launched into their Full display, highlights of this for me was the "Palm Split, "Vertical Break" as well as "Python", unusually after they had finished the display they headed straight for Blackpool, instead of forming up for a flypast from Left to Right as they had done on the Saturday IMG_8693 by J.R.Photo, on Flickr IMG_8706 by J.R.Photo, on Flickr Straight after the Reds had finished displaying the DHFS Squirrel arrived to take Red 10 back to Blackpool to fly with the rest of the aircraft down to Rennes Airshow in France. IMG_8908 by J.R.Photo, on Flickr Once the Squirrel had departed the Shorts Tucano ZF244 ran in from the Left side of the beach, this aircraft is the striking Poppy schemed aircraft with "Lest we Forget" stencilled on the underside of the aircraft, and unlike the Saturday display showed the aircraft off carrying out various Loops, Rolls & inverted flypasts concluding in a left wing dipped flypast to formally end its display. IMG_8931 by J.R.Photo, on Flickr IMG_8941 by J.R.Photo, on Flickr Within a few minutes of the Tucano displaying the sound of four Lycoming AEIO-540 engines was heard over Southport behind us and this announced the arrival of the Blades display team, the team which has become one of the most recognised display teams in the UK performed manoeuvres from the "Hammerhead" to the "Goose & Gatling" before finishing with the "Blade Break". IMG_9025 by J.R.Photo, on FlickrIMG_9042 IMG_9042 by J.R.Photo, on Flickr Up Next was the Plane Sailing PBY-5A Catalina, which for me is always a welcome addition to any airshow display. The display showed off the lines of the aircraft perfectly and also showed it flying with the Pontoons down and the gear down. IMG_9106 by J.R.Photo, on FlickrIMG_9144 IMG_9144 by J.R.Photo, on Flickr Immediately after the Catalina display the Royal Navy Sea King XV661 in the very distinctive Grey & Red scheme which for the weekend was based at RAF Woodvale, but can usually be found at RNAS Culdrose in Cornwall approached from the left to display its SAR Demo: IMG_9227 by J.R.Photo, on Flickr The display included winching two lifeguards from the beach and then lowering them back down to the beach, after this had happened, they positioned the aircraft to the left of the beach they flew slowly down the flightline displaying the Royal Naval White Ensign, before vacating to the right side of the show at the end of its display. IMG_9254 by J.R.Photo, on Flickr IMG_9272 by J.R.Photo, on Flickr Next in the display schedule was the Scottish Aviation Bulldog and Grob Tutor T.1 in a formation fly past before they each broke off into their separate display's. IMG_9304 by J.R.Photo, on Flickr After the pair had finished their formation display's, the Bulldog came in directly front the crowd and began its display, after seeing this last year it was great to see this back as I can remember them from the late 90's being based just a short flight away at Woodvale, although the display started quite high up by the end of the display the pilot was down to around 150feet and which he waved his wings left to right down the display line to conclude its display. IMG_9382 by J.R.Photo, on Flickr Almost immediately the Tutor ran in from the front of the crowd, pulling up into a stall turn and showing off the kind of manoeuvres that the pilots entering their flying career in the RAF, before after around 7 minutes it came to the end of its display and flew a nice topside pass down the crowdline. IMG_9419 by J.R.Photo, on Flickr Next brought Peter Teichman's Hawker Hurricane Mk IIB "BE 505" Hurri-Bomber colloquially known as "Pegs", to everyone's surprise as on the Saturday the team who provided the pyrotechnics set them off while he was displaying his other aircraft "Jumpin Jacques" instead of "Pegs". Almost immediately on the run in there was a sound of Machine guns firing as he ran in fairly low level to strafe the beach before pulling up into one of his trademark curving turns, during the display the crowd was treated to "Victory rolls", "Barrel Rolls", and long sweeping topside passes before on his final pass the beach erupted with the simulated 250lb bomb's, his display could definitely be described as Sedate as each pass and manoeuvre was designed to show off the definite characteristics of the aircraft. IMG_9461 by J.R.Photo, on Flickr IMG_9527 by J.R.Photo, on Flickr Once Peter had finished the display, in the distance you could hear the tell tale noise of the next display act flying in from its base near Blackpool, and as soon as it had reached the pier the speakers started to pump out "Wagner's - The Ride of the Valkyries" and thus started the display of The Huey UH-1H. The display showed off all the angles of the Vietnam era Helicopter, and you could easily imagine the effect of 30 or 40 of these on the way in to an operational theatre and the noise that they would make. IMG_9553 by J.R.Photo, on Flickr IMG_9568 by J.R.Photo, on Flickr The next act to display was the Jet Provost XW324, having seen the Strikemaster last year I was wondering how this would be displayed, and to my surprise was displayed like a classic jet of its age should have been done, showing off its various lines & manoeuvrability, with various loops & rolls thrown in as well as a few topside passes. IMG_9666 by J.R.Photo, on Flickr IMG_9682 by J.R.Photo, on Flickr Running in almost as soon as the Jet Provost had displayed was the Royal Navy's Solo Black Cat XZ692, in the past years the Black Cats have displayed as a pair but certainly last year & this year has only been a single aircraft display. Although certainly lacking the second aircraft the crew displayed with precision showing why this is one of the most known Helicopter display acts in the UK. IMG_9699 by J.R.Photo, on Flickr IMG_9714 by J.R.Photo, on Flickr Next in the display was the Unlimited Aerobatics pilot Ed Cyster flying the Xtremeair XA41 (sbach 300), this was a show of high precision piston aerobatics with Lomchevak's, Knife edge climb's, stall turns & much more. IMG_9730 by J.R.Photo, on Flickr IMG_9807 by J.R.Photo, on Flickr The only change to the schedule was Peter Teichman displayed his P-51D Mustang "Jumpin Jacques" instead of the allotted display by the Navy Merlin, compared to his Hurricane display this was more fast paced, with the background music of "In The Mood", as with his previous aircraft his display was a mixture of aerobatics & fast top side passes. IMG_9832 by J.R.Photo, on Flickr IMG_9886 by J.R.Photo, on Flickr Running in from the right of the display line was the Army Air Corps last display with the Lynx AH.7, as usual this left a lot of people shocked with the aerobatics that it is able to perform, and it started straight away with a roll fairly high above the crowd before carrying out the move that its well known for, the "Backflip", as it was the last year this is being displayed this move was carried out quite a few times. IMG_9911 by J.R.Photo, on Flickr IMG_9931 by J.R.Photo, on Flickr During the above display if you looked out towards Blackpool you could just make out two aircraft taking off, after a few moments it soon became clear that this was perhaps the most anticipated and historic display to take place. In from crowd right you could make out the Battle Of Britan Memorial Flight Lancaster "Thumper", very closely followed by the Canadian Warplane Heritage Museum "VeRA" and with the Supermarine Spitfire LFIXe MK356 and Hawker Hurricane MK IIC PZ865 the skies above the beach was filled with the sound of 10 Merlin's. The aircraft flew together for a few passes before the two Lancaster's headed off to the right of the display to wait over Southport to leave the fighters to display together. IMG_0075 by J.R.Photo, on FlickrIMG_0083 IMG_0083 by J.R.Photo, on Flickr After a short while both Lancaster's could be seen running back in from the right of the display line to show off their topsides and fly together for a few moments before the fighters re-formed up and the formation flew back in from the left side for their final flypast before heading back to Blackpool and then off to the flypast over the Derwent Dam. IMG_0135 by J.R.Photo, on Flickr IMG_0138 by J.R.Photo, on Flickr Two Lancs by J.R.Photo, on Flickr After a couple of minutes wait the Eurofighter Typhoon TP-Y ZK308 started its display from the left, running in and immediately igniting its afterburners and pulling up producing a large amount of vapour from the top of the wings, during the display the pilot showed off all aspects of the aircrafts flying characteristics from the low speed high alpha pass, to the final pass which it pulled up in the vertical axis straight up to around 10,000ft again producing vapour from the wings. IMG_0269 by J.R.Photo, on Flickr IMG_0358 by J.R.Photo, on Flickr IMG_0372 by J.R.Photo, on Flickr Apart from the two Lancaster's, the next display act was something I was really looking forward too, catching a glimpse of the sun from both aircrafts wings to the left the Mid Air Squadron's Canberra PR9 & Hunter T.7 made their entrance with a excellent topside pass by both aircraft. For me the Canberra was the star of the pair and the display definitely was definitely more orientated in my view towards this. Although it was good to see a Hunter T.7 back on the display circuit as the last time one had displayed was in 2007, I personally think that the display should of incorporated both aircraft doing solo displays. During the display the Canberra came in very slowly as it had its Flaps and Landing Gear down, Spoilers deployed and the Flare Bay open, and carried out a wide 360degree turn following which the aircraft was tidied up as they prepared for the last pass which showed that although she is an vintage aircraft, she still knows how to move. IMG_0383 by J.R.Photo, on Flickr IMG_0445 by J.R.Photo, on Flickr IMG_0497 by J.R.Photo, on Flickr As with yesterday the Royal Navy Merlin from RNAS Culdrose didn't manage to winch a crew member down to the beach due to a technical hitch, but the crew kept it closer to the crowd than I've previously seen over the years. Showing off the manoeuvrability and also the power of the three turbines pirouetting down the display line up to the final act of its display, bowing to the crowd. IMG_0550 by J.R.Photo, on Flickr IMG_0593 by J.R.Photo, on Flickr This is one act that always gets people talking the RV8tors, unable to display yesterday due to the weather & one aircraft being stuck somewhere else (according to the commentator), these displayed their small Vans RV8 home built aircraft with a mixture of loops, rolls, stall turns and their own version of the "Heart" made from smoke. IMG_0605 by J.R.Photo, on Flickr IMG_0650 by J.R.Photo, on Flickr IMG_0658 by J.R.Photo, on Flickr For most apart from the two Lancaster's, the Vulcan would have been the star of the show. Having seen this almost every year since it was restored back to flying status, I have to admit this was the display I'd like to have seen at Rhyl last year. Quite a few power climbs were welcome, as well as a couple of the trademark "Howls". IMG_0729 by J.R.Photo, on Flickr IMG_0766 by J.R.Photo, on Flickr Thanks for Looking & comments more than welcome. John2 points
-
Ok buried in the mists of the dim and distant past, I started a build of the old Hasegawa FW 190 A8 in preparation for the Telford 32 nd sig display in November this year. This was the second build for the 70th anniversary of D day theme, the first being the "Solar Bolt" P 47 dio. On the similar theme, I thought I would do a second dio effectively a scene on June 5th, the day before depicting Pips Priller's FW 190 A8 which was one of only two Axis aircraft to fly over the beaches on June 6th. Just to balance the books shall we say. I did actually start a build thread but what with work and my attention being taken by a 1:1 scale MGB GT The thread went somewhat wayward. Anyhow, Im now calling it finished. The dio consists of the old boxing Hasegawa A8 of which i have no idea wether it was accurate, poorly moulded or otherwise, just to say I scored it for a massive £3.99. To this I added the Verlinden detail set, Cutting edge decals (which were extremely brittle and cracked in many cases) and the new Verlinden "Luftwaffe" repair section set, a beautiful resin set I must say. The base planking is made from believe it or not, coffee stirrer sticks, No I dont drink that much coffee, but i did need a bit in order to get stuck into the figure painting! Wobbly prop thingies are not my usual bag, however Jets just didnt make D Day so i had to build something appropriate and i have to say enjoyed both the Jug and the FW 190, however Its back onto a big jet of some description next. Here's the Photos with Pips nicking the maintenance crews coffee.2 points
-
A small update... Next on the list of ‘to do’s’ was the steering box and column. Quite a bit of adjusting, cutting and trimming was needed here as OOB, the box will fit nicely to the engine, but then foul the main frame later on. It needed to be trimmed and re-shaped on the inside face to move it around 2mm closer to the engine. Once done, the column also lines up better with the hole in the fire wall. Another alteration was to dump one of the kit parts and make a new one. On top of the steering box to one side, the kit provides a threaded rod about 25mm long, to be bolted through a flange on the front of the ‘box. In the kit, this rod serves absolutely no purpose. Inspection of the real steering box in photo’s shows it should actually be a hollow tube, with the accelerator and choke cables feeding through and along it, with an adjustment nut at each end. The rod was dispensed with and a piece of fine bore ally tube replaced it with miniature nuts at each end as the adjustment nuts. An extra bracket had to be made up for support of the tube at the upper end, as per the real thing. Once fitted, more connections were made for the choke and throttle cables. I also had to fabricate the sensor from the intake manifold and the fuel line intake to the carb. I've stood the engine in front of the Rolls to give an idea how 'small' the Alfa engine is compared to the Rolls Royce.... Mind you, it still measures 7" or 180mm from block front to rear of gearbox. All good fun. Roy.2 points
-
Ah..... I see what you've done there Jennings., you've tried to apply the laws of aerodynamics to a Gloster Javelin.....a classic mistake!2 points
-
Thanks for the kind words, I'm glad the daytime pictures work for you as well. It is motorized, the only external evidence is a switch and a protruding screw head underneath. When I was a kid I loved the Tamiya Mini 4WD cars (I couldn't afford a proper RC car) so there was no way I was going to leave the motor out. I love opening a kit box and finding those little bags of screws and gears and the obligatory tube of grease. It's like being ten years old again. The Mark IV runs pretty well, and will climb over things quite happily. I suspect it would be fairly easy to fit the 2-motor gearbox from Tamiya's line of 1/35 RC tanks, but for this one I just followed the instructions. Cheers, Will2 points
-
Hi, trying to put some clutter on the back end for propulsion,is it me or is looking like the back end of thunderbird 1,?lol...no i suppose as its only a low moon orbit/earth orbit vehicle to transport helium 3 to the orbiting storage tanks,for earth bound transport...later as in the movie moon,i can see the helium just being fired back to earth on SRB type transports.ie unmanned missiles..on a daily,weekly monthly basis,?.....SO on the chance you have not watched moon..DO SO,because its very good,and often found in the pound shops,...though there is no reason why,to be so cheap???,anyway back to the back end...... so the support structure,which will be hidden.. so onwards.. don2 points
-
Update of the day (not much time to work on it last night): First of all. following Gene's suggestion, I fixed the outer wing borders (poor pics, but you should see it) Then I started working on the exhaust nozzles: after priming, they received a coat of Tamiya's Sky Blue Tail chute cover with a coat of Sail Color (mix of Tamiya's Buff and Flat White, actually) A gloss coat on speed brakes, now they're ready for weathering, although I still have to find a clear pic of them showing how they weather Finally, I also started some work on the transparents: Future coated and PE parts Ciao2 points
-
Great job. Fifth Vulcan eh? Another couple of dozen or so and you'll be competing with Rob!2 points
-
Here is a quick update This morning i masked clear bits that are now installed and polished up, rescribed a couple of lines , then undercoated parts with Mr surfacer 100 from a rattle can, when fully dry i will see how things look and if all o.k i will install wings and tailplanes, Cheers http:// http://2 points
-
And if that fails 80 grit will sort it every time! Definitely try Nige's idea before mine though!2 points
-
Some sort of drugs den?2 points
-
All done, finished photos can be found in the Ready for Inspection section. regards, Jack2 points
-
That would be like me saying that Hasegawa have the F-16 well covered.The Hasegawa kit IS good, but needs serious updating through expensive resin add ons. The level of detail and fit in the Tamiya F-16's would be what every Tomcat fan would be dreaming of. I too hope that if it is not a reality, Tamiya observe the scale of discussion and interest that a F-14 from their stable is creating. Fightertown decals are talking about new F-14 decals and re-releasing old, sold out sheets. Ah, the Golden Age cometh!2 points
-
Thanks all of you guys cheers I got a bit problem with the black.. i dont know why, either vallejo and agama spirit based did not want to cover properly.. so i used it only for the tail and then switched to tamiya acrylic. This time it worked properly, but i ll have to let it dry till tomorrow, before i ll go on with masking for the walking paths on the wings.. I did at least paint the little parts. Tomorrow i ll remove the flaps(its just dry fit for now) and paint details on it, mask and paint the walking paths and complete rest of the little parts (gear, propeller).2 points
-
Good evening This We I finished painting and started decalling the Spitfire .. Patrice2 points
-
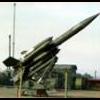
The site in the photo is the same one that of my Avatar picture was taken at, Missile Training Flight at Newton. My photo shows the Launcher and LCP (which is behind the T87 Radar in the photo on the first post). The Missile collection was there in 1983 when I stayed on the Camp while doing an ATC Gliding Course at Syeston. When I got there in 86, the missile collection was at Cosford due to the planned move of BH2 missile training to North Coates the following year. (Just behind the Radar Type 87 tower assembly (known as the Dalek)), you can just see the head of the Radar Type 86 radar that was also on the site as well).2 points
-
Definitely RAF Newton, I was there in 1976 on a Bloodhound course. They had a Lightning at that time which was used to train missile loaders. That is a Radar Type 87, with a BH2 launcher. There should also be a launch control post nearby as well. The missiles at North Coates were further from the hangars than that, and so would appear smaller. West Raynhams site was on the far side of the airfield, never got to Bawdsey so cannot comment on that. Wyton also was on the far side of the runway, well away from the hangars. Can't comment on Wattisham as another site I never visited. Barkston Heath I visited once but don't remember seeing hangars nearby. HTH Ted2 points
-
I'm pretty sure that is urban myth. My father worked on Vulcan squadrons from their introduction in the 1950s just about up until the RAF handed over the the UK's nuclear deterrent in 1969. He was involved in the early bombing competitions and testing of NORAD. I think is where urban myth may have come from - one the the tests of NORAD; three Vulcans hit their primary targets including NYC. For those exercises US airspace was completely closed down for 12 hours. So the Americans knew they were coming. The chosen aircraft an crews relocated to Scotland and flew over the pole pretty much evading large chunks on NORAD. Father looked after the dopplar terrain following radar and some of the electronic countermeasures which at times of heightened tension they used tweak on an hourly basis as they were fed intelligence. My dad remained quite tight lipped on most of what he did right up to his death and was the master of swerving inquiring questions, but towards the end of his life he was a little more open. Whilst watching a documentary on 9/11 where the narrator blithely stated it was the first time US airspace had been locked down, which he retorted "man-vegetables" it was about the only time in my life I heard him swear. Then he told me a little bit about one of the tests of NORAD. Four Vulcan went to a Northerly Scottish base and then headed out towards the pole. My father hinted that three machines went high and one went low.One of the high flying machines was caught be sheer luck over Goose Bay and nearly aerobatted his way of trouble, they didn't close to the other three.The one that hit NYC my father hinted that the first the Americans knew it was there is when it started it's bomb release procedure. Which was pop up from low level and the bomb was released at the top of an Immelmann roll to lob the nuke onto it's target, which was of course too late! The bombing competitions my father attended back in took place in California when he clamped eyes on a B-36 for the first time was astonished at the size and that it had train like device to transport crew around the aeroplane. One prank some of the Vulcan crews played on the bombing competitions, was stooge around waiting for returning 36s and 47's, swoop behind open the all channel radio and announce their presence with "dagger, dagger, dagger", before peeling away like a fighter. I'm pretty sure my father took far more stories to his grave than he ever told, one thing I found retrospectively was that every member of first V Bomber squadrons were interviewed by Sir Bing Cross and only the best made it. By the way I was being tongue in cheek about the Vulcan being the first stealth bomber. Marty...2 points


.thumb.JPG.3498f40362ff13ebfc4b2e45abbd545e.JPG)


This leaderboard is set to London/GMT+01:00