
Leaderboard


Popular Content
Showing content with the highest reputation on 21/08/14 in all areas
-
This was supposed to be my entry for the Harrier GB but because of a last minute paint disaster it didn't make it. Finally finished it tonight, mostly OOB but with extensive scratch building in gear bays and to ejection seat. Cheers, Liam10 points
-
Hi, That was finished last year, never got around taking pictures of it. First got the kit for practicing a bit, but I think I got crazy trying to get a smooth finish with the brush... I'm quite happy with the finish Gallery IMG_7587.jpg by scorder666, on Flickr IMG_7595.jpg by scorder666, on Flickr IMG_7591.jpg by scorder666, on Flickr IMG_7592.jpg by scorder666, on Flickr scorder10 points
-
Since my last build here was reason to some political engagements... not from me... Now Im back with a Brit Legend... EE Lightning F.2 from 92 Sqn, Gutersloh, Germany 1969. Airfix kit, 1/48, paint with Brazilian Car Silver paint and weathering with Mig Jimenez. Hope you enjoy. Cheers9 points
-
I was lucky enough to have a week off this week and spent a couple of days in and around Lincoln to see the Lancs and '558. No photographs could do the formation justice, and the Canadian Lanc had drifted out a bit (due to high winds probably), but it was still an amazing sight to witness. Avro formation by tony_inkster, on Flickr Avro's finest 3 by tony_inkster, on Flickr Canadian Lanc by tony_inkster, on Flickr Smokey Vulc by tony_inkster, on Flickr Lancaster Formation by tony_inkster, on Flickr Canadian Lanc 2 by tony_inkster, on Flickr Vulcan B.2 XH558 by tony_inkster, on Flickr7 points
-
This is my lasted Models. I made them from March until yesterday. I hope you liked. Somua S35 (Heller) Matilda Mk.IV (Tamiya) M4 High Speed Tractor (Hobbyboss) AEC 4x4 Armored Command Vehicle "Dorchester" (AFV Club) M3 Scout Car (Italeri) Type 97 CHI-HA (Tamiya) Sdkfz.250/3 "Grief" (Tamiya) Humber Snipe 4x2 Staff Car (Airfix) Land-Wasser-Schlepper Late Type (Hobbyboss) Marmon-Herrington Mk II (IBG Models) Char B1 Bis (Tamiya) Carro Armato L6/40 (Italeri) Chevrolet 30 cwt "LRDG" (Tamiya) Willy's Jeep "British Airborne" (Bronco) Fiat 500 "Topolino" (Bronco) M.T.M. "Barchino" (Italeri) Higgins LCVP (Italeri)7 points
-
1/72 British Army DUKW (built from Italeri kit) Build thread is here: http://www.britmodeller.com/forums/index.php?/topic/234962040-172-italeri-dukw/ Cheers7 points
-
My second but not last Spitfire from Eduard. SZ G was personal aircraft od W/Cdr Aleksander Gabszewicz who command 1 Wing of Polish Air Force in mid 1943. Older WX D painted by oils Model Master & new SZ G painted by Gunze.6 points
-
Went to the Imperial War Museum with the family on Sunday and we let the boys choose something from the shop at the end. My 5 year old chose an Airfix Curtiss Tomahawk. So this WIP is going to show his build. I thought it needed marked for posterity. It's a case of getting it built in one sitting (like me when I was younger). J5 points
-
Hi, Next scratch from my shelf - Percival Petrel Q6 from Royal Flight, Egipt (Cair) 1944 (1/72). This is a free hand work (or sculpture as you want) except engines which basicly comes from DH 88 Comet from Frog/Novo (but they are reshaped following drawings of course). So it looks like this: I started like this: Regards Jerzy-Wojtek5 points
-
My last day in the RAF after thirty years, ten months and sixteen days approximately, went to Newark North Railway Station to close the circle (it was there that I jumped on the RAF bus to take me to basic training at RAF Swinderby on the first day), and just as I turned to walk away, I got a flypast from the Lancs and the Vulcan, priceless.5 points
-
I'm sure Airfix are trying to make me backrupt5 points
-
Hi everyone Well do I have some catching up to do! I've manged to finish the cockpit area and I'm quite happy with how its turned out, its taken much longer than intended but what do you think? The only additions was the Sutton Harness by RB productions (very nice and easy to assemble), instruments by Airscale (very nice and easy to use) and some lead wire added to the control column to replicate hydraulic hoses. I might make a start on the motor later but I have stuff to do around the house and I'm at work tonight... Yours aye Iain5 points
-
Unmasked the nose light glazing - came off pretty cleanly - I had been a bit concerned given the number of coats of paint and klear it's had: And for want of something else quick to do I added the roundels onto the home brew white discs: Now slighly ahead of where I was when I dropped the bl**dy thing!5 points
-
3 hours of work and other side is here5 points
-
Airfix is still hitting slapshots into the net! Gem of a kit! OOB with Xtradecals, as it flew in Operation Market Garden. This Gooney Bird was lost on 25 October, 1944. It was suspected the load inside shifted way past aft CG, and crashed on takeoff near Guilford. All four crew aboard were lost.4 points
-
Since my last build here was reason to some political engagements... not from me... Now Im back with a Brit Legend... EE Lightning F.2 from 92 Sqn, Gutersloh, Germany 1969. Airfix kit, 1/48, paint with Brazilian Car Silver paint and weathering with Mig Jimenez. Hope you enjoy. Cheers4 points
-
Just turn the sound up and enjoy. http://www.bbc.co.uk/news/uk-england-lincolnshire-28873614 Well that's made my week / year.4 points
-
Just finished is my 1/72 P-40N ex. Hasegawa, built OOB except for seat belts and the antenna wire. As many know, this is quite an old kit, but I think it built up quite well. I especially enjoyed using my Grex TG on the paint job. Enjoy! - Adam4 points
-
M4 Sherman 75mm 'Normandy 1944' Dragon 6511 1/35 scale 37th Tank Battalion, 4th Armored Division, Brittany, France 1944 (this Unit, but not this tank, was Commanded by Creighton Abrams) Follow the full build thread here4 points
-
Unbelievable, all that money spent on kit development & they screw it up by printing the box artwork UPSIDE DOWN. I for one won't be buying for that reason.4 points
-
Aaahhhh, nostalgia. When I was about seven or eight, my Dad bought me my first model. Coincidentally: The old fashioned blister pack, which I hunted down and bought recently as a reminder. The instructions were printed on the back of the card in those days: We built it together in one sitting, as you and your son did, and I still have it, about forty years later: It'll never leave me, the memories are too precious. One day, in about forty years, maybe your son will also look back fondly on that first model he built with his Dad... Thanks for bringing back nice memories, Dean4 points
-
Edit: This has turned from a WIP on Canberra to a project a little bigger in scope, but I will keep this post going to keep everything together.But this is going to be a diorama with the LHD HMAS Canberra, Air Warfare Destroyer HMAS Hobart, 2 3d printed Anzac class frigates and a Collins class sub docked at a section of of the Australian Navy's base in Western Australia. So continueing on with my 1/700 Aussie Navy, heres the next one. Not to far off commissioning is Nuship Canberra, a 27000 ton LHD based on Spains Juan Carlos design. 2 ships have been ordered Canberra who is about to enter service and her sister Adelaide who arrived here in Melbourne a couple of weeks ago. The hulls for both ships were built in Spain then transported to Melbourne to have there Islands structures fitted and completion of the ships. How the hulls are transported here is just amazing Having discovered that Orange Hobby do the Juan Carlos in 1/700 I started to have a look at the differences between the Aussie and Spannish versions. Really all it comes down to is slightly different radars and sensor arrangements the centre mast is further over to the starboard side on the RAN Class and 4 of a new type of light gun system as apposed to close in missles on the Spanish ship. Another company Bigblueboy do the Spanish Aegis F-100 frigates, which is the design the new RAN airwarfare destroyers are based. The differences between the 2 are the same more or less as the LHD's . So I figure an LHD and AWD together would make a good Modern RAN scene to compliment my RAN of yesterday scenes. So heres the OH Juan Carlos kit I bought this kit from Hobby Easy online and nearly fell over at the price. It cost me $70 au (around 40 pound) including postage. For a resin kit the size this thing is with all the PE etc included this is just amazing value. There is not really much to the ship so there is not much to the kit in terms of number of parts. But everything is there to be able to detail it. You get 2 Harriers and choppers for the airgroup and a couple of landing craft for the well deck and if you want more you can get them seperately. Now Australia has no intention of operating Harriers so I won't be using them, but the choppers are NH90's which we have just introduced into service, so they can be used. The landing craft are wrong as well being a model the RAN is retireing, but OH do the correct version but I've decided I'll have the stern gate closed so I don't to worry about it. I've also got a couple of Chinooks, Seahawks and Eurotigers to fill out the flight deck. Aussie marking for these are non existant but in 1/700 I think I can live without. I've also ordered so hull number decals from Hawk Graphics. So far all I have done to the ship is cut those resin pour lugs off the hull and cut the centre mast off and clean up a seam line where the hull meets the Island on the starboard side. I'm still a little vague on just what all the changes to the masts and radars etc I have to make But I can kick on with the build while I work it all out. Anyway I thinks thats enough of a ramble for tonight. More to come soon on this beastie Cheers Callum3 points
-
Here is my latest attempt at making a Sunderland flying boat on the sea. It was the Italeri kit with the huge panel lines and the plate armour photo etch. I hope you enjoy it. http://s1294.photobucket.com/user/SY64/library/Processed%20Sunderland?sort=3&page=1 Regards, Marags.3 points
-
Thanks a lot guys, she's a clean smooth miss indeed. I have now sanded the second primer coat and cleaned a few scribings and luckily I found nothing more to bother with before painting. So I fabricated and attached the small details that need to go on before paint but would have been a misery to work around earlier. The pitot tube is actually from the Airfix kit. And here we are after touching up the primer. Some fine sanding on this and the white colour can go on. Somehow I am now supposed not to damage that rear antenna during the rest of the build... I'm not sure how that will be possible.3 points
-
If one looks closely at box art, the tailplanes are missing.3 points
-
Permission to treat the witness as hostile.3 points
-
Right well I've managed to finish the mem's decorating chores...hope she like the bathroom in RAF dark sea grey and dark green, goes nicely with the LAG hallway and trainer yellow kitchen.....................makes a pleasant change from all that magnolia nonsense ! AVMRIP Moore, true...I'd better crack on with some 'work' I spose, ... 'Shanks', 'Parkhurst', what are you trying to tell me man...are you trying to escape from the front ?.......get back to your dug out and write out...'I'll be a good boy from here on in' oh and leave your underpants and the pencils on the desk !! Radders, Good Heavens man, do the prison governors know what you have planned ?........... Ah ha, yes I remember that too Trevor...always find a way to gain the upper hand...mind you they'd pick it up pretty quickly...lanky bloke flings a hard lump of leather at you.....you respond by trying take avoiding action and hitting it as hard as you can with a long plank of willow that someones thoughtfully provided you with...then when you hit it run like bu*****y from one bunch of white sticks to the other til someone shouts..stop or Out !!...no one knows quite why but there's not much to it really. Mind you they got there own back in a few other small ways, football, Formula 1, tennis, cars, electronics, efficiency........just about everything else really......but by George they can't lose as well as we can........no sir, we have 'em there ! Keef and Steve...she's already gorn by...low level eh.....now that's the way to travel ! Ah, coal fired Speys eh......not so sure old Keefy could keep up these days, but he'd have a damn good go .. Anyhoo back to the model..................funny, could have sworn there was one here a minute ago .... I've managed to finish the other airbrake as well as both inner faces...and almost gone blind in the process, I'm sure the old eyes will return to some semblance of normality at some point. There are rivets all over the gaff now, leading edge of outer wings, tailplane etc...used the third set up and I'm not adding any more ! The elevators have been given the once over too, The larger spine mounted aerial has its base plate fitted, this will be sanded into the fuselage spine as per the real thing, And the hook bay side plates have been added....I still have to detail the inside of the bay and make the brass hinge joint so that the hook can deploy and stow. Just a small thing but I also added small plates either side of the rear fuselage, again these will be filled and sanded into the surface. Also added a double length of small rivets down the outside of the rudder line. Finally riveted the underside actuator plates, (the actual actuator is only blu tacked on hence the slightly skew whiff angle).... The next big job will be sanding the area around the rear underwing joint, (just ahead of the flap where the outer wing meets the inner section...should be fun !)....3 points
-
I finished this yesterday, I have been wanting to build one of these for an age but scarcity means that they don't come up for sale often and when they do they tend to be a bit pricey (especially if you add the expense of the Dutch Decals Neutrality Markings - the orange triangles - which do not come with the kit). The model represents no.328 flown in May 1940 by Sgt. H Soufree with his gunner Sgt. de Man of 3 Ja.V.A in which he claimed an He 111 and a Bf 109 in the fighting over the Netherlands. I added some Airfix pilots as crew and a pitot tube from the spares box, and I replaced the protruding nose gun barrels with resin ones as those provided were a bit chunky, apart from that it is I think oob. As always I could have done it better if I had paid more attention and had more patience but I didn't and I haven't and for a limited-run kit it was pretty forgiving and I have at least, at last, built one. Decals as mentioned were from the Dutch Decals set DDS9072, paints were Humbrol 64 Light Grey for the interior, 168 Beige, 180 Red-brown and 244 Dark Green for the camouflage scheme. Cheers, Stew3 points
-
Quite enjoying this thread, at least two are on the list and being worked on, both will surprise you and I have provided research material and seen the CAD for another , keep going.3 points
-
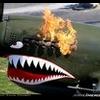
It's the shark teeth IMO. J3 points
-
I got the wing on ,. the fit is remarkeable , considering the parts are from different kits , just a small gap at the forwards edge of the upper wing root. Should be no problem with a smear of filler. A word of warning however, the lower wing parts have "shrink marks " ,that have appeared near the tip , this is probably due to the finess of the parts and an excess of liquid cement , so be careful. Andrew3 points
-
Thanks for the advice Sgt I have been playing with a couple of washes tonight. The first I applied was a 'sand' wash. I used this on the wheels and hull. I've also applied a black / brown wash over the top half of the model. I'm quite pleased with the results though I'll be adding more washes and detail once this has dried (but am calling it a night for now).3 points
-
Thanks a lot for the kind words. I've made some more progress today. 2-part filler was applied around tail plane joints, but only to fill the fuselage sides. Here it is sanded smooth. Then I saw no turning back from having to glue the canopy. It was a bit scary but worked fine with no drama. I used CA that I know will not fog when used correctly. The fit seemed very good so the work done before paid off I think. And again I had to tack the spinner on for some more speed bird looking... The I filled the joint with 2-part filler and sanded all the painted vac form sections smooth with the fuselage, more scary work. I also scribed the joint around the sliding part, but I'm sure I will have to revisit that after the first primer coat. It's probably not the only scribing that will need later attention either... It's now time for a first primer coat, after masking the canopy of course. There are also a few tiny antennas to be scratched and fitted, but I will leave that work until the primed surfaces are sanded and ready for the top coat, as I'm quite sure there is a good deal of work remaining. I will wait a few days with the primer though, so I can bring my racing vanship to the primer stage and do them both in the same session.3 points
-
HI all, here a some pictures of a kit I completed some weeks ago. It's the Tamiya D520, with Regia Aeronautica markings. On the web one can find several pictures of this plane on the Istres airfield in the south of France, at the time of its transfer to the italians. On these pictures, the french cockades are overpainted in grey, but the italian fasci are missing, I added them thinking that some months later they would be present. I took the decals from an old Aeromaster sheet. The cockpit is detailed with an Aires resin kit, the exhausts are from Quickboost. The camp is done with mixes from Gnuze paints, that I found on the web. The basis of the small diorama is some 'cardboard foam' glued on a photo frame. The ground is done with isolation foam, covered with wall putty, then sprinkled with earth and small gravel. The high grass is static grass, glued on diluted white glue, using a 'grassinator', this small gadget can easily be done using an electric fly swatter, the grass stands then upright because of static electricity. The tree is done with thyme branches from our garden, the leaves are from Mininatur. I will add an italian pilot from Jaguar, which is currently waiting to be painted. I hope you will like it, regards, Christian. <script src="safari-extension://com.ebay.safari.myebaymanager-QYHMMGCMJR/f470c93b/background/helpers/prefilterHelper.js" type="text/javascript"> </script>2 points
-
This is my latest completion: Boeing's big twin in the form of a 1/144th KLM Boeing 777-306ER. This model was based on Minicraft's 777-200 kit, with numerous modifications. I inserted Braz's fuselage extension plugs forward and aft of the wings, did a bit of re-profiling of the nose area, added Contrails' extended and raked wingtips, completely re-worked Contrails' GE90-115B engines and pylons, and finished it off by using a DrawDecal set for the current KLM scheme. All paints were from Halfords' automotive range. This was a fairly straight-forward conversion, but I did create a fair bit of extra work by modifying the engines. However, I think it was well worth it and they are now a better representation of the real thing. Boeing 777-306/ER, KLM, PH-BVA, 'De Hoge Veluwe National Park' Happy modelling! Tom2 points
-
The RNZAF operated the Mustang postwar after ordering them to replace the Corsair from 1945. The end of the war saw most of the order cancelled and those received to be placed in storage, before being activated in 1950 to fly with the Territorial (reserve) arm of the RNZAF. The Airfix F-51 boxing is basically perfect for doing an RNZAF machine, as it includes all the parts necessary, namely the uncuffed prop and rocket rails. With that in mind I'm using up the remaining decals on my Ventura RNZAF Mustang sheet, and doing the first option, which is a Mustang fresh out of the shipping crate and still with the US serial on the fin. I also decided to customise this one a little bit by adding an exposed engine from the Verlinden P-51D Update set. The rest of the set I'll use on other builds. Colour scheme is the first option here: First thing to do is start carefully cutting up the fuselage: Considering it was intended for the Hasegawa kit the Verlinden engine fits pretty well. That's a good start so far:2 points
-
Finally finished my Airfix Westland Apache. Build thread here. http://www.britmodeller.com/forums/index.php?/topic/234961435-airfix-longbow-apache-172/?fromsearch=1 As with all attack helos, the weapons fit took ages. J2 points
-
I wanted to play with some Precision Ice and Snow before using it in a diorama that is probably more ambitious than my skills will allow. Some pictures on the interweb of HMS Tireless in the Arctic ice gave me the inspiration to butcher Airfix's Trafalgar Class sub, and experiment with a few different icy textures. Figures are from WEM, which I tried to bulk out a bit with PVA, but still look very flat. It was a fun little project, so I hope you enjoy a slightly different presentation of a modern sub. Cheers, Paul2 points
-
Evening guys, this is my last finished kit, P-51D from Airfix 1/72 kit Kits - World decals, built mostly OOB with few details added to the wheel wells and riveted fuselage + improved the fasteners around cowling. The paints used are agama alcohol based silver and aluminium, mixed in various ratios for diferent shades and vallejo paints for rest of the painted areas. I did not want to go too hard with the weathering this time. The WIP is here http://www.britmodeller.com/forums/index.php?/topic/234965758-p-51d-f-51d-2x-airfix-sweet-arlene-finished/ Exhausts are just placeholders (cut from Hasegawa exhausts), ll be replaced by quickboosts during next week . Hope you like her and thanks for watching guys2 points
-
This has been on the back burner on and off with other things going on my life. But managed to finish it regardless. Its the AZ models Spitfire T.8 and in kit decals as one of the 3 variations of G-AIDN.2 points
-
Stunning photos what a sight & sound that formation must have been. Thanks for sharing2 points
-
Alright... STILL not done but getting there. I finished the topcoat on the Sandy, but I'm not entirely too happy with it. Basically the decal areas you can still see some film... like its more flat than its surrounding area. So what I might do is hit those areas with some more future then do my final coat again. We shall see. I also added the rest of the bomb racks as well. The other area I finished was the exhaust plume, which we all know is quite prominent on the AD series. I use a bit of technique that a Spanish modeller on ARC showed me. It involves laying down a base coat of black, over which I put a desert brown: Then I use a bit of black artist oils to add in streaks into the exhaust plumes. It looks a bit too much, but I'll correct the desert overspray with a very fine coat of black, perhaps masked off a bit so the overspray doesn't cover the oil painting that I added. That should also give the distinctive "kink" in the exhaust that is seen on most skyraiders. Well, I'm getting there. Just a few more things before I'm done!2 points
-
I like it but I do hope those nay sayers, who panned the Vampire don't see this thread, they nay just have a hayday. Congratulations Airfix. I do want one, the box art sold me on it. Colin2 points
-
It's all finished. Pics on Gallery shortly2 points
-
You must be coming to the stage now where it takes that hand-held flight round the workshop - Is that how it got dropped? Gone on admit it. Or would that just be me?2 points
-
When you say "enlarged" tail-rotor, you mean from microscopic to minuscule I assume? Detail here is fantastic. A nostalgic build that brings back those memories of a Saturday afternoon trip to Woolies followed by modelling (in the loosest sense of the definition) - More tube glue than green styrene in my case, with the inevitable crash and burn in the garden. Thank you.2 points
-
after a short rest in the surroundings of beautiful nature, I've come back to work before painting the main markings I had to paint a few stripes2 points
-
Here's how the contemporary British magazine The Aeroplane viewed this aircraft: "Your nose is here, your engine's there Your tail's just stuck on anywhere You symbolise the grotesque Hun Begone, distorted one four one!" Not fans, it would seem! And for those who still think it couldn't fly... https://www.youtube.com/watch?v=SV96hXwWN7c2 points
-
Thanks for the kind words folks... I just made it from some scrap plastic - not sure if it's a good representation of the real thing or not to be honest, but in this scale you can get away with it! The gloss finish is Halfords Clear Lacquer. It only seems to work over Halfords' paints (it is pretty potent stuff!) and must be applied in very thin dust coats otherwise it can eat the decals... this has had about 5 very thin coats and it builds up into a beautiful gloss finish that is very hard-wearing and won't yellow over time. Welsh Models do a conversion set to turn the -200 into a -300ER, and provide GE90-115B engines and pylons, new flap tracks (to improve on the kit's) as well as the raked wing tips. If you've already got Braz's plugs then you'll be good to go. The picture on the link below is not working so I can't judge the engines, but I've only ever been very impressed by Welsh's stuff in the past: http://www.welshmodels.co.uk/RE003.html Or, as I did, there's the Contrails route: http://www.contrailsmodels.com/Engines.html Scroll down the page and you'll find them! It's not too bad to be fair, but does require more work than say an offering from Revell would. I love the 777-3000ER and with the work involved in converting this one I think I'll go for the Welsh Models vac if I do another - it'll probably be more straight forward! Tom2 points
-
Neil, That Manchester looks spectacular. Really like the exhaust staining. As you asked here are some pics of the home baked conversion. The different coloured plastic is that I used bits and pieces of discarded kits to see if I was able to do such a complicated conversion. You can see how the nacelles are built using formers filled with Milliput. The various intakes are from the Lanc kit suitably cut down. Hope you like it. It was fun. L7518 was a Manchester whose wreckage was recovered by the museum I work for as a volunteer. Cheers Cees2 points


.thumb.JPG.3498f40362ff13ebfc4b2e45abbd545e.JPG)


This leaderboard is set to London/GMT+01:00