
Leaderboard

.thumb.JPG.3498f40362ff13ebfc4b2e45abbd545e.JPG)

Popular Content
Showing content with the highest reputation on 18/07/14 in all areas
-
Hi all, I'm new to this forum and I think to show a model is the best thing to introduce myself. I`m from germany an I build aircraftmodels in 1/72 for a couple of years. I watch here for some years all the great models. I must apologize for my mistake english and I hope you can understand me anyway. So, here is my newest model: Kit: The Do 217 family of Italeri goes back to the mid-70s and is almost 40 years old. The J version is a reboxing from the year 2007. Almost no cockpit- and undercarriagedetails, narrow-chested engines, a too narrow rear fuselage and raised and false engravings featuring this model. Positiv to mention are the thick but still perfectly transparent clear parts. Original aircraft: The Do 217 was created as a medium bomber to replace the Do 17/215. Similar in structure to the predecessor, the Do 217 aircraft has however a completely new design with a much larger fuselage, new wings and many other improvements. In the J version, the aircraft was delivered from 1942 as a Nachtjäger (nightfighter) in 130 units. Basically, these aircraft were bombers of the E-series with a solid nightfighter nose. There, the FuG 202 (J-1) or FuG 212 (J-2) was placed, in addition 4 MG FF (250 rounds each (!) and 4 MG 17 (1,000 rounds each). If the fully functional bomb bay was equipped with fuel tanks, the aircraft weighed 15,250 kilograms - a predestined long-range nightfighter and probably the "heaviest" German fighter aircraft in World War II. In terms of flight performance, the Do 217J-2 does not really convinced. The top speed of 480 km/h and a climb rate of 540 m/min were values that also from the older and lighter predecessor Do 215 B-5 (http://www.modellboard.net/index.php?topic=45568.0 in german only) were achieved. My model: My model shows the Do 217 J-2 "KI + LV" of the II. / NJG 101, Hungary 1944., At that time the J usually had no more flamedampers to get a bit more performance out of the machines. Construction: In addition to two BMW 801 from a Hasegawa Ju 88, I also use the historic upgrade from Italeris Do 217 M-1 kit for this model. From the latter come the carriages, the cockpit interior, and the casemates of the (developed) site arms. Scratch were built: - cockpit adjustments for Nachtjäger - MG FF cartridgeejections - front arms positions - FuG 212 antennae - recessed engravings and cockpit back armor - widened rear fuselage - landing light and pitot tube - Dornier conversion kit R7 (rubber dinghy) on the fuselage - position lights and other small parts. The kit was as painted with Gunze RLM 75/76 and 74 in the area of the fuselage Balkenkreuz. Weathering: Preshading, lightened base color, Gunze mud on exposed areas with airbrush, Tamiya Smoke for traces of oil and gas plume, various oil colors for dirt and wear, finish in my special "Bacon flat" (uneven greasy finish with flat but also greasy surfaces that simulate a dirty surface ). Top view: Bottom view: Details top: Details bottom: Work in progress cockpit: Hope you like this. Best regards. Kai15 points
-
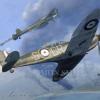
P-39 in unusual skin. Most of Cobras were Olive Drab, but I think desert scheme much more pretty. As usual for my models were added photoetched cockpit and flaps.12 points
-
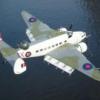
Finished! Blenheim Mk.1 L1388,AV-W, 113 Squadron, Greece 1940-41. This I managed to complete in a week! Lovely kit to build with a a couple dodgy area that now I know about will tackle differently next time. In particular the nose. Maybe the nose halves would be better fixed in place to the main fuselage half before joining said fuselage halves? I'll try that next time. But in the meantime, I enjoyed this build and opted to use the new DK Decals I bought from Hannants on Sunday at Duxford( the website shows this set as sold out!!!). All main colours are Xtracrylics and a top coat of artists acrylic matt varnish thinned with flow improver and a drop of matt white paint added to get a faded appearance. A touch of nose art. Bombed up! Not sure if the small bombs would have been fitted on these at the frontline but I used them regardless to avoid filling my spares/leftover parts box! .....Slight paint chipping done here and there... The only kit decal I used was the walkway that fitted the model perfectly! Also I only added some seat belts. Pics of part of the WIP can be seen here: http://www.britmodeller.com/forums/index.php?/topic/234964274-blenheim-in-progress/ PS: I lost one of the open bomb door parts.(C29). But not a big problem as when I get the next kit, be it another Mk.1 or the Mk.IV, I can replace it, as my next one will be closed up.11 points
-
Brassin engine added.11 points
-
Another one just finished in between other things being seen to in my shed!! Academy kit and Leading Edge Decals!! This is 188764 of 439 squadron in Germany early 1990s. Nice kit and very nice decals. Overall paint is 35327 as opposed to the normal two tone grey. Only peculiar to this Tiger Meet scheme. Some tiny amounts of trimming and touching to the decals was needed but no way a serious issue! By the way, I spent FOUR evenings of around 2 hours each to do the decals alone!!!9 points
-
This is my first chipped airplane. Its not "what if", that was realy: For box content were added photoetched for cockpit and flaps.8 points
-
Another build that's been languishing in the started pile for a while now, So seeing as the blackjack build is still awaiting white rattle-can procurement, I got on and finished this one. The kit built beautifully, only slight meddling was needed on the top nacelle to wing fairings really. Primed with rattle-can grey, then pre shaded with semi gloss black. Then the camo was sprayed free hand, Tamiya flat earth, and Vallejo bronze green were used, after masking the black was sprayed I used Tamiya NATO black. Then a gloss coat of Tamiya clear cut with Mr levelling thinner was sprayed all over. I had a bottle of Humbrol Decalfix on the shelf and thought id use this on the airfix decals rather than my usual Daco product, And this is where things started to fall apart...... The decalfix seemed to dissolve the paint where it touched right down to the grey primer(Never had that happen before with Daco or Microsol) , so this had to be touched in with the airbrush again. The decals settled nicely though, and a quick MIG wash was run into the panel lines. Some zorst stains were added using rubber black and deck tan, and a mist off deck tan was sprayed all over to tone it down a bit. Finally a coat off Tamiya flat clear was sprayed all over which oddly dried with odd white powdery patches, luckily some neat klear applied with a brush sorted those out. So all in Im happy with the outcome, Its no prize winner But It's taught me some more lessons from the trial and error book of modelling. Enough waffle so now here are some photos. Thanks for looking8 points
-
Not another boring old Spitfire, I hear you say. Well, having struggled for the last few weeks with a fiddly and time consuming decal session on an Airfix Trident airliner (it will be finished soon, I promise), I decided to fall back into my comfort zone and build something World War 2 and simple. Well, you can't get much simpler than the 1974 vintage Airfix Spitfire VB. The kit shows its age and is devoid of any meaningful cockpit interior. However, with the thick cockpit canopy in place, most of the interior is completely invisible. So I decided to scratchbuild a crude instrument panel and some basic sidewall detail but nothing else. I have inserted Paddy the Pilot ( you will see why I've chosen this title later) as he helps fill the void. Overall, the outline of the kit is pretty accurate and when built it definitely looks every inch a Spitfire. The version of the kit I am using is a recent release but it still contains the scheme for the version that was issued 40 years ago, i,e, Jan Zumbach's RF-D. However, as I built that version a few years ago, I decided I would have a go with with a plane that represents that of another immigrant RAF pilot, this time one from a bit closer to home. Brendan Eamon Fergus Finucane was from Rathmines in South Dublin. His dad was an ex-member of the IRA and had fought against the British in 1916 and 1921. Despite that, Brendan and his brother Raymond were 'plane mad and desperate to join the RAF. His dad apparently had no problems with this and, in fact, the whole family emmigrated to London in 1936. True to their ambitions, both brothers were successful in joining the RAF. Raymond ended up in Bomber Command and survived the war. Paddy (as Brendan became known to his RAF colleagues) became a fighter ace and eventually the youngest Wing Commander in the RAF (he was 21 at the time). He was credited with downing 28 enemy aircraft. Sadly, he was lost on operations in 1942 when he had to ditch his Spitfire in the Channel. He was unable to get out of the sinking aircraft. This is my tribute to Ireland's greatest World War 2 ace.7 points
-
Hi all, Here are some pictures of my Pan Am Space Clipper from the Moebius kit. Lots of work done, but I think it turned out pretty well. An extra shout out to Marty Hobkirk, Ian Gazeley, Kevin Foss, and others who have worked long and hard to amass and share the data that we can use to do the subject justice. Thank you kindly, gents! And finally, a beauty shot... Cheers, Jim6 points
-
Calling this one finished, done some little touch ups since the WIP. Kit is the Hasewaga boxing with kit decals, Eduard wheels and painted using Alclads for the metallics and Mr. Hobby/Tamiya for the main scheme with ProModeller wash. I decided not to weather this bird any further, I like the finish I've got just by fading the panels a bit. My first attempt at seatbelts, really glad I tried a bit of detailing, it makes a big difference compared to my RAF Phantom! And parked on the flightline! Thanks to the guys who helped me out on the various threads I put up6 points
-
Hello All, Here is an Airfix Heinkel 111, extensively modified, and backdated to an H-1. The model represents the "Humbie Heinkel", which was the first German bomber to be shot down over the British mainland, in October 1939 . Build thread is here. I had a lot of fun doing it, but I won't be doing another one. Thanks for all the comments and support along the way! Thanks for looking, Adrian6 points
-
After having been away from aircraft for many years, the opportunity arose of doing some for developing projects; resulting in these two: The old Airfix RE-8. Rigged with fishing line. It doesn't bear close scrutiny as a decent model of the aircraft but it is only a wargame piece. Revell Fokker E-III, in Turkish service in Mesopotamia. All as before.6 points
-
I'm new here! Finished this yesterday, a Firefly 5 from an old Palitoy-era Airfix kit - basically accurate but a bit rough, decals going a nice shade of brown. It was moulded in nice navy blue plastic, which wasn't very easy on the eyes. After building a decent interior, where I cheated by copying the parts off an Airwaves etch set instructions, building seats and instrument panel etc. from sheet, there was a lot of filling and sanding involved (first off were the boiler rivets...) - I used Deluxe Materials "Perfect Plastic Putty" - talk about boast. This stuff is water soluble so you can wipe it with a wet cloth rather than sand, but it is porous as chalk so needs priming with enamel - I sprayed the whole plane with Humbrol Aircraft Grey before attempting to paint it. Then sanded it some more. A lot of work. Underside colour was Humbrol Beige Green - my tin had nearly gone off and I had to strain the paint before spraying it. Nice coverage though! Top colour was Humbrol grey 32, probably a bit dark but it looks ok. Korean War Invasion stripes were masked and sprayed - should have done the white before doing anything else, masked them and sprayed the main colours, I know, but I forgot. It all looks good now though. Decals are off the Print Scale sheet (Hannants) - very good decals but a bit thin - I destroyed the squadron code on one side so it only has one! These went on over a brush coat of Klear. A further Klear coat sealed it all in. Handsome plane! PL5 points
-
Greetings from Ukraine! That's my first post on this forum, and I want to introduce one little kit: F4U-1. As copy of Corsair in 72, this kit is very good (maybe even the best of current).5 points
-
If you make something you're entitled to sell it how and where and when you like. Airfix is in the business of selling kits: for every one it sells retail it avoids having to give away a large margin to a retailer. What might be unfair is if they used that to undercut their retailers. but they don;t do that: they are usually one of the more expensive online sources for their products, at least in the UK. Is it "unfair" for E-Hattons and Amazon and others to take orders for the kit at a lower price than the Airfix price? Of course not. And all those orders were placed months ago. So nothing Airfix does now is affecting those orders. And anyone who wants to buy one in a shop will by definition not be ordering it from the Airfix website. So it's swings and roundabouts.5 points
-
OK, after several tries linking the photo from Photobucket, and three paragraphs of text gone into Cyberspace, here is my last Real Space model, from the 94 reissue of the classic 60's Revell Astronaut in Space kit. I'm not going into any more detail about techniques in case that goes poosh as well, but there's a fair amount of scratchbuilt detail using the many available photos as reference. Umbilical was thick alloy wire wrapped in strips of gold foil. The visor was first sprayed gold inside then clear yellow outside. Better post this before anything else goes wr PL4 points
-
Funny you should mention Gazelle, Sioux and Bolkow Miggers me old bean They're on my shelf and on the soon to do list too, the Bolkow was a part built given to me by a club member with antilittlemodelitis However I know my limitations, I'll try but never get to the degrees of intricacy that they and most of you can achieve I notice a tendency to get sloppy when finishing off, one reason I'm trying out etch That must take a higher degree of self control to get it looking right I have been polishing the side door moulds, stuporgoo is great to achieve a shiny polish on Pretty poor pictures my first moulded pieces were too thin and much too large to really fit the holes. Now they're thin enough for when there is acetate there too Here's the mould tools sitting atop two of my favourite 99p shop buys 4 Manicurists buffing blocks for 99p, they have 'file', 'smooth', 'buff' and 'shine' faces and work very well The mould tools are ready for the first 'pulls' All the grain has been filled by cyanoacetate and sanded and buffed to a nice finish I use a tea light flame to soften the acetate, try not to get too close to the wick 'cos 'blackness' happens if you do This acetate was too bluey and the colour was visible in the plastic uh uh discard The chosen one This was from the newly thinned and polished mould, tacked into place with Formula 560 canopy glue It won't need it but it is going to have 24hrs to set before I trim out the inside excess plastic from the moulded bubble the bubble being tacked into place I'll trim it tomorrow Tonight I'm playing at etchmeister Well playing with the etch morelike! wish me luck4 points
-
This is the Huma Models kit in 1/72nd. I've had it in my stash for yonks. Decided to get on with it about a year ago and finished it a couple weeks back but have only just got round to doing photos. The decals are from my stock of MicroScale generic post war Luftwafe letters and numbers as too are the crosses. WW2 Luftwaffe Dunkelgrau 74 I think it was for the top camo with WW2 US olive drab. Undersides 'Silber' All paints from Xtracrylics. Dayglo from the Revell Acqua range. PS; unit badge from another Microscale set with FIAT G-91 and Phantoms on. So I chose to do one from LeKG44, a G-91 unit who operated 5693 as a hack. The kit wasn't too bad to build. It could have done with lots of internal detail as the clear parts are ...clear. But its beyond my time available and eyesight!!! The windshield/doors were fiddly to get to stay in place but I won out in the end.4 points
-
As I now this Airacobra the most accurate kit in 72. I changed only some small parts ( some handmade, some photoetched), and made new nose weel bay.4 points
-
Hiya Folks, Although I`m more of a bodger compared to other more skillful modellers,....in case anybody is interested here is the progress on my Revell Hurricane so far; First off, here is the Grey Matter Figures resin conversion set,.....it was to have been a Mk.IId but I decided to build it as a Mk.IIb instead and save the cannons for another day; I set to whittling away one night while watching a film and before I knew it I had sanded all of the rivets away, re scribed the parts, cut the Revell fuselage down fixed it together, attached the upper wing parts and fitted the replacement resin nose section! Pity the break line isn`t along a panel line but with careful cutting, filling and sanding it can be disguised,....hopefully!; The Grey Matter Figures cockpit is excellent and much better than the kit parts, so this was obtained as well. It could be fitted from below, which is why the lower wings were not fitted yet and here is the cockpit before; and after,...ready for fitting, although I still have to do some detail painting, especially the brass firing button on the control column; Here is the cockpit with the main kit parts; Once the cockpit was in place the lower wings were fitted, along with the Vokes filter and the radiator. A section of armour plating was fitted behind the pilots head rest, made from plastic card; I couldn`t afford the Grey Matter Figures wheel well set this time (although it is excellent and I`ve used one before on a previous Hurri!) but the lower wing section still had to be cut to accept the resin nose. Unfortunately I made the cut bigger than it should so the gap was packed with scrap plastic and filler!; Almost time to start painting,...more to follow! Cheers Tony3 points
-
Here's the next one for this year. The Revell He 111 H-6 And yes, I know the cannon muzzle broke off.. And here's a rear view It's so big, I've had to display it on a computer desk in the mancave. Thanks for looking. Simon3 points
-
Hello again with another one of my planes. I did this to see if I could follow an Alan W Hall article in the April, 1966 Airfix Magazine, converting the Airfix Ki 46-II to a Ki 46-III, the long canopy version. (As older readers may recall, Mr. Hall was an advocate of the "balsa and dope" school of conversion, in the days before resin and vac conversion kits. It's impossible to judge the results now because of the blurry and rather dim photos normally seen in Airfix magazine of this period...). Well, the scale drawings in Airfix Magazine April 1966 were quite useful! I moulded a new canopy using the old technique of male/female balsa mould, PVC sheet (I had nothing else that wouldn't tear) and some gas. It took a few tries. Using photo reference found on the all too modern Internet I built a new interior and remodelled the nose, engine cowlings and spinners. I also remodelled the tail ends of the nacelles as per the article, although I used sprue as a basis rather than just dobs of putty as suggested. (And there were no rivets..). The canopy you can see here is not a very good fit but I wasn't going to light the gas to do another one after several tries! The model was brush painted, which is unusual for me. The decals were adapted from the kit's plus some Hasegawa items from a Zero. They have silvered a bit. However, I think as an "old school" conversion it was quite a useful exercise. And I didn't touch that dope! The stuff they did in the '60's... PL3 points
-
Hi Folks! Finally I've finished something. The kit is superb Tamiya's Zeke 32. Building was pure pleasure. The only problem was narrow gap between fuselage and lower wing. But with a llitle help from Evergreen I fixed it. I painted her with Gunze C, Gunze H, Tamiya and Vallejo paints. Hope you like it. Cheers!3 points
-
Well here it is, My 1/72 Airfix Spitfire XIX that was used by 541 PRU Sqn RAF late 1944. I got a few upgrades for the kit; being the Quickboost fishtail exhaust (for Fujimi), the Quickboost prop and spinner (for Academy) and the Pavla vacform early canopy (for Airfix). The kit exhaust and prop are dreadful, but the rest of the kit is quite nice. Here's the meal I made of it. IMG_8512_zps7ebfd09d by Ben Standen, on Flickr IMG_8513_zpse11642be by Ben Standen, on Flickr IMG_8514_zpsd5a904e3 by Ben Standen, on Flickr IMG_8515_zps210c7b41 by Ben Standen, on Flickr IMG_8516_zps491f2a93 by Ben Standen, on Flickr IMG_8522_zpsf2f243df by Ben Standen, on Flickr IMG_8524_zpsb34d55d9 by Ben Standen, on Flickr Ben.3 points
-
Day off today so got some more done - first a coat of Alclad Grey Primer, then a light rubdown, then clean with a tac cloth Then sprayed Alclad aluminium on the leading edges followed by some AK Worn Effects liquid Preshaded with a mix of black and dark grey Then broke up the surface randomly with a buff / grey mix that was very thin, and gradually lightened as I went on Then onwards with the base coats - first Neutral Grey ( Gunze , with levelling thinners ) Followed by the Olive Drab ( once again Gunze with Levelling thinners ), and the theatre ID patches on the fins ( white ) Let all of that cure overnight before the masking marathon (or snickers now ) tomorrow for the blue bat Peter3 points
-
...... but is now finished. These couple of pics were done when I was thinking of doing a WIP for this column butI got carried away and finished it. BUt as a teaser here are those few pics: This last pic is at the late stages with just a couple things to be added before signing off. For those interested, I added a drop of matt white acrylic to some Rowneys or W&N matt varnish, flow improver all weel mixed in my airbrush and lightly sprayed over the model roughly depicting a faded paint work. The glazing is masked, by the way, with liquid mask also from W&N or someone and not matt varnished over!!. The dark window on the nose is where I peeled off the masking. Pics of the completed job tonight hopefully in RFI!! See you later!3 points
-
There was a plan in the 80's to resurrect the TSR2 with modern (aka Tornado) avionics and Tornado style ramp intakes (which this one will be having) I think if it had gone into production in the late 60's it would have looked similar to the prototypes. Possibly a different nose, depending on how the radar developed, and an IFR probe. RWR would have been a problem with the all moving tail fin, hence why on my GR6 I fitted wing tip RWR.3 points
-
Thanks The decals are on. Tonight I'll be doing some detail painting, a bit more post shading (dirty up those very bright decals) and a couple of Clear coats.3 points
-
Yes Hendie, I mean you have done 9 pages without any paint being applied. Next thing you know you will try for 33 pages, but who would ever be that outrageous and try that?3 points
-
M5A1 Stuart VI 2nd Fife & Forfar Yeomanry 11th Armoured Division Decals are a mix of those supplied with the kit and Archer. Painted with Tamiya and Vallejo paints. Build thread http://www.britmodeller.com/forums/index.php?/topic/234962233-7th-armoured-stuart-vi/ Please excuse the fact that the build thread is marked up a 7th Armoured! Regards, Steve3 points
-
Pinched another Cheshiretaurus idea this afternoon. Used the vac machine to mould some painting masks from the resin canopy moulds. Vac machine excels at stuff like this.: JP5's had a warm water washing/up liquid bath and is in prep for priming - here with canopy masks test fitted (great idea Mark). Unfortunately were out tonight - so it may not be until the weekend until I get to see how all the surface detailing looks under paint...........But hey it'll be painted before the snow!!3 points
-
Thank you VERY much, Dave! I don't think I had seen the site before. Bookmarked now. I was shouted at by SWMBO because I lost track of the time skimming through it and it was gone 2:00 in the morning before the shout started ....!3 points
-
Well I am very happy and excited today as a few days ago I received an email asking me If I wanted a 1/144th Valiant for simply informing them my postcode so they could send it. I was not sure but thought "Why not I would love a Valiant". So I did and was soon sent a Tracking number. I asked is this for real !, The person on the other end of the email said "Yes you are the first to receive it". Well that was a surprise and as I have just turned 30 what a way to start my 30's. It has arrived today all the way from Ukraine. So I was mega excited when I opened this a few minutes ago and sure enough I have a nice 1/144th Vickers Valiant. Most welcome as a V-bomber lover and I have therefore started a build. I don't have a clue what I have done to deserve it but I am indeed very grateful indeed to have the opportunity to make it. Its rather Ironic as for the last 3 months I have been off here working on a secret project I am soon to reveal that could be related to this. But save that for later lets have a loot at the wee beastie But just before we do I must say I am sorry to hear that today a plane has crashed In Ukraine and its a sad irony that this model plane should arrive from Ukraine today. R.I.P. 1st off lets check out the box art which looks very cool indeed. Here is one of the sprue's containing the landing gear. Engine faces etc.. Gear bays and intakes which are split in half. I will have to do something with those and try take molds of them to make some resin replacements. The Undersides of the wings etc Beautiful top surface of the wings. This is a part of the Valiant I have always thought attractive. Beautiful aircraft. Here are the Fuselage halves I was kindly given two canopies The decal sheet looks beautifully done I must say. And something I would never think to see with a kit like this PE ! I got a nice 2014 catalogue which I can post picture of the contents if anyone wishes. Nice clear instructions always helpful I am not sure on which Valiant I will do yet. But it will be a white one as pictured here. Not necessarily these airframes though but that's a long way down the line yet. Well I will have to look through our own General Melchett's build of the Airfix kit and look for any issues with the kit. I think it looks fantastic overall. But will look for any areas to correct as we go and if folk wish to point stuff out please do. This is my first MikroMir Kit and I must say I like it. It has a retro vibe and reminds me very much of old FROG kits. The plastic seems nice and thick so this will be a totally new experience for me and I look forward to their Victor !. Right I am going to have a quick study and get Cracking on her Cheers Rob :frantic: :frantic:2 points
-
A few weeks ago at 'club' a mate slid up to me rustling a small placky bag "Fancy this?" he said as I peered inside I could see a pair of Y shaped mouldings, all shapely and too darned skinny for their own good AH HAH Airfix Scout with transfers and instructions but no header or box, he knows my affinity for all things rotarial of course so I am usually a bit of a captive audience. "How much" I asked expecting damage to a couple of tenners at least, it does build (if done careful like) into a pretty good model. "How about three quid?" says my man (cheers mate) as I stuffed some metal in his pocket and whipped it outside quickly to hide it in the boot of my Midget I remember my friend Ed Deeley used to sell conversions from C-scale and one they did was the Wasp conversion kit. I built a Wasp many years ago using Slater's rodding and lots of little wheels and the Airfix engine always looked too skinny butthe C-scale wasnt around those days I looked at the Kits And Bits in Ebay, no C-scale or Airwaves Wasp bits but I could get the Airwaves etch set from Hannants, (so I did) As I looked around the net I saw a few models that had been made using the C-scale engine but didn't really like them either. From my 'Bill's eye view' the C-scale unit looked as over beefy as the Airfix one looked undernourished. So I stopped looking for the conversion, I wasn't much interested in building a Wopse anyway as my unit had a Scout attached to us on an excercise in Scotland in 1976 and I thought it time to pay homage to Army Aviation So I began making a new RR/BS Nimbus engine to stick on the rear decking, drawings were trawled from the interweb and checked for scale sizing Evergreen tubing came to my rescue at once when looking for the basic raw materials You can see how thin the kit bits are here laid over the drawings, apologies for crap lighting and blurry picture the shapely curve of the combustion area is the front of a large bomb I found in my weapons box (I don't have a useful spares box like the rest of you yet, I threw all my treasures from many years of modelling away when I stopped playing in '85) The larger (front) compressor stage is an old drop tank piece and the ribs round the rear turbine stage are from Slater's strip. The rear tube is the Evergreen tube I started with The front intake ring was part of an F4 drop tank skimmed down to suit Here's the basic engine Here is a piece of the puzzle for you to ponder 'til later What is he using the depth charge for? This won't make you wonder for long, if you know what I like to do Beginning to detail the basic unit now, Evergreen strip being curved round the casing and glued on Glue fingerprints are later reduced honest Gubbinses being tacked on the outside now, I'm buggered if I know what they are. Maybe Fozzy can tell us More gubbinses port side this time. It looks like these doodahs may be fuel injection ports, style of thingmy with some kind of control box too check size for fit on the rear deck, fine so far but need to keep checking for size creep during the task Tailpipes and a (?) vent tube added now, reaching the end of the 'make' phase the distinctive intake dome now in place And now on with paint, The jetpipes given pastel dust coats over Tamiya Flat Brown XF-10. Yellow ochre, golden yellow, black, grey, green and white combine to give the burnt, heated metal effect. Hope it works for you Can you see what I used the rounded off depth charge for? Yup crash moulding the mesh dome that sits over the intake duct. I moulded it from clear acetate trimmed to 'sit right' then took it outside well away from my missus's asthma zone and sprayed a couple of coats of Flat Varnish from Tamiya. This dried out slightly opaque and gives the effect of looking through a fine grey mesh shield This Nimbus isn't perfect but it IS a better look to me than either of the commercial alternatives So this is where I am so far, I have to learn how to manipulate etch next Join me for loads of fun---- NOT anyway here's Nimbus in its latest test fitting, deck over the plan and engine over the deck What do you think, do I need to remake it or is it what I hoped for? (p.s the deck is slightly undersize to the airframe but looks OK on the model) When Photbucketof ditched us and countless pictures I didnt keep a very reasonable list of locations for pictures so I am still trying to locate all the ones I used, this is the best I can do for now but further digging will, I'm sure let me put in the missing ones Note the drawing of the Scout's tail section next to the Wasp plan view, the pencilled outline is where Airfix moulded it. The proper outline will be added when I get that far IF! Hope you enjoy this one b2 points
-
So, like busses, 6 months passes by without a finished model post from me, then rather anticlimactically, two turn up at once! Manufacturer: Airfix Scale: 1/72 Type: Skyhawk A-4B Extras used: Resin seat (I think Pavla? Doesn't fit!!), Photoetched instrument panels which can barely be seen.... OOB next time me thinks... Paints: Tamiya underside, Xtracrylix top colour, and for the weathering, Tamiya smoke, Flory Models Grime wash for panel lines, oil paint, Flory's Black and Dark Dirt wash for streaks. Alclad Aqua gloss and Matt Kote also used. Build link is here, although it's not great!! Good little kit this one, fit is excellent throughout. Panel lines look ok to me, the decals are magical, only problem is all the little bits that keep snapping off (slat activators, aerials etc). That, to be fair, is more my fault than the kits, but explains where there's quite a few bits missing! Weather is possibly over the top, but I had fun! The cockpit is open to show off the resin seat, and mainly because the seat is too big for the cockpit to close, even with loads hacked off the bottom!! As usual, I haven't killed myself for accuracy, but would be very interested to learn about the mistakes I've made for future reference. Any tips and constructive criticism is welcome. It's a great fun kit, just don't bother with the after market stuff (imo). Oh, and the refuelling probe is scratch built out of a plastic tube, and using the Airfix end bit thingy, as the original snapped... Thanks for looking Val2 points
-
In September Sword (http://www.swordmodels.cz/) is to re-box their Supermarine Seafire Mk.IIc and Mk.III kits - ref.72083 & 72084 Supermarine Seafire Mk.IIc - ref. 72083 Two decals versions: MB 218 809 NAS ,Operation Avalanche, HMS Unicorn 1943 MB 156 880 NAS ,Operation Torch, HMS Argus 1942 Sources: http://www.hannants.co.uk/product/SW72083 http://www.aviationmegastore.com/seafire-mkiic-sw72083-sword-859297772083-scale-modelling/product/?shopid=LM53c056b10982364d72a2bdddd0&action=prodinfo&parent_id=212&art=122813 Supermarine Seafire Mk.III - ref. 72084 Two decals versions: NF 547 885 NAS, D-Day invasion June 1944 NF 434 809 NAS , HMS Stalker 1945 Sources: http://www.hannants.co.uk/product/SW72084 http://www.aviationmegastore.com/seafire-mkiii-sw72084-sword-859297772084-scale-modelling/product/?shopid=LM53c056b10982364d72a2bdddd0&action=prodinfo&parent_id=212&art=122814 V.P.2 points
-
I had this Tamiya Krupp Protze with 3.7cm Pak 1/35 in my stash and had no intention of building it for some time when i came upon a photo in "Panzer Colours" book and it i thought i would try and copy the unusual picture in the book. It's not spot on but ok. I have used Value gear for the items in the back and tissue paper on windscreen and front licence plate. Used Vallejo paints with Mig weathering products. Comments welcome. Colin.2 points
-
Started in December 2005 and completed almost 3 years later, this is my most time-consuming build so far. My only excuse is that I had to do with a resin kit for the first time... to be continued...2 points
-
Hey everyone, Here's a recent completion from me for the Tomcat II GB. The aim was to finish her as Fast Eagle 107, just as she landed after shooting down an Su-22.I still have to add two Phoenix missiles but am calling her done. You can read the WIP build here but in summary; Kit: 1/72 Hobby Boss F-14A Paint: Brush painted with Revell Acrylics, Flory Models Wash Decals: From kit Extras: Hasegawa pilots from pilot set. Close up of the crew.. Pylons for the fuel tanks were scratched... Thanks for looking! Dermot2 points
-
This is #16 since I started back modeling in April. Hope it is to your liking.2 points
-
Hi, another model I finished some time ago: the SWS with armored cab carrying a flak. The 1/72-kit is made by MACO. The flak is probably somewhat over engineered with fiddly parts and the sidewall of the cargo bed would benefit from PE parts or mesh. Nevertheless, MACO has made a fantastic kit, which is very well detailed and fun to build. The dark yellow base coat was airbrushed with Tamiya acrylics. I used Revell Aqua paint to brush the stripes. A mixture of pigments, sand, matt clear coat and probably white glue represents the mud on the vehicle. Ole2 points
-
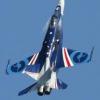
Giorgio, I think you misunderstand the market for the Scorpion. "The aircraft is intended to handle mission profiles typically performed by the U.S. Air National Guard, including domestic interdiction, quick-reaction natural disaster support, air sovereignty patrols, and low-threat battlefield missions." Think OV-10 Bronco, or A-10. It is not a fighter, but designed to operate where there is no Air threat, or where other types (fighters) can provide air cover. Even the USAF recognise the need for this role by deciding to replace the A-10 with, well, another A-10. But eventually the A-10 will become too expensive to keep running so conceivably there is a home market for the Scorpion. Currently, would you wish to see F-35 or Typhoon operating in these roles? OK they may be super-modern but if you can only afford 40 then you will be less likely to use these assets where they may be lost to ground fire unless there is a compelling reason. But if you have 80 light types you can take greater operating risks whilst still maintaining a baseline capability. In some ways the UAV is the proof if the concept, however not all air forces would have access to the technology or wish to leave the man out of the loop. AFAIK current UAVs have more 'flight crew' than their manned equivalents, so this factor alone increases operating costs, as you point out. I wish Textron success, although they do have a lot of nay-sayers who are still thinking cold-war type conflicts Peter2 points
-
Dusted off the JP3. The CMR Canopy is beautifully vac formed: My only issue with it is that cos the windscreen and main canopy are moulded as one it's almost impossible to separate them neatly enough to use both halves to pose the canopy open. At least I ended up sacrificing the main canopy so as to ensure I got the windscreen perfect: Dunno what I'd 've done if they hadn't provided a spare. Anyways the JP3 gets its G meter/E2B as well: And after a fair bit of careful and judicious fettling the windscreen is a cracking fit: P'raps ever so slightly wide - but that's probably because I sanded the fuselages halves a bit thin in trying to ensure a neat join (first resin kit and all that). But I can deal with that (hopefully) when I glue it in place.2 points
-
Hmm I appear to have been somewhat remiss in documenting my latest project, which is a follow up - or rather a prequel to my recent Hurricane IIc project. In October 1942, my Dad was posted to 81 Squadron which at that time was in Gibraltar, awaiting the launch of Operation Torch to invade North West Africa. At this time 81 Squadron were flying Spitfire Vc which were adapted to the Tropical configuration by adding a Volkes filter at some point. So my source kit is the HobbyBoss Spitfire Vb Trop and to convert to the Vc I'm using the resin C wing conversion from Grey Matter Figures. Obligatory sprue shot Some of the aftermarket - the wings and some other bits turned up later The most glaring problem with the kit is the tailplanes which are metal on one side and fabric covered on the other! This is easily fixed by the QuckBoost update. I've also sourced fabric seat belts from HGW and metal cannon barrels from Masterworks, plus some Eduard PE for the exterior. Now comes the major admission - I appear to have all the photos taken int he early part of the project. I'd been keeping a photo record of the cockpit progress, but all the pics seem to have vanished, so all I have left are those I've taken very recently which you will see is some distance into the build!!! For this build I am going to do another diorama with my father in like I did with the Hurricane, but this time it will be set in Algeria in winter 1942, so no shorts and bush hats! The first thing I need to decide is what will my father be doing? For the Hurricane it was easy - open up the sides and have him fiddling around with the main junction box behind the cockpit. The HobbyBoss kit comes with an openable radio hatch and a crude representation of the radio set, however my dad wasn't a radio tech but an electrician. While building the cockpit I realised that the 3 lights that are on the port sidewall are only represented by small blobs in this kit... bingo, Dad is obviously replacing these lamps!! That means he'll be standing on the port wing leaning over the side if the cockpit. Although this kit comes with an engine and removable cowelings, the engine isn't a very good representation of a Merlin 45, so I'm going to leave it closed. The main work is going to be replacing the kit wings with the resin wings. So to begin - a lot of work was put into the cockpit, the Baraccuda resin set is very nice and although intended for a Mk IX, it'll pass for a Vc. I also used an Eduard Zoom set for the instrument panel. So here are some photos taken this evening to show the cockpit. There is a bit of dust from sanding the wing joints which I'll need to flush out with some air and the control stick is missing as it fell out during assembly so I left it out for now! The cloth seatbelts were superb and took staining very well and I would recommend them to anyone who has the patience to assemble them properly!! and here is the radio hatch - I did superdetail the radio but you can't see it in the small opening. I did add some placards from the airscale set to try to make it a bit more interesting and there will be a PE door from the Eduard set to fit later. So what of the wings? Well let me tell you they are beautifully cast but a total bugger to fit! For a start they come with the tips missing so you can add your own LF, high altitude or normal ones. Problem here is that the HobbyBoss kit, unlike the Tamiya kits come with the wing tips moulded on! So you need to cut the wing tips off. Then you find that the wing chord and width of the resin wings are just a little bit smaller than the wings that come in the kit! Fortunately, I have a Tamiya Spitfire VIII in the stash, bought when I thought my dad was with 81 Sqn in Burma. I'm still planning on building an 81 Sqn Burma Spitfire VIII but will build that with the high latitude wings as they first used when being posted there in late 43 early 44. So I can use the normal wing tips from the VIII to match up with the resin wings as their chord is slightly thinner. However they are still about 4 mm too wide when joining up. I solved this with some careful trimming and sanding as you can see above. Now when it came to attaching them to the fuselage, you need to cut up the kit lower wing section to provide the under-fuselage joint. I managed to mess this up a bit and had to insert extra triangles where I'd been too eager to cut and got the shape wrong. The upper surface fit is quite good but again the resin wing is about 6 mm narrower than the original kit part. The wing thickness is also thinner but this isn't so prominent. Here are the wings fitted and the cannon bulges added (these come as separate blisters that need gluing to the right places. Notice also the pencil marks to show where the cannons and machine gun ports need to go on the leading edge) Here is the underside where you can see the triangular in-fills I had to add where I'd made mistakes The trickiest part here was getting the dihedral right and I think I might have overdone this just a little - judge for yourselves here: So thats the progress so far. Its been about a month and a bit elapsed time but I haven't been rushing... Oh I almost forgot, I'm also building another of the iconair accumulator trolley kits to go with the diorama, but this time I'm doing it in RAF blue (ish) and adding a small motor on top as was seen on many airfields like here: (Copyright IWM Archive, used here for reference only) and here it is so far I used a piece from the Tamiya 1:35 US Maintenance kit which has a compressor with a small engine on top. I cut of f the engine and stuck it on top of the accumulator trolley. I doubt if it is 100% accurate but its a decent representation of the sort of thing they would have had. Oh and there will NOT be another PE toolbox in this diorama - I had enough with the one in the Hurricane dio2 points
-
An interesting question Peter. Hard to give a definitive answer. This may help? rare pre war colour shot. This is done at squadron level, post munich crisis i presume, to paint out the A1 types. Colour balance maybe off, as seen in other pics from same session There was a also this clip, http://www.britmodeller.com/forums/index.php?/topic/60896-601-sqdn-hurricanes-markings/ HTH T2 points
-
As early as 1940, instructions from the Air Ministry included, "Service aircraft in O.T.U.s,, A.F.D.U., and Fighter Interception Unit will conform to the normal colour scheme for the aircraft role."2 points
-
Thanks. Back to crappy pictures: Seats and front control stick installed. Made the rear cockpit windscreen fit by glueing one side at a time with super glue. After that partial masking and painting of the frames: Preview on coming attractions: I cut the canopy at the frames but it looks too big right now. As heritage includes two canopies I will boldly go ahead with the first one... Rene2 points
-
I cut off the hopeless radiator flap and opened up the underside. The Airfix interior part was cut up in sections to separate the outlet piece I need. While the Airfix fuselage is a P-51D and I'm working on a P-51H based fuselage I think I will get away with this when I compare to the drawings and P-51H photos. I cleaned up the inside of the fuselage halves and installed thin styrene side walls. The idea is to build it up like this, and keep the outlet flap separate until after painting.2 points
-
Note the tug being lifted by the crane to the head of the dock to help push the ship out !2 points
-
Hahaha your right there actually, its sad that these days I now expect there to be glaringly obvious issues, It's amazing how some people can't see anything I once had two Vucans I made sat next to each other at home and my parents had friends over, one was looking and said "what's the difference ?" Bearing in mind one was the prototype and the other XH558. I said well there are quite alot (about 50+ differences), I didn't bother with all the differences as I could tell I was being judged by one of the "what do you want to do that for, you want to watch eastenders and conform like everyone else mob" so I just said the wings are different, The person said "NO they are EXACTLY the same!" , I should have replied saying yes they are both Concorde, The amount if times I've been to airshows when the Vulcan is running in and there is always someone who shouts something like "oh Timmy look its Concorde!" I have been tempted for many years to paint a British Airways Vulcan, just to see what kind of reaction it gets, hopefully laughs.2 points


This leaderboard is set to London/GMT+01:00