
Leaderboard


Popular Content
Showing content with the highest reputation on 08/02/14 in all areas
-
This is my Trumpeter TU-22M3 Backfire. I participated in Operation safe skies in 2011 at Mirogrod Ukraine and was able to spend a day at the air museum in Poltava. I was amazed at the size of the engines on the Backfire which inspired me to build this kit. I was pleasantly surprised when the decal sheet I ordered had Blue 80 as a choice since it was the one on display there. I used Armory Exhaust nozzles, Amodel Kh-22 (AS-4 Kitchen), Authentic Decals, Neomega cockpit, Mastercaster tires and Modelmaster paints. Thanks for looking Rod16 points
-
Hi Everyone, just finished my second Trumpy F-100F build, Done this time as an aircraft of Commando Sabre, Detachment 1, 416th Tactical Fighter Squadron, Vietnam in the late 1960`s Which were a specialised `Fast Mover Forward Air Controller` outfit, operating over the Ho-Chi-Minh Trail in Laos, Made a few changes to the basic kit, including deletion of the inner pylons, shortening the main gear to improve the sit, re-shaping the nose intake a bit, adding a cross brace and opening the canopy, adding the HUD, and widening the main tyres slightly. The decals are some from the kit, the spares box and a very old War Eagles sheet which took three applications of boiling water to release and had to be assembled jigsaw fashion as they shattered severely Hope you enjoy looking at, Cheers Russ5 points
-
Hi everyone, Recently just finish my latest project for the training type group build, where you'll see my WIP for this build. Here is the finished result. Decals are a little tough to settle, but soon after some solution settled down better. The original clear parts were broken in the box and replaced by Revell but have a nasty seem straight down the middle of the canopy parts, a little annoying to remove. but i'm please with the results, especially since its all painted in Tamiya acrylics. even the metal.4 points
-
That site looks interesting, and your builds look amazing! Yes I think it is a great tool, let me know when you've got your business up and running! The outer fin flashes are done, like many other things (turrets and props). The inner flashes will sure be fiddly though, I'm almost thinking about using the decals for those but we'll see how it ends...4 points
-
..well Col you did ask, so here is where I am at! I have chosen a Hawker company demonstrator from 1948 Fury 1 NX748 effectively what became in lineage the Sea Fury prototype.... For those with an eye for history, the shot is attributed to be in Luqa, Malta and I have the following info (would welcome any further pics / details / corrections): In April 1948, Bill Humble, Hawkers chief test pilot, flew the first prototype Sea Fury to Cairo for the forth-coming Heliopolis Air Display. On this occasion, it carried the civil registration G-AKRY instead of its original RAF serial number NX798. Humble arrived on 21 April and three days later put on a demonstration of aerobatics and high-speed passes for the Royal Egyptian Aero Club at Almaza AB. This display so impressed the Egyptians that an excited crowd swarmed over the aircraft as soon as Humble landed. On 27 April, Bill Humble gave the machine a ten-minute test flight preparatory to his homeward journey. Just before his intended departure the Hawker test pilot discovered that the Fury had been moved from the civil to the military side of Almaza AB and that the aircraft had been impounded by the Egyptian authorities who turned it over to the REAF. It was given code '701' and become an REAF fighter. On 4th June 1948 this aircraft scored the first REAF air combat victory shooting down an Israeli Fairchild Argus. Anyways, enough waffling, on with some pics ..this is roughly where I am at after 15 months on one £29.99 kit... ..and a potted history.. ..my company airscale makes aircraft cockpit details - so start with my favorite part.. ..made an engine by making master parts & casting in resin, also opened up the firewall area.. ..undercarriage bay - lots of bits & bobs... ..lots of scribing & riveting.. ..tailfeathers from brass - I find it easier to work and good for panels with raised detail.. .wing corrections... ..first time vacforming & made a new canopy.. ..cast 90 gal wing tanks & pylons from masters... ..undercarriage doors... I have the PE set I designed it was time to start using it - the under wing cooling vents used to look like this (I made these..)... ..pulled them off and roughly rebated where they will sit so the louvre slots don't sit on solid plastic... ..painted the rebates matt black and annealed, shaped & primed the new vents... ..also added the cowling fasteners.. - think they look ok but I can't get them any thinner ...also made up the open fasteners to finish off the cowling panel - it was quite satisfying using home made PE ..I also added the two rings around the engine, I think these came out well and I could not think of any other way to get the tiny square holes that are where the cowling panels would fasten to. Had a little dry fit with the other panels to see how it was coming together.. ..the front windshield looked ok from my home made vacformer, so thought I would start on it - if nothing else I can practice the processes involved... ..first up the cockpit frame - this is thick sheet brass - marked it out and scored the inner cut-out (always remove inner shapes / holes first as the part still has strength..)... after scoring, careful repeated bending and you get a nice clean break... made the inner edge in the same way and CA'd together ..added fastener and structural details... ..basically it needs paint... ..anyone who has followed this build will know how terrified of painting I am so I guess the next few weeks are going to be some of those 'kill or cure' moments.. ..I have just started using alclad and I have to say I think it is pretty forgiving to a bad painter, so I am building up experience and practice before doing the airframe itself.. ..I started with some of the sub-components - cowl panels, gear & doors and the canopy... ..thankfully nothing ruined ..I masked the legs and added some steel to the aluminium colour to try and get some contrast... ..gave the parts a going over with Flory dark wash - very easy to use and effective... ..will add more weathering later - the inside of the cowl panels will have quite distinctive burn marks from the diamond shapes on each cylinder head.. ..canopy needs the inside weathering (and a good clean..)... ..doors will need angled oil streaks from crap spilling out of the engine - anyone know how you do that? ...I think the legs may be a different colour if you look hard enough.. ..nearly finished.. it was only when I looked at these while posting I realised I was a bit too keen to paint as I forgot I hadn't done the brake lines yet... doh ..we have stripes! ..I masked everything up and am pleased to say the alclad held out perfectly - the only bit that didn't was on the brass panels over the exhausts... I must have forgotten to prime these... ..no matter, I think I can sort them out.. ..anyways, here it is all masked - and I mean all... ..after a coat of paint - I darkened tamiya red a bit, mixed it 1:2 with thinners and sprayed very lightly - the first coat went a very fetching metallic pink... ..also did the cowling panels... ..I think they came out pretty good and am very happy I didn't have any disasters... ..now well on the way to the finish - this is the first ever airbrush paint job I have ever done after getting back into modelling in 2010... ..sorry for huge post, but didn't want to just show over a year's work in a few pics ..until next time folks... TTFN Peter @ airscale3 points
-
Many many years ago walking around the Perth Airport apron area I snapped a pic of the very attractive aircraft. I hadn't got back into modelling then but did eye it off as being a nice candidate if one could get decals for it. I pulled the Lear out of the stash a while back and looked through my photo collection for some inspiration.. I found that pic and decided to build it knowing that designing the decals was going to be a real challenge. My usual methods were not going to work I had to bite the bullet and learning how to use vector graphic tools so I downloaded the free "Inkscape" and began the process of learning how to use it while designing / drawing the decals. I also used sticky back label paper to use as a mask for where the "Wards Express" printed on clear paper was going to be so that the fuselage underneath remained white so the white letters would show through the red on clear decal paper.3 points
-
I am now in with this little fella:- Purchased for 1 euro last November, which is about 82 pence. So well within the tenner allowance.... It is one of Matchbox's familiar creations, and gives two options for markings - a RNZAF bird in Singapore in October 1941, and a Dutch plane from the Militaire Luchvaat in the Dutch East Indies in December 1941. I plan to do the RNZAF version, as it is more interesting, especially with the dual colour underside.... It's a fairly simple kit, with only two sprues and a clear canopy:- As with many of the Matchbox kits, the plastic comes in two colours, but luckily in this case the two colours are dark green and brown, and not bright green like the Spitfire! The decals look to be usable too, which is nice given the age of the kit (the box says 1974 - so it's about 40 years old). If not, then I should be able to cobble together something from the spares tray (another reason not to opt for the Dutch version, as I have none of those....) However, I plan to paint the sky fuselage band, rather than risk it with that decal. I'll make a start next week. Thanks for looking! Philip3 points
-
Hello everybody, I'm glad indeed to have finally something to share. This is a Finnish Fokker D.VII from Revell. I bought the kit in Helsinky during my new years holiday there. In fact I bought it as a souvenir as it was a special edition for Finland. I wasn't even going to start it, but somehow got involved bit by bit. I scratchbuilt the interior and added some minor detailing, but nothing really special. I hope you will like it even though the pictures are not nice. Cheers, Dmitry3 points
-
Hello Folks, I`ve always been interested in the post war occupation air force in Germany (2nd TAF & BAFO) and here are my latest efforts, a pair of Spitfire XVI`s, first a newly built ICM kit which represents an aircraft from 349 (Belgian) Sqn and the second one is a refurbished Occidental kit which now wears the post war markings of 402 (Winnipeg Bear) Sqn RCAF, both based at Fassberg during June 1945. First the ICM kit in Belgian markings; Next the refurbished Occidental kit in Canadian markings; [/url] I would really like to thank Dick (Jenko) and Alex for helping me with the decals for the Belgian model, cheers lads your help was very much appreciated, I hope that I`ve done your kindness justice, All the best Tony PS- I think that the serial of the Belgian Spit might be wrong as I`ve just checked a better copy of the reference photo that I was working from and the numbers that I could make out didn`t look like 444,..oops! I think that the serial should be TD237, but that's what happens when you trust kit decals and don`t double check, I just hope that TE444 wore the same scheme too! However the codes and roundels etc were spot on!3 points
-
Hi Mods I'd like to enter with this little lad:- I got it for 1 euro at an aviation fair last November in Dublin. On my reckoning 1 euro is about 82 pence, which must be one of the cheapest kits in the GB. Let me know if this is OK, and I'll start a thread. Thanks, Philip3 points
-
Hi guys I would like to show you my latest effort. That was a terrible build but finally over. I start from az model but have some problem with canopy and a lot of gaps so I drop this project.After that I bought the same model but from Airfix and it was even more worst.I hade a lot of problem with that one as well but on the end of the day I made my spit from 2 of these sets.I have use the wings fuselage and canopy from AZ model and rest of parts from Airfix(MacGyver mode on ) spitfire is from Polish Wing ,Northolt,july 1941 Flown By W/Cdr John A Kent ok after this long intro here are somr pictures Ok so that would be all like always I am waiting for your cc Cheers Pawel3 points
-
On with the show. I did a bit of cleaning up on the frames and cut out the first piece of lead: I then cut out the notches using this arrangement: I then finished them off like this: It was fun gluing on the cover, seen here from underneath: Here it is from above: These photos took ages to upload and I have nearly finished the other one now. I need to stop and get some lunch though.3 points
-
It wasn't; the largest dimension, that I've found (so far) was 2", between upper and lower colours; one ex-sprayer told me that he had to work to half an inch, when spraying freehand. When the war started "blended" finishes were the norm, but, in 1940, during (failed) attempts to get a (cellulose) smooth finish which would remain matt, a circular went to every Resident Technical Officer, detailing what to do, and it included the following:- "To assist in avoiding dry or partially dry spraying at colour boundaries, it is now agreed that colour merging need not be done; masks can be used for the different colours and the resulting sharp boundaries between colours will be accepted." Due to the farcical nature of a few responses on the "rubber mat" thread, I ceased adding to it, but, if there's genuine interest, maybe it's time to resurrect it? Edgar3 points
-
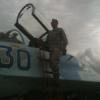
Did anyone notice that one of the crew is having a crafty fag!3 points
-
Okay... walking around in their warehouse a few years ago, I was concentrating on the kits. However, I had an odd feeling that there was something quite familar at the back of the warehouse. In there was a couple of old cars, a caravan and... a Harrier GR3 and a Sea Harrier FRS.1 !!!! I was amazed. Both jets were up on sticks with the mainplanes removed and stacked behind them. I went and found one of the managers and told him that the GR3 that he had was one of my jets from Germany. We had a chat about Harriers and when he found out I was a plumber he asked about the ejection seat and the guns. I showed him how to dismantle the ejection seat, pulling the seat pan out first and then removing the headbox and finally the gun. Then we put it back in. He then wanted to know about the guns and the gunpods. I removed the panels from the starboard gunpod and started to explain about how to drop the guns and then take off the empty gunpod. Now... the thing with the starboard gunpod of a Harrier is that it is close to the shark's fin. When the engine shuts down it leaves some unburned fuel in the combustion chamber which can cause a fire hazard. A scavenger pump dumps this fuel from a vent on shutdown. However the vent sticks out in an aerodynamic fairing which looks just like a shark's fin, so preventing the fuel from running along the fuselage skin. The GTS is a small jet engine which acts as an APU and starter when the jet is on the deck without Houchin support. The GTS also has a fuel vent which is located three feet higher up than the shark's fin. Unfortunately the tip of the shark's fin it at the perfect height to catch an unwary plumber in the eye as he is loading the starboard gun. The plumber will then shout "Oh for fffffff......!" and stand up, catching the GTS vent in the back of his head. Plumbers on a Harrier squadron were often seen to be sporting a black eye and a bleeding scalp because of this. So... it had been fourteen years since I last loaded the guns of a Harrier. I was still perfectly happy with the procedure, but in my excitement I had totally forgetten about that shark's fin. And it caught me. Right on my temple! OWWWW! I shouted "Oh for fffffff......!" and stood up. That was when the GTS vent had a go at me as well. Black eye and bleeding scalp. No matter how much you love 'em, Harriers will always try and hurt you!3 points
-
Flying wings are supposed to be ultimate flying machines. But for different reasons there are very few examples of successful flying wing designs. Most of aviation enthusiasts know about mighty XB-35, but have you ever heard of DB-LK - Soviet pre-WW2 attempt to build a long range bomber based on flying wing concept. ДБ-ЛК stays for "Long Range Bomber - Flying Wing", the plane was designed by Victor Belyayev and remains one of the oddest aircrafts ever flew. AMT/ERTL XB-35 kit is well known, DB-LK replica in 1:72 is represented by resin kit from AirKits http://modellingworkbench.blogspot.co.uk/2010/09/db-lk-172-resin-kit-review-kajukair.html The photo of completed model by made by kit manufacturer himself Okay - let's get started. The boxes Airbrushed parts with Mr. Resin Surfacer Mounting rear turret assembly Fuselage parts glued together - had to remove a lot of resin from the side walls and do some scratch building In a mean time - assembled and painted XB-35s cockpit Joinned it with ..... a wing ?.... The canopy has developed an incurable crack when I removed if from the sprue so I decided to "push" a new one from acetate film Filled the original canopy with epoxy for strength and mounted a piece of film is attached to a piece of cardboard whith a hole that matches the canopy and heat over portable electric cooker (no open flame) once the film is hot and soft it is gently "pushed" over the mounted canopy "master" I made about 10 copies and chose the best The result Usually I use Mr.Surfacer as a primer, this time I decided to prime with Halford's Alluminium that I poured out of spay can and apply with conventional airbrush to reveal scratch marks Well well - American approach in visibly different from Russian2 points
-
A-6A Intruder 1:48 Hobbyboss The Intruder was the eventual replacement for the successful and long-lived Skyraider (as was the A-4), and was unusual in having a side-by-side cockpit arrangement for the pilots, which meant a wide nose that became well known due to its involvement in operations and deployments around the world. Entering service in 1963 in the Vietnam war, it performed all-weather and night attack missions extensively throughout the conflict for the US Navy and the Marines, it had a long service life that was ended prematurely by the need to cut costs after the Gulf War. The A variant was the first into service, and incorporated some leading edge systems to enable it to fly low over terrain with little to no visibility. Due to the complexity of the systems, it was also equipped with a self-diagnosis system that could be used to test and report faults from within the aircraft without costly and time-consuming strip-downs, thus saving many hours in the hangar. The following variants showed the versatility of the airframe from buddy-buddy refueller to electronic warfare in the EA-6 Prowler, but the definitive variant is considered to be the later E, which was upgraded in the 70s with the TRAM (Target Recognition and Attack Multi-Sensor) turret that allowed it to drop laser guided munitions, further extending its usefulness. The Prowler was the last Intruder based airframe to be drawn down in 2009 and was replaced by the EA-18G Growler that took over electronic warfare duties. The Kit The A variant was the basic airframe for all Intruder variants that came after, with few changes to the aerodynamics, but plenty of changes to the equipment fits. Almost 500 were built of the A, and this is the subject of the kit. It arrives in a large flattish box with a painting of two Intruders flying over a mountainous area on the lid, and you wonder whether it's going to be one of those boxes that is way too big for the kit. Once you open the box, you find that it isn't, although there is a section at one end that it divided off to keep the canopy and other delicate parts safe from the mass of plastic in the box. The Intruder is also a surprisingly large airframe, with a long fuselage and large tail fin, which takes up a fair amount of room within the box. There are thirteen sprues of grey styrene, three of clear parts, a small fret of Photo-Etch (PE) brass, a bag of metal landing gear parts, two decal sheets, instruction booklet and two glossy sheets containing painting and decaling instructions. The detail on the parts is impressive, and the breakdown is that of a kit that has been designed to provide other variants, which have indeed just been announced for the 2014 year from Hobbyboss in the form of the A-6E and A-6E TRAM that I mentioned in the preamble. Good news for Intruder fans all round. Construction begins with the cockpit, with two nicely detailed ejection seats with PE seatbelts fitting into a cockpit tub that has substantial detail moulded in. The rear turtle-deck is also nicely detailed, although as you are told to glue it to the tub before it is fitted into the fuselage, getting the angle right might be tricky unless you offer it up to the fuselage and let it dry there in order to get it just right. The instrument coaming is also busy, and the instrument panel conveys a good likeness of the multi-layered nature of the real thing, although there are no decals provided for any of the panels for those that perhaps find the painting tedious or difficult. For no apparent reason the landing gear is built up next, and here HB have been clever and given the modeller a strong metal casting to act as the central support for the more detailed styrene landing gear parts, which should result in a handsome, strong depiction of the real thing that will stand up to the rigors of time, and the weight of any resin that you might add to your base model, because we all know that's sometimes quite tempting, don't we? The gear of a carrier based aircraft is always substantial due to the hammering it takes on a sometimes pitching deck, and this comes across well, particularly the nose gear with twin wheels and massive retraction link. The main gear centres are L-shaped and the end carries the two-part wheels, ensuring no problems with weight, while the styrene retraction jacks and outer-legs are purely cosmetic. In order to close up the fuselage, you need to make up the intake trunking amongst other parts, which goes full-length and includes the turbine face that one deck-crew member got to know intimately when he was sucked into the low-slung intakes on night-ops. The outer skin is separate from the trunking, making seam-fettling a little easier, and as they are only around 5cm long, it shouldn't be too hard to make them silky smooth. They are inserted through a hole in the front of the fuselage, necessitating the alignment of the outer skin with the fuselage side, which is just in front of the built-in crew access ladder. The instructions would have you install the aft fuselage mounted air-brakes at this time, but most modellers would probably wait until later for such a fragile part of the build. The detail within the bays and brakes is nicely done, and the brakes have the correct holes moulded in to allow air to bleed through when deployed. The nose-gear bay has separate sides to allow extra detail to be moulded in, and although the instructions show it being installed in the fuselage with the leg already attached, that isn't actually necessary. The arrestor-hook housing is added along with the rudder, which isn't glued to give some "wiggle", and the fuselage is closed up, then the radar that sits within the nose cone is added along with its bulkhead to the front of the fuselage, to be covered up later by the radome, which could be left open, but isn't that detailed inside out of the box. The Intruder's fuel-efficient wings are next, and as you would expect from a carrier-borne aircraft, they have a hinge-point to facilitate efficient stowage below decks. The wing inner portions have the exhaust bulges moulded in, plus the large flat gear bay sections, and have poseable flaps and slats, and pop-up spoilers on the upper surface, the tabs for which are simply cut off if you are modelling them closed. The kinked exhaust trunking is built up from a single part nozzle, two-part trunking and rear engine-face before being placed within the rear bulge at the wing root and enclosed in the other half of its fairing, and at the outboard end, a nice hinge-plate is added to a ledge within the wing that also has guides moulded in for the hinges themselves that pass through the plate. The inner wings are then mated to the fuselage sides, along a substantial mating area that includes the usual tongue and tab arrangement along the top edge. The outer wings have a similar hinge-plate added, plus poseable slats and outer flap sections, and a choice of two shapes of hinge for the clamshell decelerons at the tips of the wings, with one posed open with two deceleron parts, the other closed, using a single part to portray them at a near scale thickness. Clear formation lights are added to the front of each wingtip, and you then have a choice of using a straight linking rod for wings down, or an angled rod plus lots of ancillary linkages if you're posing it with the wings folded. The hinge-covers are also similarly different, with a single part for wings down, and two comb-like parts for folded. The APU on the top of the port wing root is shown deployed, but it wouldn't be difficult to close that up if you're minded, and the elevators, although they are of the all-moving type, are installed using the tongue and tab method, meaning that if you wanted to show them deflected, you'll have some work to do. The canopies are very nicely moulded with clear glazing and well-defined frames, which should make masking them pretty easy. The inside of the sliding canopy is fitted out with a "parcel shelf", retraction rails, a small instrument box on the centre rail, and an opening handle, plus a quartet of rear-view mirrors spread around the forward frame. The windscreen is fitted with a single part just off-centre on the frame that bisects the front screen, and both are fitted to the airframe after some interior painting. The radome that is mentioned earlier is capable of being mounted in the open position with a two-armed hinge that fits to the top and engages in matching slots in the radar bulkhead within the fuselage. A PE hinge fairing and two retaining clasps are added to the radome, but whether you feel the radome would need more work before being used in the open stance is entirely up to you. A simple thinning of the lip would be a good start, and as it's going to be difficult to see inside when the model is planted on the table, you could probably get away with just that. If you're posing it closed, just glue it on and add the PE parts, then you're done. The instructions advise you next to assemble and install the integral crew-access ladders before completing the outer skin of the engine nacelles, so perhaps skip forward over this step and come back to it later, unless you are planning on closing them up. It's not immediately clear whether the fit will be good if you close them, but if you feel it'll spoil the lines of your Intruder, it shouldn't be too difficult. The steps are a nice mix of styrene outer skin, PE side-frames and steps, with two more PE retention straps. The two steps within the engine nacelles are added from styrene parts, and of course this is repeated on the opposite side. If you skipped making up the ladders for now, the next job is to complete the engine nacelle outer skins, which is where your delicate ladders are likely to be rent asunder, causing much gnashing of teeth and wailing. Due to the Intruder's sub-sonic flight envelope, the intake trunking was simple and short, with the bulge of the engines contained by a large fairing that was removable for maintenance. This area of the fuselage is blank for ease of moulding, and the detail is added by installing an insert with separate auxiliary intakes added along the way, and the bulged door to the electronics bay sat between the fuselage mounted air-brakes, complete with a small transparent window. The main gear legs and their nicely detailed bay doors are added to complement the already installed nose gear leg and its doors, and these have closing mechanisms added as separate parts for extra detail. With airframe construction completed, the prodigious load-carrying capacity of the Intruder is demonstrated by a choice of weapons that hang from the two plyons on each wing and the centre-line pylon nestling between the two engine humps on the underside. The pylons make up from two halves, plus a pair of separate sway braces, which is a good start. The weapons are plentiful and varied, as follows: 1 x Centre-line fuel tank 4 x Wing mounted fuel tanks 2 x GBU-8 HOBOS guided bomb 6 x Mk.82 iron bomb 2 x M117 iron bomb 2 x multiple ejector racks 12 x Mk.81 small diameter bomb 12 x Mk.20 cluster bomb A diagram on the following page gives a suggestion for what each station might carry, but there's no substitute for checking your references for actual load-outs that were carried. There are no air-to-air weapons included in the box, so if you find a weapons load that includes them, you'll have to source some from the spares, or get hold of some of Eduard's excellent Brassin range of resin weapons. Markings The A-6A was in service during what's now called the hiviz (or variation on the spelling) period, with colourful tails, national insignia and black unit markings. Consequently, the decals are bright by modern standards, and with the tan radome, you'll end up with a bright Intruder on your shelf. From the box you can build one of the following: US Navy VA-115 Eagles, USS Midway 07/NF Bu.No. 155715 grey over white, tan radome, black tail with grey tip and yellow flashes on tail and fuel tanks. US Navy VA-35 Black Panthers CVW-9 USS Enterprise, 10/NG Bu.No. 152940 - grey over white, tan radome, black panther motif on a white circular background on the tail. Decals are printed by an unknown source, but are typical of Hobbyboss quality, with good printing, register and colour density, although there is a little over-printing of the yellow past the edge of the white background, and a very slight mis-register of the black that shows under magnification on the slime-lights on the fuselage sides, and the apparently undocumented wrap-around lights on the wingtips, which are shown on the decaling diagrams but not numbered. The stencils are shown on the same diagram as the unit and national markings, so at times it gets a little cluttered, but if you take your time, it shouldn't cause you any problems. The decals for the munitions are on a separate sheet, and the single page bomb painting and decaling diagram shows where everything goes. If you are portraying the Black Panthers airframe however, a quick check on the colour of the drop tanks reveals that they weren't painted in the same fashion as is shown on the diagram in the style of the Eagles scheme. It appears they were plain white in the pictures I have seen, but if you're not quite awake when you build and paint them, you could easily make that mistake. Conclusion This looks to be a promising model of the early Intruder, and certainly comes loaded with detail sufficient for a great many of us out of the box. The inclusion of metal gear leg centres, PE brass parts and plenty of modern slide-mould use gives it the edge, and once the A-6E and TRAM variants are available, the Intruder will be well-served by modern toolings in this scale. To get you in the mood, why not watch (or re-watch) the Flight of the Intruder, an oldie but goodie, with plenty of in-flight footage to get your enthusiasm going. Caution before clicking the YouTube link, as there's a little bit of bad language scrawled on the bomb passing the lens at the beginning of the clip. Highly recommended. Review sample courtesy of2 points
-
I shall start off with 3 early ww2 RAF trainers. They are the following. NOVO Miles Magister NOVO Percival Proctor Donetski Miles Master.2 points
-
When I bought the kit I had plans to build either a Maroomba, Skippers or Cobham / National Jet Dash (all Perth Operators and aircraft I had controlled over the years in a previous life when I actually worked for living (shudder). But frankly they were all rather boring livery - wise. So then I trolled through airliners.net looking for VH registered Dash 8's other than the Customs machines this is the only one that stood out and tickled my fancy.. Anyway its not a very nice kit, well that is to say it looks good on the sprues BUT filler required on the nacelles, fuselage halves. the cockpit windscreen is a bugger, and I guarantee you will break the horizontal stabiliser, molded in one piece with a thin section of elevator holding the thing together, I dropped and broke it a couple of times so I re-pinned it (much more robustly than my previous repair) I hazard to say if it isnt already broken on your sprue (mine was), break it in two and put a brass pin spar through it..you will have to do it eventually, so do it now before it is painted! Among the other problems the wings droop a bit, they don't have any dihedral, I dipped the constructed model in hot water and bent them up a bit outboard of the nacelle, not quite kosher but visually more appealing and less obviously wrong. No use using the kit cabin windows, they are way over-scale..otherwise a great kit, I wont be building another... oh yes and the props are awful. The decals were home made inkjet printer jobs designed on "Inkscape" a free drawing program which I am slowly coming to grips with.2 points
-
Here’s my complete Lynx Mk.7 in IFOR markings that I have built as part of the Lynx single type group build Build thread is here2 points
-
Allright here we go. This is my No: 12 since my restart approx two yrs ago, havent build in 19-20yrs before that only with Humbrol enamel and a brush, didnt know what a wash were back then. The Kit... The kit is the Tamiya FW190a3 1/48 scale, it went togehter without fuzz, no filler needed at all, the only tiny gaps this model had were located at the upper wing root and on the joint between enginge cowl and the fuselage, the wing joint ive use hombrew surfacer made out of tamiya putty solved in acetone (benefit, it dries fast), take a small bruch an let the capilaryforce do the rest, and the gap at the enginecowl were solved with some thin sheet of plastic card, glued in to place and after that futted to right shape. Paint, Weathering and Techniques Used... Model were primed with Vallejo Neutral Grey. The paints ive used is Tamiya in the cockpit and detailed with Vallejo Model Colors, ive used the dryprushing techunice with Vallejo colors to make things pop out, the camo painting i went for Vallejo Model Air, the clearcoat was Tamiya Clear heavily diluted in Isopropanol, and many thin coats, The Airbrush i used is a H&S Infinity whith 0,2 (my first Aibrush for that matter lol ) decals were tricky one, theu were very stiff inded, bucket loads of softener needed to get them down in them panel lined, little help from a scalpel cutted along the panel line, after that they got settled down nicely. after that clear coat over the decals and then after that the Oilwash, ive used Windsoor Water Mixable Oils, the colors were lamp Black and Sienna Red solved in Beckers odurless thinner (yep don got to use water, they mix perfectly with beckers Paint Thinner), and ive pinnewashed all the corners, and lines and let the capilary force work for me. On top of that decanned Tamiya TS 80 Flat clear and airbrushed, love that flat finnish (ive tried many different flat clears). I Really do rekomend this kit, its cheap, nice fit, aceptable detailed thats enough to get a nice model out of it. All in All it took one week for all of this. allright enoug words and over to the pics instead. The result, at the end few pics from the progress. Enjoy. /Mal2 points
-
F-35B Lightning II 1:72 Fujimi The Lockheed Martin F-35 Lightning II, sometimes also known by the name of the American led multi-national Joint Strike Fighter program to which it owes its existence, is a fifth generation multi-role aircraft. The Lockheed X-35 prototype flew for the first time in 2000 and went on to win a competitive process ahead of the rival Boeing X-32 design. There are three variants of the F-35, the A, which is the conventional land-based strike fighter, the B, which is the navalised VSTOL model equipped with a lift fan, and the C, which is the navalised cat & trap variant fitted with arrestor gear and a larger wing. The F-35B is the variant selected by the Government of the United Kingdom for the RAF and Royal Navy. It is the most complex of the three variants as it relies on a lift fan installed between the pilot and the engine for its VSTOL capabilities. The nature of this design continues to provoke discussion as outside of take-off and landing, the fan becomes dead weight, reducing range and payload. Make no mistake, however. The F-35 is still an incredibly potent aircraft, packed with cutting edge technology, the latest avionics and weapons systems and low-observable design. It has two internal bays that can be used to carry munitions, as well as six external hard-points for when stealth is a lesser consideration. The first of the evaluation F-35Bs was received by the RAF in July 2012 and the type is expected to be operational by 2018. Despite being a relatively new design, there have been several kits of the F-35 from manufacturers including Italeri (X-35 and then latterly F-35A) and Academy, with more kits on the way from Cyber-Hobby, Hasegawa and Kitty Hawk. This kit is one of the first from respected Japanese manufacturer Fujimi for some time. It first appeared in 2010, but owing to the difficulty of obtaining Fujimi kits on this side of the globe, relatively few have been seen on Britmodeller. Now Amerang have signed a deal to import Fujimi kits to the UK and the kit is much more widely available. The top-opening box is adorned with a simple picture of an F-35 demonstrator (complete with dodgy English translation) and contains eight sprues moulded in grey, metallic dark grey, white and clear plastic. Altogether there are almost 70 parts, as well as instructions and decals. Moulded detail is generally very fine and sharp, with recessed panel lines and rivets/fasteners. The combination of multi-coloured plastic and state of the art mouldings leaves you with the impression that this is some kind of glorious cross collision between Tamiya and Matchbox! As usual, contruction starts with the cockpit and lower front fuselage. The cockpit tub, seat, instrument panel and side-stick are all moulded in white plastic. The detail on the tub and instrument panel is pretty reasonable, but you'll need to make use of the instrument decals in order to complete this sub-assembly. The ejection seat is a bit of a letdown as it is very basic and bears little resemblance to a Martin Baker Mk.16. Once completed, the tub fits into the lower front fuselage, which is moulded separately to the rest of the airframe. Next up, the lift fan and drive shaft have to be assembled. These are relatively simple (although nicely moulded) but I'm not sure how much of them will be seen once sealed inside the fuselage halves. Construction then jumps to the internal weapons bay. The bay itself is ver nicely moulded, with plenty of structural detail. The weapons are a different story and appear almost clunky when compared to the rest of the kit. The AIM-120s will probably pass muster, but the JDAM bombs are very basic indeed. I'd recommend replacing them with items from the spares box. Fujimi would have you assemble the landing gear at this stage too. These parts are better than the weapons, but still a little basic when compared to the rest of the kit. The wheel hubs are quite nicely detailed though, and the tyres have flat spots moulded in place. A fairly complete engine is included, made up of the fan/low pressure compressor, a choice of two engines (in conventional or angled vertical takeoff configuration) and a beautiful exhaust section which I can't imagine will be bettered by the aftermarket manufacturers. Once the lift fan, engine, cockpit and weapons bay have been installed, you can close up the fuselage. On this occasion I would advise you not to test fit the join between the upper and lower fuselage halves as they are pretty much snap-fit and you will have terrible trouble prising them apart again. Once the fuselage has been assembled, then the remaining parts of the airframe can be added. The horizontal tails are one-piece affairs, as are the vertical tails. The nose cone is last in place and it doesn't look as though any nose weight will be required. A choice of doors are provided for the lift fan and undercarriage, designed to make life easier depending on whether you want to finish your model gear up or gear down. The engine just slides in through the opening in the rear of the fuselage, allowing it to be displayed alongside the aircraft if required. A choice of two canopies is provided clear and tinted. Both are extremely well produced and very clear indeed. The quality of the canopy will make a replacement ejector seat all the more necessary. The decal sheet is nicely printed but includes markings for just one aircraft the F-35B demonstrator shown on the box artwork. A full set of stencils is included, alongside a large number of Remove Before Flight tags. Conclusion Whilst it has one or two weak spots, on the whole this is a very appealing kit. The overall fit and finish looks like it will be very good and the outstanding surface detail more than makes up for the odd dodgy ejector seat. The kit looks accurate too. The ordnance options won't set the world alight, but that shouldn't be too much of a worry. The only other downside is the price. At around £35 it isn't cheap, but until the Kitty Hawk kit arrives, it's the only real option for a B model. I'm know I'm certainly looking forward to building mine. Review sample courtesy of UK distributors for2 points
-
Slowly getting there, I'm going to make masks for the wing decals, and apply limted decals on the side. Whites on though.. Winter distemper on. by Totallyrad.co.uk, on Flickr Winter distemper on. by Totallyrad.co.uk, on Flickr Thanks for looking..........2 points
-
For anyone out there with a love of all things Ark Royal - some great material on Gannets, Phantoms, Buccs etc... Apologies if already posted.2 points
-
This week's inspiration is a Georgian Ground-attacker... Cheers Cliff2 points
-
Please don't get the idea that I have an axe to grind on this; I do research in order to find out what happened. What modellers make of the information is entirely up to them. Edgar2 points
-
Hi Russ, so well done that it looks real! Congrats on your build. JR2 points
-
Thats it for today,re-painted the cowl and control surfaces(thanks Wolwe82) and tried a couple of decals without glossing and top marks to Airfix they have settled well.Thanks for looking2 points
-
Are we really sure it's a model ? Can't think of a better compliment than that !2 points
-
Someone at Airfix has a good sense of humour! Lol!2 points
-
I used the K&S round cutter, as the corresponding slide shows. Brass would also have worked but bronze is harder and less likely to give way under the cutter's pressure. Undercarriage struts: A piece of metallic rod with plastic sheathing was glued on the leading edge of an airfoil cross section shaped piece of plastic rod. The upper part of the metallic rod is inserted on a hole at the underside of wing (thus supporting the model). The lower part serves as the oleo. the lower part of the oleo is inserted in a hole drilled in a piece of plastic rod that serves as the axle of the wheel. Several details were then added such as the torque link, nuts & bolts, brake lines etc.2 points
-
Well,here,s the result of rubbing the surfaces with a soft cloth and I am reasonably happy with the result.I an going to touch up a few spots especially the cowl and ponder how on earth I am going to tackle the decals.thanks for looking2 points
-
G-usa have you been hitting the patented horse rub-down elixir again? This is not a stretcher but a bench seat, like this: The stretchers were finished ages ago. I am saddened that you do not read my posts as diligently as I read yours.2 points
-
Coming along nicely so far. Only the undersides and wing leading edges left to decal.2 points
-
I love this build - thanks for sharing and putting together such great tutorials.. ..astounding skills and wonderfully thorough, it really is a pleasure to watch a basic kit airframe become a showstopper.. ..love the decal strips for rib tapes - seems obvious now I see it, but I have messed around with masking and primer in the past so a method I will be sure to pinch ..tuned in for life.. Peter2 points
-
to be continued...2 points
-
I fancy doing an Airfix 1/72 Hawk in the short lived 92 Squadron colours so I've been looking through my old slides and photos for inspiration: XX157 / B, RAF Chivenor. 17th Feb 1994: XX205 / V, RAF Chivenor. 17th Feb 1994: XX337 / K, RAF Chivenor. 17th Feb 1994: XX287 / S, RAF Chivenor. 17th Feb 1994: XX330 / D, RAF Chivenor. 17th Feb 1994: XX167 / Q, RAF Chivenor. 17th Feb 1994: XX242 / Y, RAF Chivenor. 17th Feb 1994: XX242 / Y, RAF Chivenor. 17th Feb 1994: XX329 / C, RAF Chivenor. 28th July 1993: XX292 / R, RAF Chivenor. 28th July 1993: XX335 / I, RAF Chivenor. 28th July 1993: XX178 / M, RAF St Mawgan. 3rd August 1994:1 point
-
Hi fellas! I want to share with you another of my birds of prey. Please welcome Su-27! As additional sets i used a correctional nose cone and fiaps from "quick boost" and stencil decals from "begemot", Eduard interier and exterier PE sets. The assembly works was hard and it takes a kilo of putty ( )and a couple weeks of sanding works. The kit was gifted to me by my wife. So that why i was must to trace this work to the finish line))))) In paintworks i used AKAH color set "Russian flankers". The prototype is an 689 guard fighter regement "Alexandr Pakryshkin" of the Baltic fleet aircraft which locating in my city at Chkalovsk airfield.1 point
-
So, here it is at last. Thanks to the advices I've collected here, I've been able to gather enough information to complete this model. In the mid-thirties, Estonia ordered to Hawker a dedicated version of its Hart light bomber which was called...estonian Hart, and differed from the basic version in several points, including a second fixed machine-gun on the engine cowling starboard side, a windscreen for the gunner, and long Osprey-type exhaust pipes. Theses machines were still in service with the estonian air force in 1940 when the country was invaded by USSR. Some of them were used by the soviet VVS later. The model is based on the A-Model kit with a little bit of scratch-building to match the estonian specifications. The starboard machine-gun has required a little "surgery" on the right fuselage half-shell. The national insignias come from a Kora sheet intended for an Avro Anson, while the "146" code was printed on Experts Choice clear decal. The shiny metal parts were painted with Alclad II "polished aluminum" and the fabric-covered areas were sprayed with a coat of Tamiya TS30 which was later oversprayed with Pebeo matt varnish to give it the typical "silver dope" finish. Now enough with talking, here it is:1 point
-
First stage of the cockpit painting is done.1 point
-
You see, it's addictive isn't it? A Spitfire here, a Gnat there, suddenly kits are following you to the checkout, before long you'll have a stash like the rest of us... Good move about the primer, I often prime the parts while they're still on the sprues. One thing to watch out for is to make sure you get rid of all the primer from the mating faces of the parts during assembly, or they won't stick. Not sure about it being a quick build though - I've got this one in the stash and it looks like it's got a LOT of tiny bits and plenty of detail. As far as paint goes, grey, green and black should do you for starters on this one. Should be fun...watching with interest. Cheers, Dean1 point
-
With such a blustery day outside curtailing my original plans for today (doing some real aviation) I thought I would try and crack on a bit. Some progress made on kit No 1, but I'm afraid that May be it for today; there's rugby to be watched and beer to be drunk!!1 point
-
1957. Full release history here; http://airfixtributeforum.myfastforum.org/viewtopic.php?f=41&t=1501 point
-
Welcome back to modelling! That's a nicely finished Gnat you've got there, especially considering it's brush painted! As David W. pointed out already, an RAF display machine would be spotless and shiny – part of the show. The pitot boom looks a bit suspect, though. On all the pictures I just checked, it's much finer (a stainless pin or hypodermic needle would look more in scale), not angled up but parallel to the fuselage datum and metal coloured, not red. Otherwise, very good work, coming straight out of adecade and a half hibernation! Keep at it! Kind regards, Joachim1 point
-
Hi I am looking at your work and is great.Iam learning from you a bit.Keep going with good job Cheers1 point
-
two more pics tonight played a bit with the tail wheel and used hook from eduard PE, the PE holder was too small though so i made new easy from plastic strips Since then i am cutting, sanding and trying to not break rob taurus vacu canopy - its made for this kit and it looks awesome, it even has rivets on the frame all around! Bud the bad thing is, its made as a whole, so if you cut the middle part out, you have same problem as with the original canopy - you are missing the canopy frame line closest to the pilot seat, from the back canopy piece...+ i am not so good with the vacu stuff, so i ll probably use front and back parts from airfix (and just make the missing frame by paint) - already masked these with eduards mask (best spent money ever! for planes with such a difficult canopy masking, the aftermarker masks are bless!) and for middle i ll use the vacu part. But if i am lucky enough and can get the rest of vacu canopy out undamaged, i ll just buy another masks and use the vacu, bcs its realy looking great with the rivets..1 point
-
Whoa!!!! Is that 1/72?!?!?!?!?! Okay, I realise those models have been built my a master modeller, but it all bodes very well for the rest of us. I don't see how anyone can resist that civvy scheme!1 point
-
Great and top knotch models Mal, welcome to the forum. Just for fun, what do you think should I improve in my working place besides avoiding to let cotton sticks on the floor? Open to receive feedback1 point
-
Hello dear modellers, I am happy to announce here that the 1/32nd T-2 Buckeye is finished now and you can buy it in two various boxes: SH32059 Camouflaged Trainer: http://www.cmkkits.com/en/aircraft/t-2-buckeye-camouflaged-trainer-1/ and SH32037 Red & White Trainer: http://www.cmkkits.com/en/aircraft/t-2-buckeye-red-white-trainer-1/ Here are some photos of assembled and unpainted model:1 point
-
Hi All, Well I'm looking forward to getting one. Cheers, Daniel. All of the above images in this post are Copyright ©2012 Daniel Cox.1 point
.thumb.jpg.d17ff607fc7e89ed057e63fcb6f2a888.jpg)


This leaderboard is set to London/GMT+01:00