
Leaderboard


Popular Content
Showing content with the highest reputation on 13/11/13 in all areas
-
Been working on this for about a week... Converted from Airfix's XIX and F.22, sporting a very striking scheme which makes the "new wing" Spitfires look very nice! IMG_5807_zps69903331 by Ben Standen, on Flickr IMG_5806_zpsa0b7d909 by Ben Standen, on Flickr IMG_5805_zps999da7b3 by Ben Standen, on Flickr IMG_5803_zps0a25d766 by Ben Standen, on Flickr IMG_5802_zps0e9c332e by Ben Standen, on Flickr IMG_5801_zpsc1e5a256 by Ben Standen, on Flickr IMG_5799_zpsa699a006 by Ben Standen, on Flickr All comments welcome Regards, Ben.6 points
-
Hi all, here some pics of my Mirage 2000D by Italeri (Kinetic Kit) in scale 1:48. Used two Aires resin MB Mk.10 Seats and some etched parts by Eduard. Decals are OOB.5 points
-
Hi all this is not my usual scale but I have enjoyed every minute of building it, its the 1/72 Fujimi F-4M Phantom a nice little kit goes together real nice hardly any filler was used it really is a sweet little kit of a great plane so here she is. Hope you like her. Clive5 points
-
Hi all again not my preferred scale but yet another 72nd scale model, this time its the Mosquito absolutely love this bird and this is the Airfix offering. Cheers all Clive5 points
-
Yeap i picked up #3 on Friday, although not really bothered about numbers as various parties involved in the books would have had their copies first. I had a word as well with Airdoc, they said they were going to revamp and re-issue the RAFG Phantom set they did. So i pushed for the FAA sheet as the fujimi kit decals are a bit naff and it would be rather nice to have decent markings for the prototypes, 700P, 767 and 892 squadrons, so maybe we'll see them eventually. I aslo suggested to the Airfix researchers to pick up both volumes as a decent Phantom is not in their range and a British one to their new standards would be greatly appreciated and could also be done as an RN special boxing .5 points
-
Hi folks well its my first Vulcan with the wheels down not including the lindy I made for my dad. This is her as she was on display at Telford this weekend. I have really enjoyed this build I hope you enjoy the photos of her. She is on a diorama base I made to represent the end QRA pan at waddington. Cheers Rob Comments good and bad welcome but I apologies in advance for being photo heavy... Many thanks to Precision Ice and Snow for letting me display this on their table. I absolutely Love their product its made this dio look quite magical with the frost. Also it was fantastic to meet so many people off Britmodeller at Telford this year. I was very good fun indeed. Cheers Rob4 points
-
As with all things, it's likely to depend on how the modelling "fraternity" greet each successive offering. Already, the net is awash with "It's too big for me," "Why isn't it 1/32?" etc., etc., and, thankfully, it appears that Hornby have enough nous to allow sales figures to dictate future policy, not the outpourings of the (understandably) self-centred. Whenever somebody says, "Well, I won't buy one," I try to gently point out that I won't buy a BMW, but my refusal doesn't seem to have spoilt their standing in the automobile world. Edgar P.S. To me, a Spitfire IX or XIV seems the logical next step, in WWII importance.4 points
-
I imagine that we owe Mr. Chris Thomas, Mr. Bentley, Sam the designer and anyone else behind the scenes that we do not know about a huge thank you for this. Thank you very much.3 points
-
Just to close this unpleasantness caused by someone with dislexiya. If, I take 5 years and a lot of trouble to do some research I will make it available to who I damn well like.. For the record I have supplied drawings and information (free) to Czech companies before and they couldn't even be bothered to say thank you anywhere.. Nowhere did I accuse "all foreigners" of being greedy but I did refer to foreign companies who in my experience are. And who mentioned specific UK companies, I didn't. I gave one UK company certain drawings only last weekend. and I assisted another UK company only a couple of weeks ago but you don't need to know who they are. John3 points
-
I present my Matchbox Marauder "Bar Fly" (41-31877) of the 554th BS/386th BG at Station 150 (RAF Boxted) which was one of the first Marauders to complete 50 missions, going on to complete 175 missions before crashing on take-off. There is a half-hearted WIP here. This model was a genuine straight from the box weekend build - started at 9am last Saturday and finished at 9pm last Sunday and I loved every minute of it (apart from the undercarriage collapsing under the weight of some lead to stop it sitting on it's butt!) For such an old kit, I am really pleased with how it turned out (there are some "operator errors", but I can live with them!) My reference photos showed that the olive drab on this machine was not chipped, like many Marauders, but it was patchy and faded. Unfortunately, my first attempt at patchy paintwork was so subtle, it is all but invisible, not helped by a Raw Umber oil wash to tone down the decals! I used some Mig Pigments Black Smoke for the exhaust staining. I hope you like my blast from the past....2 points
-
Hi all, I finished this last week but in the mad rush before Telford I didn't have the time to take and post pictures. Also, my work in progress thread starved off a bit for the same reasons. But I had a day off today and with the nice sunshine I took the opportunity for a photo session. Just to recap, this is the Revell 1:48 kit and despite being the best Strike Eagle kit in 1:48, it's still lacking in many areas and has lots of simplifications that needed addressing to bring it to my liking. I removed the main wheel wells and scratch built new ones, including the forward part where the wheel itself goes. The main landing gear struts, actuators and linkage were heavily modified or scratched. The nose wheel bay was detailed as was the nose wheel strut (complete with a new, longer, oleo). The cockpit was detailed with scratched throttles and oxygen hoses, Quickboost seats, iridescent film for the CRTs and the HUD, Eduard PE and other bits and bobs. I used Aires exhaust nozzles and Royale Resin wheels. The vertical stabs got the stiffener plates and rudder bulge, built up with layers of Mr Surfacer and detailed with Archer raised rivets. The antennae/sensors at the top are from an Academy kit as are the three main pylons and LAU 128 launchers (lengthened by a couple of mm though). The antennae under the nose a scratched, as is the GPS receiver. A lot of work went into getting the intakes right - as per the kit they're not fully up as for a parked F-15 and have awful seams in all the wrong places. The engine faces also got additional detail. I used my own (Hypersonic) jet fuel starter exhaust and decals. The rear area around the engines was treated as well to give an impression of thin skin, not chunky plastic. The AIM-120 is Eduard Brassin, the AIM-9L is from the Academy kit (modified for a training missile) and the ACMI pod is scratch built. There might be more, but I don't remember it now... Painting was done by a standard enamel coat, lightened in places. I then used both the salt and the hairspray technique in conjunction with acrylic paints to achieve the worn, dirty/grubby effect. I have to say that I really don't like working with acrylic paint and haven't become a friend this time either, but it's easier to use with those techniques. Subsequent weathering was achieved with oil paints and AK interactive enamels. Btw, I scored a Bronze with it in Telford, and I'm quite proud of it, in particular as the other entries were stunning and I know I've bodged a few things here and there. Here are the pics: Thanks a lot for your time! Jeffrey2 points
-
Finally finished this rather difficult kit. It fought me all the way, but I think it's come out ok, although it's far from my best work. Just glad it's all over.2 points
-
Hi y'all Not much of a progress update. I attended my first Aberdeen Modelling Society club night; wish I knew and attended sooner. Had a great time and will definitely be along again. I'm afraid I've had to steal Nigel's photos for my update as I have no pictures and his photography skills and camera are far better than mine. I hope he doesn't mind pictures stolen from Nigel Heath's Darlek Diaries: http://www.britmodeller.com/forums/index.php?/topic/234945781-15th-scale-sevans-models-dalek/page-43 Front doors: I had been pondering what to use for the white framing around the gazelle doors. I didn't want to mask and paint so was going down the path of plastistrust with some adhesive trials on clear styrene (think i mentioned this in a previous post). I just happened to be in a local DIY store and spotted some electrical insulation tape and thought "perfect!" Can't believe I didn't think of this earlier as I use it all the time at work... Once I tone these down during the weathering I think it will look nice. Gearbox / MRH: slowly struggling on with this. Sort of wish I never cut off the cowlings in the first place... However, I must admit that overall it is an enjoyable challenge. Despite endless searches on the floor for bits that have sprung from my tweezers and holding my breath during the gluing stages as to stop any uncontrolled movement. I've 'completed' the support struts but have yet to fit them. Gearbox in place The remainder of photos are a general walkaround (better quality photographs than my previous posts). Prior to attending the club meet I did have an "oops" moment (if I'm honest the actual words used where a little stronger than that). I dropped the gazelle ###$%@@&£ the skids snapped off but i have managed to glue them back together. The sticky out bits at the front also fell off; managed to find all but one item... To be honest it could have been a lot worse!!! Thanks for looking2 points
-
The main spar of the Hornet is not as always depicted a straight taper from root to tip. It has a step on the top surface as it goes outboard from the nacelle (so does the Mosquito). If you look closely this photo shows it. The spar comes in from the tip, rises to the rear of the nacelle and continues to the root. The rear fairing of the nacelle gives the impression that it drops back again, but let me assure you it doesn't. I have a factory drawing. No it's not just the radiator housing the spar has a step. John2 points
-
I suspect it will have the too short fuselage but that is the most difficult aspect to see and which I suspect might be in the region of 3/8ths of an inch. The one that is the easiest to see is the windscreen and cockpit area. The lower edge (glass) of the side panels of the windscreen are a straight line projection of the cockpit rails in side view and they do not curve upwards as in the Huntley drawings and in nearly every kit made. This throws the entire nose contours out with the 'bridge' of the nose too high. This gives away the Huntley drawings and it was copied by the Australian Spring and it's this, that is the eye catcher. To correct this will mean scrapping the kit windscreen... but before folks throw a wobbly, the real screen of the Hornet has hardly a curve in it and the whole thing can be made up from flat pieces of clear sheet. There is the merest curve on the lower edge of the glass side panels aluminium "glass to wood" fairing strip. The lower edge of the bullet proof screen in front view has a curve and this is quite shallow. The stepped main spar, missing on every kit and drawing is a different thing to fix but then who knew it was so? It will also need the slight extension to the stbd nacelle behind the spinner. A ring of 20 thou plastic card will sort this out, hardly the worst of your worries John2 points
-
Spitfire finished last one for this GB been a delight taking part and watching all the other builds completed and still ongoing thanks folks2 points
-
Many thanks guys. I must say I am chuffed with it and think when looking back at my old posts on here from when I joined that joining Britmodeller does improve your modelling thanks to all the helpful friendly people on here. Cheers Rob2 points
-
Hi everyone, just finished a refurb` on my Amtech P-40F, entailing a partial strip and rub down, repaint, more refined weathering, some extra detailing here and there and decals from the option sheet from my Hobbycraft Sharkmouth P-40F that I showed here recently. This is the same basic AMT kit but with the resin nose supplied in the Amtech issue, which is a much more accurate representation ( but I think it`s just a bit too deep at the front ) Built to represent Destitute/Reckless Prostitute, White 111, of the 44th F.S. `The Vampires` at Guadalcanal and Munda New Georgia 1943. Apart from the usual wire embellishments, I used some left over etched cowl flaps from a long gone Eduard P-40, mirror from a Revell P-40E..... the theatre stripes were cut fron a sheet of blank white decal and some hand painting and a butterfly for the carb` intake from some thick foil I`m having a bit of a P-40 renaissance at the moment with two more recently aquired ones in the `stash`. Hope you enjoy looking at, Cheers Russ2 points
-
I think you all should thank me for this release. It is the result of me having put in a lot of effort building an original Airfix Hurricane mated to a Magna resin fabric wing.2 points
-
So, is Periwinkle a female, male, hermaphrodite, asexual, alternative lifestyle? I'm thinking a decision should be made so his/her/its exterior color can truly reflect his/her/its inner Dalek and fully comport with his/her/its fung shui. Think of the turmoil that would be created if he/she/it is painted fuchsia, when it should have been flamingo, fandango, damask, coral or even carmine!!!!! Oh the horrors. How can you exterminate when you just feel a shade off?2 points
-
I managed to find time to look at this at Telford and was completely blown away. I'm mostly a figure modeller now but I would have quite happily taken the Typhoon away with me I have no idea how accurate it is or how easy it will be to build but just by looking at it I could tell that it is a fantastic piece of design and engineering and it looked as good as the products on the ZM stand that I spent the weekend next to! If Airfix are going to punt this out around the £90 mark then it's a bargain; I paid that for the Pegaso 20th anniversary 75mm foot figure and you get one of those with the Tiffie!! I don't think the modelling world has ever had it so good as it is now with the range of kits and aftermarket products so there is pretty much something for everyone. If you like this kit then buy it if you don't then buy something you do like; would you go into a Land Rover dealership and moan at them for not building a 2 wheel drive 3 door hatch, no you'd just go to a Mini dealership2 points
-
I had this idea of building a Chengdu F-7 of the Namibian Air Force for some time now. Seeing that a 1/72 scale F-7 does not seem to be on the horizon, the original plan was to convert an old Academy MiG-21 that is lying in my stash to the F-7. Problem is that that stash is some 1600 km away from me in the capital of Namibia. And unfortunately I don’t get many a chance to go home to my home town these days (Job, life, you know the story...). Then a local stationary store had one of these Academy kits in stock, and my wife convinced me to acquire it and start to do some model building again, after a 3 year break. So, armed with some nice plans of the F-7 that someone was so kind to put on the internet and the kit I set off to work – and a very big surprise awaited. I know the Academy MiG-21 is not the greatest, but this was an odd one. Somehow the kit parts and the plans did not match up at all. Double checking that I printed the plans to the correct scale, the problem quickly became apparent: who ever scaled the kit used the overall length, including that very long Pitot tube, to scale the fuselage. The result is a VERY long fuselage, bit deeper than required, and approximately the correct width. Due to the stretched and distorted fuselage, the wings were also over-scale, but strangely the horizontal and vertical stabs were pretty much bang-on scale. Go figure.... Considering shelving the project, I spent an evening studying the fuselage, and found a way of salvaging the kit. Since this project would in any case require the liberal use of a hacksaw, I might as well go all the way and go mad on the fuselage. Muhahaha.... This compares the scale plans to the kit fuselage and the parts that need to be trimmed: And this is the result of all the chopping on one half of the fuselage. With the whole other side to compare: And gluing it all together again.... Gives a good idea of the size difference! The Academy kit also models the fuselage with a distinct Coke bottle shape, something that is not really present on the MiG-21. This was corrected by chopping the fuselage (again!) into 3 pieces after it had been assembled and inserting plastic card in the centre section to “fatten” the mid fuselage. Visible in the photo by the white pits of plastic: At this stage one begins to wonder why subject oneself to all of this torture. Well, it is fun. But one day, one day I’m gonna build one of these kits where you put a tube of glue in the box, shake the whole box and out comes a perfect model. One day... Oh, and I am the new guy here; so HELLO!1 point
-
Hey guys! Next up on the bench for me is Hasegawa's P-40K in the markings of the plane on the box art, but with more accurate decals from Roy at Barracuda Studios. Obligatory kit/aftermarket pic: I've started out by attaching the modular fuselage parts, eliminating seams, and rescribing panel lines. I'm not a fan of Hasegawa's poorly engineered modular fuselages. If you assemble the model following the instructions, you end up with large steps for ALL of the modular parts. Doing it this way I have gaps to fill along the centerline of the fuselage, but gaps are easier to fix than steps. Still needs some MrSurfacer around the inserts in front of and behind the exhaust holes, but it's getting there. I wanted to sort out the fuselage halves first thing, next I'll be moving on to the cockpit1 point
-
After having had a break away from flying things, in favour of motor car and motorbike things, I have returned to aircraft and here is my latest effort. Probably my favourite World War II fighter in my favourite scheme. The kit is the 8th Air Force Aces boxing of Tamiya's 1/48th P51D Mustang and this is truly straight OOB. No aftermarket, no fancy etched stuff or resin, just as Mr. Tamiya intended. There are still a few small things to finish off, but I'm getting ready for the trip over to Telford and they will have to wait until after the weekend. Hope you like the pics and as always, don't be shy to criticise and comment as that's the way we all learn.1 point
-
This is Belfast in July 1945,before she set sail to the far east,she went back to over all grey with the blue strip along the hull,but the war was finished by the time she arrived.Then she went to spent most of her working life out there.Back to the model,as usual,the hull has been waterlined.having done one ship already,this was easy this time,had enough plans and pictures to make the changes to Belfast,most of it is where the walrus use to be.the crane was repositioned,the ships boats and added decks for anti aircraft armament and extra accommodation.I thought it was going to an easy conversion,but as I get deeper, kept discovery thats change and thats moved.In too deep now so carried on.The P.E. is by White Ensign models and deck by Artwox. The Walrus was used to dropped the mail off and was kept on the fleet carriers for this and other duties. Link for build http://www.britmodeller.com/forums/index.php?/topic/234946874-airfix-1600-hms-belfast-may-1945-waterlinedpe-wooden-deck/ Photos1 point
-
John Many thanks for posting that side elevation - very useful. Nothing that a bit of milliput will not fix for now and a windscreen out of clear plastic sheet should not be too hard as you say. The spinners seem to be better than the CA ones. Will1 point
-
I am desperate for an XIVe (buuble top) XIVc and XII in 1/72. Airfix have much of the CAD designs for all this already!1 point
-
I was talking to Tony from Comet at Telford and it is the cost of the shop that has caused a rethink. They are still trading but are going to be called Timeless Hobbies www.timeless-hobbies.com Steve Edit: www.timeless-hobbies.com turned into a link - couldn't do it on my phone!1 point
-
Ahh .... I get it now ... The Hawker Hart was rhyming slang!1 point
-
Very striking and a very nice build of an unusual subject1 point
-
Unmistakably a T-34, possibly a bit dark on the paintwork front, it's hard to tell for sure with the wonderfully moody lighting in your pics.....Overall I'd say a very commendable first attempt! . Might be worth using a paler basecoat (pick the colour you like most, then add buff, cream or white to it) and being a little more judicious & selective with where you use washes as it appears to have darkened your paintwork up significantly and also may have formed a bit of a tidemark around the turret (a coarse pencil eraser may sort that out).....If you look up pin-washes, you won't go far wrong. So will you be doing more armour? I hear there may be a GB coming up!1 point
-
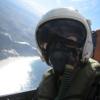
Great photos - they really put you there with the real thing.1 point
-
Fantastic job there, build, base, backdrop, pic`s all great1 point
-
Overall effect is great Base sets it off a treat Weathering is nice, not something you see too much of on Vulcan models, they were dirty most of the time!1 point
-
The Italian and German Tornadoes are as nuclear capable as the RAF ones and their main original mission was dropping nukes over the Warsaw Pact countries. It's not really true that the RAF don't use the IDS: IDS was a Panavia acronym for the attack version. Every country then had some different equipment in addition to a number of common systems. The RAF aircrafts are IDS built to UK specifications. The same happens for German and Italian machines, they are not simply IDS as we modeller like to think but the aircrafts of each country differ in a number of details as a result of different equipment.1 point
-
It is a cracking model Duncan, I echo all the above comments about black being very hard to pull off (I would avoid like the plague) but you have achieved an excellent effect. I am still searching for the copy of the German girly mag., I know its in there somewhere.....1 point
-
Hi Rob, I`ve had success with coating brittle/cracked decals with old formula Klear/Future, I brushed on twocoats, being careful not to go too far over the edges, They wont go over wing fences, very compound curves or the like afterwards though. Hope this helps1 point
-
They are, Nils;-) I just used the kit decals instead of opening one of your decal sheets;-);-) Thanks.1 point
-
In light of certain recent releases, Ive decided to resurrect this build, now the biplane modeilling is temporarily on hold. Now where were we? Jonners, to be continued....1 point
-
I wouldn`t like it to fly anyway,....not with that Sabre engine up front,.....they were not exactly safe were they and todays Health & Safety people would have a fit! We would only end up losing the last surviving Tiffie in a crash due to engine failure or a fire. Cheers Tony1 point
-
Well, if the GBs that go through to the vote have to be all correct by Friday at 6PM that sort of suggests that the vote will follow soon after, Doesn't it? I'm one person trying to juggle many group builds that would like to get into the vote, couple with this I'm trying to organise BMs appearance at shows next year which means finding dates and organisers and contacting them. Of course I then have a real job to do and really occasionally I like to build models. Give me a break will ya?1 point
-
."So, if two were built and both are now in museums, what crashed at Boscombe Down in (IIRC) 26/09/1994 on takeoff? The truth is out there! Christian the Married and exiled to africa" --------------------------------------------------------------- According to reports, the Boscombe a/c was a 2 seater, and I believe a larger airframe. It sat in the back of a hangar with a tarp over the centre section and someone accidentally left the doors open!1 point
-
Hi All, At the risk of having a mob with pitchforks turn up at my front door, I have to say that in my opinion the Vulcan has to be one of the ugliest and least interesting aircraft ever flown. To this day I am surprised that anyone would want to build a kit of one in any scale for any reason. Cheers, Daniel.1 point
-
Beautiful model1 point
-
Bit more done Door hinges and latch fitted from 0.25mm rod and PE fuel filler caps Added the lower tail leading edge fairing from CA & bicarb and fitted the tie down point Flap hinges, ive left the inboard one off as they are vulnerable to getting knocked off from the masking that will be going in that area. Thanks for looking1 point
-
Windscreen is in and gaps filled with Vallejo filler Masked off the windscreen by starting with the outlines, the filling in the centres with small rectangles, once done, the excess strips were cut away with a curved Swann Morton No.10 blade. Sprayed the wing roots with HU33 matt black to represent the walk way on the right wing and the black rubber strips on the wing to fuselage join, I believe these are fitted to reduce interference drag. A few blemishes still to remove, jumped the gun a little with the black, still need fit the fuel filler caps, tail tie down, flap hinges, door hinges and upper door latch, try to get them on tomorrow. Also tomorrow Im going to mask off the black areas and give it the 1st coat of gloss white http://en.wikipedia.org/wiki/Parasitic_drag#Interference_drag This wiki article suggests transonic speeds but as far as i'm aware its present at much lower speeds1 point
-
Hi folks,spitfire latest,after a bit of trial and error the wheels are up in place,just popped on the prop and canopy for photo.pilot is now in place and the stand will be the right way round when glued after completion.thanks for looking.1 point
-
I've no clue what an Avro Arrow should look like, but that looks great!1 point
-
This posting brings me up to date, i did it directly after the YF-12A, it was finished last week. Well after just over two weeks pretty solid work she is now done, got to say I am happy with the result. Model is sprayed with Tamiya acrylics the same as the YF-12A. I have another one on the shelf but that will be built as the standard SR-71, I do not think I have it in me to build 3 on trot, another year I think :-) There have been some real challenges along the way especially with the assembly and finish of the resin, but I cannot grumble about that, patience, hot water and plenty of Tea. Model is depicted as an early A-12, very few decals, no national insignia, just a few pilot extraction decals around the canopy and that is it. I have included some example images. Testors 1/48 SR-71 Kit. Kiwi Resin A-12 Conversion True details cockpit and seat, modified cockpit panel to suit the A-12 True Details Wheels. Spare Afterburner Decals from the YF-12A All finished with Tamiya Metallic Acrylics. Nothing left other than a few pictures. Regards Danny Attree With the YF-12A, Please see the following link. http://www.britmodeller.com/forums/index.php?/topic/234938130-1st-post-testors-148-yf-12a/1 point
-
1936-1969 according to the interweb. So some prewar and lots of post-war.1 point


.thumb.jpg.d17ff607fc7e89ed057e63fcb6f2a888.jpg)


This leaderboard is set to London/GMT+01:00