
Leaderboard


Popular Content
Showing content with the highest reputation on 04/11/13 in all areas
-
Greetings folks, It a took a while longer than planned due to five months off whilst I did some 1:1 scale filling and sanding on my kitchen, creating dust like I've never seen! All the modelling gear was packed away and only retrieved two weeks ago. Anyway, without further a do, here are yet more Suez stripes! I added a Pavla ejector seat, though in retrospect, not much can be seen with the wings folded. I also added the Pavla resin exhausts, replacing the pathetic attempt Trumpeter made of them. Oh, and having learnt my lesson from the Seahawk, I used Xtradecal roundels, backed with white discs (that come on the same Xtradecal roundel sheet). At times Trumpeter seem to needlessly over engineer things, then do dumb things like mould the wing fold ends with the wing top and bottom halves creating four awful horizontal seams to deal with. I'd originally planned to do this bombed up, but the instructions indicate wing bombs are mounted outboard of the wing fold. I doubted that wings would be folded with bombs mounted so backtracked. However, I'd already stolen half of Mr Wyvern's continent of rockets to arm up Mr Sea Venom! Scratching around I got some Pavla rockets, which required much cleaning up followed by scratch building the pylons for the Wyvern. Lesson learnt, plan ahead before stealing weapons from a kit! Paints, Xtracrylic Sky and EDSG, Tamiya 60/40 Lemon Yellow/White for the stripes, Vallejo for hand painting the seat, Alcad Stainless Steel, Pale Burnt Metal & Jet Exhaust for the exhausts. Dr Darren7 points
-
Hello again . This is my latest build . The kit comes from Eduard , i used Gunze paintings , and for the weathering , oil paintings and Flory models washes Hope you like it ....4 points
-
3rd build after returning to hobby. Custom printed decals for hong kong based aircraft. (only to find out the special hobby kit comes with) Some scratchbuilt stuff in cockpit, gunsight, seatbelts, headrest4 points
-
Both Look to Windward and Consider Phlebas take their titles from the same couplet of The Waste Land by T.S. Eliot: IV. DEATH BY WATER Phlebas the Phoenician, a fortnight dead, Forgot the cry of gulls, and the deep sea swell And the profit and loss. A current under sea Picked his bones in whispers. As he rose and fell He passed the stages of his age and youth Entering the whirlpool. Gentile or Jew O you who turn the wheel and look to windward, Consider Phlebas, who was once handsome and tall as you.4 points
-
At last my Harrier on it's deck. While taking part in IPMS Athens 2013. Great show by the way.3 points
-
Here’s my latest completion, finished last night. It’s 1/48 Special Hobby Sopwith Tabloid built and decaled almost entirely OOB in the markings of No 1 Squadron RNAS in April 1915 Box top: Nice and simple interior Finished today And my first real attempt a figure, Eduard this time…3 points
-
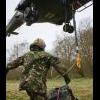
Post final build update. After a bit more trimming with a scalpel here is the finished mesh: I used a plastic bag to protect the circuit board from overspray: I asked Attitude Adjustor if he would like me to make him little cushion or at least throw in some foam to where he would be living but this was met with a scornful rebuff; he tells me he would be prefer it to be as scratchy and uncomfortable as possible. Apparently this helps to keep Daleks in the right permanent grumpy mood required for universal domination: We now had a final look at the skirt section, AA thinks it looks very good: I am pleased that the little nutter is now snoozing quietly in happy anticipation of his new home. Good night, sleep well, Nigel3 points
-
I must confess I tend to keep my weathering on civil stuff reasonably restrained. However, I found this album on Airliners.net and it has certainly got me thinking... http://www.airliners.net/search/photo.search?album=31542&thumbnails=noinfo&page_limit=120&photos_in_album=65&album_name=Dirty+Airplanes&album_creator=LesageCyprien&disp_order=desc Some great ideas for 'dirtying up' your next civil build Kev1n.... control yourself Tom2 points
-
Hello guys. Hope I put this little fella, in correct topic. I´ve seen such bird nest in modelling magazine, and I´ve decided to build one myself. I would say it´s cca 1/35 sparow´s nest Hope you´ll like it.2 points
-
Hi all Here is my completed build for the Obsolete Kits GB. It is the 45-year old Monogram Ju-87G. The box lid says it's a G-1 but it has the long-span wings, so I'm calling it a G-2. What a great kit for its age - I added the Airwaves etch for the cockpit and bought some beautiful Master barrels for the Flak 18 cannons. The fit was exemplary, the decals are the kits - although they are shot. This was one of the reasons I went for the winter finish as I wouldn't need to use most of them! Underneath that white distemper is a full splinter RLM 70/71 camouflage - I wanted to 'weather' the white a bit more than I did to show it through but I got scared of rubbing all the coats off! I added some minimal plumbing for the cannon to replace the moulded on detail and added the armour plating to the cockpit. The 65/70/71 and 04 theatre markings are Xtracrylix, the White is Tamiya and the spinner has Humbrol 47 brushed on. For anyone interested the build thread is here - http://www.britmodeller.com/forums/index.php?/topic/234946391-148-monogram-ju-87g-update-0111/ Finished as an unknown Werk Nummer of Geschwader Stab, III/St.G 2, early 1943, Russia Many thanks for looking and all comments welcomed!2 points
-
From the A-4 GB, the Fujimi 1/72 E/F kit built as an A-4G in the hybrid scheme that appeared when the RAN Skyhawks crossed the ditch and entered RNZAF service in mid 1984. There were a few variations on this but this is what 877/NZ6218 looked like for it's ferry flight and the immediate period afterward before the full complement of RNZAF markings were applied. Apart from the roundels the scheme is RAN, with an RNZAF SEA schemed tank on the centreline station. The roundels and rescue markings are slightly oversize, but they are the closest ones I had in my stash. The rest of the markings are from an Aussie Decal set included with some boxings of the A-4E/F sold in Australia. The pale colour is Tamiya AS-5 light blue, but it changes hue slightly depending on the lighting conditions, much like the full size aircraft did. Weathering was kept to a minimum (none in fact) as you see little if any on the real things in contemporary photos - they were very clean and tidy looking in general. Thanks for looking!2 points
-
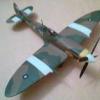
No long backstory for this one so clear your mind and lets imagine `What If` the Sea Vixen had gone into service on time with the USN showing an interest and purchasing it as a stop gap prior to the F-4 Phantom. VF-112 took the Vixen into combat in the last few months of the Korean War. Ok.., a bit of a long shot, but perhaps she may have looked like this? Straight out the box build, just shortened the booms at the leading edges.2 points
-
Here are the results from my latest project. It's an OOB build of the latest release and couldn't resist finishing it as an Auxiliary Air Force machine. Went together quicker than I expected and it's finished with Gunze Aqueous paints apart from the green which is from Tamiya: Look forward to your comments, Best regards Howard2 points
-
Hiya Folks, Here is my 1/32nd scale Hobbycraft Sea Fury finished in the silver and red scheme worn by the Aerobatics Flight of the Royal Australian Navy`s 805 NAS, circa 1958. Some nice photos of the real aircraft including three in colour appear on pages 70-72 of Tony Butlers Sea Fury book by Dalrymple & Verdun and my built thread is here; http://www.britmodeller.com/forums/index.php?/topic/234948523-silver-sea-fury-132nd-hobbycraft-kit-in-aussie-markings/?p=1433498 Anyway, here is the model, Tamiya silver spray paint, with Humrol enamel gloss red and varnish applied by brush; I`d like to say a very big thank you to Peter for helping me out with the vacuformed canopy and his fantastic 1/32nd scale land based Hawker Fury model, based on the Hobbycraft kit can be found here; http://forum.largescaleplanes.com/index.php?showtopic=40054 Cheers mate!! All the best Tony O2 points
-
My second 109, and probably not my last. Academy is not up to the Hasegawa quality for sure, its a very simple kit, not much detail on the surfaces or cockpit. Build direct off the box, just a couple of things modified such as guns, made out of brass tubing, pitot tube out of hypodermic needles and the tail wheel which was cutted and a shaft installed. Finished with Model Master enamels and Alclad lacquers.2 points
-
Hello people, Today I want to show you my latest model. Trumpeter DH FB9 Vampire. The model has tried some of the problems I have to make the best of it. More to see 2014 in the German Modellfan Magazine. All the best Hans2 points
-
Hi Chaps Many moons ago, I started this and its more or less there........Paints are Gunze .....wanted the used and neglected look............. Some minor fine tuning to go.....the whip antenna needs to be glued back straight......and some minor pesky clear lenses for the nav and top side lights............ Overall the kit fought me most of the way but the end result and the size is impressive......Maybe it was also due to the fact that when I started this I had many other things on my mind as well.............. Thanks for looking Mr B As always pardon the photos I am not a good photographer and the weather is very iffy these few days in my part of the world...........2 points
-
There is some rubbish spouted on here about shops. Back in the seventies in Colchester, I used to buy Matchbox around the corner at a Sweetshop or a sweetshop on the way to my mums workplace, Esci from a garage with a small toy section, Woolworths & Smiths knocked out Airfix and a department store called Williams & Griffins sold a bit of everything from down in the basement. They got me into the hobby, I was more interested in being able to afford the kit, and why I could never find a Spitfire than being given specialist advice. I even remember finding Hannants for the first time @1977...that was upstairs in a Toyshop in the centre of Lowestoft. nothing particular specialist about that. Other than Hobbycraft, nowadays kids will not see models in shops, with the demise of Hobbyzone, Smiths may just be giving the hobby the exposure that will attract the people who will be keeping the hobby going in a few years.2 points
-
"So AA will definately have a home somewhere at the show. He is getting very excited about it all, he has never been to a show and is now talking about little else. He is especially excited about meeting the full size Daleks and catching up on events in the wider Dalek universe." Did you ever see that Anthony Hopkins film "Magic" about a ventriloquist and his dummy ? . Does this scenario worry you at all Nigel2 points
-
There's an awful lot of snobbery rearing it's head on here with comments about staff on minimum wage etc. I happen to know several people who work in retail who, despite their relatively low wages, will go the extra mile to help customers. Also don't get it in your head about the so-called 'serious modellers' somehow being disadvantaged by retailers only offering Airfix/Revell...retailers are only interested in what sells purely because of operating costs and if there is a demand for it. In an average sized town how many people on any given day are looking to buy an 'Eduard kit with all the bells and whistles'? If kits of that quality and price were in such high demand then there'd be a model shop on every high street. A retail outlet would be insane to hold stock like that unless it had a mail order service too. Modelzone may well have been scuppered by overstocking on RC and diecasts but they would have been in deeper trouble had they stocked shelves full of high end resin and brass...the reason these items make money is because they are largely stocked by online retailers who aren't paying thousands of pounds out simply for shelf space. MZ did well on kit sales but I'm willing to bet that most of those sales were Airfix/Revell/Tamiya....I think the management at WHS may have checked out unit sales of each brand before deciding what to stock.2 points
-
Hi all! I want to show the new work. Prototype CT-133 from acrobatic group Heavy Metal Jet Team. http://www.airliners.net/photo/Canadair-CT-133-Silver/1810895/L/&sid=0297b8a65666abc7f5e8793c6cdd86e0 http://www.airliners.net/photo/Canadair-CT-133-Silver/1938239/L/&sid=0297b8a65666abc7f5e8793c6cdd86e0 http://www.airliners.net/photo/Canadair-CT-133-Silver/2275843/L/&sid=b6184bc031f55c09ded5c779c6696d40 And the kit.2 points
-
I should've seen that coming shouldn't i? Love - hate Gary - or more like hate then affection. Hated the JP3 at the time - cos it was the source of considerable misery and not much pleasure. Quite liked the JP5 cos I was getting a bit more confident by then - that is until I spent many miserable minutes (felt like hours) lost during low level navigation training. Now I feel the nostalgia and affection that creeps on with advancing age and the blunting of traumatic memories Now the Hawk - I did love the Hawk. Even though it was still training and no-one was guaranteed to pass the course. Surely everyone that's ever sat in the Hawk loves it. Get that FOI request in Tim; they'll be hanging around in an MOD file somewhere....... Yep. Some memories are exempt from my comment about the blunting of traumatic memories. Gonna share one or two? I did have a look at it after I'd got the Pavla Strikemaster. I wouldn't have used the instrument panel from either set and so that wasn't an advantage of the Obscuro set for me. Also the Obscuro set doesn't have a vac canopy. I decided to stick with the Pavla set as the mouldings were so nice and the mods on the sidewalls etc needed to turn it into a JP cockpit were only minor. Now - I know you'll all be as sick of the Ejections seats in this build as I am. But.... I've finally finished one It's taken me two sessions to get the CMR PE belts finished on one seat and half finished on another - and I've still got two to go! Anyway - I promise not to bore you with any more photos of ejection seats other than when they're sat in the cockpits. After this that is... It took an age not withstanding there are no negative G straps or leg restraints (and neither will there be in this build!). I'm not convinced that they're as good as moulded in belts. I guess both styles will have their advocates. TTFN Steve PS. I've left the PE top handle off deliberately so that it doesn't get knocked off. I'll stick it on just before the canopy goes on.2 points
-
Weapons are the same, so plenty of spares. I picked one of these up on Hobbyeasy for £25 including shipping and was impressed. Expensive for a 1/72 kit, but a big saving over the UK retail price. There are some niggling and annoying inaccuracies in Hasegawa's kit (what were they thinking with those seats?) but the detail is excellent. To be the choice is between this and Revell is a difficult one, because the advantages Hasegawa has over Revell are cancelled out by it's deficiencies, not least the price, and the same is true the other way around. A couple of additional points to note. Hasegawa have tooled two different fuselages for the single and twin-seat aircraft to reflect the difference in the location of the avionics bay, which means they are the only manufacturer to do it right. They've also done the 29 Sqn markings correctly and included the walkway markings for the wings.2 points
-
2 points
-
And don't I feel like a twerp, talking about something that only happened eight months after I was born!2 points
-
The US had been conducting psychological warfare (which I'm sure the Soviets called provocations) for some time prior to ABLE ARCHER 83, including FLEETEX 83 in the Pacific, SAC flights almost into Soviet airspace, and announcing the SDI. Andropov was obsessed with the idea of a US first strike, and had initiated Operation RYAN, an overall plan to focus the KGB on warning of a NATO first strike prior to launch in 1981; by the time of ARCHER, many unrelated incidents had started to look like a pattern, because if you look for a pattern long enough, you'll find one.2 points
-
Or worst-case scenario, a harbinger of very serious shape issues with the new Beaufighter.2 points
-
Needs a voice synthesizer. How much fun would it be to have a remote microphone and the first inquiring mind that attempts to put his hands on AA is told not to touch or be exterminated. Great fun. Have a pirate figure 6 feet tall (or 18 hands high thought you would like a new measurement scale Nigel) with a built in voice box I use at Halloween to scare off teenagers much too old to be trick or treating. AA needs a voice!!!2 points
-
Plodding along with Canberra and she's getting close but looking very monotone The catapault and crane are just blu-tacked down to get an idea how they look. I still have to finish the crane off yet and the cat I'll attach after rigging is finished. Still have to do the support lines for the aft mast, just have to figure out where to attach at the bottom without interrfering with the arc of the main guns or crane. More to come soon thanks for looking Cheers Callum2 points
-
Didn't the Skua get the first British a-a kill of WW2 (Dornier flying boat or something)? Anyway: Flatted the filler now, and given it a guide coat, which revealed a few pores. After a bit more fettling and shaping, and a final guide coat, I've dotted some Mr. Surfacar 1200 (basically a filler primmer that I tend to use purely as a filler) into the flaws. When that's set I'll flat it again and start rescribing the panel lines.2 points
-
Not been taking many pics this week but have managed to get all the big bits together and the fuselages re-scribed. What a chore that was ! The tail feathers on the AF kit have benefitted from some solar trim strips and in the progress of having the lights fitted on the rudder. I left the Frog feathers as they are apart from some scribing, whist different, I do want to finish this side of my funeral ! The cockpits need a bit of tidying up and there's some other touches of filler still needed, but happy with the progress. Close up of the Frog kit - the wing roots have been faired with Miliput. The cooling gills haven't been made yet. And the AF kit Cheers, Neil2 points
-
Flatulence - a source for female embarassment and male bonding.2 points
-
Hiya Folks, Following the research for my recently released book `No Place For Beginners' ( http://www.dvpublishing.co.uk/ ) dealing with the Air War Over Malta, I came across the correct paint mix for the blue applied to the well known Hurricane Mk.I, V7101 which was converted for PR use over Sicily and mainland Italy. It was painted in a dark blue colour concocted from " five gallons of De Lux Bosun Blue, seven pints of turpentine, 16 lbs of zinc powder and 3lbs of De Lux Black". This would make it look very similar to the PR Hurri`s flown by 2 PRU in the Middle East and from the only known photo of this aircraft taken during the process of its conversion from a fighter to the PR role it had the radio mast removed and was fitted with a Rotol propeller which gave it a better climb performance to reach its operational altitude of around 30,000ft. Unfortunately it isn`t known whether it had a Vokes filter fitted and my hunch is that it was not (if it was originally fitted it was probably removed during the lightening process to increase performance). However, as I was repainting my old model of V7101 which had originally been painted in the old `light blue with camouflaged tail' scheme which had been surmised for this aircraft judging by the photo which was taken part way through the conversion work- and as this model already had the Vokes filter fitted (and I couldn`t remove it!), then it was retained! The cartridge ejector ports under the wing were plated over using plastic card and a pair of camera ports were fitted below the fuselage behind the radiator. Anyway,...enough blurb,..here is the model; Hope you like it, all the best Tony O1 point
-
While Hobbycraft is being mentioned Note to W.H.Smiths. Put the B****y price on each item and not on the shelving which is nowhere near where the kit ends up and put them where the staff can see that every box does,nt get ripped open by silly B****rs showing little johnny what,s inside!Other than that good luck with your new venture.1 point
-
You could say how are we going to fill our lives..... mind you I suppose I/we could get back to finishing our own builds, it's been great watching this come together Nigel. Glen.1 point
-
Thank you guys for all your very kind comments, I find the britmodeller crowd really does provide significant motivation, even when builds don't go smoothly. I'm in awe of the skills here... :blush: OK, you guys are seriously weird, I thought there'd be requests for group photos, not kitchens and models. However, I'm never one to refuse a hint, so here's a group shot in the kitchen! And before anyone comments, it's clean because it's new, it won't stay this way for long, so thanks for prompting the photo whilst it's clean! Photo setup: Tamiya photo studio (pricey, but worth the money imo), desk lights with 30W (150W equiv) daylight colour temp cfl bulbs - much cheaper than studio lights. I couldn't show here as I only have one tripod, but the key to the larger than life appearance is depth of field. That means a high f number and slow shutter speed. Most of my shots are f/22 and 2 second exposures. So any requests for an FAA Suez group photo...??? Darren1 point
-
I painted the canopy.1 point
-
1 point
-
A bunch of us visited the RSDG back in Sept 1991 at Fallenbostel, Germany just after they got back from the Gulf The Tamiya Kit is about 95% there but one element is missing from the original kit - the mounting plate for the side armour I built the model back then and could post some Kit pics later showing the changes if needed. I do have quite a few pictures of the real vehicles here if you are interested - especially for the detail parts The Kit 'Ferret' bin is also waayyyyyy too small.1 point
-
It's been a while since my last post... This extremely flammable and unarmored Japanese "medium" bomber with a ridiculously modest bomb load and large crew is surely among the more famous Japanese warplanes from WW2 period. I always admired it's pleasing lines. Hasegawa kit of a late model Betty is still the best and only available option in 1:72 scale (their early type offering isn't on the same levell). However, considering it's size, it's more an empty shell than a detailed kit, so I did what I could to make it more interesting. All seats got seatbelts, the landing gear covers got some structure, the starboard waist window was opened, the guns got sights and the antennas were replaced with thinner and more realistic ones. Oh, and the whole model was riveted from head to toe according to technical drawings from an excellent Czech publication. In the process I managed to disfigure the dorsal turret. Nobody could help me with a spare part, so I helped myself. I wrote some really nice e-mails to the distributors and the Hasegawa company. British dealers ignored me, German ones couldn't help me, the Americans could, but only in USA and our dear Japanese friends went deaf and dumb. They could really learn some lessons on customer services from Revell! Eventually I got a spare turret from my countryman Dušan who moved to California some years ago, but still keeps contacts with us via our modeling forum. A friend in need indeed!!! Since I really dislike large and dull models I finally decided to make a very unique an one of the kind model of a Betty bomber. In 1944/45 US forces found a relatively intact Betty on Clark field. After they fixed the faulty landing gear etc., they stripped it of all paint and armament and test flew it, along with several other types. Fortunately there are plenty of before and after photos of this perished airplane. Et voila: Josip1 point
-
Cheers Louiex2 Thanksf for the tip. The intakes have had no filler its just the photo angle but they are a good enough fit to get away with it (maybe ) Here is the Vulcans 200 series pipes they are the early type and quite nice though the outer two should go down and out but they do look pretty darn good. Canopy now fitted this is in two pieces so you could have the rear lift off if you wanted to display the insides but not for me with this one.. I like the claustrophobic part of the Vulcans character its whenever I have sat in one I never wanna get out its too difficult after the effort of getting in and you feel very safe inside there quite misleading considering their Armageddon nature.. I started to tidy the usuall mess up with 1200 wet and dry. Then I PVA masked the windows as I normally do using kids school PVA great stuff. I have also been rounding and blunting off the the air intake lips/edges they are sharp on the pit road and on my last 2 builds I was not satisfied with the look. They should not be razor sharp and should be soft and round. I love curves... More tommoro.... well its late so later today now for people who have normal sleeping patterns and not mad Owls like me... Cheers Rob1 point
-
Yep me to, thats a big big SP that if it was produced in numbers might have made a difference. Watching to with interest Cheers foxy1 point
-
Sprayed the primer today and I've popped the spare canopy back on until I'm ready to paint the upper fuselage. Next will be some Halfords appliance white on the undersides.1 point
-
Nice progress. Looks like you got the intakes' insides all sorted but in the future you might try Liquid Green Stuff painted in with a Microbrush. It's worked well for me in tight spots. I'm also enjoying the Vulcan history lesson- being from the other side of the pond, I don't know much about the aircraft type but have always liked their looks. Keep up the great work.1 point
-
looks pretty fit to me Mark And if it fits use it sorry I love the way you are taking this baby to a fine finish, the windows are a good example I am staying along to the end and enjoying every update bill1 point
-
Are all those tube production though? It is conceivable that some, at least, are test instruments1 point
-
I would not mind that, very tasty.1 point
-
Thank you all folks! Thanks a lot!! Modelglue, take it and build it!!! Do yourself a chance!! Cheers! Serelle1 point
-
Yep, I'd have to agree with those choices, additionally I'd like to see: 1/72nd Vampire F3/FB5/9 1/72nd Hunter T7 1/72nd Venom FB.1/4 1/72nd Hawker Hart/Hind series 1/72nd Hawker Seahawk 1/72nd F-84F Thunderstreak 1/72nd RF-84F Thunderflash 1/72nd Sabre F.4 with slatted wing 1/72nd Meteor F.8 1/72nd Moon on a stick! Wez1 point
-
The kit itself needs no introduction as many reviews are doing the rounds on the net. Tamiya 1/32 P-51D Mustang As with any model, you always have a finished subject in the back of your mind, in this case I have 3 FG's in the running for the final scheme Images from the great littlefriends web-site 353rd FG Raydon (station 157 ) 20th FG Kings cliffe ( station 367 ) 356th FG Martlesham Heath ( Station 369 ) Dependant on the FG that I choose, and the chosen airframe, i will try to replicate the barcodes as they were applied in theatre.........dog rough A few more etch items should be in the post. Mart1 point


This leaderboard is set to London/GMT+01:00