
Leaderboard


.thumb.jpg.87669a5ffb8b13672a3d675087a46d42.jpg)

Popular Content
Showing content with the highest reputation on 12/06/13 in all areas
-
Hey Ho ! So I borrowed a camera from work over the weekend and tried to have a better crack at taking pics of my builds.......still getting to grips with it all. Here are my first 2 (or 3 !) Hawks. XX188 and XX233 (pre and post the respray to mostly red). 188 has the Eduard photo etch treatment while both 233s are mostly OOB except for a couple of minor correctional modifications and Xtradecal bits. I had to buy 2 red arrow kits so that I could cobble the white stripe decals together so as to make the line solid on the side of the fuse like they were in the good old days. I had a wee attempt at doing the canopy MDC on the first one and wasn't happy with the result so I left it.....and of course the others have followed suit. I've got an Airfix one as well, but to be honest I prefer the crisper detail of the Italeri version. Comments welcome, good or bad.......enjoy. Cheers Gaz3 points
-
Evening everyone Well Ive completed my 2nd ever build and as the title suggests its the fabulous Eduard 1:48 Spitfire Mk IXc. Its been built OOB except for the Brassin wheels and the addition of fuse wire to areas of the cockpit. The build was fairly painless but I do think that items like the exhausts are over engineered (in my opinion) but once completed they really look the part. I did make some mistakes during the build, but they were my fault not the kits and I'm going to keep them to myself. The build thread can be found here http://www.britmodeller.com/forums/index.php?/topic/234940732-another-eduard-spitfire-mk-ixc/ Would I build another? In a heart beat! Everything about it oozes quality its certainly on par with anything the other major manufacturers can produce. What would I change? The only thing would be not to use Citadel paints for painting of the major parts as it lifted when I removed any masks and that was after I'd applied a gloss coat to seal it, but apart from that nothing springs to mind. Hope you like what you see and please give any feed back as you see fit. Yours aye Iain3 points
-
Here’s another of my collection of F-8 Crusaders, a 1/48 Hasegawa F-8E. I finished it in the markings of 'Superheat 210', a jet flown by VF-162 commanding officer CDR. Richard Bellinger from USS Oriskany, when he downed the Navy’s first MiG-21 of the Vietnam War in 1966. I used a mix of Eduard and kit decals, a Cutting Edge cockpit, and Aires resin gear wells and underwing bay. I scratch-built the boarding steps and ladder, and added brake and hydraulic lines to the gear. In the cockpit I added a flap handle and emergency canopy release to the insturment panel, a grab handle and standby compas on the windscreen bow, and added a canopy restraint strap and the canvas cover to the hole in front of the gunsight. As per my research, the jet carries a dissimilar weapons load of an AIM-9B and an AIM-9D, since there was a shortage of the newer sidewinders at that point in the war. While Hasegawa's F-8 is the best in 1:48 scale, I had numerous fit issues, most likely due to all the aftermarket parts I added and my own building errors. It’s no contest winner, but it’s finished, and on the shelf!3 points
-
I finally finished this which was supposed to be part of a Matchbox trio, but so far I have only managed to finish this one.3 points
-
Greetings from Italy! Here you are few pictures of my last job. It is the nice Italeri Macchi C.200 2a serie built OB with just some additional detail on cockpit and engine. The model represents an aircraft from 386a Squadriglia, 157° Gruppo, based at Torino Caselle airport in summer 1940. The cosed cockpit is typical of early building series of the Macchi C.200, but due to complaints from pilots soon it was modified into a semi-opened one that became the most popular configuration. "Next one please" is more or less the translation of the motto written on the fuselage together with the emblem of the 157° Gruppo. Please apologize the poor quality of the pictures... I've just a very basic camera... Comments and suggestions for improvements are most welcome. Ciao2 points
-
Ok, just finished model so I thought I'd post some pics up here. I used the following: Academy Spitfire mk XIV, Mr Hobby acrylic paint, Aires cockpit detail set, quick boost engine cowl and spinner/ props. Xtradecal decals In summary it was an enjoyable build with the overall quality not too bad, the fit of the main parts was acceptable with the wing/ fuselage joins being really good with a very fit with no rubbing down required. I didn't use any of the decals as quite frankly they just weren't good enough being rather thick and besides, I had better sitting in me spares box. The only real let down was the clear parts which were rather too thick, especially the sliding canopy which is so thick at the rear its laughable so I had to use a spare Eduard jobbie which is a bit too small, but is miles better than the kit offering. Fitting the quick boost engine cowl wasn't too difficult, care is needed to ensure a good fit and rescribing needs to be done carefully otherwise the panel line can end up over accentuated as mine did. Overall, like I said I enjoyed this kit but seeing as Eduard have raised the bar with their Mk IX, the lack of quality in comparison really makes itself apparent.2 points
-
Hi everyone, Her is my latest model for your inspection, the Trumpeter 1/48 F-100F Super Sabre. She is finished in the markings of the 50th. TFW based in Germany during the 1960's, when airplanes had proper colour schemes ! I spent quite a lot of work on her, re=shaping the fuselage spine and the rear section of the canopy frame to better depict the shape in these areas. I also used some spare wheels and drop tanks from the Monogram kit, as these were nearer the correct size than the kit items, although I did extend the noses of the wing tanks with filler, as the kit ones were too "Blunt" I used Xtracolor Aluminium as the overall colour, mixed with brown and gold for the rear fuselage areas, which were finished off with ground down artist's pastels for the streaked effect. I know a lot of people have expressed doubts over Trumpeter kits, but this one went together like a dream, and with a little extra attention it can be built up into a nice model. I did replace the nose, but if you use an intake guard that wouldn't notice. also, the surface detailing is a lot finer than the 1/32 version.2 points
-
Hi a recent spitfire mk vb by tamiya i completed i built this as a group build on facebook and it has a quickboost resin seat with moulded in belts ENJOY The underside i decided not to grime it up although i faded paint A nice view of the side and tail showing the nice preshade affect2 points
-
Hello Folks, This model was built alongside the new Trumpeter kit and guess which one is the best,.....Ali`s Alley Cat/ A2Zee is the best by a long chalk and is very highly recommended. This one was built using the kit markings as a Vampire FB.5 of 14 Sqn based in West Germany as part of 2nd TAF during the 1950`s and the decals are great, however the upper wing roundels have a dark outline, which shows up more in these photos, so they may be replaced. Anyway, as pictures paint a thousand words, here is the model; The canopy has not been properly attached yet so may appear a bit wonky in some pics, but I hope you like it anyway, I certainly enjoyed building it and have a few more to build in different schemes, Thanks for a great kit Ali, All the best Tony O PS- Brush painted as usual using Polly Scale PRU Blue for the undersides and Humbrol enamel Dark Sea Grey and Dark Green for the uppers with Polly Scale flat varnish brushed over the top. Kleer was used to make the canopy look a bit shinier.2 points
-
There is no question of *restoring* the aeroplane, which given its state would result in no more than its destruction and replacement by a replica. It is unfortunate that the word is inaccurately and inappropriately being bandied about by sections of the media (and today even by a UK government press officer who should have known better). The purpose of the recovery is the *preservation* of a historical artefact. Nothing made of light alloy emerges from 73 years of immersion in the sea in show condition, but there is the major part of an otherwise extinct aeroplane with actual Battle of Britain combat history.2 points
-
Couldn't agree more. It's a new tool MiG-25 for Pete's Sake!2 points
-
Ok, after numerous requests, I've now put together a 'how to' make Lynx mesh intake guards. As we know, both the Revell 1/32 and the Airfix 1/48 kits area devoid of decent parts and only have clear intake guards which to my mind look a bit pants. When Ali, Colin (heloman1) and I were developing the aftermarket sets for AlleyCat, we scratched our heads for ages to come up with a brass etched option that would be easy to produce and relatively simple for the customer. Alas, we couldn't easily convert my method to production so for the time being, it will have to be a DIY solution. I've used this technique for all my Lynx and am satisfied that it looks convincing. I have seen some very very good intake blanks made by chaps on here but I guess most would like to have proper intake guards. So here we go then. This technique works equally well for the Airfix or Revell kits. 1, Here's what we are trying to replicate. A point of note is the guard you see below is the standard one and this is the one we are going to make. The other version is what we call the 'snow guard'. Very similar in look apart from there is a large gap to the rear of the mesh to allow for air to still get in to the intake should the mesh area become clogged with slush or snow. It also helps to prevent large build up of snow on the intakes. If any one wants to do that one, let me know and I'll dig some piccies out. 2. Materials used are: Aber S10 net mesh or S19 mesh (the latter is better for 1/48 and is actually the perfect 'over and under' weave. I prefer to use the larger mesh for the 1/32 Lynx but it has larger scale squares and plain weave compared to the real thing. You'll see me using both on this tutorial as I experimented with the smaller S19 for 1/32. I have yet to find the correct weave pattern of the correct size for 1/32. Mesh squares need to be about .8mm. I am currently investigated Eduards range of mesh. 3. Get the kit intake part and clean off any flash. Orientate the mesh so it runs north/south relative to the part then using nail scissors or a sharp knife, cut an approximate shape out of the mesh being mindful that due to the curvature of the guard, you'll need to allow for quite a bit. We will trim it later. Remember: measure 3 times, cut once! 4. Once you have your square of mesh, overlay it on to the intake guard and make sure it conforms to the shape. Fold under the top and bottom to help it stay secure whilst youre manipulating the shape. Luckily, the Aber mesh it strong and flexible and because it is brass, it holds its shape. Carefully burnish the mesh with your finger so the raised horizontal frames appear in the mesh. Try to manipulate the excess that you will have along the middle rib as this is where the curve is at its most prominent. Use flat tweezers to 'pinch' the excess up then carefully trim it away. Use a non permy marker to mark the other horizontal parts of the frame and also the frame itself. This will aid trimming later. 5. Heres the S19 mesh thats ideal for 1/48. You can see that I've cut the mesh out from the spue and kept the sprue as the rear part of the frame. It just makes it a bit easier later on when placing the rest of the frame on. I've trimmed the front and bottom to size. Dont trim the top just yet as we will use this to help attaching it to the fuselage. Once youve done this, remove the kit clear part carefully. The mesh should maintain its shape to a certain degree. 6. You can clearly see the cut out along the middle rib of the frame. 7. Cut thin strips of plasticard to about 1mm width for 1/32 and about 0.7mm for 1/48. Use paper thin card as it needs to be flexible to conform to the shape. 8. Now this is where is gets fiddly. I have found that starting from the front/bottom is easiest. Using a cocktail stick, apply a tiny amount of cyano (I use Rocket medium) to the plastic strip then carefully position it. This will anchor the strip so we can apply a bit more to the strip as we go along. Dont be tempted to leave the kit clear part under it as there is a great risk youll stick it to it! 9. Heres the S10 mesh with front part of the frame complete. You can faintly see where I've marked the mesh for the horizontal parts of the frame and the obvious curve with the bit of mesh we cut out. Do the bottom, rear and top parts of the frame next. 10. Horizontal frame strips. Starting from front to rear, dab a tiny bit of glue on to the plastic strip then place it flush with the forward frame strip. Continue to do this until you have attached it to the rear frame. 11. Once its all dry, trim off the excess strips. Carefully sand the frame down. Its very important that throughout the glueing process, we dont get excessive glue anywhere as this will clog the mesh up. This is why I suggest a dab of glue on the strip and not directly on to the mesh. 12. Repeat for the other side. 13. Initial fitting. As you can see, its doesnt appear to conform to the shape of the body. Not a drama as we can carefully make it conform using a toothpick and tweezers pushing the frame around a bit. (Hopefully you can see that all the pain of putting the rivets on the fuselage has paid off as they look pretty good!) 14. After a small amount of careful prodding and fettling, it fits nicely. 15. The completed article. Prior to priming with Tamiya fine grey, I applied a few Archer resin 3d rivets to simulate the attachment fastners. I then gave the guards a very quick spray of Tamiya fine primer (really important not to go OTT as this will clog the mesh). I've applied a bit of Flory black weathering solution to give it a bit of depth. 16. This is why we left excess on the top of the mesh. We can use is to hook around the top of the gearbox fairing to aid positioning. 17. When I finally attach it to the aircraft right at the very end of the build, I cut very thin strips of double sided tape and apply it to the rear and bottom parts of the frame. With the top 'hook' of the mesh and this tape, I've found its more than adequate to keep it secure. As you can see, the S10 mesh is quite large compared to the real thing. As I said at the beginning, S19 is perfect in pattern but a bit too small for 1/32 and you have to be very careful with glueing and painting so as not to clog the mesh up. Hope this helps. Tony1 point
-
Morning all, this is my latest tiny project, the tamiya uss bouge set as cve 21 uss Block island. The idea came from a picture of the uss Bismarck Sea replenishing aircraft from barges. Picture visible in "escort carriers in action" by squadron , and larger in "aircraft carriers" by Roger Chesneau books. Barge, crane and fresh food trawler are scratch. Just some etching railings and some weathering to add a life, that's all. Calm harbour sea is watercolor card, with a shallow-water effect made with some transparent filters i'm testing.1 point
-
An old favourite. One of the first Tamiya models I completed (about 7 or 8 years ago), also one of my first times using after market decals (in this case by Techmod). Some of the antenna masts are a bit wonky as they didn't survive the trip to Perth from Geelong very well. Also one of my first models after switching to brush painted Tamiya acrylics from enamel paints. Thanks for looking.1 point
-
Hi all, After reading the wonderful Maxheadroom's post relating IAT 83, I take the opportunity to share with you some slides about the 1987 edition.... fasten seat belts and enjoy ! cheers Olivier Olivier1 point
-
Hello the dissolved VA155 nov 30, 1949 and reborn from its ashes when the Feb 15, 1953 the VA728 becomes VA155 equipped with skyraiders. The comp is Monogram, exit and emerged since some years before the arrival of a Japanese manufacturer, which has not much better about the accuracy of the kit, if it is to have brought the sacrosanct engraving in very large hollow... I simply added the canvas protection as well as connecting rods of the mechanism of folding of the wings, also 2 bars of maintaining security...Unlike some affimations, bath-shower at each arrival of aircraft was not mandatory, reason why I brought a some chipping to the beast. Not to be confused, this is not mud (go on a P.A.!!) in fact the wheels are clean. I finish my chatter on the media (this is not my cup of tea!) but asked for an exhibition by a fellow Designer, I did a quite exceptional effort... the precious wooden slats are glued one by one... (but not kidding!) Finally it is an AD6 that the next war would be given the name A1...1 point
-
I've been referring to this as a Widgeon...sorry. the kit header clearly states GOSLING. I think its a potato - potahto thing. Finished in MM enamels and rigged with .005 Ethicon stainless. All decals are from the kit. The kit was sanded down and scribed. The horizontal support struts and float struts were replaced with left over strut stock from old Pegasus kits. An interior was scratched (seats, floor board, back wall and instrument panel.) Tape seat belts were added. The square blobs on top of the engines were replaced with exhausts from the spares boxes.1 point
-
Been working on this one a few weeks now but just remembered to get it posted up! The model seems to go together pretty well. I think I have put the wrong nose due to the Revell instructions. But the other nose is available so I may still change this over. Rear area for radio operator etc Bomb bay complete with bombs Pilot, navigator and bomb sights Another view of the rear area with a bit more detail of the turret Rear gunner position Fuselage all together and glazing added. Fuselage before the glazing was added Full fusealge All masked up ready for painting. The kit is designed pretty well so you can construct the wings seperatley and then but it all together at the end. This will make it easier for painting1 point
-
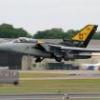
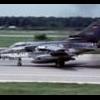
75th Anniversary of the show, and 40th of the Jaguar. 9th June saw a VERY well-attended airshow, with record numbers of visitors. SO many, in fact, that there was some appalling traffic congestion both pre and post show; tales of many cars turning around after hours in queues.. but that's another story. Compared to last year, where I drove straight in with no waiting at all, this year was different, in fact it theoretically ended up being a tickets-only affair, and anyone without they advised not to travel. However, I talked with a few punters who had managed to get in paying on the gate, so they weren't that strict. Anyway.... The photos here represent a small amount of what I took, and what was there. A lot of the same stuff was there last year so I didn't bother photographing them. Indeed the first couple of displays I didn't see as I was stall hunting. The Typhoon put on a great display in clear blue skies, but muggins here had left his big lens in the car so by the time I got back he was long gone. Also, around about the time of the Chinook display, said ig lens decided to die on me, leaving me with no Image Stabilisation or autofocus, so I gave up with it in the end and just used a smaller lens. There were multitudes of Jaguars on display, some I had seen before others I hadn't, and whilst I photographed them all (having picked up the KittyHawk Jag there they will come in useful!) I won't put them all here as a Jag is a Jag is a Jag! I didn't even go around the hangars or museum to look for new stuff, so for now, here are some of the good ones The Chinook display was incredible, never seen it thrown around like that before. It went vertical forwards and backwards, very impressive stuff! Oh, and that's Harry flinging the Apache around... Apologies for being pic heavy!1 point
-
You can! It did! Lovely Wessexes (Wessii? Wessices?) I had mixed results with my home brew decals. I'm pretty pleased with the FSS logo but the stenciling was less successful. I think producing stencils in 1/72 scale was actually a bit beyond my printer - and although I had pretty good scans of the red Airfix originals and it was easy to convert them to black - by the time I'd printed them they were a bit too heavy and clumsy looking and rather too visible in situ on the chippie. I've only used 3 of the stencils on the model - and only where the stencils are very obvious and can be seen from a good distance in many photo's of the full sized article. I think maybe the Airfix originals are a also bit on the heavy side to begin with. That said. I'd be quite comfortable now to attempt the same in 1/48 scale. I reckon it will work fine for the Barracude Ex-FAAWAFU. You can see what I mean in the photos below. With Decalling finished she's just had a final gloss coat of Klear over the decals - so looks a bit shiny and toy like. Once the Klear is fully hard I'll micromesh it smooth which will flatten it to a sheen and put some matt coat on the canvas bits and the anti-dazzle black. I think you can see why I didn't want to plaster it in heavy back stencils. There will be a little bit of oily weathering applied behind the engine cowling (using some of Rod's photo's as a guide) which will help tone down the contrast with the stencils that I did use. You can see in the background that I've masked off the main wheels to paint the hubs grey and the prop has a coat of white. The bits of masking tape are covering the yellow tips on the rear (only) of the prop. List of outstanding jobs is reducing. Matt coat Restrained weathering Prop Main wheels Radio Aerials - somewhere in the thread Rod posted the dimensions. Shoulder straps. Nav lights Main section of the canopy And anything else I've forgotten to mention. (Pitot tube - added by edit) Not much - but at my glacial pace....... Steve1 point
-
Restoration or not restoration, IMHO this Do-17 is a historically important aircraft, and I believe that spending money on this would be justified by the historical importance alone. It's a true BoB veteran and the only remaining example of the type, a type that played an important part in the early years of WW2.1 point
-
Wow, a stunning Tiffie! Cheers John1 point
-
With that amount of grunt who needs flaps?1 point
-
Great model! Are you sure the stand is the right way? Looks like it`s going to crash:-)1 point
-
Nice one. Your build has inspired me to pick mine out the loft to have a look at. Not sure what the group build etiquette is, but if you're OK with it Doug I might even enter my kit too? I can't think the thing will ever get built otherwise! Will1 point
-
The A350 is set for its first flight this Friday at 10:00 Toulouse time, that is 09:00 UK time. http://www.flightglobal.com/news/articles/a350-set-to-fly-on-14-june-386977/1 point
-
That is a cracking model of XV254, I remember doing the MOD 3000 production plan for this aircraft.1 point
-
Don, please put down the scalpel and step slowly away from the modelling bench...1 point
-
I havent seen it either.1 point
-
I've certainly got nothing against the flying pencil Mike. It's just that I prefer any aircraft to look more or less like it did in service. But having read TonyO's post about it's future role at the base of a BoB diorama I can see the sense in displaying a genuine downed aircraft from the 'other side' along side one of our own. But then, like has been said above, the idea of the aircraft hanging by string at jaunty angles up a staircase sounds pretty darn awful anyway. Kind of glad that I'm not the only person who is less than impressed by that Cold War museum at Cosford. The way they have crammed the V bombers in so that you just can't actually get any real sense of shape or size and the nailing of the Canberra to the ceiling and worst of all, my favourite the Aardvark, shoved up against a wall in a very dark corner. Oh dear, I'm off ranting again. Anyway,1 point
-
Very nice job on the weathering especially!1 point
-
What a beautiful rendering of a lovely aircraft. Fantastic build, love the finishing - the detailing really pays off.1 point
-
Great work and great photography1 point
-
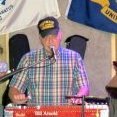
Hi Arnold, yeap it had to be a night-fighter. This version has the Fug-218 antenna array mounted in a long nose cone, a few 88-G6’s had the same setup, and supposedly it was meant to reduce drag. I already have a resin Ju-388 bomber and night-fighter 72nd scale, but not this variation, which is my favourite. Am sort of halfway through a 72nd Ju-488 which is really giving me grief, may re-look at it once I’ve worked my way through my GB workload! If this build goes ahead I will really have my work cut out for this build, though the mouldings are excellent. Will start to look into with extra PE and resin bits I can use from late model 88’s or 188’s.1 point
-
Whilst I understand the desire to have a restored Do17 in a museum, I do not think that that is a practical consideration here. I suspect that practically every component has been corroded to some degree and to restore the airframe would require a complete new skin. In which case, the historic parts would be largely out of view and what the public would see would effectively be a replica.1 point
-
I have built this model in the past year to the day of the Great Victory. It is a machine of Lieutenant Colonel Anton D.Yakymenko. He was the commander of the 150th Guards Fighter Aviation Regiment (5th Air Army, 2nd Ukrainian Front).1 point
-
Welcome to the GB Dave, looks like an interesting subject you have chosen, I'll follow this one with interest. Colin1 point
-
Stunning! Love the weathering, the crisp build and the pictures as well. Very, very nice! Sid1 point
-
Finally got around to painting the exhausts.. First a layer of Alclad steel, then accents with alclad burnt iron. On top of that Vallejo acrylic washes of blue and grey..1 point
-
Thats a very nice F-8, makes me wanna go buy one. Seriously I like that alot1 point
-
Here is a nice view of the bulged doors on a Mk II: http://www.abpic.co.uk/images/images/1329096F.jpg Jari1 point
-
cool, very nice!1 point
-
Finally took a picture of progress now I've finished the cockpit & gear bays. I've also painted up the exhaust too, and using our walkaround, I attempted the latticework pattern that you can see feintly on the pic here: I used some Jammy Dog 0.5mm masking tape laid down in similar pattern to the pic, sprayed a slightly darker colour and then over-sprayed with some of the base colour. The tips were darkened a little with some Alclad Jet Exhaust, and the inner was given some coats of orangy beige to finish off. The rear section at the back will be painted boxy colour later, but for now it's just overspray The cockpit was nice & simple to do, and the decal settled down perfectly with some Gunze Mr Mark Softer. I suspect the pit is a mixture of old & new layout, but can't say for sure, and don't have the time to find out The gear bays are also pretty simple, but the small parts needed some adjustment before they'd fit. I drilled out the lightening holes in the little tirangular parts, but whether it was worth the effort, I don't know. There's a lot more tiny pipework you could put in there, but again, it's a simple build for a simple person I've also painted up the exhaust tube & burner ring which I'm just about to put together, and the outer bays have been given a coat of grey, a wash, and are waiting for a coat of matt - I forgot when I was doing the rest1 point
-
Oh that was sad to see. It doesn't take much heat to go to far. I suppose if we try to see something bright in it we all know that Le Mans is a gruelling race that always takes some tough retirements...1 point
-
1 point
-
Steam Punk certainly has come of age, especially after the Telford winner last year. Did you see the howls aof derision on IPMS UK Forum, with comments like "it's not real modelleing". I looked at the build thread on Fictenfoo.net under the forums and the builder certainly posesses some serious skills, not to mention lots of imagination. For those non believers just google monocycle motorbikes. Don't know how soon you would get a GB date, the calendar is full and with the proposed reduced number of GB's, you could be waitng a coule of years! Colin1 point
-
Tamiya Mosquito PR.IV, 1:72 She's finished now! Build thread is here! Alex1 point
-
very good job AAAA+++++s1 point
-
And I think I'm about done on this one! Went over the sandpaper paving slabs with another coat of grey and then a wash of oils to give it a darker grimey feel. Put some cut-up paper-clips in the wheels to pin into the board and then just started superglueing everything in! Whipped it outside for a few pics, will take another look tomorrow to see if anything needs tidying up. Didn't add aerials in the end, may possibly add them - I'll have a think about it. Will take some better pics with the proper camera outside tomorrow (rather than from my phone!). Anyway, this will be the last set of images I'll post as WiP - I'm calling this one substantially complete! Will post in the RFI once I've tidied it up! Thanks for watching comrades - I don't have any vodka so will celebrate with a beer instead1 point


This leaderboard is set to London/GMT+01:00