
Leaderboard


Popular Content
Showing content with the highest reputation on 06/05/13 in Posts
-
British Phantom FGR.2. Hasegawa kit. -Aires cockpit and exhausts -Aires wheels -Xtradecal6 points
-
Okay, the easy bit is done.. Next up is the base.. Anyway, here's the tired old girl.. And, to remind us how big/small this thing actually is..4 points
-
Hi everyone, here`s my first ( and most recent) completion from my haul from the Hinckley Show in March. Tamiyas 1/48 Bristol Beaufighter VI completed as an Australian built Mk21 Representing an aircraft of No 93 Sqn RAAF known as the `Green Ghosts` Apart from the decals all the parts were in the box, only extra work was deletion of two wing guns, some antenna, seat belts and a small fillet ahead of the observers station the decals were from an old Eagle Strike set also I thought I`d show you an earlier build This time a Mk X, actually done from the TFX boxing Done as an SEAC aircraft of no particular airframe or squadron but inspired from a pic` of a 22 Sqn, RAF aircraft Markings from the spares stash and the kit decals Only real work done was deleting the guns and ejector shutes and fixing a camera housing to the nose Hope you enjoy them both.4 points
-
Well, after a long and protracted 3 year build the Lancaster is finally done. This is by far and away the hardest Tamiya kit I have built. I added Eduard Etch in the cockpit, Belcher Bits resin engines, Paragon tyres and some scratch builing in the cockpit area. The guns are from Flightpath. Hope you like her. I present the Picadilly Princess, a Mk III, of 424 Tiger Squadron RCAF, March 1945. It is painted using a mix of Tamiya, Gunze and Vallejo acrylics. [/url] Alan.3 points
-
Hello, Finally finished my Eduard Hellcat. Built totally out of the box with the exception of new gun barrels [drilled plastic rod] and brake lines. Painted and weathered using Tamiya acrylics mixed by eye. I have achieved a first with this model - an aerial wire! Hope you like the pics and any comments are welcome! Thanks for looking Matt3 points
-
This is my first double ship display,enjoy the photo,s,if could get photobucket to work Grrrrrrrr Link for build http://www.britmodeller.com/forums/index.php?/topic/234930347-hms-ocean-orange-hobby-resinhms-dragon-type-45-dragon-1700/ [/url]3 points
-
WESTLAND LYNX HAS 2 702 NAS, HMS Avenger Flight, Yeovilton 1979 This is the Fujimi 1/72 kit with a few alterations, the main ones being a new tail rotor drive shaft cover to give a more bulked-out look compared with the kit, reshaped fin (the kit gives the Army style fin) and reshaped exhaust area. I left the main cabin empty but worked on the cockpit a bit. The kit doesn't supply the pilot's collective for some reason even though the other 3 sticks / levers are there so that had to be added. I also repositioned the cyclic sticks nearer to the seats to give room for the instrument panel. I added the Seaspray radar display on the observer's (post) side, but the rest of the instrument panel came from Modeldecal's sheet. I really like the original Oxford Blue scheme. I've had a tin of Xtracolour Oxford Blue for more years than I care to think about, but it still sprayed OK - took a while to dry though! The old Modeldecals performed well as usual, and a final coat of Humbrol satin varnish gave it that semi-gloss look of the early Navy Lynx. Nice to have some real warm sunshine to photograph it in after a long grey winter. Chris3 points
-
de Havilland Heron II G-AORG 'Duchess of Brittany', Jersey Airlines3 points
-
Thought I would post some pictures of my GR9. It's not perfect by any means but I am quite pleased with it. A great aircraft, greatly missed.3 points
-
Wings on nd test fitted the exhaust. I tested microsol nd set on spre with lcld - it was fine... going to alclad the UC doors and tail plane next...3 points
-
Hello The Supermarine Scimitar of Dynavector is my first Vacu-kit and temporarily the last. Built out of the box, Pavla Resin ejection seat and colors from Gunze. Thank you for looking and regards Martin2 points
-
Hi mates, here is my latest project, the Spitfire Mk. I as seen in summer of 1938. This started out as an out-of-the-box build, but of course that didn't last long. Project: Supermarine Spitfire Mk. I Kit: Airfix Supermarine Spitfire Mk. I/IIa (kit number A02010) Scale: 1:72 (The One True Scale) Decals: From the kit, representing 19(F) Squadron at Duxford in August of 1938 Photoetch: Eduard Interior Set No. SS400 Vacuform: Falcon Spitfire Canopy Set Paint: Gunze H72 Dark Earth, H73 Dark Green, H309 FS34079, H47 Red Brown, H90 Clear Red, H91 Clear Yellow, H93 Clear Blue, H94 Clear Green; Tamiya XF-69 NATO Black; Testors 2062 RAF Interior Green,1149 Flat Black, 1168 Flat White; Alclad 101 Aluminum, 104 Pale Burnt Metal, 115 Stainless Steel, 314 Klear Kote Flat Weathering: Some post shading to simulate paint fading, but generally not much weathering as the aircraft was new during this time period. I applied a burnt umber panel line wash to the camouflaged areas, light gray to the white underside, and black to the night underside. Improvements/Corrections Applied the Eduard PE set to the cockpit. Cut open the kit canopy, and used the windscreen and rear canopy. For the sliding canopy, I used a section of a Falcon vacuform. Camouflage pattern was hand masked (not a template). Shortened the HF mast to represent correct height of 68cm. Added antenna with 0.005" diameter Nitinol wire. Build thread: Link All told, I liked this kit a lot. Only a couple of points of discussion during the build, one of course was the panel lines. I partially filled them with Alclad grey primer, and I think that helped a lot. It's not so much that they're too wide, it's that they're very deep. Which in some respects is good, as you won't lose them during sanding. The panel line wash that I applied made them stand out a bit more, but I think it adds some interest. More discussion in the build thread... The other point was the markings, specifically the wing roundels. I could find no photos that show WZ-T with the roundel placement shown by Airfix. The directive in place at that time specified upper wing roundels on both wings, and most photos (but not all) of 19 Squadron Spitfires at that time show both. I chose to model WZ-T that way, partly to be in compliance with the directive, and partly to appease my sense that Spitfires should have roundels on both wings. Again, more discussion in the build thread... So on with the pictures! EDIT - I really should have used a different seat. This one is about 5 scale inches thick! Enjoy the photos! It's a great little kit and I had a great time building it. It took longer than it should have, but the project was interrupted by my ninth back surgery. It is so much fun getting old! Cheers, Bill2 points
-
Hello all, Here is my attempt at the Twin Seater Typhoon. All comments welcome. Thanks for looking2 points
-
Hi, this is Teemodeller. For those who don't remember, I'm the 13 year old modeller who some of you jhave been giving advice to. Anyway,these are my latest builds. The first is thye Airfix Gnat I have been talking about for a while, but have never got around to posting the pictures. The second is the Revell Spitfire Vc. Both builds went together very well, with no fit issues etc, etc. The only thing I'm worried about is the orange paint on the Gnat, I'm not sure if I put enough paint on. Oh well. The aerial on the Spitfire was done with stretched sprue. Anyway here are the model;s. Please criticise openly and honetsly. Thanks!2 points
-
My first Armour build I decided to try something quite cheep and easy to build to try out some weathering techniques which are new to me. I choose the Tamiya Panzer KAMPFWAGEN II which I picked up for a fair price and ended up with something I'm quite happy with. After finishing I then decided it needed something to sit on , two days later. More Armour ? Yes I think so Thanks for looking Martin2 points
-
Finished this a couple of weeks ago. Straight from the box except for as few additional details added to the cockpit and I filled in all of the panel lines with milliput. I seem to have had a lot more fit problems with this build than others appear to have done, the top wing was dictinctly warped and took alot of twisting and cutting to get everything lined up to my satisfaction. Paint is Aluminium Alclad and International Orange from the Xtracolor range. There is certainly some very nice detail in the kit and makes a nice pair with the previously released Gnat. The single seat Vampire is a rescribed Heller kit with markings from a Euro decals sheet. Andrew2 points
-
You are pretty limited for the G-2, if you were to expand it to a G-4 then you have a couple more options. The captured Russian and Swiss machines are definitely G-4, the Croatian machine, take your best guess. There are pictures around of at least 1 G-2 in British markings and the Hungarian machine is probably a G-4, but there are no clear pictures of the markings, so it could have been used in standard Luftwaffe markings, so the profile and decals should be considered a bit of a guess.2 points
-
I've done the wings, inside of the UC doors and the red line round the tail of the fuselage. Doesn't look much but it took me two hours! Going to do the black base for the rudder, tailplane, doors etc tomorrow the the UC and wheels. I'll take some pics of the wings when they re dry.... more soon!....Hope you like it2 points
-
Just the box shot to start, 1/72 Hobby Boss F-14. Going with the box art bird (as chosen by SWMBO). Started and made good progress - hope to get photos of cockpit and main fuselage up tomorrow.....1 point
-
Hi, This is my A-4C Skyhawk from Fuerza Aerea Argentina - grupo 4. Model is Hasegawa. The scene takes place on june 8th, 1982 on San Julian airfield just before departure for attacking RFA Sir Galahad already damaged. The plane raises the HMS Invinsible mark, and is loaded with three BRP 250 with drag chute. Enjoy ! Thanks for looking, Nicolas1 point
-
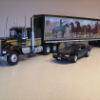
Hi guys Just a couple of photos of my latest build. It is an Italeri Volvo FH16 with several resin extras to convert it into an FH12 It is coupled to a Revell fridge trailer that has also been altered slightly. Hope you like it!!1 point
-
P-51B 'Old Crow' Clarence E. "Bud" Anderson This is Bud's first Mustang that he received upon arrival in the UK replacing the P-39s that the Group left behind in the US. You will notice the white nose and spinner. This was just before the 357th adopted the yellow and red checker-board and yellow and red striped spinner that was so characteristic of the Fighter Group. This is the 'Old Crow' boxing of the Academy kit, although I didn't use the kit decals as they was for a later 'Old Crow' Instead I used one of the options from one of Eagle Strikes 357th sets. Right on with the photos. I have included photos taken on a blue background and identical shots taken on a white background. Please tell me which ones you prefer when you comment on the build. Thanks. Thanks for looking, as per usual your comments are welcome.1 point
-
Having jogged the old brain cell and remembered how to extract a URL for an image out of my skydrive....Taking a break from aircraft, I visited the dark side to tackle a project I have been thinking of for sometime. Old Tamiya MK 3. Only enhancement were the black mud guard thingies on the front. I fashioned them from brown paper. No attempt to convert to a MK 5, and no attempt to correct any of the faults of the kit. It's the colour scheme that steals the show. Right colours of this beastie are allegedly RAL 7031, RAL 8025 and RAL 9010. I was too mean to crack open the old wallet and actually by paints to these specifications (e.g. from LifeColor) so did my own thing. I used Windsor and Newton Titanium white for 9010. Citadel Shadow grey from RAL 8025, and a home brew of Citadel's (using old names) Dark Flesh and Bestial brown , plus a dash of titanium white for 7031. The highly colourful results sort of match photos of the Chiefy sporting this scheme. If you squint, and look at it from a distance. Now the camouflage pattern. Ahhhh, much fun and games here. Had to rely on a few internet sources and photos. I soon realised that there were at least two distinct patterns (probably an early and late), and even the one I settled on had minor variations. The biggest problem was lack of overhead views. Best schematic/guide I found was a colour drawing by Barry Deldam. However, even here there were slight inaccuracies. I have restrained from weathering the tank, so it does look a little bland, but I have read that they were kept very clean. However, I do have a photo of a Chiefy being transported back to blighty, and it was quite dusty, with a bit of scrapping of paint off the skirts. Masking the beastie(though quite simple with all the straight edges) was a bit of a chore, not least due to lack of reference material. I would check the photos I had, cross reference against Barry's drawing, then work out various alignment points on the tank to which I could apply the masking tape. I kind of made an educated guess about the top surfaces. To compound matters I had stuck on a lot of the little bits as I had decided to paint the tank in the standard green or green/black scheme, and only changed my mind late on. Getting the masking tape around all the little bits proved challenging. To cap it all, I messed up the application of the white (due to a moment of utter stupidity) so had to spend ages touching up the paint work. Not one of my best spraying adventures. Would I do another one. Absolutely, if I had a MK 5, and only to do a better paint job. Enjoy, Angus1 point
-
stunner what more can i say1 point
-
Howdy chaps and chapesses While the bodywork on my Laverda is busy drying, I got this old donkey off the shelf.... This is a resurection job, a very abused kit I bought about 10 years ago from a flea market for some ridiculously low price. It had a 'needs love' sticker on it which is why i bought it. Took it home, opened the box, said uuuuuuuurm, and shelved it. So, the oblig box shot. and the bits... This is the 1988 kit of the '87 Paris Dakar bike, based on the Cagiva 750 Elefant. I have two of these, this one being an original issue with the three digit code, rather than the later five digit code. Also, quite a rare bike kit. Ok, so how bad is it... in a word,.....absolute :poo-poo: The frame has been handpainted, and apparently sprayed with something glittery...!!! The engine has been stuck together with superglue, so bit of an issue there, also hand painted and glittery sprayed. Not quite sure what the plan was with the bodywork... and the shaft of the shock has snapped off and disappeared Worst if all was the wheels. They have been sprayed directly over the chrome plating, a couple of times, and the previous owner then touched up those areas with brush painting. (stooopid, didnt take a before photo), but theyve been stripped completely and undercoated. The wheels are all black, so not sure why they were chromed, and the spokes are within a ball hair of the right diameter, so they are going to be left as is. So, if you are not aware of what Protar kits are like, they had some really unique bikes over the years, but they are real dogs to work with, and it takes a lot of work to get a nice kit out of them, but most have Cartograf decals and are actually fun to build, especially the bikes you dont see very often. This will be a slow one, but worth it in the end, this is the only kit of the Cagiva Explorer, and one of the very few Paris Dakar bikes available, soooooooo enjoy. (and yes, i can guarantee you, there will be a LOT of swearing)... Cheers Steve1 point
-
Very nice Mish - prefer the blue background. One very minor point that can be checked with google, This aircraft had white wall tyres like a car.1 point
-
Gosh, I hate to throw a spanner in, but those golf-ball pocks on the white wing surface really stand out in a couple of the shots (the ones from a low angle, with tail close to camera). Maybe they look less obvious in real life, but I'm a little worried that they don't measure up to the artwork that is your fuselage. The 'rivets' work on the metal (even the tailplane). Offered for your consideration, as objective (or even-keeled subjective) comment. bob1 point
-
Thank you for the nice comments Tested fitted flaps and slats, Tail on... and need to clean up the inside of the intakes. Allso sprayed the UC doors. I copuld still see pinmarks in the rudder, so I'm going to re-fill and rub down again. Starting to look more like a starfighter now. I'm looking forward to getting the decals on and I'm probably going to put future on the wings and flaps so I can give it a subtle oil wash... more to follow1 point
-
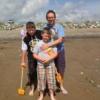
Nice one,got to the last stage of the same kit but messed up the canopy! at least my son makes use of it.1 point
-
Well, here we are, I've actually nearly finished a model!! It's had a coat of filter to give it a grubby look and a coat of satin varnish, ready for some grimy streaks, rainwater streaks and some rust. What do you think?? I'm now going to wait for the varnish to dry, and start on something else... but what will it be??? The Tiger is waiting for the Zimmerit material to arrive.1 point
-
They are based at Coningsby. 41 was already established as the weapons trials unit flying Tornados and have simply taken on the added responsibility of weapons trials for the Typhoon fleet. Regards, John1 point
-
Really nice build! As for the background colour! I like the blue!1 point
-
Amazing brilliant job1 point
-
Congrats Gruffy! Don't let the sprog distract you - this Jug is begging to be finished Tim1 point
-
http://www.modelismolatino.net/6-tema7266.html?postdays=0&postorder=asc&start=601 point
-
Well done. When I was your age everything was covered in glue fingerprints!!1 point
-
That's the one !1 point
-
Oh yes, now that would be an interesting duo! Tim1 point
-
Believe it. This is the postwar Desert Scheme not Temperate Land. Also seen on Tempests. If you need a more thorough description, it's in the book.1 point
-
The best reference would be the one quoted by the decal sheet, where extracts from 208 Sqn ORB and an Air Ministry document are mentioned. The former mentions aircrafts repainted in "light brown and light green with sea grey undersides" between august and october 1949. The latter states that MEAF was given permission to use a scheme with uppersurfaces in dark earth and light grey with undersurfaces in medium sea grey. Lucas concludes that the light grey mentioned is light slate grey, a colour that fits well with the description in the 208 Sqn ORB (light green) and that was easily available from stores. The same information is contained in a couple of articles that appeared in Model Aircraft Monthly, one about the Tempests and one about the Spitfire XVIII. Light slate grey was later used on the top surfaces of another camo scheme with medium sea grey, so its use as part of a camouflage scheme is not that strange.1 point
-
Very nice, like them1 point
-
Nice one Matt - have always liked the Hellcat - ever since I built the Airfix 1/72 kit many moons ago.1 point
-
Probably the best Hellcat I've seen. Outstanding.1 point
-
The thing is were making something that represents the real thing. If you paint it one overall colour then yes, you would be correct,but people when they look at your model don't think well that's what it should look like from 30 feet away, no they go wow look at all the detail on that, seat belt/buckles, rivets,bolts, and such like, and how do you manage to paint all those details and 'make' it look real. You see most people who look at my models haven't got a clue what they are, or look like in real life1 point
-
Interesting I posted a thread some time back about panel lines suggesting that the width of the panel line on the real thing was usually so tight you would have trouble getting a thumb nail in the joint. Not always but mostly Take that down to even 1/32 and you should not be able to see them far less in 1/48 or 1/72 Bit like airframe instructional stencilling which IMHO does not transfer well to smaller scale models as they tend then to look like the have had an attack of measles. But I appreciate others prefer otherwise. Duncan Re Michelangelos David - it ain't just the hands though it might have been cold in the studio that week1 point
-
Swiss, Hungarian and Croatian spring to mind, though they mightn't have used G-2's.1 point
-
Wings Palette has a profile of a G-2 in Croatian markings on their site, but as with a lot of profiles, I have no idea how reliable it is.1 point
-
Very nice indeed Andrew, I think we have all had our share of build problems with this kit, maybe we were all trying to be too clever! I love the finish you have achieved and see the finish you have achieved by filling the panel lines. Congratulations. Colin1 point
-
Very nice models1 point
-
Ivan, to the BM. STUNNING P-61A ...your Black Widow is simply SPLENDIFEROUS.1 point
.thumb.jpg.d17ff607fc7e89ed057e63fcb6f2a888.jpg)


This leaderboard is set to London/GMT+01:00