
Leaderboard

.thumb.jpg.158e2e086d45b8f96b7d93b8bee8dc21.jpg)

Popular Content
Showing content with the highest reputation on 17/01/13 in all areas
-
My first post of the year after a bit of an absence (lots of ups and downs over the last two months - demise of a much loved family cat, saying good bye to an old car, purchasing a new car, promotion, arrival of two new kittens etc. etc.). This is actually my first completed model in a while (started back in beginning of 2012, languished 90 % complete for 6 months, finally completed last week!). Completed as the prototype Vickers Type 667 - I am a sucker for big shiny aircraft! Finished with a Tamiya rattle can.3 points
-
AMX 30B French Main Battle Tank 1:35 Meng Models After dabbling with home-grown and US purchased M47 Patton tanks following WWII, and then attempting to collaborate with other nations to produce a suitable modern Main Battle Tank (MBT), France decided to go-it-alone after the nations couldn't agree on a common set of requirements (nothing new there). The result was the AMX-30, which was a non-standard solution for the time, sacrificing armour in the name of size and manoeuvrability, the thinking being that the weight of armour needed to survive a direct hit from modern weapons of the time would result in a large ponderous tank that would present an easy target. The AMX-30 weighed in at 36 tonnes, and was faster than its competition due to its lighter weight and powerful 700+hp diesel engine. Its transmission turned out to be a weak point however, so was soon upgraded to cope with the power of the engine. It was an export success, with orders from Cyprus, Qatar, Saudi and Chile amongst others, with a total of over 3,500 produced over its long life span. The new Leclerc sounded the death knell for the AMX-30 with the French army, with drawdown beginning in the late 90s. Qatari and French forces last used them in the first Gulf War, with their force placed strategically to avoid the more modern T-72s that the Iraqis had on strength. They achieved their aim, destroying several tanks, and various soft skinned vehicles during their mission. The AMX-30B was the first variant into service, but a basic AMX-30 was produced for export, along with a bridge-layer, recovery vehicle, Anti-Aircraft vehicle, and even a nuclear missile launcher, which was a curious looking beast with a rectangular missile tube that housed only the rear of the Pluton short-range missile. 30 of this type were used by the French during the cold war, and each one had a small drone that could be used to obtain up-to-date information on targets before launch. The Kit News of the AMX-30B was announced flamboyantly at Scale Model World 2012 by Meng, who as well as sponsoring a hall, arranged for an AMX-30B to be present next to their stand. The size of the beast was evident to all, and although it dominated the stand, it was evidently a compact MBT. The box is typical Meng - top-opening, satin finished and with a nice painting of the tank in front of a French flag. Inside the box is quite a lot of styrene, including seven sprues in a dark olive-green styrene, five in a dark brown styrene, the hull and upper turret parts, clear sprue, Photo-Etch (PE) brass fret, a sprue of flexible poly-caps, and a single flexible "rubber" flap that attaches to the mantlet. The usual glossy covered instruction booklet completes the package with nice clear instructions in black and white. A fold out page to the rear gives a sprue layout and painting charts. Detail is excellent throughout, as we've come to expect from Meng, and one sprue even includes a multi-purpose PE bending and track making guide that is almost unheard of in my experience. There is quite a lot of mould release agent adhering to the parts, which gives them a somewhat shiny appearance, so it would be a good idea to wash them before you begin. It's nice to see that slide-moulding has been used to give us hollow machine-gun barrels, and some complex shaped wire baskets, all of which ease the job of the modeller. Construction of a tank usually starts with the roadwheels, and this kit is no exception. This time we get poly-caps to fit within the twin wheels, and of course the rubber tyres will need painting, although you might get away with it if you're planning on doing the NATO scheme, which has an all-black lower hull and wheels. The idler wheels and drive sprockets are similarly fitted with poly-caps to ease installation later. The underside of the main hull is faceted, and has a keel-like shape, with the suspension torsion-bars exiting in armoured fairings. To the hull sides are added shock absorbers and bump-stops, as well as the bell-housing for the final drive and idler wheel plate. Then the torsion bars are threaded through their housings to the other side, where their opposite end-part is glued on, taking care not to spread glue onto the shaft. A scrap diagram shows how the parts should sit within the hull floor. Pushing on the roadwheels and installing a scattering of return rollers completes the running gear, and focus then turns toward the upper hull. The majority of the upper hull is provided in a single part, with various holes for other detail parts to install within/on. There are a pair of skins for the angled sides that hold the pioneer tools, and these simply glue to the hull, with two shallow tabs making for a firm location. The front facets of the glacis plate are then detailed with hatches, vision blocks and a bullet-splash guard for the driver's hatch, which could accommodate a driver figure if you can source one. A large portion of the rear deck is then installed with a central circular vent that drops into a corresponding hole. The rear bulkhead is made up from two parts that interlink and cover the hole in the rear, while a pair of mudguards with optional raised parts are installed at the rear of the fenders. A double-layer pair of radiators attach to the side of a recess in the rear of the deck, which later receive the large exhaust mufflers, which have hinged non-return flaps at the end of the short exit pipes which again have alternative parts should you wish to pose them open. They attach via three raised location points, and are then hemmed in by an angular brace toward the rear. Then a set of angled mesh covers are installed, which is where we first meet the ingenious folding template, part C10. The end of this chunk of styrene is perfectly The rear bulkhead is festooned with more pioneer tools, towing points, infantry telephone box, plus a choice of two different styles of rear light cluster and fire extinguisher bottle. Similar mudguards are applied to the front of the fenders, and front light-clusters are built up, with optional parts for one of the lights. A couple of antennae mast bases affix to the sloped sides, and a pair of stowage boxes with more fire extinguishers sit on the front of the fenders. A couple of protective hoops are added over the front lights, along with some towing shackles and the towing cable, which is moulded in styrene on this occasion. A couple of separate towing eyes are also included however, if you feel like making your own out of braided steel wire. The next task before building the turret is the construction of the track links into runs of track. The excellent C10 template part comes in handy again here, with a 7cm construction bed with sloped run-off to ease the construction. The tracks are designed to be workable after completion, so careful gluing is needed. The instructions advise 80 links per run, which are each made up from an inner and outer layer. The outer layer with the track pad on are placed into the template, and then the inner layer with the guide-horns is glued into place, located by three pins on each one. Once the section is done, place the last link in the first link on the template and carry on. Each outer part has three sprue gates, while the inner part has only two, so you're in for a fair amount of clean-up, although the few ejector pin marks are on the mating faces between the two parts - Good thinking on behalf of the Meng tooling designers. You are provided with 180 complete links, so have up to 20 spares if you stuff up a few. Turret construction starts with the mantlet, which has the elevation gear installed within the rear, and the movable part of the mantlet attaches to the front. Mediating the attachment are a trio of poly-caps that should also prevent "floppy-barrel" syndrome, allowing the barrel to be posed raised without resorting to glue. A scrap diagram shows how the parts align to complete the job, and the rubber mantlet cover attaches to the upper portion of the mantlet. You are advised to only use acrylic paint on the flexible rubber, as I guess enamel or lacquer would render it a mushy black mess. Remember here that some primers are lacquer based, and plan accordingly. The gun is made from two halves, split horizontally, as the underside has a number of small holes moulded in, as does the real thing. The muzzle is a separate part to obtain a hollow end, and a pair of shroud parts clamp around the rear of the barrel, split vertically. This slots through the mantlet and mates with the breech, which is a painted mixture of olive drab and white. How much of it will be seen is a question best answered during the build though. The turret top is a very attractive moulding, and makes up all but the bottom portion of the turret, due to some slide-moulding. You'll need to scrape away the hair-line seams before painting, which is easy enough with a curved blade. The mantlet slips under the front of the turret part, while the rubber shroud is lifted clear to avoid trapping it, and then the lower traps it all in place. The small gunner's hatch is added, and this can be posed open or closed using some alternative parts if you have some crew figures to put inside. A choice of blanking plates or three antenna bases plus cages, plus a set of smoke discharger units are added, then the large turret bustle and white-light/infrared searchlight are built up from their components to be added to the rear and side of the mantlet respectively. The template C10 comes in handy again for bending the bracket that attaches to the top of a cylindrical sensor, which is mirrored on the other side of the turret minus the bracket. The commander's machine gun is applied to a chunky looking mount that has a built in search-light and ammo feed, and then that and the periscope is added to the large glazed commander's cupola that slots onto the top of the turret over the cylindrical window part. The windows and sensor windows will all need washing with clear blue/green to give them the correct hue of bullet-proof glass, but most colour ranges include some clear colours these days, so that shouldn't be difficult. The final act is to add the large and delicate stowage baskets that run from the front to the back of the turret. These parts are provided as a single part each due to some fancy (slide) moulding, and with a little care should slot straight into their mounting holes. A movable cover for the sight is added to the mantlet along with a rail along the top, and the job is done. The turret twists onto the hull with the usual wings and slots, and it's over to painting. The Decals Two schemes are supplied on the small kit decal sheet, which is printed by Cartograf and sealed in its own little bag, safe from harm and moisture. As usual with AFVs, there's not much on the sheet other than number plates, a couple of stencils and unit markings. Needless to say, the decals are well printed and in good register, with minimal carrier film. The two schemes are either all over olive drab with the marking "Cassel 1677" on the side of the turret and 221 on the bustle, or a NATO green/brown/black camouflaged machine. This option has only the number plates and a couple of decals on the side of the turret, but does offer some more interesting tonal options for weathering. Conclusion It was a bit of a surprise when announced, but having seen it soon after the announcement I was pleased with what I saw. Now I've handled the parts and given it the once over, I'm sure that fans of French armour will be over the moon, and even those that haven't built any French AFVs in their life will be intrigued, even if just for the quality of the kit. It's easy to recommend this one, and I hope that some of the variants make it to market - that weird looking missile launcher option would be rather fun! Very highly recommended. Review sample courtesy of2 points
-
same situation as me... mind i need to fold my PE bender first... erm anyone got a PE bender bender... we can swap tips & "what not to do" type comments2 points
-
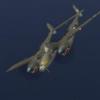
The latest one fresh of the production line. This is the High Planes RB.57D with home made mods. This D was used for calibrating satellite cameras. The patterns are to test the resolution of the lenses and the quality on the photographic film emulsion. You can see the build here.http://ipmscanberrasig.webs.com/apps/forums/topics/show/8436639-operation-pigs-ear-or-how-to-build-the-high-planes-rb-57d John1 point
-
2018 and Wales have followed Scotland and have been granted self rule. Part of the conditions are that at least two fighter squadrons are based in the country. With RAF Valley being the only suitable airfield in Wales for Typhoon operations (and has the room), newly reformed 74 Squadron took up residence on the former STCAMME pan. 234 Squadron will be the second Typhoon unit to arrive at Valley during early 2019. Since 2016 RAF Typhoons have been painted in the now standard 'Cloud' two tone grey scheme. Revell 1/48 kit with Eduard etch seat straps and 74 Sqn decals from the spares box. The kit was a bit of a let down, needing more filler than I'd expected, and some soft detailing on one side of the fuselage. The canopy was probably the worst bit, being wider than the windscreen! A good fun build that was a bit of light relief before I tackle something a bit more serious.1 point
-
This is the old Revell kit of the HH3 Jolly Green Giant. I grafted on the engine unit from Revell's new Sea King and used the canopy and cockpit interior. Other parts borrowed from the new kit were the rotors, and undercarriage. The old kit's plastic was very hard and brittle which made engraving the panel lines difficult. I scratchbuilt the rest of the interior and I used Humbrol acrylics for the first time, to paint her and I wasn't too impressed by them. I found them difficult to thin to airbrush properly, and they left a gritty finish. Decals are a mixture of the kit's and ones from the spares box. Thanks for looking.1 point
-
I'm calling this done, finished on the last day of 2012. I'm generally an aircraft modeller but I like to dabble in 1/48 armour. I was looking to do a very weathered and worn winter Stug and I wanted to try some of the AK interactive products and techniques to see if they would be transferable to my aircraft builds. I'm happy I achieved both those aims. I think it needs a base, and it a figure or 2 so maybe I'll add those later. I think it needs a antenna somewhere as well. The carpet monster ate the machine gun and shield so I've had to live without them. I also broke the armour modellers rule 101, i.e. every AFV needs a bucket. I did have one but forgot to finish it before photographing. Some Details Kit: Tamiya 1/48 Sturmgeschütz III Ausf.G (Sd.Kfz.142/1) Stowage: Legend and Verlinden PE: legend (the intake screens and rear frame is part of the legend stowage set) Metal Barrel: RB Model1 point
-
Here's my Sherman, fitted with Friul metal tracks and RB brass gun barrels and Plus model stowage. I sprayed it with the AK US Olive Drab modulation set and weathered it with various AK and Mig products. The tarp is made from Army Painter green stuff and I got the rope from a model ship company. How accurate it is I don't but all in all not bad. I hope you like1 point
-
OOB, with Eagle Strike decals.1 point
-
Here is my last build. Marking is Swiss Air Force 1944. This plane have long service life from 1940 to 1954. http://i1340.photobucket.com/albums/o736/FildaT/D3800%20RS%20models/D3800_1_zps63fe792e.jpg http://i1340.photobucket.com/albums/o736/FildaT/D3800%20RS%20models/D3800_2_zpse41b8bd2.jpg1 point
-
Along with the F-84G and T-33 the Canadair F-86E(M) Sabre was the third Western combat jet aircraft that wore the red star. After they finished flying with the RAF they were refurbished and send down south. They had a long and successfull career in Yugoslav air force from 1950s-1970s. Some even wound up in Guatemala in 1970s. This one was flown by a certain Serbian colonel Nikola Lekić who was allegedly the first Yugoslav pilot to break the sound barrier. His callsign was seagull or galeb in native language. Hence the cartoon of the bird painted on the port side. The kit was the venerable 1:72 Fujimi which is still the best Sabre in this scale. It was painted with Vallejo acrylics and marked with Balkan Models and LiftHere decals. Enjoythe pics! Josip1 point
-
It's seems like I've been spending a life time working on the damn Merlins. Now I know why I usually only build jets! Here's a pic of one of them so far....still a work-in-progress at the mo. Will be glad when they are both finished!! Graham1 point
-
Marking yellow parts...1 point
-
Makes a whooshing noise all by itself, doesn't it?1 point
-
GIAT (Groupement des Industries de l'Armée de Terre) AMX-30 Main Battle Tank. Pics thanks to Dave.1 point
-
a lot of had work well done regards Glenn....1 point
-
Thanks for taking the time to read all the pages, I know there are quite a few. The build was started back in October 08.....Ouchh that hurts. Oliver1 point
-
Wow, is that the kit I sold you less than 2 weeks ago? Good effort!!! Agree with the OP, it's shocking that there isn't a more modern representation of an aircraft which was an important step in the evolution of a key branch of modern air power. Mind you, until a year or two ago there wasn't even a restored HH-3 in the USAF's own museum - hopefully someone can now get out their tape measure...1 point
-
I've been using Fiat Broom Yellow as Trainer Yellow for some years now.1 point
-
Consider the mind set to get in this thing!?! Kind o like stickin' a rocket up the bottom and then kissin' it goodbye! Nice build Russ!1 point
-
Very tasty piece of work1 point
-
Halfords Fiat Broom Yellow looks to be a reasonable match.1 point
-
I'd like to have a go... I've got an Airfix Spit XII looking at me going 'Ramrod missions' (yes, I do need to get out more when the models start talking). The old Airfix Hampden is also looking rather tempting - if I can summon up the courage needed for that kind of challenge!1 point
-
1 point
-
Hi Everyone, My son is into steampunk and asked me to do the business on a tank...........here's the result so far - hope you like it. The base model is the 1/35 Emhar MkIV Male kit. I was going to slag it off as being very poor but then I saw the fantastic results rom1 has achieved with the tadpole version and decided that maybe it's me and not the kit that's the problem! Anyway, here it is so far: I'm going to replace the 'stick' machine guns with more detailed versions out of the 'bits box' before painting. Plain green paint seems just too boring so I'm open to suggestions as to the final finish. I was thinking along the lines of a 'Caunter' or battleship 'dazzle' type scheme. Comments/critisisms/suggestions welcome. Bandit1250 (aka Dave)1 point
-
Great job on that !! Wish there was a 1/48 scale one !1 point
-
Well done on a fine build of what is one of the most basic of helicopter kits. A new H-3 Jolly Green Giant 1/72 kit is badly needed. BM.1 point
-
Good build jockey!1 point
-
Some folks(rs2man will agree)have never lived keef. 120-130 bhp in a RWD Escort/Cortina can be a real hoot,especially when you leave some spotty 'erbert in his "souped up" Corsa with his chin on the floor1 point
-
Hello, thank you Sir. Some more progress: More to come.1 point
-
Not as late as the P1154...1 point
-
I have just noticed a peculiar thing on JASDF RF-4Es: It appears that at least some of them had the triangular reinforcement plates on the lower surfaces of the stabilizers but not on the upper surfaces. Jens1 point
-
I hope I will do good! I am not a huge fan of PE. Seatbelts OK but when I have to do all sorts of bending I mostly screw it up. I have got now a PE beder so, maybee I am ok now. Time will tell. Cheers,1 point
-
my last project in Trumpeter...1 point
-
Nice Job Matt, really need a Beaufighter in my stash and you've nudged me a little closer to getting one. Cheers...1 point
-
[deliberately misunderstand] I think you should probably put food in your mouth every now and again, unless you have some interesting alternative suggestions? [/deliberately misunderstand]1 point
-
Very nicely done1 point
-
From the splash page: "a modelling resource with a slightly British slant... It's important to us that our hobby remains fun..." Which I would hope allows for the odd bit of irreverence and (whisper it) fun.1 point
-
Very nice, I like this a lot RR1 point
-
Then please dont read it. Simples! Jonners1 point
-
One word: STUNNING!! cheers Nicolai1 point
-
This is a beautiful beau.1 point
-
Thanks chaps! The mod's were home made decals, camera window on the canopy and the convex mirrors. John1 point
-
Good day to all, I have just found this topic and it was an interesting read. Not surprised with the response (or attacks) on Yurij as I get the same in other forums. Believe that Yuriy is just trying to help to all those who have no real comparison and access to the real aircraft. After all it would be foolish of Yuriy or me making any reviews of a Spit or a Buccaneer and pointing out inaccuracies of the kit. There is no Spit of Buccaneer anywhere near me (even if I have seen some both on the ground and in the air) but on the other hand there are a number of MiG’s all around as well as decades of research into them, as I know the same applies for Yuriy too. Everyone can make up their own mind concerning this kit and either buy it or not. All that Yuriy is saying (as well as me) is that it has problems both big and small. On ARC there was a question for any opinions and review of the Trump MiG-21 F-13 kit. I did not use any four letter words to describe it, simply called it a TOY and not an authentic scale representation of the real aircraft. I have taken considerable flak as a response, but I still feel the same. Trump DID NOT DO a proper (or any) research in designing this kit. Apart from the points raised by Yuriy there are many others and I believe he has offered to “continue with the list”. I ceratinly do so on ARC illustrated with photos of both the kit and the real aircraft. It is very unfortunate but there is no going back, the kit is out and although it ”looks like” a MiG-21 F-13, the fact is that it is just a toy. I will wait for the Eduard’s scale replica. Yuriy was comparing the manufacturers approach in design, research and production when making a parallel between the MiG-21MF from Eduard and the Trump F-13. It is perfectly acceptable! The only advantage that the Trump kit has is that it was first out on the market. Best regards Gabor1 point
-
Finished! Here's a taster....more piccies are posted on RFI. Please head on over there to see them. Thanks to everyone whos taken the time to visit the thread and to leave comments. This is my first posting on Britmodeller and I've been really suprised (and pleased) at all the positive responses I've received. It really is a friendly forum and quite unlike some other armour related forums I can think of. Next build will more steampunk - I'm trying my hand at resin casting for the first time and was wondering how much interest there might be for producing a steampunk conversion kit for some of the Emhar of Warhammer tank kits. I'd be up for a steampunk GB Iain. Just say the word and I'm in. Dave1 point
-
Nearly finished........... Thanks to everyone who's responded with suggestions and kind words of encouragement. I'll post a few more pics on RFI next week. The accompanying MkIV female is waiting in the wings..................... Dave1 point
-
A bit more progress ....... hopefully not so camp now (cheers Anthony). Mixture of Lifecolour, Games Workshop and Tamiya acrylics used so far. Lots more detail painting still to do, then touch up the rough ares of the camo scheme, add decals, washes and weathering. Supposed to be finished for this weekend!1 point
-
A liitle more progress................ Went with a dazzle scheme in the end. Still got a green pattern to add, plus washes and weathering to tone it all down! Hopefully make better progress next week. Dave1 point
-
Primed & ready for some colour...... Hopefully next post will be on "ready for inspection"1 point
-
Thanks to everyone for the kind words and colour suggestions. Still unsure of which way to go - kinda like the idea of pinstriping - especially over "Doncaster Green" along the lines of the old LNER locomotives (and the new Tornado). I've added a couple of "brass" name plaques now to go with the train theme. This one is now called "Triton" and the mini-gun equipped female version (not started yet) will be "Neptune" after the trains on the Scarborough north bay miniature railway I spent so much time on during holidays there as a kid (how sad is that?). Dave1 point


.thumb.jpg.d17ff607fc7e89ed057e63fcb6f2a888.jpg)


This leaderboard is set to London/GMT+01:00