
Leaderboard


Popular Content
Showing content with the highest reputation on 02/12/12 in all areas
-
Hi all! Thanks for the comments and compliments! Yesterday I received from my friend Martin from the company Armycast templates for spraying detcord on theHharrier canopy. Today I put the templates on the canopy ... ...sprayed light gray ... ...and here is the result! Thanks again Martin! Regards Jan3 points
-
- An oddity in 48 scale from the excellent Italeri kit.......not very often seen I suppose....It was a prototype designated Ju 87 C , intended to board the German navy aircraft carrier Graf ZEPPELIN -Thanks for watching2 points
-
That looks very nice Mish. I met the bloke that shot him down a few years ago,so how about doing his Spit to go with the '109.2 points
-
You want to see the size of the tweezers that go with the dish2 points
-
Never mind all that - was there chocolate inside?!2 points
-
This monster has been in my to do pile for a few years now, but having just returned from a trip to the USA, I have finally been given the inspiration I need to get started. First up, I came face to face with Enola Gay: Then Bocks Car: And most impressive of them all was seeing FIFI at the Thunder Over Michigan Airshow: Even better, I got to go inside her: ...and whilst holding that iconic Boeing control column I decided there and then that when I got home this was going to be my next long term, vacform project. The kit itself is enormous, I've not seen one bigger, although I think the 1/48th B-52 also from ID Models could well pip it to the post. Here is the fuselage at a whopping 36" - the 'small' fuselage next to it is the Monogram 1/48th B-29: And the wings - a quick measure gives a span of approx. 54". Again, the 'small' wings are the Monogram 1/48th kit: This was a very old unwanted kit at some point and the stabilsers are missing; instead I have a spare set from a Combal Models 1/32nd B-17 which with some modification will substitue nicely: The transparencies were also missing in my kit, so Tigger WIlkes (who has the molds for these now) kindly made me a new set - they are beautifully clear too! Again a nice size comparison - here is a 1/48th cowling compared to 1/32nd: As I'm sure you can see from the photo's this is a very basic kit indeed. Altough very accurate shapewise, the kit is devoid of any panel detail, interior, undercarriage, wheel bays, propellers and engines - it's certainly going to be a challenge! The Monogram kit will be used as a guide for scribing and the interior parts. I plan to have a fully detailed interior, wheel bays and open bomb-bays which will all need to be built from scratch. As for the undercarriage, engines and propellers... well I'll cross those bridges as I come to them! Having built Combat Models' B-17 and B-24 in 1/32nd scale and ID's 1/32nd Lancaster too, I know from experience that something usually turns up, and if not... improvise! I've always got a few projects on the go so this one will probably be picked up and put down as with long term builds like this you often need a break and a freshen up! I've pretty much got all the references I need to get started on the flightdeck, so hopefully I'll be able to cut some plastic soon. Tom1 point
-
This was also a build for the Britmodeller table at Smallspace this year. It is basically the Pegasus Hobbies Alpha Centauri UFOs, with some liberties taken, which made it hugely enjoyable. The UFOs can be built in flight or landed, so I made one of each. The grounded one was probably inspired by some of the cars I used to own, hence the oil leak, the rust spots, the 'blue screen of death' and the, (inappropriate), workshop manual to hand. The engine was built in the age-old tradition of sci-fi modelling by scavenging interestingly-shaped bits from the spares box. The flying machine had a number of colour-changing LEDs built into it as an experiment in nailing LEDs into things. This was enormous fun to build, and raised a lot of smiles amongst the visitors to Smallspace and Coventry, which justifies it as a bit of unrestrained silliness.1 point
-
Here is my rendition of the frog/Revell/eastern express Shackleton which I built about 12 months ago. I sanded all those thousands and thousands of rivets off, rescribed it and added a few etched parts in the cockpit. The latter was a bit of a waste of time as you can't really see much. Apart from that, is pretty much 'out of the box'. It was entirely brush painted. Hope you like it.1 point
-
Hi guys & girls, here's some FGR.2 Phantom profiles in various different camouflage schemes, just in case you ever get bored with the regular stuff! Cheers Richard.1 point
-
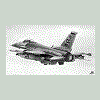
English Electric Canberra PR.9 1:72 Revell To put into perspective what the Canberra was, let's first look at the fact it was only retired 6 years ago in 2006 from RAF service. Yet it started out in life as a replacement for the De havilland Mosquito as an unarmed bomber and first flew in 1949. Not many aircraft have provided half a century of military service. In RAF service, it served 35 squadrons and around the world served 15 countries. It was a success right from the drawing board and went into service initially in B.2 form replacing the Mosquito, Lincoln and Washington and shortly after, the PR.3 in the reconnaissance role. The B.6 with more powerful engines and greater fuel capacity replaced the B.2 at UK bases freeing the B.2's to form overseas squadrons. From 1955, the Canberra was replaced in the high level bombing role by the Valiant, so its future lay in low level attack. This led to the B(I)8 with the fighter style cockpit as oppose the dome shaped canopy with numerous revisions to suit the low down role including nuclear strike capability and external hardpoints. By 1972, all bomber versions of the Canberra were retired from RAF service, but it continued to serve in the reconnaissance role in PR.7 & PR.9 form and it was the PR.9 that stayed in service until 2006. In its time, it broke the world altitude record three times, achieving over 70,000ft and won the 'Last Great Air Race' flying from London to Christchurch in 23hrs 51 min, a record that still stands today. Whilst there are many examples of British aircraft failing in their bid for international success, the Canberra really was one of our greatest aviation achievements in that respect, not only being exported to many countries, but being licence built in the USA and Australia. The kit Don't get too excited here, this is the old Matchbox kit revisited, so the kit you are about to look at has a history comparable to the real thing ! The three colour scheme has been replaced by Revell's normal light grey coloured sprues of which there's three and a clear one. First impressions are more of nostalgia than anything else, quite a change from the Eduard 1/72 Bf110 I've just reviewed. That said, it looks like a Canberra and is an ideal kit for beginners and young modellers due to its simplicity. The instructions are black and white A4 pages with good clear diagrams and decaling / painting instructions at the rear. Assembly starts with the cockpit area. The moulding of the pilots is actually quite detailed, but the seats are very basic as is the rest of the cockpit. As not much will be seen inside, this isn't a major concern. In not too much time at all, you will be closing the fuselage up and attaching the wings. I suspect there will be some filler use around these major sections. The bomb bay can be built either open or closed, however being a reconnaissance bird, it doesn't house weapons so there isn't any. There is some flash around the sprues, which you would expect as these moulds have been around since 1978. If you do want to get one of these, you may want to add some extra detail, perhaps give it a rescribe to add some interest to those vast open surfaces of plastic. The engine intakes and exhausts fit onto each end of the nacelles moulded into the wing sections. You can have the wheels up or down, so this could make a nice 'in flight' display piece. If you choose to have the wheels down, there is no wheel well detail, so you may want to do something about that. The undercarriage is fairly basic in detail, I would describe it as adequate. The canopy is one piece, so unless you get a vac replacement, you won't be able to have it open. That said, with such a basic interior, you won't want to unless you give it a make over. Whilst the canopy looks a little thick, I should imagine that after a dip in Kleer it won't look too bad if you decide to use it. Also on the sprue are the wing navigation lights and forward windows. The decals The decal sheet does look rather nice. There is some very fine stencils, in fact there's an incredible amount of stencils ! The instructions are well written and show clearly where each stencil goes as each is numbered for ease. The register on the decals is spot on and the printing is very crisp. Two options are provided: XH136 No.39 Sqn, No.1 Photo Reconnaissance Unit RAF based at Karup AB, Denmark during 'Best Focus' in 1982 wearing the camouflage green/grey over light grey scheme XH135 No.13 Sqn, No.1 Photo Reconnaissance Unit RAF based at RAF Wyton 1991 wearing the hemp over light grey scheme Conclusion This is an old kit that's been resurrected. Airfix released a new PR.9 quite recently with much more detail, so the competition is strong, however Revell must have their reasons to release this. Detail is very basic, being of typical Matchbox output of the 1970's. That said, it has a lovely decal sheet and would be a great kit to help to build your way out of modellers block and is well priced. It's also a great kit to get kids into modelling, in fact my 7 son is quite excited about being asked if he wants to build it. Revell model kits are available from all good toy and model retailers. For further information visit1 point
-
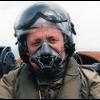
Messerscmitt Bf109E-4 Flown by Oberleutant Franz von Werra Guppen-Adjutant 1/JG3 Samer, France August 1940 Kit: Airfix Scale: 1:72 Paint: XF-23 Light Blue, XF-2 White, XF-24 Dark Grey, XF-27 Black Green, XF-13 JA Green, XF-22 RLM Grey, XF-69 NATO Black. Build thread: HERE Built for the Me Bf109 Single Type Group Build Franz von Werra is notorious in history for being the only German Prisoner of War to escape form captivity and make his way back to Germany. His escape was depicted in the British film of 1957 'The One That Got Away'. Which can be seen in full on You Tube Werra was shot down twice before being taken captive. Firstly in northern France during the Battle for France. After being attacked his engine caught fire and he had to make a forced landing. This resulted in the aircraft being fitted with a new engine cowl, explaining the lighter colour of the engine cowl. The fuselage sides are also said caked in smoke and soot stains from the engine fire. Werre was shot down for the second time on the 5th September 1940 and crash landed in a field in Kent and was taken prisoner by an unarmed army cook! Werner was held in various camps in the UK and made several escape attempts before being transported to Canada where he escaped from a train and walked over the frozen St Laurence River and crossed the border in the the then neutral USA. Despite attempts by Canada to have him extradited and America to hold him eventual crossed the border in to Mexico and made his way to South America where he sailed for Spain and then got back to Germany on 198th April 1941 where he was decorated with the Knights Cross of the Iron Cross by Adolf Hitler. Werra returned to the Luftwaffe and on 25 October 1941 Werra took off in Bf 109F-4 (W.Nr. 7285) on a practice flight. He suffered engine failure and crashed into the sea north of Vlissingen and was killed. His body was never found.1 point
-
I have loved this scheme ever since I first built the Frog kit, you know the one with the optional clear spinning prop!! Anyway this rendition is the Hasegawa 1/48 kit enhanced with Quickboost cannon barrels, SAM long range tanks and Ultracast wheels, seat and exhausts. The canopy is by Rob taurus and the decals are a mixture of Aeromaster and Sky with additions from my decal dump Paints are aeromaster and Xtracolour with the final matt coat being vallejo. Tamiya weathering powder was used for the weathering Thanks for looking, critiques welcome Bruce1 point
-
I finally finished my Harrier. I was trying to avoid any after market stuff but in the end I used Heritage Aviation's undercarrriage set, and a Neomega seat. My WIP thread is here: http://www.britmodeller.com/forums/index.php?showtopic=234929126 I used the decals from the new issue of the kit and Xtracolor enamels to paint her. Thanks for looking.1 point
-
I wish to introduce my last finished job A4 Q from the Argentine Navy The kit is the new Airfix A4 B/P , and it is excellent. Decals From Condor Decals My A4's : ( The another "Q" is the very old airfix A4D1 , and the B is an argentine resin kit named "surmodels"1 point
-
I am not opening the boxes, I am looking at the images. Web sites usually store image together, with logical naming.1 point
-
Just found his thread; I wasn't a member when it was started in 2010. I flew XX741 a good few times in the mid to late 80's - getting on for 30 sorties. She looks so sad in the early pics. Great to see her getting some real TLC. I'm another one with a couple of Airfix Jags in the stash. One day - One day...1 point
-
I don't know if you can still get hold of one of these?? Catalogue number 80617 Worth a try..............Smudge1 point
-
Wow great job on an old dog of a kit! I think I caught the start of your build thread, that didn't seen all that long ago...1 point
-
Very nice , like this a lot !1 point
-
That's lovely work1 point
-
Hi, I am back with my Schwalbe after a pause caused by waiting for airbrush masks. As there is no decal sheet for the marking I have chosen as I had to design my own masks. I had a masks for white 25 and all balkenkreutzen. The rest are normal decals from the box... Now some wash and dirt (very light...) and she's done... Thanks for watching :-) S.1 point
-
Nice one, would it look better with the Perspex discs that represent spinning props?1 point
-
Agreed with Miggers! Great idea to list those color call outs and excellent short history of a remarkable man. Looks like a very nice kit! Martin1 point
-
Nice work Mish1 point
-
Messerscmitt Bf109E-4 Flown by Oberleutant Franz von Werra Guppen-Adjutant 1/JG3 Samer, France August 1940 Kit: Airfix Scale: 1:72 Paint: XF-23 Light Blue, XF-2 White, XF-24 Dark Grey, XF-27 Black Green, XF-13 JA Green, XF-22 RLM Grey, XF-69 NATO Black. Build thread: HERE Franz von Werra is notorious in history for being the only German Prisoner of War to escape form captivity and make his way back to Germany. His escape was depicted in the British film of 1957 'The One That Got Away'. Which can be seen in full on You Tube Werra was shot down twice before being taken captive. Firstly in northern France during the Battle for France. After being attacked his engine caught fire and he had to make a forced landing. This resulted in the aircraft being fitted with a new engine cowl, explaining the lighter colour of the engine cowl. The fuselage sides are also said caked in smoke and soot stains from the engine fire. Werre was shot down for the second time on the 5th September 1940 and crash landed in a field in Kent and was taken prisoner by an unarmed army cook! Werner was held in various camps in the UK and made several escape attempts before being transported to Canada where he escaped from a train and walked over the frozen St Laurence River and crossed the border in the the then neutral USA. Despite attempts by Canada to have him extradited and America to hold him eventual crossed the border in to Mexico and made his way to South America where he sailed for Spain and then got back to Germany on 198th April 1941 where he was decorated with the Knights Cross of the Iron Cross by Adolf Hitler. Werra returned to the Luftwaffe and on 25 October 1941 Werra took off in Bf 109F-4 (W.Nr. 7285) on a practice flight. He suffered engine failure and crashed into the sea north of Vlissingen and was killed. His body was never found.1 point
-
I think you will find it stands for "Brilliance" awarded to NAS sqn which show an example to the FAA ,awarded each year. many shots of Sea Kings carrying it by tail wheel & Lynx on their nose ,Wessex also on the rear. Regards Len1 point
-
Look forward to seeing this all come together Skybert, have seen your overall base in WIP and it is impressive so this should be a great addition to it!1 point
-
Ready for gloss and decals: Forget about what I showed you and try to feel it, feel your airbrush, thinning of the paints etc...1 point
-
Cool! I have a soft spot for anything to do with the Graf Zeppelin. Martin1 point
-
Nice job. I must admit when I saw the header I thought, "oh heck, not another one of these" but the decision to have a squizzey was well rewarded. Thats a way smart Hurricane. Thanks. Steve.1 point
-
That is a bit neat. That wing fold looks like it might be inspired by the Grumman system as used on Wildcats. Avengers etc. The scale is a bit big for me but I'd love to do one of these in 1/72, albeit without the details as in engine & folding wings. Is this a RLM 73/74 finish?. Steve.1 point
-
Mostly finishing progress here, although the undercarriage legs have been added, and aileron control horns, as well as bit of extra detail in the front cockpit, and a seat (folded up) in the rear cockpit. After surface flaws showed up by the spray silver were tended to, and areas re-sprayed where necessary, I put on several coats of craft acrylic silvers, heavily cut with Future, and here and there tinted with some grey or white. I expect this is the way I will always be doing aluminum dope finishes now (previously I used a white primer undercoat; this is better). I will be doing, as it turns out, JR-7444, the machine pictured at the head of this thread. This is mostly in concession to markings availability. Most Vimys had full-chord roundels, and I had assumed something big enough would be readily found on a larger-scale sheet of generic roundels. However, on the XtraDecal 1/48 roundel sheet, they neatly bracket the needed size, with one roundel size too small and one just a bit too large. However, JR-7444 is clearly shown in the printed copy of the header picture in the Windsock Vimy Special to have roundels that do not reach to the ailerons, and further, that these roundels have 'Siskin' proportions. While non-standard, this was not unique; I have seen several other photographs of Egypt-based Vimys with such roundels. Appropriately sized 'D-type' roundels I had on hand. Next leap o' the critter should see the upper wing on, as well as the upper tail-plane and the verticals, and then I can get to work on the struts supporting the engines, and the engine-bearers, and associated components. Wife will do up some home-made decals for the serials for me.1 point
-
Really lovely Harrier. Another nice build. Congrats. Karen1 point
-
"Was there chocolate inside?" Bugger the Lightning!!1 point
-
I knew it would only take minutes before someone would rip the whole thing open and eat all the chocolate. Father Christmas won't be coming to you this year, me lad. Well, I'd say 1/72. I'd certainly buy one if it was 1/72; even if it's a bit exotic for those beginners that we believe Airfix is courting, it's a helluva wicked-looking aircraft, so the right box art (which Airfix also does well) could make it a strong seller.1 point
-
Hi Chris, I'll be doing the mid scheme from the 70's. Flying surfaces were originally bare metal but painted in light grey shortly after. Progress seemed glacial as I kept thinking I would work on it but wasn't getting round to it. I spent a fair while making little ariels and things tofay, and sticking them on; Reday for decals now; Its gone dark now, making me need to use the camera flash. The base decals are on, but photo quality is poor so i'll only do 1. Cheers John1 point
-
About time I updated this thread! I've made a few small steps foward. Not much, but this all had to be scratch built so it's proving to be quite time consuming. I finally got around to finishing the instrument panel: I've also made and installed the contols, and rigged them up to the tail. It all works, with some brass pulleys that smooth out the movement quite nicely. The other additions are the fuel tanks, throttle quadrant, fuel pump, and the plumbing to link it all together. Next I'm going to add the ribs down the cockpit sides, before starting on the Vickers guns.1 point
-
Glad to share - you guys keep me motivated to keep working and posting! Thanks to everyone who has offered support, I'm especially glad to keep those who have had their hands on these jets happy! Quick update - photo's taken almost literally as I was running out the door on the way to work - my apologies. So after attempt 5 (probably 6) I finally got the chisel nose correct. In fact, I rebuilt the whole thing including acrylic sheet at the window locations. In the photos the acrylic is covered by white vinyl tape - i chose the acrylic so I'm assured a clear section when the casting is done. With the new nose in place I did a little sheeting. I use paper templates taken from the 3d model where possible, print them out, glue them to aluminum sheet cut out and apply. The larger piece was created with partial patterns printed from the plans and masking tape to make a pattern to transfer to the aluminum. A good bit of trimming and test fitting and I got it to fit. More on this process in the next update when I have more photos to share. Timmy!1 point
-
You will need a big dish for the decals Graham1 point
-
Quite a few Phil Masking is one of my pet hates but thankfully another Britmodeller, SPARKER, seems to have a bit of a fetish about masking so he is doing most of it!1 point
-
Great pics, how many rolls of Tamiya tape did that lot take to mask?....1 point
-
Hi folks, Continuing work on the Harrier, I finished the pylons. Since there was quite a big gap, I used Miliput putty and then re sprayed paint. Thanks for watching and comments Jan1 point
-
Nice work, i love the port side scheme1 point
-
Very nice1 point
-
Very nice1 point
-
Hi, today's continued - the lower part is sprayed with Gunze paints.Now I have started painting the upper part of the fuselage Regards Jan1 point
-
Been a while since I did much on this one! I've got the tail nearly finished though. I said before that the fixes to the tail had made the rudder fit badly.. well it turns out that a big part of the issue is the kit part is simply much too small. So the new rudder actually makes things fit much better with the plans: I've also covered this part of the aircraft- unlike most parts of the fuselage or wings, the rudder assebly has no internal rigging and the whole thing looks a bit basic and empty on its own. I used salartex linen, and it gives a really nice translucent effect.1 point
-
Nick, that DR1 looks awesome. I'm quite looking foward to the Model Airways DR1, it'll be easier to find room for at least I've been working on the tail for the Camel over the last week. This is what you start with- that U shaped thing is actually one of the hinges! You can imagine how bad that will look, so I replaced them with loops of brass, hidden inside the rear bar of the stabiliser. The front bar shouldn't be there either, so that's been cut away and replaced with wood. And the attachment points are all replaced with photoetch. The rear of the horizontal stabiliser is also lifted up to make it level- the kit plans just have it level with the sloping rear fuselage, making it point upwards... probably not too good for level flight You can see here there's a small bar at the back to lift up that central compression bar: With that corrected, the rudder won't fit properly- it's too short of course, so I'll have to make a new one next. But the kit doesn't really make the rudder assembly attach to the fuselage correctly anyway (it has two fictional blocks of wood to close up the rear of the fuselage instead), so plenty more to change there.1 point


This leaderboard is set to London/GMT+01:00