
Leaderboard


Popular Content
Showing content with the highest reputation on 07/11/12 in all areas
-
Now Finished:4 points
-
Here I present for inspection my second build after a fifteen year break in aircraft modelling, Revell's wonderful 1/144 CF-18A Hornet. I can't say I'm 100% happy with it and in the end it was a bit rushed but it's done and so I'll move on to the next project with that bit more experience and try to improve upon it Poor picture quality as I can't find my decent cameras charger. Hope you enjoyed looking anyway Dan3 points
-
I think it's safe to show progress so far - I dedicate this post in praise of all things Zacto! This may sound long-winded, but if anyone else has this set, my experience may hopefully help you avoid some odd occurrences during the fitting of the parts. This is the third Zacto set I've purchased, but the first I've actually used. I must be honest, at first after I'd made the initial measurements and cuts, I thought the resin intakes and engine nacelles were garbage. Part of it was my own inexperience at severely chopping up a kit. Having made the cuts and test-fitted the intakes, it looked like there were yawning gaps on the inboard joins. The parts themselves looked almost exactly the same size as the ones I'd cut off, (they are supposed to be bigger in cross-section) and I was beginning to think Zactoman had sold me a major dud. Luckily I was wrong. The parts come into their own after gluing the outboard joins. In the picture above, you can see the parts fitted to the lower fuselage half. I glued the forward full-length intake to the aft nacelle section before fitting. I then glued in the outboard sections along the whole length - some adjusting of the resin part is necessary to get it to fit snugly. The next pic shows the part glued down the outboard edge, following the contour of the wheel well: Doing this does leave quite a large gap down the inboard edge, and can lead to the conclusion that a) you've taken off too much material (I followed Zacto's cutting template exactly for this, and thought the parts were duds as a result) or b ) the parts themselves are undersized. However, when cured, the inboard edges of the parts can be stretched inboard to meet the join exactly, and glued in stages using CA and accelerator. The result is a gradually enlarging cross-section with no significant gaps at all, as can be seen in the following photo: In situ, the quality of the parts is clear, and Chris deserves a massive pat on the back for the quality of his resin casting. Intakes with FOD doors closed Rear stabilator mounts are also included, giving the correct hinge points and enabling poseable stabs: These did cause me some aggro, and I haven't cut in quite the right place, so putty will be required! Next I cut out the very plain and heavy louvre doors in the upper wing, adding the closed Zacto replacements instead: You can just see the very finely engraved louvre detail in this shot: One of the really nice things about the Zacto set is it comes with 9 pages of instructions detailing not just the replacement and upgrade parts, but also some very useful templates for us in reprofiling some of the kit parts to match the real MiG-29. Having the monstrous and very comprehensive Yefim Gordon book to hand makes checking these details easy, and shows he is spot on. Tails: Stabilators - New hinge points: Reprofiling of inboard edge and curves of the tips - the finished one is superimposed on the stock one, you can just make out the subtle but necessary adjustments. I've put together all the major components - I'll bung the whole lot together and have a one-hit putty fest (actually, the kit test-fits very well, yet another plus point compared to the poorly-fitting Tornado and Typhoon which followed decades later!!) before getting down to the fun bit - painting! If you're still with me - thanks for sticking this mammoth post out to the end!!3 points
-
Hi all, Monograms old F-14 built with the addition of microscale decals. Brian2 points
-
Hi All I have finally completed this unusual airvraft. Model is courtesy of Anigrand Craftwork in 1/72nd scale. The aircraft itself is a conversion of a C-119B, designed to be flown with a variety of cargo pods. The model is a reasonable build, though being a short run resin is not a shake and bake kit. There were a few things that needed sorting. The undercarriage main legs were not correct, and also a bit weak, so I rebuilt the legs from scratch, and used a 0.8mm brass rod as a core to prevent the legs from collapsing in the future. Also, I was missing one of the nose gear sections, so I scratched a replacement from plastic and brass rod. I was not happy with the porthole windows, being thick resin pieces so I used some clear PVA glue from Staples. This stuff is marvellous and dries to a really shiny finish. Most pleased with this bit. Paint was overall Tamiya Titanium Silver with the walkways having been painted black, then oversprayed. Markings are as supplied with the kit. Onto the pictures. I hope you enjoy it, and if you wish to see it in person, I will be putting it on display on the 580 modellers stand. Thanks for looking. Ted2 points
-
Hello all, this is my first post on here so I have a whole heap of catching up to do! Below are photo's of my recently completed P1154 "Supersonic Harrier" kit. ( Silver Cloud SCK7202 ). As I'm an ex-Harrier "rigger" techie that served on Harriers from 91-95, I had to have one of these kits, (plus its respective weapons set), as soon as it was released a few years back. This is/was my first experiance of a resin kit, but it was an easy & enjoyable build. I especially enjoyed the additions & alterations aspect of the build. I highly recommend the kit ..... if you can find one! I hope fans of all things Harrier like "the look" of it as much as I do. I've tried to make it resemble the smaller, real world GR1's of the early 70's by adding 5 mm long "combat tips" to the wings, a ventral fin to the rear fuselage & made 4 mm longer replacement tailplanes as the kit items looked too small to me. I've also added various aerials & data probes etc. to the fuselage from plastic stock & wire, plus an etch brass hover yaw vane.from an Airwaves etch set for GR5 Harriers. ( AEC72034 ). The "bolt-on" In-flight refueling probe was "robbed" from an Italeri GR5 kit. I've finished it as a "What If..." / Counter-factual Hawker Siddely Harrier FGR 1, Ser. No. XV802 "Double X-Ray", of 20 (F) Squadron based at RAF Wildenrath, West Germany in March 1972. This is what the RAF should have had had the Labour government of the time not cancelled the P1154 project in Feb. 1965 ! ( The real world XV802 "Double X-Ray" was a P1127 derived Harrier GR 1 that served with 20 Sqdn. at Wildenrath until lost in a crash near Hanover on the 21st of March 1972 which, unfortunately, killed the pilot ). As mentioned above, I've painted & decalled it as real world GR1's were in the early '70's, ( mostly ). The decals were a mixture of kit, ( national markings, some stencils & some serial No's ), Xtradecal, ( some serial No's ), Model Decal, ( Harrier GR3 inst. panel & stencils ) & Aviation Workshop, ( 20 Sqdn. badges from one of their 1/48th, yes, 1/48th, Harrier GR 7 decal sets ). I also managed to apply little black squares around the airframe to represent the reaction control system "puffer ducts" & also two tiny brown squares to represent radio altimeter dielectric panels / aerials. ( On the panel just forward of the nose gear bay ). Oh, nearly forgot ! The white Double X's on the fin came from an Airfix Hunter FGA9 decal sheet. The underwing stores / weapons comprise the twin 30mm ADEN gun pod & centre line pylon from the Silver Cloud P1154 weapon set, ( SCK7203 ), the tandem bomb carriers & BL755 cluster bombs were robbed from an Airfix Jaguar GR1 kit & the pair of SNEB 68mm rocket pods came from a Hasegawa Jaguar GR1 kit. ( Well, a Harrier's not complete without a pair of those ). Each BL755 received an etch brass fusing propeller to their noses which came from the same Airwaves etch set that the hover yaw vane came from. I've just got to finish its display base & it's ready to be displayed on my local model clubs tables at the Nationals at Telford next month. It's been a few years since I was last at Telford so I'm really looking forward to it. See you there if you're going.2 points
-
Well, No2 Daughter found wallpaper, so progress on the model has slowed somewhat (not that I am a quick builder in the first place). Started getting the decals on, which so far have applied okay.. Also carried on working with the CBLS's. I am quite pleased how they have turned out, just need to wait on the varnish drying on the 'terror weapons' before finding out if they will fit into the body. Added some 'random' decals to spice them up a bit (luckily they can't be read with the naked eye!) Also tried adding some lighting to my 'photo studio' (in the loosest sense of the word) now that I am trying to take pictures of my work. Bit of cable, some tape and some balsa wood... should have been on Blue Peter Back to the grind stone...2 points
-
Trumpeter OOB. Finished just today.1 point
-
Combo Pigment & Colour Sets Lifecolor Lifecolor are well known for their acrylic paint sets which provide all the colours you'll need for the subject covered. Well time moves on, and with new techniques coming to the fore, they have begun creating combination sets that contaion both the colours you'll need to paint the subject, and the pigments that you will need to complete the job. The first release of three sets is detailed below, and the new pigments have the prefix PG for ease of discrimination: Israeli Army This set is perfectly timed to coincide with all those Merkava kits that are coming out at present. It contains three base colours and three pigments as follows: Golan Dark Earth (PG101), Sinai Sand (PG101), Lebanon Dust (PG103), IDF Sandgrey 1 (UA901), IDF Sandgrey 2 (UA902), UDF Green (UA903) Tracks Painting and weathering realistic tracks can be a difficult task, but this set contains three base colours to paint your tracks, and three pigments to weather them up after. The addition of the Rubber colour is especially welcome, as it is a very nice brown grey that gives a good representation of the real thing. Reflecting Agent (PG110), Dry Dust (PG105), Damp Dust (PG106), Rubber Track (UA904), Intermediate Wear (UA905), Old Track (UA906) Rust Rust is another technique that takes some mastering, and this set is here to help. It contains the basic three shades of rust, which are then modulated by three pigment tones to break up the colour and add realism. There is no substitute for studying references to get rust effects right, and there are six photos on the boxtop that will give you a good start, although there are myriad photos available on the 'net to assist you. Eroding Burned Rust (PG107), Oxidation State (PG108), Weathering Marks (PG109), Burned Rust (UA907), Corroded Rust (908), Streaking Rust (UA909) Mud & Dust Mud and dust are found in large quantities on any vehicle that has been in-theatre for some time, despite the best efforts of crew, wind and rain, showing different colours and effects depending on conditions and terrain. A four-panel pictorial instruction is included on the rear of the box, along with captions giving extra information, which helps to make the process more clear. N.Europe Dry Mud (PG114), Red Dry Mud (PG115), S.Europe Dry Mud (PG116), N.Europe Dark Mud (UA913), Red Mud (UA914), S.Europe Mud (UA915) N.Europe Dust (PG111), E.Europe Dust (PG112), S.Europe Dust (PG113), N.Europe Dust (UA910), E.Europe Dust (UA911), S.Europe Dust (UA912) Lichen & Moss A set of four pigment powders and two fixers for your dioramas that are over-grown or unkempt. Sprout Green (POW01), Lush Plant (POW02), Fall Season (POW03), Rotten Plant (POW04), Gloss Lime Fixer (FF01), Gloss Muddy Fixer (FF02) Algae For wet & slimy areas of your models and dioramas. Luxuriant Green (POW05), Full-Blown Green (POW06), Blight Plant (POW07), Dried Plant (POW08), Gloss Dirty Green Fixer (FF03), Gloss Yellow Green Fixer (FF04) Burned Not strictly a Combo set, but as it includes pigment, it's here. Five burned colours and one ash pigment for burned out vehicles and buildings. Blackened Umber (UA758), Exhausted Umber (UA759), Rusted Umber (UA760), Burned Stains (UA761), Incinerated White (UA762), Ash (PG117) Conclusion Very helpful sets, especially for those that have yet to venture into the world of weathering and adding realism. careful painting and weathering should always be accompanied by reference to how the real items look, so study photos of the real thing before trying these techniques, and it will pay dividends. Look out for more sets soon. highly recommended. Review sample courtesy of1 point
-
From Hasegawa 1/200th Decals used are from the maker's boxing. Unfortunately, Hasegawa now sells its models with Japanese Airlines decals only. A-300 Thai A-300 Philippine Airlines (Love Bus) A-300 JAS (Formerly TOA, then TDA - TOA Domestic Airlines )1 point
-
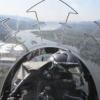
Hi all, Before normal life is resumed, I wish to get this lovely MiG-29 done. For infor about the kit, you can do no better than read Greg's helpful Review thread HERE. It's a really nice kit for its era (1990), much better detail than the far more recent Eurofighter release. Unfortunately due to its early release, it suffers some issues with accuracy. I prefer the Sparka to the single-seat version, it falls into a rarefied group of combat aircraft that actually looks better with two seats than one. Throwing the kitchen sink at this one: Revell kit Zactomodels correction set Scale Aircraft Collapses metal landing gear Quickboost ejector seats MASSIVE Begemot decal sheet with no less than 24 options from around the world! I'll be building 102 Blue from Erebuni base at Yerevan, Armenia with a dramatic tiger artwork on the tails. Hopefully all the cutting and butchering of the kit to fit the Zacto set will go well - that will be the make-or-break factor, and will decide whether I wasted the 100-odd quid I spent on the whole kit and caboodle. Da svedanya! (for now!)1 point
-
Fresh from the modelling table at the weekend, the Italeri Hawk, built to represent a Series 127 of the Australian Airforce. The kit is very nice, pretty straight forward to build and nicely detailed. The instructions give you the choice of a demonstrator or a Aussie Hawk, although research is needed for proper markings on the Oz bird. Registration should start A27-, unfortunately, I have nothing in the spares to match this. Anyhow, pictures, This shot shows the closest reg. no's I had, and will be replaced when they're available. The national markings are also too dark,(they should be lo-vis), but came with the kit, and shall also be changed when possible. Built straight from the box and painted by brush using Humbrol enamels. Pilots donated by Airfix, and the stand by a 1/43 Ferrari with brass square tubing from a craft shop. All comments welcome Sean1 point
-
Well, here goes at some work in progress. It will hopefully be another 74Sqn Hawk in two-tone grey. Armament will be gun pod and a pair of CBLS 100's courtesy of Mr Parkins and his Flightpath add ons. Tried some more 'adjustments' on this fuselage. Skin stress marks, removal of the excessive 'bump' below the fin along with raising the rear fuselage above the tailplane. Decided to put more effort into the wheel wells by removing the pipe detail and replacing it with some chrome wire courtesy of Hobbycrafts' jewelery supplies. Will also add some pipework to the airbrake. Pipe junction box added. Scratch built some intake blanks. Again making use of some aftermarket cockpit instruments and scratch built 'details'. Kit seats with lowered seat pans and aftermarket straps. Added some scratch 'extra's'. BTRU triprods are too long, but once the seat is in place you can't tell. Some of the extra bits and pieces. Replaced the plastic hydraulic rams with 1mm chrome effect wire (too be cut to length and fixed in pistons) and flattened part of the wheels with one of the wifes tealights (modelling area smells sweet now!). More to follow as it moves along. Cheers1 point
-
Number 11 for the year in my Irish builds. Brigand conversion with a Hasegawa IX. Made my own canopy and raided the spares bin for lots of the interior and exterior bits. Spastic looking Spitfire-especially in this scheme,,, but it sure grows on you. Enjoy Pat1 point
-
Hi guys This is my lask work comming out from the workbench This is an old kit that i had for many years and decided to restore it How it looks And how it come out Hope you enjoy it1 point
-
Hiya Folks, While looking through some old pics I came across this one of one of my Shackleton Mk.2`s using the old Frog kit and the Aeroclub conversion kit and decals. This is my Shackleton MR.2 in the colours of 205 Sqn based in the Far East. The white top to the fuselage was introduced to cool the crew and the white upper wing panels were to cool the fuel tanks! Hope you like it, Cheers Tony O1 point
-
Another build finished at the weekend,(Sat, after the match). Built in my usual style, basically OOB, brush painted with Humbrol enamels. A bit of scratch building done in the cockpit, new seat, new instrument panel and once again a pilot donated from Airfix (this one is a Bader pilot). Decals come from Modeldecal sheet no. 85 and depict 3-29. 28Grupo, Caccia Ricognitori, 3 Stormo, stationed at Verna Villfranca in 1977. The green in the roundels look quite dark, but are just about the right colour in the flesh. Some 50 odd decals to place, so sore eyes and well into Sat. evening before I got finished. Thank God for 80's rock and lots of tea The Academy kit is pretty basic, although it is a nice enough kit for a couple of quid off e-bay. Very enjoyable build and one of my favourites since returning to modelling this past couple of years As usual all comments are welcome, Sean1 point
-
Hiya Folks, Sorry for hogging the forum but for those who were so kind about my other British armour this late war British Chaffee from 7th Armd Div may be of interest? It is built from the old Italeri kit; Cheers Tony O1 point
-
Sure I've seen discussion of the scheme and issues with the decal sheet instructions on a thread here some time ago. Maybe worth having a look in the old Hawk GB thread.1 point
-
Picked this up on a trip to Cornwall from Trago Mills for just under £5. Wanted to do something fairly quickly as other builds were getting me down. Very basic kit, starting to show its age but overall I'm happy with it. Hiary stick painted using Vallejo & Games Workshop, then finishd with a matt varnish. Cheers, Warren1 point
-
I don't care what scale it is, I'll buy it!1 point
-
Hello P40E from Academy OOTB with Rising decals.1 point
-
B-25J Update Sets (for HK Models) 1:32 Eduard The large scale B-25J from new company HK Models has been very well received, including by this reviewer (review here). Of course it was always going to be improved on (isn't every kit?) and Eduard have stepped up to the plate with a myriad of Photo-Etch (PE) sets for you to pick and choose from to do just that. Cockpit Interior Set (32748) The first set deals with the cockpit, and comes on two sheets of PE. The smaller sheet, at 7cm x 8cm is pre-painted and self-adhesive. It contains the parts for improving the detail and providing a set of new instrument panels made up from layered PE that gives dials, bezels, buttons and switch details, plus sub-panels and rudder pedals, all of which attach to the original kit part M10 after some of the detail is removed. The cockpit floor gets a number of raised panels with additional detail etched into them, and the centre floor panel between the pilot seats receives a significant number of extra parts to busy it up and improve the look. The throttle quadrant is overhauled with a new set of detail parts for the throttle body, and a more detailed top with the slots for the levers, as well as the levers themselves, all pre-painted the appropriate colours. The seats receive extra detail in the form of skins to the sides, a strengthener at the back where the two angles meet, and optional head and back armour for the pilot's seat only. The cockpit sidewalls are detailed with plenty of small instrument boxes, as well as brackets and sill details that require some of the moulded-in detail to be shaved off first. All of the instruments have pre-painted faces, so the detail should look stunning for the intrepid viewer. A set of parts is also included for the overhead controls in the canopy area, detailing what is otherwise quite a blank canvas. There are possible seat shape issues with the HK kit that have been identified around the internet, and there is an additional set that replaces the kit seats completely if accuracy is paramount. These will be reviewed later in this article. Zoom Cockpit Set (33112) This "cut down" set includes the self-adhesive pre-painted set detailed in the review above, and is perfect for either the budget conscious modeller or someone making their first forays into working with PE. Why is says for "Hobby Boss" on the label and website is a bit confusing though. Perhaps a typo? Seatbelt Set (32746) This descriptive set contains sufficient parts to create two sets of seatbelts for the pilot and co-pilot, with full belt and buckle detail, on a pre-painted fret that measures 9.3cm x 7cm. The painting/printing includes the stitching work, as well as the stencilling that is often seen on these items. The buckles and fasteners are left bare to give the ultimate in real metal look, and don't forget to give them a coat of clear gloss varnish if you want them to remain untarnished over the years. The building of these belts involves threading the various parts through the buckles to result in a very realistic looking buckle. Take care in bending the painted parts however, bending them slowly to avoid cracking the paint, exposing the bare metal where it won't look good. Similarly, the rear of the belts aren't painted, so if you plan on posing any twisted around, you will need to find a matching sandy shade to paint the rears. Corrected Pilot Seats (32750) Shape issues have been noted with the seats supplied with the kit, and looking at the cut-down nature of the co-pilot's seat, it would appear that symmetrically paired seats might not be appropriate for all airframes, although finding pictures of the cut-down co-pilot's seat online is proving tricky. Perhaps more research on my part is needed. The set measures 14cm x 7cm, and includes a full-height pilot seat, plus a cut-down second-seater, with highly detailed mounting frames and rails, improving on the original kit parts. You will need a length of 1.2mm rod to complete the task, so make sure you have stock before commencing assembly, as the seats have these running up the rear in each corner, attached by PE brackets and flanges. Detail parts are added to the rear of the seats, and a diagonal section is inserted in the inside of the seat and has two lightening holes etched in. Some complex folds and shaping is required with this set, so it isn't for the novice. Whether you want to show your B-25 having dissimilar seats is also another question you need to ask before purchase too. The extra detail is definitely worth it if you decide to go ahead though. Front Interior (32747) A more appropriate description would be "Nose area Interior", as that is what the set deals with. It comes on two frets, with one self-adhesive and pre-painted with instrument dials etc. It measures 7cm x 6cm, and is supplied on a waxy paper to prevent accidental adhesion. The larger bare brass fret measures 14.5cm x 7cm, and contains all of the constructional parts of the set. It starts with detail parts for the rear bulkhead and crawl space, adding a full skin to the floor, with lots of rivet and panel line details. A raised section of the floor is also included, together with the controls that it contains, and a jump-seat to sit on top of a couple of ammo-boxes. The sidewalls are similarly detailed with boxes containing instruments, stowage areas and various brackets, while the bomb-sight receives lots of detail parts to improve its look. The two nose mounted .50cal Brownings receive PE cooling jackets, which will need careful rolling on a soft surface to render them cylindrical. Their mounts are changed to the more accurate suspension mount, with the A-frame removed from the handles of part I10, and their hand-grips are augmented with more scale attachment points, with a ring-sight added to the upper breech area. If you are going to be entirely faithful, you will need to put wires running to the breeches from the pulleys that you install in the glazing parts. This would be a little tricky, but the finished effect would be something special. Fuselage Interior (32756) From inside the bag, this set is deception, appearing to have only two frets, but in fact it has three – one is hidden amongst the card backing. It is a large set, and contains a pair of large brass frets sized 14.5cm x 10cm and 14cm x 9cm, with a small pre-painted fret 7cm x 3.5cm. It covers the main body of the fuselage from the dorsal turret to the rear of the aircraft, and clears up a lot of the blank space that will be seen through the side windows. Initially, the dorsal turret receives a number of detail parts to improve the look of the mounting mechanism, including the foot-pegs that sit on a ratchet track for the gunner's comfort when sat on the bicycle style seat attached to the main unit. The small box of "tricks" at the foot of the turret mechanism gets a new instrument face that is sourced from the pre-painted fret. The floor on which the dorsal turret sits receives a complete skin, and the crew access door is detailed up with some additional parts, including some runners/stays for the opening mechanism, and a set of detail parts for the tunnel that pops out at the bottom of the dorsal turret itself. The door itself is completely replaced by s laminated PE assembly, which is quite fold-intensive, and has a framework panel that sits vertically next to the hatch. I'm not entirely sure what the function of this part is, but it is replicated on the inside of the mid-fuselage, so could be an inner floor panel that is inserted in the access doors during flight. The rear gunner's position is a little bare aft of the armour panel, and this is rectified by the set. As well as more scale-thickness "wings" on the top of the panel, there are a pair of skins for that section of the fuselage, plus separate raised ribs, various boxes and some additional details for the gun-sight. Moving forward, there is the aforementioned panel/rack attached to the inside of the inner fuselage just over the rear crew access door, and the door is replaced by a new PE lamination, with a detailed tunnel insert added for good measure. The final aspect of the set is a set of those tricky cooling jackets for the many guns installed on the B-25's various versions. There are 9 short jackets for the cheek guns (if installed) and nose guns, three medium ones for the dorsal turret guns, and six long shrouds for the rear guns, side guns. It seems that a few spares are present, which is handy, as rolling barrel shrouds can be tricky if you're new to the task. A piece of brass rod on a thin bed of kitchen roll will start you off, but make sure you anneal the parts in a lighter flame before you proceed to make them softer. Bomb Bay Set (32321) Another large set, this time containing two frets of 14.5cm x 9c m and 12.3cm x 7cm in bare brass. The first and most prominent section is the detailing of the bay roof, which receives several raised detail panels, plus some additional lumps and bumps, including details to the circular crew access door on both sides. The largest parts are the inner bay door skin, which attach to the kit parts to give more depth to the lightening holes, and add details to the edges of the doors themselves. The door retraction mechanism is augmented with some additional parts, and finally the sidewalls receive a comprehensive set of ribbing and panel enhancements that apply over the moulded in kit details. The bomb racks are also improved with some more realistic bomb shackles, the bombs get a pair of arming spinners fore and aft, and the bay sills receive some additional skins to finish the area off. A lot of PE, but quite a short instruction sheet due to the large size of some of the parts. Exterior Set (32319) Yet another large set, which I suppose I should stop commenting on because it's a large kit! This time it contains two frets of bare brass14cm x 7cm and 14cm x 10.3cm that are covered in densely packs parts. While the title is "exterior", almost the whole set is dedicated to the engine nacelles, providing extra bulkheads within the main body of the nacelle, small details for the engine, as well as ignition wiring. The cowling receives a full set of mounting lips for the access panels, inner skins for the access panels, and inner skins for the 14 cowling flaps, which will improve their look if you are posing them open. The final parts are actually a pair of nose-gear door skins that fix to the inside of the kit parts. Ammunition Belts (32320) A simple set on a smallish 10.3cm x 4.3cm fret, it contains strips of ammunition belt guides that glue to the sides of the kit parts, and the "fingers" are then folded over to provide a more accurate detail to the assembly. Simple and effective, and not too tricky to install. Mask Set (JX143) There are a lot of glazing panels on a B-25J, and masking them all accurately can be daunting for a great many modellers, which is where Eduard's mask range come in very handy. This is quite a large set, consisting of two sheets of their yellow kabuki-style tape, containing masks for the cockpit canopy, the nose glazing, rear turret, dorsal turret, side windows and of course the landing light covers. You will need a little liquid mask or tape to cover some of the more convex parts, which Eduard's masks usually provide just the all-important edges for, so don't forget to have some to hand when you start the job. The sheets are so full that there isn't space for any wheel masks, which are often present in these sets, but it's better than sacrificing glazing panels to fit them in. Conclusion As usual, you can pick and choose the sets that you want/can afford, and Eduard have really worked hard to provide us with the best selection here, with so much detail to add to an already great kit, you can really go to town. Highly recommended. Review sample courtesy of1 point
-
Airfix Tamiya Hasegawa F I'm sure I can find a few more1 point
-
my bf109's Prillers Airfix E-3 and Marseilles Revell F-41 point
-
Nice model there pabbi, im on the final stretch as well, decals applied with wires to afficx then done.1 point
-
Started with the sand.This is made from woodpulp mixed with water and extra wallpaperglue for better bonding. The spaces between the dragonsteeth dry faster as the layer is less thick. Once dried it has a nice sandcolor.No need for painting . .1 point
-
Very 'real' looking! Classy job indeed. Kind regards, Joachim1 point
-
Hi Sean, nice work there. I have a heap A27 decals , numbers, roundels and operational tail flashes if you are interested. PM me1 point
-
Superb in every way. Welcome.1 point
-
Great job fella!1 point
-
I'll join in with my only 109 so far, the 1/48 Tamiya E31 point
-
Hope you lot don't mind me showing of some of my previous builds. Airfix 1/48 kit, built as a 109E-3. Southern Expo decals Tamiya 1/48 kit built as a 109E-1 Xtradecal decals Eduard 1/32 Bf109E-1 using the superb Alley Cat conversion set to build a Bf109D.1 point
-
Only got two 109's in my collection so far, both from previous GB's Spanish Civil War GB Bf109B Hobbycraft 1/48 Battle of Britain GB Bf109E-3 Tamiya 1/48 Doug.1 point
-
Looks great.1 point
-
great finish well presented..... Glenn.....1 point
-
Very nice. It took a double take to realise these aren't arty type Black and White shots.1 point
-
Thanks everyone Here are some more details from the boat.. Scratchmade exhaust system (can be seen through the floodholes) Scratchmade oxygen tanks, also underneath the wooden deck Karel1 point
-
Finally, a quick glimpse of what it'll look like buttoned up & with top turret in place - crowded! At least there will be a big hole in the fuselage side so you can see some details... That's it for this update, sorry it's such a big one. Any comments or questions welcomed thanks Rich1 point
-
*update 04/11/12* Hello everyone - here's my latest B-17 build update! I have been working a lot on the forward compartment that houses the top turret. I happen to be a member of the Sally B preservation society & a couple of weeks ago I took a good look inside the aircraft on the apron at the Duxford Autumn Airshow. Although a lot of original stuff has been stripped out of the aircraft, it provided a useful glimpse of how this area is packed with equipment & is a tight fit. OK back to the model - In previous posts I showed you how I had made most of what needs to go in the top turret compartment - the turret itself, hydraulic fluid tank & accumulator plus small generator that runs it, bulkhead, control switch panel and seat mounts. Next I tackled the numerous oxygen bottles - there are eight in total. I did have an offer from a forum member to get these cast up in resin - being an impatient man, I decided to scratch them myself - here's how you make them. Get a round tube of the approximate size you need, block off the ends with squares of this plastic sheet, then sand to shape. Prepare for cramped fingers & extreme tedium: On the right hand side there's a portable oxygen bottle mounted on a rack on the fixed, large oxy bottles - made using same principle as the big ones: Here's what you get at the end - details from plastic sheet, lead foil & a spare PE buckle: the bottles on the right are from the left hand side of the fuselage & sit right underneath the bit that I want to show battle damaged - I figured that the top one (there should be three in this stack) would get blown out of the aircraft by the blast - hence it is missing. Right next to it on the real thing are another two bottles - again they interfere with where I want to hole in the fuselage to be, so I might leave them out completely, or just build their mounting rack (damaged) & install that instead... Next - some more details for the pilot / co-pilot's seats - I'll add some Radu B seatbelts once the build is nearer completion: One thing I needed to tackle was the insulation that covers some areas on the cockpit & top turret compartment - many restored aircraft have a simple canvas covering - I believe contemporary aircraft had a quilted covering, with a diamond pattern - almost like a bed quilt. Unfortunately I found this out after I had opted for the former, base on photos of restored aircraft. Oh well - I don't think it'll matter. To replicate the canvas I used some off cuts of real cloth that I got at a local curtain repair shop - I used the finest, tightest weave I could find. Once painted up in Olive drab, it looks convincing, trust me! Here's some pieces cut to shape & glued in place on the fuselage walls: Back to the pilot's / co-pilot's seat mounts - there's a wealth of detail behind here which I added with plastic card, flexible rubber tubing & solder wire... each seat also has a little generator / motor underneath, which I assume helped pump Oxygen from the tanks behind the seats: I next tackled the life raft compartment - for the first time I used Archer transfer rivets & was very impressed. I'll just leave you with a teaser photo of this area as it's not finished yet: I now took the momentous decision to glue the interior bits to the right hand fuselage side! I also started to add some details to the rear fuselage interior. I have a nice photo of a B-17 under restoration that has several bits 'hanging off' - this junction box for example: co-incidentally, this was in the exact place that I wanted to show the rear fuselage battle damage. I made the junction box (based on my pics of it from the 'Sally B' interior): and then I attached a bunch of wires & left it hanging - I'll give it a more natural 'sag' later. You can see here I've attached control cables, and also the walkway over & around the ball turret: I got the tension I needed in the control cables by building a small peg with a hole in it, inserting the wire ends further down the fuselage in a hidden spot, and turning the peg like a touriquet - the peg is mounted directly through the fuselage side & superglued in place. I'll do the same for the other side later. Added some more detail to the back of bulkhead 6 as per my photos - it's very hard to find period pics of this area - so I may add more stuff as I find it. Once again, there are so many variations, I don't think there's anything 'wrong' with it: The bulkheads at the rear of the aircraft, in the tail, are distinctive in shape - I started to make these from plastic card: glued in place on the left fuselage half: Also started to add stringers to the right hand fuse half, plus some armour plate under the waist gunner's station & gave the whole lot a coat of primer to check for errors: I have also permanently attached some cockpit details & given this area some paint: I made an unfortunate error - in the first pic you can see that the seat mounts are right up against the floor of the cockpit - this is wrong - the seats themselves should overhang the lip of the cockpit floor. Try as I might, it was too late to fix this problem - I'm hoping it won't matter once everything is buttoned up. It's frustrating though! Oh well - everything is being done by eye - I've allowed myself some margin for error... Here's some more pics - everything is glued in place except the oxygen bottles, which are dry fitted to give you an idea of what they look like. There's a LOT of other wires & stuff to add, but these are the main components:1 point
-
Gave this pre-shading and airbrush painting thing a go... seems to have worked out okay, but more practice definately required (guess that means another kit..) Had to let it taste the gun... Also been working on the canopy. For once the decal has worked not too bad, must have been the fact i used enough Micro Sol to float the Titanic. The Blast Screen is not fitted in yet as I need to cut notches to allow the ac pipework through. Also made a start on the pylons Finally, have tried to post a picture which shows the stressed skin. Have adjusted the exposure/contrast/highlights etc to boost the effect. It does show better in real life, honest! Will hopefully get more done over the weekend, as long as no2 daughter doesn't find the wallpaper she wants... Thanks for looking.1 point
-
Added the anti tank obstacles and filled most spaces with styrofoam. ( The two missing obstacles behind the front trench will be added later when I get a new set.)1 point
-
Bit of an update. Got the wings on, remade the tail fillet and box above the jetpipe to fit the raised 'rear end'. Also got the flaps on and had some more of a riveting good time at the rear end. The riveting is reasonably straightforward as long as you take your time as the decal is extremely fragile. The technique which seems to work (most of the time) for me is to put the rivets on in as long a line as possible. I try to put all the vertical lines on, let them dry, apply some Microsol and again let them dry. Its then on with the horizontal lines, again dry/sol/dry. After that its a light coat of primer as they will be easily danaged if you dont. There are undoubtadly other techniques which can be used, but I find if I rush and try to put too many on at once I end up putting a size 10 thumb somewhere I really didn't want to before I finish. Cheers1 point
-
All the bunkers are done.It wasn't easy to find a good shade to paint them.It's a mix of several grays.1 point
-
Started on the FLAK emplacement using only plasticsheet and balsa.1 point
-
I made the entrances and added a rim on the roof that will be filled with sand as extra camouflage.1 point
-
Hi all, I started on another bunker. Made from a DIY plastic rainpipe part. It will be a personelbunker.Actually,half a bunker. As this will go at the back of the diorama and will be covered with sand,there's no point in making a whole bunker. I still need to do the entrances and other detailing.1 point
-
This thread has done one thing for me... highlighted just how crap that RAF "logo" is. What on earth is a fighting force doing with a logo? Is the strapline "You've just had the crap bombed out of you by the RAF"?1 point
-
great stuff how long you think its going to take you . i just posted some pics of my recently finished b1 xa903, and im about to post ones of my xh480 b1a that was resurected from a pile of junk from when my mate trashed it as a kid. my oldest and now newest vulcan. cant wait to see yours which vulcan you doing.1 point


This leaderboard is set to London/GMT+01:00