
Leaderboard


Popular Content
Showing content with the highest reputation on 14/10/12 in Posts
-
Awful! I'd sooner see the Vulcan kept in a fast taxi condition than painted in a Red Bull scheme!2 points
-
Hi all, this is my latest finished model, its T-33A, academy kit. OOB, only PE seatbelts. cya, Otis :-)1 point
-
Well, I've finally managed to finish one! This is the excellent new-tool P-51D mustang from Airfix. I built the kit with a few scratchbuilt parts such as harnesses, wiring and gun barrels. The decals are by Kits-world with Stencil markings and insignias from the kit sheet. For less than the price of two pints this kit has provided me with hours of entertainment, and with so many decal options available I can't wait to build more! I hope you like it. Sean1 point
-
Hello again friends. Now I will show you the second helicopter that I have mounted recently. It is a Eurocopter Tiger HAP of the Spanish Army. It is the model of Revell to a scale of 1/72, mounted directly from the box and without aftermarkets again. This model is easy to assemble and of good quality. Again the photos are a bit faulty, but I repeat that I do them with the mobile phone. Greetings and i hope you like it. Uploaded with ImageShack.us Uploaded with ImageShack.us Uploaded with ImageShack.us Uploaded with ImageShack.us Uploaded with ImageShack.us Uploaded with ImageShack.us Uploaded with ImageShack.us Uploaded with ImageShack.us Uploaded with ImageShack.us Uploaded with ImageShack.us Uploaded with ImageShack.us1 point
-
Hello everyone, hope you all had a nice weekend. Posting my latest build for you. 1/72 Airfix Spitfire, was going to be a quick clean build but after I dropped it and broke both the aerial masts I changed my mind and roughed it up a bit, not sure if roughing up this particular aircraft is historically correct but hey ho. I've used the 3D-Kits Rotol Spitfires MkI & II set, it included a new seat,control column plus the decals and Rotol prop, they all seemed to work very well. This aircraft was from 54 Squadron, Hornchurch in March 1940. Paints used were a mix of Gunze, Citadel, Tamiya and Vallejo plus washes from Flory models, Mig and Citadel. Hope the pictures are ok, using google web albums for the first time. Thanks for looking and all comments welcome. Cheers...1 point
-
This kit has been around a long while from PM models. It makes quickly and easily into an attractive kit and still only about £4-5.1 point
-
I think you'll find that's hearts, clubs, diamonds and spades.1 point
-
A crackin example.1 point
-
A great looking example.1 point
-
Hello, i will try it at ebay now. If you want to take a look,here it is. http://www.ebay.de/itm/170924844092?ssPageName=STRK:MESELX:IT&_trksid=p3984.m1558.l2649 It´s one of the first castings,they have to go.I need more room. kind regards Christian1 point
-
nice work..... regards Glenn.....1 point
-
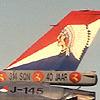
nice scheme.now lets have one at fairford please. glyn1 point
-
Glad this one is back, it was one of my favorite threads. Martin1 point
-
Nice colours on that. Looks great !!1 point
-
I really like that scheme.1 point
-
There is a whole series of photos taken at the same time as this one, and in many of them you can see the puddles on the ground. I suspect it had just stopped raining, or in fact it may still have been raining when the photos were taken. I know that's difficult to imagine, the photos being taken in the UK and all, but I'm told by a fairly reliable source that it does in fact rain on rare occasions in the fair British Isles. It's always been severely sunny and pleasant when I've been there1 point
-
Good evening everyone.... This was one of my first goes at multi-media kit. I really like things are kinda off the beaten path. The FR-1 Fireball fit the bill. I "tried" to make it look like a Navy Demonstration Team called the "Firebirds". I like the story of a P-51 pilot having to do a double take because the prop on this plane was feathered and was running entirely on jet power. This kit faught me all of the way. I had what I thought would have been a ton of weight in the front. But alas it wasnt meant to be. Then I realized that I would use the tailhook for it to rest... Comments very much welcome. John1 point
-
At last (I was quietly getting fed-up with that one). Hope you like it, Cheers, S.1 point
-
That's a nice looking copter well done1 point
-
But the kit keeps coming up in conversation, so if I did post it already, sorry If I didnt, here it is - one Otaki L1011 TriStar, handpainted some time ago now probably one of the rarest kits around now, which is a shame because it's also the best TriStar kit ever made. Apparently Otaki dumped the molds in Tokyo bay as a tax write-off or something. silly chaps!1 point
-
1 point
-
Here's my attempt at the new Airfix Mustang. I replaced the prop with a Quickboost resin one and fashioned some louvres over the side intake grills from Magic-Sculpt and added an Eduard PE harness. The kit is lovely and goes together like a dream. Everything is very snug and barely a wiffle of putty needed anywhere. The interior is well appointed and the only thing I wasn't so keen on is the two piece canopy hood, but it looks okay. As far as I can tell it's pretty accurate and would make a IV or a D straight from the box, unfortunately the markings supplied are for a IVa or K version which needs the different Aeroproducts prop and louvres. Cheer Segan1 point
-
I don't usually show my models, please be kind1 point
-
After a fairly long session, several paint mix attempts and some practice at free-hand airbrushing I have the basic colours on and unmasked: (click for bigger) The camo patches are a bit soft-edged, but I think it was good to attempt them this way and it made it possible to try and get the darker borders visible on some pictures of the real thing. I went for a fairly low-contrast trio of greys since I thought that would suit the scale better. I did look at the Academy instructions for inspiration but ended up picking paints by eye. The light grey is Tamiya Sky Grey, the light metallic is about 50:50 Sky Grey and Titanium Silver, with a blob of Medium Blue to cool down the warm Titanium. Finally the dark grey is one of the IJN greys (the slightly bluer one) plus Titanium and Medium Blue again. I tried some other combinations and the Titanium seemed to have much finer metal flakes than e.g. Flat Aluminium. I was surprised how much metallic paint I needed in the mix for the sheen to register at all - I was expecting something like 2:1 or 3:1 rather than 1:1. The flakes are still visible in close-up, which is a shame but probably unavoidable: The good news is that the intakes look quite nice now! I've been waiting for some sun so I could evaluate the paint with a strong backlight to check the sheen in non-cloudy conditions. It finally arrived this morning, and I think it looks OK. From different angles it's possible to read the metallic light grey as lighter, darker, and close in value to the matt grey edging, which is what I was hoping to capture. The really big question now is how on earth do I apply the decals without either a. silvering or b. spoiling the sheen?? I can see a few options for this - Klear the whole thing, decal and seal as normal, then Dullcote, re-mask the edges, and spray a mist of Titanium and matt varnish? Or try and polish/buff the paint so the decals can go on without Klear, or some combination of these. Bit scared at the moment since it looks pretty nice, but I guess that's normal as you get further into a build I've got some other panels and bits to paint before I need to decal so I'll probably do those in order to put it off... Cheers, Will1 point
-
And desperately received a 4 week time out for trying for the fourth time to circumvent the 100 post rule by asking for and trying to sell stuff away from the Buy and Sell area despite being warned not to by the Mod team.1 point
-
Hardly a disaster, probably reaching it's fatgue life, in which case it may well be uneconomic to keep it flying, if it crashed. now that would be a disaster. We all have to remember that any mechanical device has a finite life, and will eventually wear out. We've had several good years of displays from the Vulcan and been lucky to have them, perhaps it's time the old girl had a well earned retirement. Andrew1 point
-
Managed to grab a few hours in the man cave today and.......... Constructed the rear body and wings, the door is only temporary for painting as it will be open when finished. Hoping to use this, (tinfoil pushed on the the zester on my cheese grater!) to make the barracuda. and it turned out ok I think. The green is an under coat that i hope will show through with aid of some hair spray! Thanks for looking Jon1 point
-
what about dairy lee imagine a giant flying cheese triangle1 point
-
So,just need some layer of clearcoat and the first is ready!! :D I think it looks good right now.Maybe the decals must be 3-4% bigger print. meanwhile i changed the mold again a bit. Now i got less wall thickness at the roof and the doors. Christian1 point
-
This one? Iain1 point
-
Started work on the aft part of the ship. The white LED strobe is attached in the centre, and the red and green ones are positioned on either side, To be honest, there is probably a far simpler way of me doing this, but ah well The white LED for the rear window is put into place, along with some aluminum tape to help the light spread a little more evenly. The nacelles are then positioned and the wires soldered into their correct points, setting the circuits up as parallel. Ive tried to clean it up as best I can inside using insulation tape. After its all glued together it looks a bit like this: I know, it looks like crap . A fair bit of the primer has come off with the tape i used while the cement dried, that's the price you pay for using crappy cheap primer. Once the model is assembled I will give it another coat so this wont be a problem. This picture is mainly to show the light arrangement.1 point
-
A rugged looking beasty. Jk1 point
-
My God....that is incredible.....gorgeus work. Congratulations1 point
-
WAOUH! great job I like it very much1 point
-
Simply outstanding modelling, Vitor. ( I'm off to lie down in a darkened room, and dream about being that good) Sean1 point
-
Beautiful, outstanding models - the kind I aspire to building: intricate and perfectly built and finished.1 point
-
Outstanding work I am very familiar with the size of the actual kit and you have done wonders......... Great Skill Rgds Mr b1 point
-
A thing (or pair of things) of beauty, Vitor. Just tremendous quality of workmanship - bloody well done! Thanks, Roger1 point
-
They are amazing models Vitor, I'm looking forward to seeing much more of your work1 point
-
Freaking amazing detail there Vitor1 point
-
Hi Laurent: yes, i have been change the nose.1 point
-
Yes I believe it is one of the most famous! I've built a few in all scales. Sadly she sits at the bottom of the South East Asian sea now and even more sadder the guy that flew it is serving time at the pleasure of the United States Government I believe..........Great Model! Brian.1 point
-
Really nice, especially in this small scale!1 point
-
Wow, those are REALLY good builds, well done. Your doors look so delicate and well detailed. I have a load of these kits (11 of them). I plan to build some examples as used by the SAAF, the Rhodesian Air Force and also by the Portuguese Air Force when they flew them in Mozambique. I fell in love with the gunship version of the Alouette when two RhAF Alouette gunships flew over us while we were on holiday in Rhodesia. I remember jumping up and down excitedly waving my arms wildly as they flew over and this hand poking out next to the what seemed like a HUGE gun barrel and giving a calm wave in return.1 point
-
Hi Vitor, They look amazing. So delicate and yet made from a 'robust' Heller model original. Well done! I was looking at one of these at the Maceda show last weekend and thinking how to go about building one. Now I know! Cheers, Christian the Married1 point
-
(sorry, but I could'nt put the post properly before, now it´s ok) Here some pictures I took of the real machine More step-by-step pictures here: http://www.forum.modelismo-na.net/viewtopic.php?f=109&t=20709&start=01 point
-
Nice looking build for a nice looking machine. Thank you very much for sharing,1 point
-
I've used the new "Pledge" Klear for a while. It works fine as a decal sealant and varnish. I can't really comment too much re: dipping canopies, I have used it for this, but tbh I never used the old original "clear" Klear, so I have no benchmark. But the canopies I have tried it on are nice and clear and show no signs of any yellowing... Yet.1 point
-
I'd like to do the Gotha one day, problem would be where to put it! Cockpit it built up now and installed in the fuselage, both halves zipped up. John1 point


This leaderboard is set to London/GMT+01:00