Leaderboard
Popular Content
Showing content with the highest reputation on 14/10/12 in all areas
-
Awful! I'd sooner see the Vulcan kept in a fast taxi condition than painted in a Red Bull scheme!2 points
-
Hi all, this is my latest finished model, its T-33A, academy kit. OOB, only PE seatbelts. cya, Otis :-)1 point
-
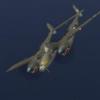
Hi, here is Academy's P-38J finished in the markings of Robin Olds using Kitsworld decals.Painted in Tamiya acrylics and sealed in with humbrol satin varnish from an aerosol can. A very enjoyable build. Thanks for looking.1 point
-
Hello again friends. Now I will show you the second helicopter that I have mounted recently. It is a Eurocopter Tiger HAP of the Spanish Army. It is the model of Revell to a scale of 1/72, mounted directly from the box and without aftermarkets again. This model is easy to assemble and of good quality. Again the photos are a bit faulty, but I repeat that I do them with the mobile phone. Greetings and i hope you like it. Uploaded with ImageShack.us Uploaded with ImageShack.us Uploaded with ImageShack.us Uploaded with ImageShack.us Uploaded with ImageShack.us Uploaded with ImageShack.us Uploaded with ImageShack.us Uploaded with ImageShack.us Uploaded with ImageShack.us Uploaded with ImageShack.us Uploaded with ImageShack.us1 point
-
Hi all, just finished Hasegawas 1 / 48 Kawasaki Ki 45 Kai Koh Toryu (Nick) a very racy looking heavy armed two- seater. Kind regards Peter1 point
-
Hello everyone, hope you all had a nice weekend. Posting my latest build for you. 1/72 Airfix Spitfire, was going to be a quick clean build but after I dropped it and broke both the aerial masts I changed my mind and roughed it up a bit, not sure if roughing up this particular aircraft is historically correct but hey ho. I've used the 3D-Kits Rotol Spitfires MkI & II set, it included a new seat,control column plus the decals and Rotol prop, they all seemed to work very well. This aircraft was from 54 Squadron, Hornchurch in March 1940. Paints used were a mix of Gunze, Citadel, Tamiya and Vallejo plus washes from Flory models, Mig and Citadel. Hope the pictures are ok, using google web albums for the first time. Thanks for looking and all comments welcome. Cheers...1 point
-
Hi all, My latest build, thought I'd put up some pics. This is an interesting enough aircraft. Designed by Horten but built by Gotha (hence the 'Go' 229) it was first meant to be a bomber but cannons were added to it to give it a fighter-bomber role. There were 3 prototypes built, the first (the V1) a glider (Horten's speciallity) to show the concept worked, and the second (the V2) had the jet engines added, the same engines that were in the Me 262. That second prototype had a few test flights before crashing and killing the pilot. But the Luftwaffe were impressed enough (apparently it out-performed the Me 262) to get the V3 prototype built, which was to be the design for the production version. It's the V3 that this kit represents, a bit bigger than the earlier versions, with the cannons fitted, and a basic ejection seat as well. Its large nose wheel was actually a main wheel from the HE 177A heavy bomber. However, the factory was captured by the Allies before the V3 prototype was finished, and it ended up in the States, where it still is today, currently undergoing restoration in the Smithsonian. The kit itself is from the mid 90s and is a nice kit, some good detail and easy enough to put together (though there would be a lot less seam lines if they molded the fuselage in with the wing). Took me about 11 or 12 days in total, I rushed it a little but I just wanted to do a quick build. Anyhow, enough talking, here are the pics. All comments welcome as always, thanks... J. *Kit : Revell Horten Go 229 *Scale : 1:72 *Paints Used : Brush painted with Revell Aqua Colour, Citadel Nuln Oil Shade, Tamiya Weathering Kit *Extras Used: None1 point
-
1 point
-
Evening campers, been brewing various shades of ALCLAD to try and get my 'inside of a soup can' look, reckon this isn't far off:- I'm liking the ripple effect on the skin as well, more of that later. Thinned and wired the back of the IP today as well used some micro brass tube to represent the connectors on some of the thicker cables. Added the Eduard panels to the wings. After seeing the Casa, everything is way too smooth on this aircraft, the skin is really thin on these things and you can see every bit of framing underneath. I need to represent this somehow before I start rivetting. I have a few ideas, watch this space. Built both wheel wells now. Might need to start again as the plumbing doesn't match the Casa. For example there are two extinguisher bottles in each wheel well, not one, I suspect that might be due to the Merlins in lieu of the DB motors? anyone help? Also had a go at the radiators. The flaps are much to thick, so I think I will be scratching them from ali sheet. Stay tuned for the next exciting installment. Nick1 point
-
I thought all crew-room card games were full body contact games anyway - certainly are in my experience! Wez1 point
-
Hello, i will try it at ebay now. If you want to take a look,here it is. http://www.ebay.de/itm/170924844092?ssPageName=STRK:MESELX:IT&_trksid=p3984.m1558.l2649 It´s one of the first castings,they have to go.I need more room. kind regards Christian1 point
-
1 point
-
Very nice model. Still have this in the stash to build. Having built two of the older but with resin bits for Australian(pacific). But you are right that the detail is far better for the re-molded version. Very Impressed with the overall finish and the Crew are fantastic. Well Impressed1 point
-
1 point
-
Hello Here is another Airfix Mustang I finished during my hollidays Decals come from an Aeromaster sheet , I used Humbrol Metalcote applied with brushes ... Uploaded with ImageShack.us Uploaded with ImageShack.us Uploaded with ImageShack.us Uploaded with ImageShack.us Patrice I love these new Airfix models ..1 point
-
1 point
-
1 point
-
But the kit keeps coming up in conversation, so if I did post it already, sorry If I didnt, here it is - one Otaki L1011 TriStar, handpainted some time ago now probably one of the rarest kits around now, which is a shame because it's also the best TriStar kit ever made. Apparently Otaki dumped the molds in Tokyo bay as a tax write-off or something. silly chaps!1 point
-
One of the areas that was causing a bit of a drama was how I was going to intergrate the engines into the wings. Well..., I couldn`t. It would have been to risky cutting int the Lanc`s wings for it to go wrong. So as part of the rethink I went for hanging the BAEU`s under the wings on small pylons. Problem solved. This in turn meant filling the holes in the side of the units so out came a couple of drop tanks from a Hunter and again, job done. Since the photo was taken, filler has been applied and it will be at least 24 hours before I can go back to work on them. I also removed the `V` shape fittings for the outer engines on the wings as the positioning of the jets will be midwing.1 point
-
Hi All, Further to sorting out my old built up collection in preparation for this year’s SMW event, I thought I would post some of my older builds for your viewing pleasure. It’s sad really as these seldom now see the light of day and reside in a box in the loft. I built the Frems kit when it first appeared quite a few years ago, Built from the box but used a bit of artistic licence as it has Paragon Resin Jaugar seats fitted to enhance the cockpit area. From memory a nice pleasant build, and did well for me in the comps entered at the time. Enjoy Rick G1 point
-
Hi all, Just finished this yesterday, WIP thread here http://www.britmodeller.com/forums/index.php?showtopic=234923158&st=60 Its the revell reboxing of the hasegawa 1:48 spit mk IX / XVI What can i say, it was a great kit to build and i recommend it to anyone, i am aware the fuselage is slightly too short but i wouldnt say that detracts from what is a lovely kit. The instructions are a bit misleading on the mk XVI as it does require some modifications to get a mk XVIe but doesnt show them. If anyones interested they are shown in my WIP thread but changes made to the basic kit are as follows: fitted eduard cockpit set for hasegawa kit drilled out bulkhead and scissor link lightening holes modified cannon bulges to move to other side fitted kit supplied 50 cal caps and drilled and fitted brass micro tube hollowed exhaust and cannon tips with scalpel added brake lines from fusewire cut out cockpit door and scratch built one from a can of cider and some sheet styrene (door lock from eduard set) removed spine ID light blanked off MG ports in wingtip and shell ejector ports Paints used were Tamiya XF81/82/83 for main camo and various others for details Kit decals used with micro sol / set and were great, though seeing the pics i should have goe round the radio access hatch with a knife Anyways on with some pics And last one, bit of an adversary shot with the Tamiya 190D i finished before i started this one Thanks for looking, all C&CC greatly appreciated, cheers, Stu1 point
-
1 point
-
Here's my attempt at the new Airfix Mustang. I replaced the prop with a Quickboost resin one and fashioned some louvres over the side intake grills from Magic-Sculpt and added an Eduard PE harness. The kit is lovely and goes together like a dream. Everything is very snug and barely a wiffle of putty needed anywhere. The interior is well appointed and the only thing I wasn't so keen on is the two piece canopy hood, but it looks okay. As far as I can tell it's pretty accurate and would make a IV or a D straight from the box, unfortunately the markings supplied are for a IVa or K version which needs the different Aeroproducts prop and louvres. Cheer Segan1 point
-
1 point
-
Derek got there before me, however I do like the Finnish.1 point
-
1 point
-
50000+ Bomber Command dead in WW II helping preserve the freedoms you enyjoy today says the Lanc has more relevance to you than you think. And I say that as one who loves to see the Vulcan fly.1 point
-
So you reckon the Vulcan has more historical significance than the flight that pays direct homage to the RAF personnel killed in WW2 (the RAF's most significant conflict afterall), and the 55573 of Bomber Command in particular? (that said, I partially agree that the BBMF does seem to have quite a few Spits these days!) As for remaining a runner, I don't know if that's an option being considered for whatever visitor attraction they come up with. Certainly if they didn't, Bruntingthorpe has plenty of other exhibits and there's the taxying Vulcan at Wellesbourne Mountford too. They're down to their final serviceable engines, so if they lose any, then it probably couldn't fly again anyway for any long term. With a business head on that makes it very difficult to justify spending £200,000 on a long term wing fix if it might only get 5 minutes use.1 point
-
1 point
-
So,just need some layer of clearcoat and the first is ready!! :D I think it looks good right now.Maybe the decals must be 3-4% bigger print. meanwhile i changed the mold again a bit. Now i got less wall thickness at the roof and the doors. Christian1 point
-
1 point
-
1 point
-
Started work on the aft part of the ship. The white LED strobe is attached in the centre, and the red and green ones are positioned on either side, To be honest, there is probably a far simpler way of me doing this, but ah well The white LED for the rear window is put into place, along with some aluminum tape to help the light spread a little more evenly. The nacelles are then positioned and the wires soldered into their correct points, setting the circuits up as parallel. Ive tried to clean it up as best I can inside using insulation tape. After its all glued together it looks a bit like this: I know, it looks like crap . A fair bit of the primer has come off with the tape i used while the cement dried, that's the price you pay for using crappy cheap primer. Once the model is assembled I will give it another coat so this wont be a problem. This picture is mainly to show the light arrangement.1 point
-
That is really a nice Alouette. Thanks for pointing out the Extratech to me.1 point
-
1 point
-
Simply outstanding modelling, Vitor. ( I'm off to lie down in a darkened room, and dream about being that good) Sean1 point
-
1 point
-
Outstanding work I am very familiar with the size of the actual kit and you have done wonders......... Great Skill Rgds Mr b1 point
-
1 point
-
A thing (or pair of things) of beauty, Vitor. Just tremendous quality of workmanship - bloody well done! Thanks, Roger1 point
-
1 point
-
1 point
-
1 point
-
1 point
-
Yes I believe it is one of the most famous! I've built a few in all scales. Sadly she sits at the bottom of the South East Asian sea now and even more sadder the guy that flew it is serving time at the pleasure of the United States Government I believe..........Great Model! Brian.1 point
-
1 point
-
I think this is brilliant modelling in any forum Vitor makes me wish I could model helicopters as good as his Thanks Vitor, marvellous models bill1 point
-
fantastic models! I was thinking about building the same kit in swiss markings, but the heller kit scares me off a bit. Seeing your Alouettes, I might give a try... Alex1 point
-
Nice looking build for a nice looking machine. Thank you very much for sharing,1 point
-
I'd like to do the Gotha one day, problem would be where to put it! Cockpit it built up now and installed in the fuselage, both halves zipped up. John1 point
This leaderboard is set to London/GMT+01:00

