Leaderboard
Popular Content
Showing content with the highest reputation on 30/09/12 in all areas
-
2 points
-
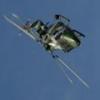
Good evening guys! Since yesterday my favourite forum was dead but I now see is still alive! Here is my another item from my heavy autumn's offensive. Trumpy-Dumpy Seahawk Mk.100/101 with Aires cockpit and main wheel bays heavily weathered in West German Navy markings. My deep apologies not British one this time. Please forgive me .2 points
-
30 September 1944 a De Havilland Mosquito of Royal Canadian Airforce crashed in the danish forest Gribskov about 10km from my home. This build is meant as a tribute to the brave pilots that gave their lifes for freedom. In the afternoon of 30 September 1944 the Royal Canadian Air Force 418 Squadron had 4 Day Ranger missions to Germany, Austria and Denmark. The mission to Denmark, carried out by 2 Mosquitos, had fatal consequences for one of the planes and its crew. The 2 planes were TH-W, NS906 with Flight Lieutenant (Pilot) R. H. Thomas and Flying Officer (Navigator) G. J. Allin and TH-S, HJ821 with Flight Lieutenant (Pilot) H. E. Miller and Sergeant (Navigator) W. Hooper. These Mosquitos took off from RAF Coltishall at 15.25 hours danish time. Their mission was to shoot down and/or destroy as many German planes as possible at the airfield at Grove (Fliegerhorst Grove - Karup), the airfields at Aalborg (Aalborg West, Rødslet, now Aalborg Airport - and Aalborg East) and Copenhagen Airport, Kastrup. At Aalborg the 2 planes engaged a German Bf109 fighter which was shot down. Another Bf109 was approached but escaped. From here they flew over Sjællands Odde to close to Hvalsø in the central part of Sjælland (Zealand), where they attacked the locomotive of a passenger train. Then the planes flew in a crescent over the Køge Bugt (Bay) and over Copenhagen Airport. When they came over the Sound they were exposed to flak from flak-batteries in Flakfortet and Middelgrundsfortet. At full speed the planes flew to the north following the Sound till they passed the coast of North Zealand at about Espergærde. The two pilots had radio contact when they flew over Esrum Sø (Esrum Lake). They had not been hit by flak. One minute later the Mosquito with Thomas and Allin hit two tall trees near Gribskovlejren. The left tailplane was torn off and the plane crashed. The plane hit the ground in a narrow angle and ploughed a 300 meter long track in the ground. The plane stopped about 800 meters from where it hit the trees. As this point the two crew members where more than likely both dead. The cockpit was completely burned out, apparently because the incendiary ammunition had made a huge shooting flame into the cockpit. Shortly after Miller and Hooper noted that they had lost radio and visual contact with NS906. They took a course that would bring them back to their base in England as fast as possible. When they passed between Skovby and Holse, app. 8 km south west of Bogense in Fyn (Funen), they attacked what they believed was a black German staff car. Actually it was a taxi from Bogense. The passenger was killed and the driver was injured. Miller and Hooper left Denmark north of Rømø at 19.00 hours. They landed after a flight of nearly 2,000 km in Coltishall Airfield to a debriefing at 20.50 hours. The entire mission had lasted 5½ hours and cost the lives of half of the aircrew. For 68 years one of the big questions has been where the bodies of the two airmen are. Apparently the Germans removed them in spite of serious attempts from the local vicar to have them handed over, so they could have a decent burial. However, the Germans refused that. The local citizens raised a memorial stone at the crash site. Translated to english the inscription says something like this: "For the freedom of Denmark we thank God On this place fell two messengers They came from England to the coast of Denmark And brought arms to the fight of the country They bought us freedom with their deaths God give them piece in the womb of Denmark" Short about the model: This is the Tamiya Mosquito 1/48 kit. It fell together without problems. I used an Eduard PE set for interior and exterior, resin wheels and mud guards and turned brass barrels. Paint was xtracrylix, which I have become quite fond of. The roundels and codes are painted, only serial numbers and stencils are decals. The model was weathered using Flory Models dark wash, thin layers of oil paints for streaks and airbrushed alcohol tinted with Tamiya paints. Thanks for watching!2 points
-
After a F-35B (http://www.britmodel...topic=234924464), Kitty Hawk is to release a 1/48th F-35A kit - ref. KH80103. Source:http://www.britmodel...topic=234927067 Images: http://s511.photobuc...lovemen/uploads V.P.1 point
-
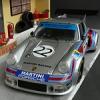
Hi, here is my Lancia Stratos. The kit was badly started as i bought it.After one year of thinking,can i rescue it or not,i`ve done my best. Here is the Wip http://www.f1m.com/forums/viewtopic.php?f=...Stratos+Pirelli and here are the pics. I hope you like it,if not,let me know. Kind Regards Christian1 point
-
Hi all. Yep, quelle surprise.....another Lynx from me. Slightly different this time as I decided to do G-LYNX in its 1986 World Speed Record livery. I had a set of Belcher Bits G-LYNX conversion that Michael Belcher was kind enough to give me last year. The set consisted of the decals, the rear facing exhausts and the horizontal stab (end plates were made using a template in the instructions). It was designed for his 1/48 multi media kit but with little effort, it fits on to the Airfix kit. Not sure if he still does them but it would be great to see this version as an add on. I decided not to go too mad on the detail but concentrate on the clean lines and shiny finish that optimises G-LYNX. The good thing about doing this version is you can leave a load of stuff off it! Only the one antenna under the tail, no wipers and a few other areas faired off. The blades are not strictly the same as the ones that come with the airfix kit and do require a bit of modification. G-LYNX flew with the BERP 1 blades as opposed to the BERP 3 that we currently fly. Main difference is the tip paddles are flat (heated with hot water and gently rolled flat) and the blades have small trim tabs on their trailing edge (small bits of plasticard cut and trimmed and applied on the underside trailing egde). I also replicated the blade root shrouds using milliput and shaped accordingly. Because G-LYNX at this time had the older clockwise tail rotor, I utilised Alis A2Zee older tail conversion. Simplicity in itself and a very good resin group of parts. I quite like the contrast of this Lynx next to my others as it shows off the lovely clean lines of the Lynx. For the display base, I've managed to 'borrow' the original World Speed Record certificate that is hanging on the wall of Westland Flight Test to make a copy (I dont think Don the chief test pilot would have been too happy if I'd kept it!) and will use the copy as the base on top of a suitable picture frame. Thanks for looking Tony1 point
-
I've finally got round to finishing this, a bit of a self KUTA. It was started last year but in an attempt to get the top wing to sit on all the struts, I kinda melted it by being over zelous with a hair dryer so it went on the shelf of doom until this year. I picked up another kit and went about the top wing differently to avoid making a same mistake twice, something which I'm quite adept at !!! Anyway, apart from the engines which are CMK resin ones, the kit is OOB. This was my first attempt at using Alclad2 (polished aluminium over grey primer) which is great stuff, but I ran out before spraying was complete so it got finished off with some white aluminium and steel mixed together. As the plan was to do some weathering, I wasn't too wooried about variations. The last few weeks were incredibly boring doing all the rigging out of that elastic stuff, but after running out of expletives, it's finally done....well almost, a wire popped off on one of the floats so it needs redoing ! I always strugle taking pics of silver models, so I apologise for the lack of detail definition, I didn't want to use the flash. Hope you like her. Just ordered an Italeri Sunderland to go with her at some point1 point
-
Hi everyone,just about to start an airfix Lynx. Nobody is more anti airfix than me, but I have to admit this is quite a nice kit - Apart from the panel, which is, well a sticker. So the first job is to sort that out. Seeing as the aftermarket boys haven't got their act together yet I thought I would knit my own, as obviously, waiting for anything is out of the question. So after a morning slaving over a hot CAD machine, here is the result. Off to my boiling acid bath next, watch this space. Nick1 point
-
Hi folks This is my AA Ferret 2/3,first time in building a full resin kit,enjoyed it though,a bit of a long build just over a year as i switch between kits,let pictures do the talking,no photobooth photos taken with Kodak EasyShare C143 with natural light. cheers for looking,all comments welcome Darren1 point
-
1 point
-
This is my latest completion, after a few months, far too long and not perfect, no extras just oob, Humbrol paints and kit decals, I chose 801sqn simply because I was at the Waddington WAVE some years back when half a dozen from that Squadron arrived for one of the then regular ACMI bouts, ahh the good old days, if only I had a Tardis! IMAG0810 by [email protected], on Flickr1 point
-
Here are some pics of my collection on 1/48 scale Rhodesian Air force aircraft & helicopters. No 1 Sqn hunter FGA.9 (based at Thornhill AFB, Gwelo) No 2 Sqn Vampire T.11 (Based at Thornhill AFB, Gwelo - note underwing rockets mounted below air intakes) No 2 Sqn Vampire FB.9 (Based at Thornhill AFB, Gwelo) No 3 Sqn C-47 (Based at New Sarum AFB, Salisbury - done as with aerial photography camera in doorway and base to represent Grand Reef FAF 8) - decals were home made. No 4 Sqn Reims-Cessna 337FTB [Lynx] (based at Thornhill AFB, Gwelo) - weaponry [Mini golf bombs, SNEB pods with polystyrene noses, 0.303 brownings in the pods obve the wing were home made. Also the various mods to change an 0-2 Skymaster into a Cessna 337 such as angled wing tips, fences on the upper wing, curved where the tails meet the tailboom (top & bottom), anti strela exhaust modifications, bulged window on left side front, landing lights moved from wing to nose. No 5 Sqn Canberra B.2 (based at New sarum AFB, Salisbury) - still busy making the ramps as used when bombing up the Canberra. No 6 Sqn SIAI Marchetti SF-260C [Genet] (based at Thornhill AFB, Gwelo) No 7 Sqn Alouette III 'K' car & 'G' car (based at various FAFs and New Sarum AFB, Salisbury) - both the cannon and machine guns were after market white metal, the Elephant ear intake filters are scratch built, as is the anti strela engine and exhaust shrouds. The interior of each helicopter has been modified to the RhAF variation. Antennas scratch built. Steps by rear door on 'G' car scratch built and so are the ammo and link/cartridge catching boxes. 'K' Car - Alouette III with MG151-20 cannon mounted out of left side rear doorway. No trooping capability. 'G' car - Alouette III with twin 0,303 Brownings out of left rear door, also carries 4 - 5 troopers. No 8 Sqn Agusta Bell AB.205A [Cheetah] (based at New Sarum AFB, Salisbury as well as various FAF's) - exhaust shroud and air intake file covers scratch built, various antennas made and fitted.1 point
-
reports on HS by Mr Haggo - 1/44th version released at E-day but a 1/48th promised. How happy am I?? Jonners1 point
-
after a lot of faffing about I have finally finished my Airfix 'Mild and Bitter'. I have tried to represent the very tired, weathered appearance these high-time B-26's seem to display in photographs. I have used the excellent salt weathering techniques seen on elsewhere this site which I think worked reasonably well, especially 'fading' the RAF Dark Green which was apparently painted on the wings, nose and tail of this and other Marauders at the time. I am sure I will be open for correction by more knowledgeable experts, but I am pleased, hope you like her too, and many thanks for Wes for providing the markings and to Goose for the kit1 point
-
1 point
-
Hi guys, needed a quick fix to get back into modelling after being real busy at work, getting married, little things like that, you know how it is. So went for a Hase Draken, one of my all time favourite aircraft. I know damn well I cant build anything out of the box so this has aires pit and some Eduard tin. I decided I would just go for it with this model and it was quite liberating not taking any in-progress pictures. I really rushed this so consequently it's pretty rough. Enjoyed the build no end though. Thanks for looking Nick1 point
-
Thanks for the nice comments. Next on the bench will probably be Atlantic Models HMS Leopard for its build review.1 point
-
That really is good, you sure it's 1/72, just one thing, you might want to reposition the crew on the port side1 point
-
Potez 25 TOE (Paraguayan) Gran Chaco War, 1934. 1/72 HitKit kit The build thread is here: http://www.britmodeller.com/forums/index.php?showtopic=234921030 Cheers Cliff1 point
-
1 point
-
Got my Mig-23 yesterday, all sprues are present and correct, so it looks like Trumpeter have added the missing parts now1 point
-
Voila. http://sternlaurent...._Mirage72_1.jpg http://sternlaurent.free.fr/kitAccuracy/abmMarch92_50_Mirage72_2.jpg http://sternlaurent.free.fr/kitAccuracy/abmMarch92_50_Mirage72_3.jpg http://sternlaurent.free.fr/kitAccuracy/abmMarch92_50_Mirage72_4.jpg http://sternlaurent.free.fr/kitAccuracy/abmMarch92_50_Mirage72_5.jpg http://sternlaurent.free.fr/kitAccuracy/abmMarch92_50_Mirage72_6.jpg http://sternlaurent.free.fr/kitAccuracy/abmMarch92_50_Mirage72_7.jpg http://sternlaurent.free.fr/kitAccuracy/abmMarch92_50_Mirage72_8.jpg http://sternlaurent.free.fr/kitAccuracy/abmMarch92_50_Mirage72_9.jpg http://sternlaurent.free.fr/kitAccuracy/abmMarch92_50_Mirage72_10.jpg1 point
-
I've got this kit in the stash, saving it until I can do it justice. Incidentally Will, I've still got my Willesco steamer, must get it out and give it a run.1 point
-
''Bear in mind that Philippe does F-Dcal as a side business. He has a regular job that keeps him quite busy.'' I'm not to know that as this is the first time I have dealt with him and being new to the airliner world of modelling hasn't got me off to a great start, he got recommended to me by a friend so I guess we'll see if I ever do get a replacement set. Clive1 point
-
Curses, foiled again. I'd have got away with it too if it hadn't been for you pesky kids...1 point
-
1 point
-
1 point
-
MT: I sketched the stand that I saw in an engine overhaul shop and scalwd it to fit the Wasp. There are mounting pins in the vertical members which fit into the motor mount holes. The wiring is #32 from an electrical supp;y shop The stand was built from square Evergreen stock with .040" re-inforcements Barney http://www.barneysairforce.com1 point
-
Evening, I've been ticking along in between some exterior decorating in Essex and battling the rain to bring in a potato harvest - I live a very strange life Anyhoo, I've sanded down the putty and given the nose a quick bit of primer to check for gaps/scratches, and I'm jolly pleased with the result! Panel lines and the underside RCV/Zeus are next on the list. In the meantime, Aires' bits arrived. Unfortunately the cockpit is most definitely not a straight fit and both cockpit and fuselage walls had to be thinned down quite a bit. Furthermore, I did a bit of a silly and got the original AV-8B cockpit rather than the Night Attack version (mix of uncertainty and misleading images online), so will need to scratch myself an MFD I've got the cockpit tub built and painted up now as well. The top parts of the seat rails were cut off and replaced with correct scratched ones. The weathering pattern is quite interesting - based on the images I've found, the lightest bits are the crevices and the darker bits are the raised areas I think I've done it reasonable justice: More in the week, thanks for reading! Tim1 point
-
well they're here:- Just call call me CMOT Dibbler, but these puppies will run you four quid inc P&P in the UK. Get them while they're hot. Nick.1 point
-
Very nice model. This livery is very beautiful too! Cheers, Marcos.1 point
-
Excellent and well photographed! Flatten the tyres and photograph it outside again but with a suitable base and backdrop and that could easily fool me - superb sir! cheers Rick1 point
-
Finished it with a bit of a mad week of late nights, have posted more images in the Gallery Regards Simon1 point
-
After the Mustang build and a long summer spent mostly on a canal boat with no possibility of modelling, I'm finally back doing what I enjoy most, namely building models (actually it's my second favourite pastime...). Going to get it ready for Telford, I'm going both days so going to have some fun unless I get run over or something before hand. I've started the weathering process, done most of the right wing and some of the fuselage, mostly around the cockpit and engine areas. I've also made a good start on the undersides. I'm running 3 airbrushes with various stuff in each but having a pain with the air lines as I've let my setup fall into some disorder so I'm going to have to upgrade soon, but I'm OK for now, it's just a pain. Also trying to get to grips with the new look website, I'll get used to it!1 point
-
Thanks to Foxbat, Cliff and Radleigh! Further progress on the Ju last night and today...Clipped all the seat bits off the sprues A bit of a slog getting them together. Used some Jammydog micro-tape for the lap belts - here are the finished seats tacked in place And with the cockpit... Constructing the loo and basin Partitions up for the smoking compartment - I might put some 'papers' on the table in the big cabin A quick mock-up Work to the roof/ceiling. Touch-up paint to the RLM02 ribs, silver to the inside of the lights and then fit the clear glazing. Then fit the luggage racks which were pre-painted Glued the wings - they are huge slabs! Quick mock-up against the taped fuselage - gonna need a bigger shelf! last mock-up check with the glazing in place inside the cabin. The Eduard masks were used. Nice tight fit for everything - will glue up tomorrow. Until later! Thanks for looking1 point
-
I think the build Paul is thinking about is this one on Swannys Models site http://www.swannysmodels.com/He115.html.1 point
-
1 point
-
Hi Guys This is my last work This was my first What-if and I made the decals for the spetial markings, but the letters ED + Y came to bad. Need to improve in a future My intention was to make a tribute to my favorite band, Iron Maiden! Here are the photos Up the Irons1 point
-
1 point
-
The nosecones. P115: no problem, built OOB, a part of reducing the inside of the nosecone to let the fitting: On the left the green arrow shows the work already done; on the left the tickness of the original nosecone. Here the final result: P83: here Stewart at Spa: as you can see, inside the nosecone there were some flaps which Hiro didn't make. So I made a mould of the inside of the nosecone: Then I wrote with a pencil the shape of the flaps; the nosecone in the pic is that of the P83 of Spencer at Monza: With 0.2 mm plasticard I made the flaps: Here a fitting test: After painting with semigloss black and washed with dry aluminium, I glued the two parts inside the nosecone, in front of the mesh: Here the two cars together:1 point
-
Thanks Stormfront I've spent the last few days working off and on on the nose section. After separating the cone from the cockpit section, I first thinned the tip out to help detailing of the ARBS lens later: You can also see the original FLIR fairing shape (correct, like most of this kit, for the AV-8B ), pre-modifications After measuring off some approximate dimensions from the photos I've got, it appears that the little raised area at the base of the model fairing, is in fact the correct size for the real fairing. I glued a plate of 1mm plasticard to each side of the existing fairing, and one sideways between them. A lot of sanding down later and we're left with this: Now, compare that with the first image to get an idea of the accuracy issues More tomorrow! Tim1 point
-
1 point
-
Well, it's a bit later than 'tomorrow,' but the next update is due Quickly made up the turbine stator vanes - definitely not perfect, but good enough for this model Here they are in place; the insert image is the view through the real rear nozzle. The complete engine. Hidden just inside the intake is a plasticard disc into which I've cut lots of short slits to represent fan blades. The interior was given a coat of Alclad Aluminium. The bare exterior does look a bit sorry for itself, but as none of it will be visible I won't bother. The Pegasus is so thoroughly engineered that merely gluing it all together took over an hour! I've got Aires' resin cockpit and landing gear bays and Eduard's exterior on the way to me at the moment, and I've started the nose section. First task is to reshape the nose. I'm using Piero's stunning build as a guide - read it if you haven't already, it's amazing stuff! Thanks for reading, Tim1 point
-
May have wasted my time there, this detail just isn't going to come through in 1/48. Anyhoo, here it is:- Nick1 point
-
Brilliant - a 106 next please!1 point
This leaderboard is set to London/GMT+01:00


