
Leaderboard


Popular Content
Showing content with the highest reputation on 03/09/12 in all areas
-
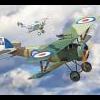
Hi guys. This is my last work...Mirage IV Heller in 1/72 scale. I love this plane. It is an ancient kit, with raised panel lines (rescribed with Trumpeter tool) and built OOB. Airbrushed with Gunze references The white dot in the port side of the nose is a camera. Micro Clear it was still drying when I took the pics. Now is transparent, of course...hahahahaha There is a nice Panzer Arai helmet in the first pic. Bibriel, a friend of me than also posts pics here is the owner. Painted by another friend. Well. I hope you like. Bye. Uploaded with ImageShack.us Uploaded with ImageShack.us Uploaded with ImageShack.us Uploaded with ImageShack.us Uploaded with ImageShack.us Uploaded with ImageShack.us Uploaded with ImageShack.us Uploaded with ImageShack.us2 points
-
Kit: F-14A Scale: 1:48 Manufacturer: Hasegawa Paints: MM 16440 (Gloss Gull Gray) and MM (36081 (Euro Gray) Decals: Fightertown 48-020 VF-101 Grim Reapers Built OOB2 points
-
Viscount 800 completed in the colours of Cambrian Airways. Brings back fond memories of journeys from Filton, Bristol to my grandparents' homes in Blagdon, Somerset along the A38 past the then Lulsgate Airport (now Bristol International). My first attempt at an S&M (name makes me smile) Kit. Decals from TwoSixDecals...(144-177 Cambrian Early Viscount 800 and 144-367 Vickers Viscount detail set). Kit was a pleasure to build. Decals went on well, reacted positively to Micro Set and Micro Sol. The door outline decals were all red and needed the addition of white strips from the spares box to show up on the red cheat line. Lessons learned include: make sure that all panel lines etc are filled/sanded down before applying detail decals such as the detail set; check the dimensions of all decals to avoid eg. overlap on the nose from the cheat line pieces. Take care. Viscount7 by jonbru0903, on Flickr Viscount5 by jonbru0903, on Flickr Viscount1 by jonbru0903, on Flickr Viscount8 by jonbru0903, on Flickr Viscount6 by jonbru0903, on Flickr Viscount2 by jonbru0903, on Flickr1 point
-
Broqwsing the SAAF site that gingerbob posted in another thread, I found this: SAAF Gladiators in East Africa Stills here: http://johnguguhewitson.yolasite.com/film-screen-shots.php Let the colour debates commence!! :-)1 point
-
Hi all, Well another little Hawk to share with you all. This time a T1A, from the RAE at Boscombe down, in the 'Raspberry ripple' Scheme. Again seats come from Aeroclub, and decals are from the Xtradecal sheet. RBF tags are Eduard and FOD guards are scratch built. Anyway one with the pics.... Hope you like her, you can never have to many Hawks....can ya??? thanks for looking martin1 point
-
I've made some progress on the forward part of the flightdeck. The first job was to add the framework found on the floor, remove the nose landing gear bay crew entry door and make what is I presume the amour plate bulkhead behind the pilots' seats: Then it was on to some good old fashioned scratch-building. Out came the plasticard, evergreen strip and milliput to make the forward part of the cockpit interior. The spares box was also extensively raided, with varius left over resin parts from my B-17 and B-24 used to assist in making the consoles etc: It won't win any prizes for total accuracy, but I think it's a reasonable representation of the real thing. I've also built the crew tunnel which connects the forward and rear pressure compartments. It started life as an off-cut of 22mm plastic piping, with evergreen strip added to represent the prominent ribbing found on the real aircraft. This will provide a nice strong join between the two interior areas to help keep everything nice and rigid: Now I'll be tackling the rear of the forward compartment, where the engineer, radio operator and navigator were stationed. Tom1 point
-
The nozzle part is in the A-4H, M and N kits. In the H and N, you also get the DEFA cannon packs for below the wings as well. It is a decent Skyhawk kit for the money (although they have gotten a little scarce in spots). This build looks great! I wouldn't worry so much about it not quite being an N model as the IAF pretty much upgraded their H and E models to N capability over the years with the same avionics packages. The only way to really tell them apart was the cockpit canopy itself (H and E using the original style canopy).1 point
-
I buit one of this Hobbycraft A-4s, they're less than accurate but they look good, and you did a great job on it, congrats!, btw, does it comes with the nozzle extension?1 point
-
lovely work1 point
-
Thank you, Sir. I use toothpicks. Stout round ones. Always work with a jumble of them near to hand, and frequently sharpen the points on a sanding stick. Lay a little on the rod, press it in the groove. Anything that squeezes out gets cleaned away on the spot with the other end of the toothpick. Anything over-looked gets scraped or cut away later with the curved edge of a #10 blade. The pieces of rod for this are, of course, cut over-length, and trimmed to fit after being glued in. The ends get sanded in to blend with a thin sanding stick. As I said, this is a new technique for me, for doing rib-lets, but I think I like it. It gives a fair match for what is there, and while certainly laborious, is less so than putting in small grooves to leave raised ridgings, and easier to correct when one goes a bit wrong.1 point
-
Nicely done! Were the paint colors stock Humbrol colors, or did you need to modify any?1 point
-
Great looking build and nice paintwork. Always amazed me how much ordnance such a small a/c could carry1 point
-
Ah, the Last Last Lightning show. Remember how it poured down and to quote the announcer 'The USAF F-111 all weather bomber will not fly today because of the rain'. Then the sun broke through for 10 minutes just as the nine ship Lightning display took off. Ten minutes of sheer magic!! I got so wet standing in the rain taking photos it took me three days to dry out. Great models that brought back irreplacable memories. Thank you.1 point
-
This is an amazing build but what I'm really interested is where you get the giant pennies from... (I'll get me coat...) Regards, Adrian1 point
-
That's nice - love the intake covers.1 point
-
Hi Everyone! Time to start work on the new magazine and so am now developing ideas for layouts. Here's the first prototype page and the template for the designs to come. As you can see, I'm trying to create a hyper-clean look, that will get the point across in an easy to navigate way. In order to make it stand away from other titles, I'm also going for a slightly retro feel that doesn't use any form of dropped shadows, clever titles etc. - not that I don't like them, I just want to produce something a little more in keeping with my own taste for once! I hope you like it as much as I do Spencer1 point
-
I think this colour is about right.... so we can peel off the masking, gloss it with Future (or nearest equivaent) and start to put some decals on.... The decals are a mixture of roundels and stencils from the spares box and Alps printed black lettering and numerals.1 point
-
Here are the colour versions. All images shown below are Copyright ©2012 Daniel Cox Vickers-Supermarine Spitfire LF Mk XVIe ISO 100, f9.0, 1/400, 50mm Vickers-Supermarine Spitfire LF Mk XVIe ISO 100, f9.0, 1/640, 50mm Vickers-Supermarine Spitfire LF Mk XVIe ISO 100, f9.0, 1/500, 50mm Cheers, Daniel.1 point
-
That's just gorgeous! One of my favourite machines and I spend many happy lunchtimes sitting beside 'Sea Witch' just outside Dublin. I'm always glad to see this modelled and yours is one of the best I have seen in a long while. Well done my friend.1 point
-
Starting with the wings.... The first thing, after assembly of the upper wing, and ailerons to all wings, is to put in the short ribs at the leading edge. Two must be between each full rib. I have tried a new technique here, using a photo-etched saw to cut in grooves that will receive short lengths of .01"/.25mm rod. Here are both wings, with the lengths of thin rod glued down into the grooves (with CA gel)..... Next step will be dealing with the exaggerated moulding of the ribs.1 point
-
Wow, very nice and quite detailed...the desert pink also looks spot on!!!1 point
-
Well, its about time i started posting instead of lurking. I just today finished off this Mustang (but now i have looked at the pics i realise i have a little bit of tidying left to do). First model really since i was a lad, so i'm just getting back in the swing of things. I'm not happy with the thick red paint, and i got the wrong shade of yellow for the stripes. But, i enjoyed building it and i'm enjoying the learning curve! Next up will be either the 1:72 BF109, or i may tackle the Revell Spitfire mk22 i started nearly 2 years ago... Thanks for looking, Nick1 point
-
You are miles ahead of my mudhen!1 point
-
Adding some color on the fuselage details:1 point
-
The 'SAR Blade' was fitted to all SAR cabs both RN and Crab to aid visual detection by other aircraft and cliff rescue guys, some Wessex blades also had Beta lights fitted to the tip caps to show the tip path at night, very striking when flying in formation at night, the rotor and small strip beta lights on the airframe (pre NVG days) :mental: The SAR Blade was 'only' painted on the upper surface to replace the green paintwork with the cradle stripes being black. Hope this helps.1 point
-
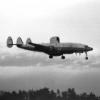
I have been collecting Constellation/Warning Star kits since 1970 and they all remain unassembled to this day. My first is a Japanese produced L1049 control line wooden airframe kit that, when built, is designed to be propelled by four gas engines. It would have a wingspan of slightly more than six feet. Second is an old Revell WV-2 which they affectionately called "Radome" and was produced in Brazil. I think it is a 1/144 scale. The scale is so small I think Iain wouldn't even be able to see it. Third is the Minicraft Navy version EC-121 (I suspect K model) in PMR color scheme. I believe it is in 1/72 scale - also unrecognizable to Iain. Fourth is the Heller in 1/48, the subject of this thread. He might just be able to see this one. I also have two handmade solid mahogany EC-121s; one is a WC-121N (TE 12 from VW-1); the other is an EC-121M (PR 25 from VQ-1) that I commissioned from Philippine artisans in the 1970s that are currently in various states of disrepair due to several household moves in forty years. These models are roughly the same scale as the Heller. Off thread, I also have an unassembled Hasegawa EP-3E (PR 31 from VQ-1) which they misnamed "Orion" instead of Aries. I haven't seen many of these in several years. The kit is a standard P-3 with resin addons for the dorsal and ventral canoes and the "seabean" APS 20 radome. I had intended to build this along with a Revell TU-95D Bear that we used to "play" with in the Sea of Japan. We tried to race a Bear out of Vladivostok in PR 31 one cold day. He smoked us badly and , although he was 10,000 feet above us, we could hear the din of his supersonic propellers through our airframe. While I have every good intention to build these kits it will probably not in fact ever happen. I don't have the eyesight nor the steadiness of hand that I did when I built models in my youth and my wife tells me that I can quit working when they carry me out of my cubicle in a body bag. So, to put an end to my rant, I am willing to part with any of the plastic kits to someone who intends to start it promptly (this year) and complete it within twelve months. I have been following Iain's WIP on the 1/32 EC-121K but I'm not convinced he will complete it in my lifetime or this century. I also have some concerns about shipping these things across the pond. I thought the USA and the UK were allies but it almost took an act of God to ship Iain two disks. Think on these things and let me know...1 point
-
I used a set of dividers and a compass. Firstly I set the dividers to the width of the fuselage which gave me the diameter, then halved it. When the compass was set to size, I simply drew circles on the card and cut it out. It's a great help that the fuselage is round, too!1 point
-
*update 29/08/12* Hi everyone - here's my latest update. I've made a start on the cockpit - the most logical thing to start with was the instrument panel. In my last update I showed you the instrument panel with holes punched out for the various instruments - I've now completed that. My method is this - cut out a duplicate fascia from thin, white plastic card, and give it a coat of gloss varnish - this will give the instruments a nice surface to adhere to and make them show up more against the black of the panel itself. Once dry, place the I.P. over the top and mark out the position of each instrument onto the plastic sheet underneath. I then added instrument dials from Airscale, Mike Grant & Waldron - they are not exactly right, but a close facsimile of what I could see in my reference pics. Data stencils are Airscale again. After sealing these in with a coat of varnish I glued the pre-painted I.P. over the top, and replicated the glass in each instrument with a coat of Micro Kristal Klear. Here's a pic of the real thing, and then mine - the slightly 'frosty' look is what happens when you inadvertently use acrylic varnish over the top of enamel paint! Oh well - it wasn't completely disasterous and looks OK to me: There's some more dials and bits and bobs to add but this represents most of what needs to be on there. Nest up was the throttle quadrant. There's a million pics of this on the net, and in reference books, but once again I will use the excellent images of the restoration of the Duxford B-17G provided by David Whitworth & WIX forum member 'Bomberflight' on the Warbird Information Exchange website - thanks again for allowing me to use them. Here's what I need to reproduce: and the top: You can see it is fairly complex - directly behind it, butted up against the instrument panel is the mag box. Here's mine - plastic card, strip and rod and fine metal wire for switches, along with some spare Verlinden resin boltheads I had lying around: mag box: at the front, underneath the throttle and mixture controls is the autopilot - here it is: I also made the pilot & co-pilot's seats from plastic card, with milliput cushions - I'll add some Radu B. seatbelts at a later date as well as any other details on the seats themselves - I needed to make them so I could figure out how big other things needed to be in the cockpit. I checked the size by using the discarded lower half of a 1/35 figure - and then made the seats a little larger to scale them up to roughly 1/32. bear in mind I'm doing everything by eye here! Finally I chucked a coat of paint on the back of the instrument panel. more things need adding, such as a data stencil on the fire extinguisher...plus a load more wiring etc...I can only add this later once the I.P. is glued in place. This is by no means finished, but you get the idea.... More updates soon! Rich1 point
-
8348M was the maintenance serial, assigned after she was retired to ground duties1 point
-
Good save. Helpful tip, leave the modelling room turning off the lights, make a "walking away" noise, wait a minute then spring back in throwing your light switch. You'll undoubtedly catch all those bits as they come out for a chat and a bit of a larf, pesky models.1 point


This leaderboard is set to London/GMT+01:00