
Diorama Content
Showing topics in Diorama Chat, Work In Progress - Dioramas and Ready For Inspection - Dioramas posted in for the last 365 days.
- Today
-

Rough road Afghanistan 1/35 dio civil works
Andy H replied to Stickframe's topic in Ready For Inspection - Dioramas
Everything so well done. Each further look rewarded with something else to spot. - Yesterday
-

Rough road Afghanistan 1/35 dio civil works
Jim Wasley replied to Stickframe's topic in Ready For Inspection - Dioramas
Great work so life like, mammoth effort put into this Dio. Cheers Jim -
Rough road Afghanistan 1/35 dio civil works
Agent K replied to Stickframe's topic in Ready For Inspection - Dioramas
Very impressive, love it, and the photography and natural lighting makes it look very realistic with good shadows cast too. - Last week
-
 The Kübelwagen is incredibly good ! Well done !
 -
Hi all, more work on my scenery on my dio - I have used some of my water product and added it to a few of the wheel ruts in the roadway, I have also added a wall extension and done a bit of dry brushing on the rocks on the roadway. Erk.
-

Rough road Afghanistan 1/35 dio civil works
Stickframe replied to Stickframe's topic in Ready For Inspection - Dioramas
@Clashcityrocker, thanks, Nigel @Keeff, thanks, Keith. This project evolved over time. The original idea had different vehicles and buildings in mind, but as I did more research, and spoke with some directly familiar with what was happening, the overall direction changed, and here we are. I thought the variety of events, people, places and vehicles became very interesting - a fun project. @Alpha Delta 210, thanks! glad to know that you were able to see the various bits and pieces! @bootneck, hi Mike, thanks very much! As for the build, sure, and I appreciate your comments and questions. I enjoy trying to get results that are not toylike too! It drives me crazy to put time and effort into something with results that are fine, but clearly look like models in photos and not the real thing! As a general observation, I find taking photos of the final build outdoors goes a long way in achieving the desired effect. This can be a double edged sword, as good things look good - and less good things look a lot less good! But with some practice, they get better. Regarding my friend Romain's input, that is a longer story. I post on another site too, and he was a regular, and offered comments on several projects. Going beyond the more obvious, like craftsmanship, his bigger critique had more to do with intent, and building/painting/organizing parts/objects in a way that reflect what they actually look like, rather than what I might think they look like. That is, paying close attention to the details in photos, and if need be, for figures, taking a minute to try and physically replicate what you are trying to make a tiny resin guy do! I think this picture sums this up: Obviously, this is a very close picture, so good and bad shows up 😄 but, I think it illustrates the point - Romain painted this guy and the cat he is petting, and even years later I marvel - this guy even looks good in 1/35 scale. Regarding the dio itself. I enjoy looking up context images and trying to identify the attributes that make up a place. I don't consider this to be the dio equivalent of "rivet counting", and instead aim more for trying to capture the character of a place. So, I search for lots of photos of the place I am trying to make, like in this compilation: After you look at many images, you begin to see patterns, colors and textures that look "right" or "wrong" for what you are trying to build - I suppose maybe it is the equivalent of "rivet counting" 😄 But, as I'm not an architectural, cultural, or military historian, I only take this so far, but far enough to have some elements/textures/colors that I want to try and capture/represent. I enjoy making the buildings and landscape - and usually use a pretty low tech approach. The base is wood frame with a thin plywood sheet, and is 30" (76 cm) x 18" (45 cm). For this project I used rigid insulating foam for the building and base. This is an interesting product, as it is soft enough to allow you to easily emboss with patterns, like stone, brick, and textures, yet tough enough to require some very messy work when carving and scraping to make landforms. I use a product called "lightweight spackle compound" for filling in gaps - you can see it above, as it is white. You can find this in hardware stores, as it is intended to be used to fill cracks in walls, and is cheap! The ground plane is coated with several layers of different densities of "pumice gel" - which is something you can find in art stores. This material is not cheap, but the results are pretty nice. It took me a while to develop a technique for applying this stuff, which I suppose feels more or less like sticky sand. I tend to use the medium and coarse textures. There is a fine texture, but it is really fine, and hard to see when applied. The medium and coarse have enough texture to leave shadows, which I think goes a long way toward making a convincing ground plane. For paint, I sprayed the building and ground plane with a base coat of Vallejo IDF Sand primer, followed by layers of complimentary earth tones. Then, added various washes to punch out details - like the colors and gaps between stones on the walls etc. Figures....another story - They challenge me too. I give each figure a primer coat - either Vallejo IDF Sand or Tamiya grey, then paint the rest by hand (acrylics), using Vallejo Model Air colors for basic colors (clothing, uniforms, weapons etc) and Scale75 paints for skin colors and tones. As is often said, practice goes a long way toward getting this down. I figured out that painting in faint layers, and gradually building colors up helps too - oh, and did I say, practice helps? I does!! I also give the figures various washes. In this case, bodies received dust coats, and skin, various shades of darker colors in order to try and define eye sockets, noses, and ears with shadows. Romain though, used enamels and oils! the results are very crisp and convincing 😲 And here you can see - Romain's guys on the top row, and mine on the lower row. A key difference you can see between our figures is that Romain achieved depth and interest in each, whereas I seem to get the effect sometimes, but not on each, which was not intentional! It turned out that we independently chose different uniform colors, BDUs (battle dress uniforms), and ACUs (Army combat uniforms) - which as it also turns out, is just fine, as in this era, both were being used, and it adds some variety to the scene. Summing up, look at plenty of reference images, practice, and select an approach that you like and can duplicate - and keep after it 🧐😃 @raider of the lost part, thanks! I'm a strong advocate for outdoor pictures, to the point that I look forward to taking pictures of the final projects 😃 Regarding the sheepsfoot rollers: My original idea was to use a wheel loader, as I converted a 1/32 scale toy to an armored unit, which looked pretty good - BUT - it looked HUGE - standing alone it was fine, but next to 1/35 scale figures and vehicles, well - not so good. I think this picture might have given me the idea to scratch build the roller! And, yes, these rollers are commonly used to compact graded and filled surfaces, roads and pads. @Pete in Lincs, thanks, Pete. I enjoy researching projects, and this was no exception. By good fortune I was in touch with a fellow who was doing this work in this setting, so was able to try elevate some authenticity in the project. Thanks for having a look - Cheers Nick -

Rough road Afghanistan 1/35 dio civil works
Pete in Lincs replied to Stickframe's topic in Ready For Inspection - Dioramas
Very convincing, Nick. With an unusual subject too. -
 Stunning job! The natural lighting and background really brings it to life. We're these land fill compactors used for road work?
 -

Rough road Afghanistan 1/35 dio civil works
bootneck replied to Stickframe's topic in Ready For Inspection - Dioramas
Hello Nick, that is truly a magnificent diorama. You mention the figures from your friend but could you give us more of an insight into those and to the buildings? I like to attempt dioramas but I end up with very stilted figures and my buildings come from kits, each looking too toy like. I would appreciate learning more on your technique on the buildings and those Afghan figures please. Also, what size footprint does that diorama cover? Best Wishes, Mike -

Rough road Afghanistan 1/35 dio civil works
Alpha Delta 210 replied to Stickframe's topic in Ready For Inspection - Dioramas
Incredible piece of work, with so much to look at! -

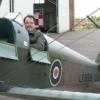
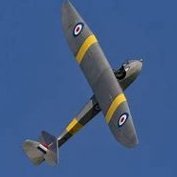
'Out of ammunition. God save the King!'
Keeff replied to Matt P's topic in Ready For Inspection - Dioramas
Excellent work, and a great story. Keith 😁 -
Rough road Afghanistan 1/35 dio civil works
Keeff replied to Stickframe's topic in Ready For Inspection - Dioramas
That is very good! An unusual story, it shows the more 'human' side of the conflict restoring roads. Great backstory, detail and presentation. Keith 😁 -
RAF Wyton, December 1941...making mistakes so you don't have to.
T-21 replied to MOK61's topic in Work In Progress - Dioramas
Its all looking good. Onwards and upwards. -
Rough road Afghanistan 1/35 dio civil works
Clashcityrocker replied to Stickframe's topic in Ready For Inspection - Dioramas
Nice work on all the elements . Nigel -
Hello dio builders, This is a project I built ten years ago. It includes a scratch built sheepsfoot roller, a heavily kitbashed M1083 to represent an armored dump, a detailed MATV, several figures, and of course the dio, which is intended to represent a rural Afghan village. The idea came because I had an acquaintance who was an engineer serving in Afghanistan in the early to mid 2000's, where he operated heavy equipment, and provided plenty of insight and help. This project holds sentimental value for me, as a fellow model builder (Romain Baulesch), who was truly a master model builder, who contributed some figures to the effort and provided greatly appreciated critique along the way. He has since passed, which is a loss for everyone who knew him. While I treasure the figures he sent, I value his friendship, mentorship, and patience even more. He was quite direct with comments and criticism - but with the obvious intent of helping us to improve - someone I greatly appreciate having had the privilege to have known. When I finished the project I was pleased with the build, but the photos were awful - that is, the pictures were fine, but, I like taking outdoor pictures of the finished build, but, as I live in an urban area, it is difficult to get images without visually overpowering backgrounds. Within the last few years, I have figured out how to crop out the unwanted background images (ie vastly out of scale everything), and how to impose what I want of the photo over a context appropriate image. This is a lot less high tech than it may sound, but, I like the results. Happily, I still have my original photos, so didn't need to to take the project out for new photos, which was good, as it was cold and rainy today! Ok, on we go: The idea behind the dio is an engineering team in a rural village working on the roads, along with locals offering their thoughts on all of it - the two guys not dressed in BDUs/ACUs or local clothing could be contract engineers. Well gents, this was fun to take some time to revisit, and I hope you enjoy seeing it, and thanks for having a look - Cheers, Nick
- 10 replies
-
- 24
-

-

-
 Hmm... interesting. The photos are still not matching with what I think I'm seeing. It's either my phone or me! Never mind, the important thing is that I'm happy with it. The next step is going to be some fine splattering. I think quite a bit of practice on scrap pieces is called for. I believe that strips 30' wide either side of the peri-track were flattened, graded, turfed and regularly mown to provide suitable areas for parking and maintaining aircraft without clogging up the hard standing, while the grass further away was left longer between cuts. If that is true I certainly have enough space to model it, I just haven't decided how! That's probably it until Tuesday or Wednesday. Onwards and Upwards!
 -
Definitely an improvement. This is much more like the dirty concrete effect that I was aiming for. I wetted each slab with water from my brush rinsing jar, randomly dabbed on IDF Sand Grey from the Vallejo Air range, which I had ordered by mistake, and then evened it out with a very wet brush. I did this for each individual slab in a fairly random pattern until they were all done. The colour is more yellow-brown than in the photo. I might try to get a better shot in natural light in the morning. Thanks for looking! Murray
- Earlier
-
Thank you Peter, a genuinely interesting read. A lot of tips and tricks there. Plenty to read there along with the rest of his works. RIP longshanks.
-
There's a (sadly) uncompleted diorama by the late Longshanks in the maritime section that may help with some tips
-
Hi all, A simple question which has been annoying me for the past fortnight now, just how do you paint realistic stones cast from plaster? I'm tired of all the warfare in modelling, so am starting some vignettes of stone circles, dolmens etc. Starting with this standing stone, the question is how to make it look real? So far I've primed it, sprayed it with various tamiya acrylics and given it a few coats of matt varnish. I also cast a practice piece which has been treated the same as the real piece, that has been subjected to clay, enamel and oil washes and actual attempts with plain oil paints. I haven't found anything I'm happy with yet. Unfortunately, all the guides I've found don't really show much for the stone shades I'm trying to paint. (yellow rocks on railroad layouts) These are the sort of stones I'm taking inspiration from. I already have plenty of ideas on how to tackle the lichen and moss etc, its just the basic "rock" toning that I can't figure out at all. To those who paint stones for dioramas and vignettes, how do you do it? Thanks, James.
-
We would occasionally get visiting helicopters like this Gazelle
-

Paratroop boarding ladder for D-Day Dakota
DouglasDakota replied to DouglasDakota's topic in Diorama Chat
Thanks for this. I've looked at these but they include far more parts than I want, this time. I think it's back to scratch-build, which is fine by me - all good practice. -
It's my first evening back at the bench for a while and I've been experimenting with getting some colour onto the peri-track without the use of an airbrush. This is a very thin, and deliberately patchy, wash of Vallejo Dark Sand with random hints of Brown Sand. If I was doing a desert, or Pacific island, scene with sand blowing across the concrete I'd be chuffed to bits, but for East Anglia in winter it's a work in progress. You can see where I started in the bottom right hand corner with far too much Brown Sand in the wash, but I think it will be fixable. Life is complicated, so this might be my only post this week. We shall have to see. Thanks for looking anyway!
-
Made a start on some flightline fire extinguishers. I need to make 3 of these, One for each pan.
-
Thanks Jim. The good old days, eh? Thanks a lot.


-
Forum Statistics
239.2k
Total Topics4.1m
Total Posts -
Member Statistics
34,533
Total Members3,626
Most Online
-
Who's Online 108 Members, 1 Anonymous, 934 Guests (See full list)
- Zulu Lima
- Model cobber
- stevehnz
- flyboy2610
- Dunny
- ArnoldAmbrose
- David H
- PF Naughton
- Troy Smith
- dreamwriter
- NAVY870
- Zephyr
- Little Timmy
- Motty
- ziaciacia
- Fukuryu
- Chimpion
- busnproplinerfan
- 28ZComeback
- slippers
- Mike
- S-boat 55
- Hairtrigger
- TallBlondJohn
- Putty Animal
- Whofan
- m0bs
- Nenad Ilijic
- dov
- plasticmasher
- WorstKaasScenario
- Zephyr91
- Richard E
- Web99
- TomMoore
- Jeff.M
- AlexM19
- Horrido!
- Smithy1961
- Hoops
- Dandie Dinmont
- Roel_D
- ERK
- Brian C.
- cngaero
- Zacharias
- GRIM REAPER
- daldroflas
- Dudko210
- zebra
- Ed Russell
- wangmm2047
- 78GT
- gunpowder17
- Sabrejet
- Gary C
- marques
- GStreet
- 172armour
- GiampieroSilvestri
- cardiff guy
- evilbobthebob
- VinBizz4786_
- rodenlee
- voozet
- Cammer625
- binbrook87
- prowler93
- Skyf24
- socjo1
- Greg B
- Stephen Allen
- bigbadbadge
- JCON
- SimonT
- Gruntpa
- davecov
- Tigerausfb
- CT7567
- moviedrone
- Way Out
- Potsie
- Alex Gordon
- Jb65rams
- Tomcat101
- VT Red Sox Fan
- LorenSharp
- Jagdtiger1
- Corsairfoxfouruncle
- rs2man
- Kyle H
- markrob
- dashellis
- Casey
- Lex77
- DennisTheBear
- VMA131Marine
- TimK
- aircraftkit
- ConorC
- Ards664
- rholland
- dnl42
- chrisrope
- Jinxman
- starseeker
- dalea
- Back in the Saddle