


claudius
-
Posts
134 -
Joined
-
Last visited
-
Days Won
4
2 Followers

Recent Profile Visitors
1,248 profile views


claudius's Achievements
")
New Member (2/9)
910
Reputation
-
Found on the web... www.clay-more.com
-
Adversaries in the Mediterranean
claudius replied to claudius's topic in Ready for Inspection - Aircraft
Used AK pigments. 🙂 -
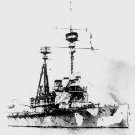
Operation Pedestal. Mediterranean Sea, August 1942. Sea Hurricane Mk IB HMS Victorious vs Savoia Marchetti S.79 278th Squadriglia. 1/48 scale, Sea Hurricane is Italeri's built out of the box while S.79 is Trumpeter's with lots of corrections and surgeries to correct everything.
-
Italian Air Force F-104 1/32 maintenance
claudius replied to Angelo M.'s topic in Ready for Inspection - Aircraft
Bellissimo!!!! standing ovation!!! -
Ok, guys, sorry for the delay. I have made myself the 3d design using Rhino. It is a real brvae new world to explore, that 3d design, initially a little bit complicated but it allows to create everything. Then I sent the 3d file to some guys in Italy (I guess there are plenty of them inthe UK as well) who provide high-res printing services. I paid something like 60 Euros for that. I designed the decals with CorelDraw and have them printed in just a couple of days from a company in Italy called Fides (excellent quality, they ship abroad as well) it was about 20 Eur.
-
Zline and thin fishing line
-
Ok.. I can call it done. Not pretty satisfied though, once again I was far too eager for having it finished and speeded it up too much. But after all I find it looking nice in my WW1 collection.
- 21 replies
-
- 15
-

-
Now time has come to put in place all the struts and to lay the upper wing onto the lower one. This requires a lot of patience, biplane builders now that very well. This is a bomber, my first WW1 bomber, lots of struts that must be aligned perfectly with the holes in the lower wing. Really lot of patience also because its is a short run kit and it lacks precision in its molds. I had some trouble particularly in setting the fuselage and engines struts. But after a whole day of work I did it. I applied at the bottom of each strut, some small rings made of twisted iron wire meant to allow the wiring to be inserted into them to facilitate the wire setting. This way, using a fishing line, the wiring would provide some strenghtening of the overall structure. Tail plane assembly was very easy and quick, luckily.
-
The detailing level has nothing to do with your masterpiece, but I am having a good time!
-
Gotha's job goes on... After having joined the two fuselage halves, with no issues whatsoever, I attached it on the lower wing assembly. I glued the struts on the upper wing with just a drop of vynilic glue (to be removed later) to dry fit the assembly. This did not show any particular problem. I was ready for the most exciting part of airplane modeling in my opinion: painting! I was really intrigued by that weird yet fascinating camouflage and I acquired Mister Kit's acrylic colors, specifically made for the LVG Gothas. They looked too light for me: I would have aestethically preferred darker tones, but after having checked the B/W pictures of those Gothas, I accepted the fact that Mister Kit's colors were realistic as in the historical reference those aircraft did not seem very dark. First coat was the light blue. It was pretty clear that the camouflage pattern had thiny soft edges, thus I decided to apply a masking raised a couple of millimiters from the surface, in order to give that soft edging effect after spraying. The results were quite satisfying to me. After few corrections by brush where necessary, I sprayed all the model with the old faithful, reliable and cheap Future (now called Pledge - totally impossible to find here in Italy - had to order it on eBay LOL). Time to applying decals! I had to use the box's crosses and I realized that they were poorly printed as the white and black did not match perfeclty... had to correct with a lot of patience and a brush with an extremely thin tip. My homemade decals were much better and showed no issue at all. Another coat of Pledge/Future to protect the decals and I was ready to go to bed.... Tomorrow will be time to use oils for panel lines...
-
I have been through all this fantastic thread... Man this is stunning! A real masterpiece very, very inspiring! By the way what Harley(s) do you have? I have a highly customized 1200 Sporty... ( I am OT I know...)
-
My work goes on quicker than expected, I must say. Placing the new engine nacells was pretty stright forward and required just some putty/sanding job. No big deal. I noticed that the upper wing showed a big problem. The kit included two semi-wings that were meant to be connected with no pins and along a very small surface. The wings were so long yet thin, with almost no place to insert any pin enough strong to keep them together to make a single, resistant, upper wing. Gotta figured some solution out of it.... I decided to prepare just a small hole for a tiny steel pin in order to keep them in place while I placed and glued two steel plates, above and below the junction, to strenghten that assembly. The upper plate would have been hidden by the double tanks, while the lower one would have been virtually invisible. Everything was strong enough, I had to work little bit with putty though to fill the gaps. By the way... In the Windosock's reference drawings there is a gap between the two half upper wings... This would be a nightmare for me to make a adequately strong junction. As I said before, the wings were too thin to insert pins... Luckily I noticed, in historical photos that some Gothas had that gap in the junction covered by fabric... Let's assume that the Mo.Ro.Tas. was one of them, right? After the upper wing job was done I reverted my attention to the interiors. Even if the kit included a PE sheet, it was very simple, I had to add few details by myself. In fact, all the interiors are completely open and well visible in this airplane. I made the right cockpit window with acetate sheet. Closed the fuselage halves, put putty on the junctions, sanded them, sprayed Tamiya grey primer, fixed the flaws highlighted by the primer and I was ready for the next step. Which in a biplane model was of utmost importance: Dry fitting the wings.....
-
I guess that Hippo's Gotha was re.bided by AZModels. Pretty hard to find anyway though.
-
First step was the "surgery". Necessary to open the hole to acocmadate the missing window and to remove that popping out volume at the pilot's station left side. Which was missing in G IVs. Luckily some G IVs had the famous "Gotha Tunnel". This was a kind of emptyness in the belly to allow the rear gunner to fire below the airplane I will keep it. After having opened the window and removed that damned thing I closed everything with a piece of a credit card, which was made of plastic stiff and strong enough. A lot of putty will be placed there.
-
Gotha G IV 1/48 Excuse me first of all for my horrible English. At least it is genuine, no online translators... It is widely accepted that Evil can be fascinating and somehow cool. I have always found WW1 German bombers perfectly fitting this idea. They were the ideal bad guys' mounts. Starting with the name... “Gotha”... Mmmh sounds quite ghastly, huh? Their colors... those Eiserne Kreuze (much, much cooler than the later, straight lined, Balkan ones). If Snowwhite’s Evil Queen, aka Grimilde, did ever fly a plane, it would have been a Gotha, night bomber. For sure. (By the way I have always found Grimilde much prettier than Snowhite) And the baddest of all, in my humble opinion was the “Mo.Ro.Tas.” a Gotha G IV, (LVG built) serial 991/16. Her colors... Blue and Purple, grim and stylish at the same time!!!! That lettering, in a beautiful Art Noveau style, applied on both sides, was indicating the crew’s names. There is a fantastic kit by Wingnuts of this plane, but it is in 1/32. Since I build WW1 planes only in 1/48 (adhering to the same scale for every model in one collection is a must for me) I had to find a solution. Managed to find a very, very rare Gotha kit in 1/48 from Hippo (never heard about htis brand before) on Ebay, I made it mine even if it was bloody expensive. The kit quality was excellent, unfortunately it was a later Gotha G V. Referring to the Windsock Datafile booklet titled Gotha! I studied carefully everything and pointed out the differences between GIVs and GVs. Those weren’t so many. I had to open a window on nose left side, flatten out the fuselage left side, in correspondence with the pilot’s station. G IV had also on the top of the upper wing a double tank. So I had to clone that single tank included into the box. Did it by casting an adittional one with resin. Simple job so far. The biggest issue was the engine nacelles. The GV had the engines mounted on struts above the lower wings, while the GIV had bigger engine nacelles kind of merged with the lower wings. No easy job, this one. I decided to play some 3D design on my PC. I completely rebuilt them according to the very detailed scheme fund on Windsock’s booklet. Sent the files to a 3D printing services provider and got back a pair of perfect GIV nacelles. I had fun in designing my own decals as well. All this stuff has been lying inside my hobby room for about three years. Now it is time to start building it and I wish to share this experience with you guys. I am a modeller who likes quick building with acceptable accuracy. I eager to call them done to pass to the next one. But not this time, at least this is my intention. I want to make out of it a good model, I will force myself to be patient and slow pacing. Every piece must be the best I can do. No question about it. The real Mo.Ro.Tas. crashed into a Belgian farmhouse
