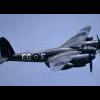
mossieramm Posted April 17, 2007 Share Posted April 17, 2007 Hi all, I’ve just started my first multi media kit, a CA Sea Hornet. Although I can find some information and a few exterior shots of the Sea Hornet on the net I still have a few questions. 1 What colour is the cockpit ?? Does anyone have any (colour ??) photos of the cockpit ?? 2 I was planning to do this kit OOB, but I want to add some seatbelts, what type were fitted to the Sea Hornet ?? 3 What colour are the wheel wells ?? If anyone has any tips or tricks on building a limited run kit, I would be glad to hear them. Thanks, David. Link to comment Share on other sites More sharing options...
zeke Posted April 17, 2007 Share Posted April 17, 2007 Tips and tricks...I can juggle, is that a trick?...anyway...my advice with any limited run stuff...take your time....lots of trial fits and trimmings and fettling to fit...don't ruch anything and you'll be just fine. As for the seatbelts thres another topic on here somewhere with someone scratch building the interior and some excellent shots of the seat and instrument panel of the real thing...I'll see if I can find it...hang on a mo... Link to comment Share on other sites More sharing options...
zeke Posted April 17, 2007 Share Posted April 17, 2007 ...ok it's in the modelling section, Work in progress: Aircraft: Aaah DeHavilland and it's by the wounderful Jenshb...ok? Link to comment Share on other sites More sharing options...
mossieramm Posted April 17, 2007 Author Share Posted April 17, 2007 Thanks, I'd seen the post which is a big help, but what's the rest of the cockpit colour, sidewalls etc ?? The instructions say gray-black. Is that black, with a hint of gray ?? What are those rectangular blocks behind the seat ?? David. Link to comment Share on other sites More sharing options...
jenshb Posted April 18, 2007 Share Posted April 18, 2007 Hi David, The basic colour for the cockpit would be black, to avoid a Black Sea, I'd use very dark grey, like Humbrol Panzer Grey (forget the number though) or RLM 66 Scwartzgrau. This will brighten the interior slightly, but still give the impression of a black cockpit as well as allowing you to highlight details and simulate shadows with a wash. You can also paint elements in slightly different shades of very dark grey or "off-black" to add interest, as well as breaking up the monotony even further. The cockpit was assembled from components that were "black", some where matt (like the basic cockpit structure), whereas other components were more like semi-gloss. The rectangular boxes behind the seat are ammuniation storage if I'm not mistaken. As for further references, the recently released Sea Hornet - From the cockpit by Ad Hoc Publications is highly recommended. Not HyperScale highly recommended, but really, really highly recommended:) Lots of pics printed on quality paper shows up details quite well. Complement that with the Warpaint book and the Pilot's Notes on the Hornet F.3 (there are differences that become clear with the Sea Hornet book), and you've got pretty much all the references you need. The Hornet File is useful as a read, but the paper quality is not very good, so the pics suffer. It can shed some light on certain aspects though, so pick up a copy if you find one at a decent price. The seatbelts - Eduard does an RAF Late set in the pre-painted series, no 49007. The belts you want to use are the tan ones with the buckle (part no 11) . The buckle was attached to the seat armour, though I haven't found out yet how the pilot was able to move back and foarwards (assuming that belts in those days had inertia reel locks for this added crew comfort?). Wheelwells...I really don't know, but my assumption is that they were painted like the Mosquito. THe undercarriage legs seem to be aluminium/silver paint, and I assume that the wheelwells were painted the same way rather than interior grey green. If anyone disagrees, please let us know before we paint... Tips for building limited run kits? Test fit and never take anything for granted pretty much sums it up. For example, the tailplanes as assembled will give you a elevator hinge line with gentre forward sweep. This is not correct, but is easy to fix by removing a wedge of plastic from the tailplanes. The engraved position of the wingspar will also have forward sweep if assembled as per the kit, and I think in relation to the wing, this is correct as it is perpendicular to the wing root. I removed a wedge of the raised wing root from the fuselage to compensate. The wings should have a dihedral of 1 degree on the upper surfaces, so it may be useful to make a wing spar that helps you set that more accurately. Gaps at the wing root may be eliminated by filling or removing plastic (or a combination) until the gaps are gone. Note too that the main wheel wells are located too far forward - they should be moved aft approximately 4 mms for the forward location and 2-3 mms for the rear. The rear bulkhead needs to line up with the panel line on the wing, though I have yet to determine the best location for it. The rudder trim tab is too tall and should be shortened. The tailfin should also be reprofiled a tad. By shortening the rudder trim tab, the curve can start further down, and this will make the tailfin take on a less straight-back appearance. The tailwheel is wrong - it is doughnut shaped rather than the grooved anti-shimmy shape similar to the Mosquito or even the nsoewheel of the Vampire. The tail wheel fork in my kit was very thin and fragile and broke. Note that the undercarriage legs should take a forward slant - I don't know yet if the kit ones do, but if you move the main wheel bay aft, then it might be worth checking. The plastic in the nacelles - and kit in general - is quite thick, and this is in most cases a blessing, as well as a necessity from the tooling process. Not a complete list of modifications I am in the process of or going to do on the kit, but things you may wish to look to improve. Jens Link to comment Share on other sites More sharing options...
mossieramm Posted April 18, 2007 Author Share Posted April 18, 2007 Thank you Jens for that extensive list. I didn't know there was that much to correct. I'll see how far my skills get me. I'll start with the simple stuff first and order the Eduard seatbelts and then take it from there. Thanks, David. Link to comment Share on other sites More sharing options...

Recommended Posts
Create an account or sign in to comment
You need to be a member in order to leave a comment
Create an account
Sign up for a new account in our community. It's easy!
Register a new accountSign in
Already have an account? Sign in here.
Sign In Now