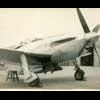
Michael louey Posted January 30, 2018 Share Posted January 30, 2018 (edited) Another of my recent builds I finally uploaded to my new hosting account - Eduard's Fw 190A-5. This is the Weekender edition and is the aircraft of Oblt Rolf Strohal of Stab/JG1 The members at 72nd Scale Aircraft have compiled a nice set of build notes for the Eduard kits and you really need to have a look to avoid nasty surprises late in your build. (See link here: http://s15.zetaboards.com/72nd_Aircraft/topic/812177/1/#new). It's nowhere near as easy a build as the Hasegawa kit but is much more detailed (and much more accurate for the A-5). Libor's build was useful to work out how the inner gear covers fitted. Once you look at it, it makes sense as the covers include a cutout for the shell ejection chutes. Hopefully Neil (Falkeins) is online soon as he is very interested in JG1 machines. Edited April 18, 2018 by Michael louey Postimage issues 18 Link to comment Share on other sites More sharing options...
Corsairfoxfouruncle Posted January 30, 2018 Share Posted January 30, 2018 Very well done Focke-Wulf and you can get his Attention by doing this. @FalkeEins Link to comment Share on other sites More sharing options...
Thud4444 Posted January 30, 2018 Share Posted January 30, 2018 Wow, thats super nice! Link to comment Share on other sites More sharing options...
Spitfire31 Posted January 30, 2018 Share Posted January 30, 2018 Very neat Würger! That Eduard kit is a temptation on my horizon… The fuselage Balkenkreuz and the fin Hakenkreuz decals look a bit 'glued on top', since the underlying panel lines aren't continued on them… Nice modelling, and thank you for the link to the kit experiences on 72nd Aircraft! Kind regards, Joachim Link to comment Share on other sites More sharing options...
Michael louey Posted January 30, 2018 Author Share Posted January 30, 2018 4 hours ago, Spitfire31 said: Very neat Würger! That Eduard kit is a temptation on my horizon… The fuselage Balkenkreuz and the fin Hakenkreuz decals look a bit 'glued on top', since the underlying panel lines aren't continued on them… Thanks for the observation Joachim! When you're looking at a model for ages, some things just don't register anymore. When others have a look, especially in high detail, they spot issues like this. Part of the problem is my solution to the RLM 74 centres to the fuselage Balkenkreuz. I sprayed a 2nd decal with grey and put the white Balkenkreuz over it. This extra thickness makes it harder to conform to panel lines. I spent some time this evening after work applying more of my strongest decal softener and reapplying the wash. Looks better but far from perfect! Don't think I'll worry about updating the pictures. Cheers Michael 1 Link to comment Share on other sites More sharing options...
Touvdal Posted January 30, 2018 Share Posted January 30, 2018 Nice build, and with the right color on the JG 1 emblem. Cheers Jes Link to comment Share on other sites More sharing options...
Meatbox8 Posted January 30, 2018 Share Posted January 30, 2018 A very nice looking 190 with excellently applied nose markings. Link to comment Share on other sites More sharing options...
glatisant Posted January 31, 2018 Share Posted January 31, 2018 That's a good looking FW190. Looks the part in every respect. Link to comment Share on other sites More sharing options...
IanC Posted January 31, 2018 Share Posted January 31, 2018 Neat. Looks the business.. Link to comment Share on other sites More sharing options...
Ed Russell Posted February 1, 2018 Share Posted February 1, 2018 Mmmm... not bad! Link to comment Share on other sites More sharing options...
mick Posted February 1, 2018 Share Posted February 1, 2018 great work Link to comment Share on other sites More sharing options...
Michael louey Posted February 9, 2018 Author Share Posted February 9, 2018 Though I wasn't planning to add the updated photos of the 190 discussed with Joachim, I had to setup the camera gear again for some Tintin subjects (see other topics) so I decided to shoot the 190 with decals redone to show the difference. As I said earlier, nowhere near perfect but hopefully an improvement. Cheers Michael 2 Link to comment Share on other sites More sharing options...

Recommended Posts
Create an account or sign in to comment
You need to be a member in order to leave a comment
Create an account
Sign up for a new account in our community. It's easy!
Register a new accountSign in
Already have an account? Sign in here.
Sign In Now