Graeme H Posted January 29, 2018 Share Posted January 29, 2018 This will be my entry for this, Air Niugini operate into my home town of Townsville several times a week, usually with a Fokker 70's, though I have seen these 737's This is an older slightly more colourful scheme I want to do, when I was a dispatch officer we usually called them Pixie, due to their 2 letter IATA code of PX. I only recently got the V1 Decals, and have not used them before, but have heard good things about them, and besides no one else is going to do these. DSCN0940 by qfa_tsv, on Flickr 4 Link to comment Share on other sites More sharing options...
Mr B Posted January 29, 2018 Share Posted January 29, 2018 Nice I will be tracking this.....I am thinking on getting an 800 series...myself...........Do you know how this stacks up against the revell kit ? Link to comment Share on other sites More sharing options...
Graeme H Posted January 29, 2018 Author Share Posted January 29, 2018 I haven't built one of these Zvezda ones yet, but have built a few Revell ones, and looking in the box the engines and wingtips are much better to my eye, and I used to be around them every day, so have a pretty good understanding of the real ones Link to comment Share on other sites More sharing options...
Romeo Alpha Yankee Posted January 29, 2018 Share Posted January 29, 2018 20 hours ago, Mr B said: Nice I will be tracking this.....I am thinking on getting an 800 series...myself...........Do you know how this stacks up against the revell kit ? The Revell kit has its known issues such as the intake shape, low cabin window line and main gear leg length. The winglets are also mis-shaped. Zvezda seems to tick the boxes in all these areas. Link to comment Share on other sites More sharing options...
Mr B Posted January 29, 2018 Share Posted January 29, 2018 Cheers Ray....much appericated...... i was partial to a Revell one has there is after market decals for a Malaysian 800. Wonder if it fit on a zevzda one.....which clearly looks like the better of both following your advise.. rgds brian Link to comment Share on other sites More sharing options...
Romeo Alpha Yankee Posted January 29, 2018 Share Posted January 29, 2018 Looks like a nice and simple scheme Graeme, had not seen it before. Link to comment Share on other sites More sharing options...
Grandboof Posted February 3, 2018 Share Posted February 3, 2018 Will be interesting to see how this turns out Will be watching Nice choice of colours Martin H Link to comment Share on other sites More sharing options...
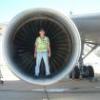
Graeme H Posted February 5, 2018 Author Share Posted February 5, 2018 A little slower off the mark than most, as I went away for the weekend to a Model Show just down the road, about 720 kms Anyway, this Zvezda kit is really really nice, I love it, I started at the traditional place of the Engines, as you do, put the outer ring onto the inner, and gave them a coat of Alclad primer, will paint the Alclad on in the next day or so. DSCN1171 by qfa_tsv, on Flickr Added the supplied windows, and got the fuselage together, utterly seamless. I put some nose weight in, but it's in PVA glue, and it keeps running out when I try to turn it over, so that will have to wait for tomorrow. DSCN1172 by qfa_tsv, on Flickr The wings have a couple of spars to add and then the tabs on the wings form the top of the Undercarriage bay, so need to paint before putting together, now they are nominally white, but don't stay that way, it gets dirty in there, and they spray a type of oil based preservative all over everything to try and keep corrosion at bay, I won't even try to do much of what is in the photos below, but will try and impart a dirty look DSCN1173 by qfa_tsv, on Flickr The real thing, my photo Undercarriage bay by qfa_tsv, on Flickr DSCF0200 by qfa_tsv, on Flickr 6 Link to comment Share on other sites More sharing options...
Skodadriver Posted February 5, 2018 Share Posted February 5, 2018 I haven’t built the Zvezda kit yet so I’m following this with interest. It’s maybe a bit late for your model but there is a photo-etch set available from Metallic Details if you want to add some additional detail to the wheel wells. Link to comment Share on other sites More sharing options...
pinky coffeeboat Posted February 5, 2018 Share Posted February 5, 2018 Off to a good start. I like the Zvezda kit a lot- it's nice to have a model where pretty much everything is accurate for our needs. I've enough Revell 737 and Braz engines to make enough as many 737s as I could probably want but that hasn't stopped me getting more Zv kits too. As to the dirty appearance of the main bay, we spray our aircraft with the same stuff and it always looks pretty awful to me - in fact I'm constantly wiping it to check it's not a leak! Jeff Link to comment Share on other sites More sharing options...
Viking Posted February 5, 2018 Share Posted February 5, 2018 Good to see a Zvezda kit, I'll be interested in your thoughts on building it, and if you think it is as good as it looks in the box. Not having built one yet, I hope it is! Link to comment Share on other sites More sharing options...
Graeme H Posted February 8, 2018 Author Share Posted February 8, 2018 Moving onto the wings I attached the uppers, and the flap track fairings, very small fit issue with these, as there is a slight gap at the front on most of them, no deal breaker, but probably noticeable when painted and you turn it over. DSCN1176 by qfa_tsv, on Flickr here you can see the Vellejo Acyrlic Plastic Putty added to the front of the outboard one This stuff DSCN1179 by qfa_tsv, on Flickr Now I have just been using a cloth or tissue to remove the excess, no sanding off, and it works a treat, here it is after doing so, I guess the big thing is not to press down too hard and create a dip, will see what it looks like after a coat of paint. DSCN1177 by qfa_tsv, on Flickr and here a gap between the fairing and the wing was dealt with in seconds DSCN1178 by qfa_tsv, on Flickr I will wait for all this to set before I attack the seam line running down the centre of each one, much easier to sand down when attached to the wing. I tried the fit beween the wings and the fuselage, and it is so good I though I would paint separately, so as to cut down the masking. Now I had heard that Tamiya has released a new line of Lacquer paints, supposedly what's in the spray cans. So went and got some of it, which arrive yesterday,and today I used the Flat White. DSCN1182 by qfa_tsv, on Flickr I can only say this stuff is super thin in the bottle, and didn't spray very well at all, really wouldn't atomise properly, I tried a multitude of things, lower pressure, higher pressure, shooting closer, further away, 2 different airbrushes, even used the acrylic nozzle for the Aztec, as well as opening up the Iwata, seemed best when thinned even more, but then had absolutely no opacity at all, and seemed to splatter a lot. I'm not sure yet if ordinary Tamiya Acrylic will go over it without any problems, yet to find out as I will leave this overnight to set up properly, I painted an unused wing tip so I can test hopefully without ruining the whole thing. The fuselage, believe it or not painted with it DSCN1184 by qfa_tsv, on Flickr You can see in this the blotchy effect, and how I have used the Vallejo filler on some of the windows, this was probably not needed, but I thought I would try it anyway, quite chuffed with the effect DSCN1185 by qfa_tsv, on Flickr a picture of the whole thing DSCN1188 by qfa_tsv, on Flickr That's your lot for now 2 Link to comment Share on other sites More sharing options...
Romeo Alpha Yankee Posted February 8, 2018 Share Posted February 8, 2018 Nice lot Graeme, I have this kit and it is good to see others tackle it. Link to comment Share on other sites More sharing options...
pinky coffeeboat Posted February 8, 2018 Share Posted February 8, 2018 Mmmh, that's rather unusual for any Tamiya product to not work. Their white spray can primer is very impressive to use. What do you normally use to paint be white fuselage? I used Mr Color or Hobby pure white and it was awful, it had a creamy white appearance. Good, rapid progress on the model. Jeff Link to comment Share on other sites More sharing options...
Graeme H Posted February 8, 2018 Author Share Posted February 8, 2018 I mostly use Tamiya Acrylic mainly because that is what is available locally, first flat then a gloss coat at the end, usually only takes one or two coats to get a nice even finish and I find the Flat very easy to polish with a polishing cloth before the gloss. Both the GSI Creos and Tamiya acrylic paints are good for me, never yellow or change colour, I have also used automotive paints decanted to spray through the airbrush, didn't have any at the moment, but if the Tamiya acrylic over the Tamiya lacquer gives me a problem might go get some. Never been able to use spray cans, I always get it on too thick, but as I think I have some Tamiya spray cans might go look to see if one of them is white and might try again, I mean what could go wrong I'm not sure if I mentioned this before, but I love this kit Link to comment Share on other sites More sharing options...
Skodadriver Posted February 8, 2018 Share Posted February 8, 2018 Like you I can never get a decent finish with automotive aerosol cans and I always decant them to my airbrush. However in my experience Tamiya cans usually do the business since they are (obviously) designed to be used on models rather than vehicles. Link to comment Share on other sites More sharing options...
Grandboof Posted February 9, 2018 Share Posted February 9, 2018 Great progress Martin H Link to comment Share on other sites More sharing options...
Graeme H Posted February 9, 2018 Author Share Posted February 9, 2018 OK, much better day in the paint shop, went back to my old method, of putting on Tamiya Flat White, first the centre section of the wing DSCN1189 by qfa_tsv, on Flickr Then first coat on the fuselage DSCN1190 by qfa_tsv, on Flickr Resting after the second coat, soon the gloss coat DSCN1192 by qfa_tsv, on Flickr Much happier with the results 3 Link to comment Share on other sites More sharing options...
Romeo Alpha Yankee Posted February 9, 2018 Share Posted February 9, 2018 Looks much better, better the devil you know, hey Graeme Link to comment Share on other sites More sharing options...
Graeme H Posted February 18, 2018 Author Share Posted February 18, 2018 OK, the fuselage has been glossed up, and the wings would have been except for the pain in the butt fairing in of that little piece with the winglets, that has the logo lights on it, which is really beginning to try my patience. Sprayed some white on the winglets and it came out blue, Seems what I thought was good clean up after spraying some blue just wasn't up to scratch and spent the next hour getting blue out of the airbrush and off me, for such a little job it sure went a long way anyhow the fuselage, wings should be on tomorrow DSCN1218 by qfa_tsv, on Flickr 8 Link to comment Share on other sites More sharing options...
Mr B Posted February 20, 2018 Share Posted February 20, 2018 Looks smooth and nice rgds Link to comment Share on other sites More sharing options...
Romeo Alpha Yankee Posted April 18, 2018 Share Posted April 18, 2018 Must be almost ready for decals Graeme? Link to comment Share on other sites More sharing options...
Wilks Posted April 22, 2018 Share Posted April 22, 2018 Coming along very nicely their GH! AGW.. Link to comment Share on other sites More sharing options...
Graeme H Posted April 26, 2018 Author Share Posted April 26, 2018 OK, getting stuck into some models again, so this is slowly progressing first up was the mating of the wings to the fuselage, the fit was pretty good, but did leave a small step at the front and the back, so being a bit anal, I decided I couldn't live with that and got stuck in to sand them down DSCN1234 by qfa_tsv, on Flickr That required several paint sand, paint sand, paint sand, , so here is where I'm at, and started to put on the decals, DSCN1261 by qfa_tsv, on Flickr baulking a little at the really big one with the windows and logo and swooping whatever they are called, this decal will have to go on in one piece and on two different sides, remember this point in time in case some mental health issues start from her on in. 🙄 6 Link to comment Share on other sites More sharing options...
FortyEighter Posted April 26, 2018 Share Posted April 26, 2018 This is progressing well - just take your time with the window / logo decals Link to comment Share on other sites More sharing options...

Recommended Posts
Create an account or sign in to comment
You need to be a member in order to leave a comment
Create an account
Sign up for a new account in our community. It's easy!
Register a new accountSign in
Already have an account? Sign in here.
Sign In Now