Pouln Posted December 21, 2016 Author Share Posted December 21, 2016 Next up the armrest. Moore shows a nice wavy armrest. I replicated it and again covered it with a single piece of leather, stretching it to the limit. Thanks to that not a single crease/wrinkle in the leather. 2 Link to comment Share on other sites More sharing options...
Pouln Posted December 21, 2016 Author Share Posted December 21, 2016 There's a map holder on the door, with a flap covering it. I replicated it as such: Next some alu work. The window opener and dooropener in the kit are way to coarse. I scratched them from aluminium and turned a bezel on the lathe. Afterwards I covered them with BMF. 2 Link to comment Share on other sites More sharing options...
Pouln Posted December 21, 2016 Author Share Posted December 21, 2016 After fitting all this with the body on the chassis rails, I ran into the exact problem that Codger described in one of his earlier posts. It all looked great but the door could never be closed due to the thickness of it. I therefore skimmed both the outer doorpaneel and the inside doorpanel as much as possible, making sure that the lower rear part of the doors was as thin as possible. Link to comment Share on other sites More sharing options...
Codger Posted December 21, 2016 Share Posted December 21, 2016 20 minutes ago, Pouln said: After fitting all this with the body on the chassis rails, I ran into the exact problem that Codger described in one of his earlier posts. It all looked great but the door could never be closed due to the thickness of it. I therefore skimmed both the outer doorpaneel and the inside doorpanel as much as possible, making sure that the lower rear part of the doors was as thin as possible. I'm not pleased you shared the same problem as me but am glad that the warning was helpful. Ultimately as you know, I was compelled to build my own doors in a totally different way than Pocher and much thinner (and in my case, lighter). Good luck with this modification; hope it solves the problem. You won't know for sure until the hinges and latch go on because they pull things their own way. So don't go to paint until that's all been sorted. Best advice from pain I can give you... C 1 Link to comment Share on other sites More sharing options...
Pouln Posted December 21, 2016 Author Share Posted December 21, 2016 (edited) Thanks Chas. I can already tell you that this didn't solve the issue. In fact I had to turn to drastic measures. I had to make the seats smaller which I already have done. Below are the pictures before and after. I actually was able to do this while saving the leather. I loosened it just enough to be able to saw of the side and rebuild it in a smaller way and glue everything again. I had to trim the leather parts again to ensure that it would look ok, but you can't see that this was repaired. Edited December 21, 2016 by Pouln 3 Link to comment Share on other sites More sharing options...
Pouln Posted December 21, 2016 Author Share Posted December 21, 2016 In the mean time I decided I needed a better stand for the car. This is what I have now and moving the thing around is quite a hassle. As I have a few Pochers in my stash needing different width and length, I wanted something flexible. I had this lying around and didn't use it, but decided that this would form the perfect base. My workbench has a separate top board that covers a big hole in the bench (it actually started life as a kitchen top and the stove was located there). I cut the separate topboard and channeled it such that the Dremel bench would fit into it. The only other thing needed was a set of posts that could be moved fore, aft, left and right, making it possible to fit any size of model. I channeled 4 pieces of Alu profiles: The idea is to create 4 posts like this one. The hole in the top is to hold the axle I later decide to give each post a hole much lower. With that I can put the car upright in the lower holes and upside down in the higher holes. I just need 4 of these so this is the material needed: The only modification to the Dremel bench needed are holes in the blue supports, which will not do anything to the functionality of the bench. This is the end result. I exhanged the normal screws with a set with thumbscrews, making it easier to change the width/length This btw is also the status of my build as it was this week. 5 Link to comment Share on other sites More sharing options...
Codger Posted December 21, 2016 Share Posted December 21, 2016 Again - I'm sorry you're experiencing the pain but a wonderful save of the seats. Looks great. Your jig is also a machinists delight - nice problem solving. Wayne has also come up with an ingenious jig which is completely flexible with the Pocher classics. 1 Link to comment Share on other sites More sharing options...
kpnuts Posted December 21, 2016 Share Posted December 21, 2016 Superb work, as always. 1 Link to comment Share on other sites More sharing options...
Pouln Posted December 21, 2016 Author Share Posted December 21, 2016 Ah, well it sure felt as real pain, but I'm quite pleased with the result after the modification. The jig is nice and helps working on the model without causing damage. I may decide to create 4 short posts to be used when working on the model upright. Link to comment Share on other sites More sharing options...
rjfk2002 Posted December 21, 2016 Share Posted December 21, 2016 Beautiful save on the door inserts. How are the doors hinged? Is it one hinge per door or are there separate upper and lower hinges? Getting the doors lined up on my Bugatti was a real nightmare. Hopefully the engineering is better on this kit Beautiful save on the door inserts. How are the doors hinged? Is it one hinge per door or are there separate upper and lower hinges? Getting the doors lined up on my Bugatti was a real nightmare. Hopefully the engineering is better on this kit 1 Link to comment Share on other sites More sharing options...
Pouln Posted December 21, 2016 Author Share Posted December 21, 2016 Thanks guys. The hinges on the doors are quite simple. There is a pin between the upper and the lower protrusion at the front of the door. This pin goes into a channel which is made at the inside of the body. A simple piece of plastic will be glued over it. That's the whole thing. I will show it later on. 1 Link to comment Share on other sites More sharing options...
Pouln Posted December 22, 2016 Author Share Posted December 22, 2016 I also worked on the underside. I assembled the exhaust system. I didn't like the big ring that was molded at the underside of the tank so I took 70% off. Instead I used metal wire to create a brace. I added oil lines to and fro the oil cooler, clamped them to the chassis rails and did some weathering at the engine . Frankly, seeing the pictures no I hate it that I didn't do anything about the totally unnecessary incomplete exhaust pipes delivered by Pocher. I fear I cannot do much about it now, so that one is for a next alfa. 2 Link to comment Share on other sites More sharing options...
Pouln Posted December 22, 2016 Author Share Posted December 22, 2016 One morning I found that the remaining part of the exhaust support at the bottom of the petrol tank just snapped off the tank. I had to find a way to mend it. Luckily there was quite a big surface that could be used for glueing. I scratched a plate to fit around the support and glued it with the support to the tank. I also cut the exhaust pipe in an angle, thin the wall and painted it black on the inside. 1 Link to comment Share on other sites More sharing options...
Pouln Posted December 22, 2016 Author Share Posted December 22, 2016 (edited) Topside I scrathed the missing floor parts that you may have seen before. Also between the cross member and the petrol tank. I also scratched a battery including connectors. Edited December 22, 2016 by Pouln 1 Link to comment Share on other sites More sharing options...
Pouln Posted December 22, 2016 Author Share Posted December 22, 2016 I haven't shown the wheels yet. I did them unpainted many years ago. I now painted them black I also made sure that there was wear on the tracks. Link to comment Share on other sites More sharing options...
Pouln Posted December 22, 2016 Author Share Posted December 22, 2016 On the body I have opened the vents on the side of the cowl also those at the top. 3 Link to comment Share on other sites More sharing options...
Pouln Posted December 22, 2016 Author Share Posted December 22, 2016 The last picture I have for you is something Roy vdM pointed out. He mentioned that the colours on the exhaust manifold were a bit too much. I toned it down a bit. I also weathered the engine so it is not in pristine state anymore. It is now a bit greasy. I need to work on that a bit more but I think it looks a bit better. Anyway, this is where I am in real life right now. Still a lot to do before it's finished. We have family staying with us, so I will not do anything the coming week. Therefore I wish you all a Merry Christmas and a Happy New Year. Enjoy the time with your family. Next year I'll be back and keep you posted on progress, which will be, as I said, dead slow a head (preferably). 5 Link to comment Share on other sites More sharing options...
Roy vd M. Posted December 22, 2016 Share Posted December 22, 2016 I really like the improvement to the exhaust manifolds. As regards heat discoloring of the heads I'll trust your research. 1 Link to comment Share on other sites More sharing options...
Pouln Posted December 22, 2016 Author Share Posted December 22, 2016 Well, actually that is an area I can improve a bit 1 Link to comment Share on other sites More sharing options...
Pouln Posted January 9, 2017 Author Share Posted January 9, 2017 Family is save home again. House to ourselves again. Not restarted yet as I decided that the workshop needed a makeover. This is going to take some time. I do hope to be able to get on with the model somewhere next week. Link to comment Share on other sites More sharing options...
Codger Posted January 9, 2017 Share Posted January 9, 2017 53 minutes ago, Pouln said: Family is save home again. House to ourselves again. Not restarted yet as I decided that the workshop needed a makeover. This is going to take some time. I do hope to be able to get on with the model somewhere next week. Please do - a Coupe is literally a rare treat. C 1 Link to comment Share on other sites More sharing options...
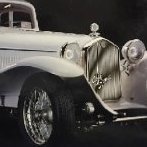
Pouln Posted January 13, 2017 Author Share Posted January 13, 2017 (edited) Oh I will do. Who said they are rare? I found the following in my stash I will not be building this one as such. When I'm finished with that one it should look like the coupe blow. This requires major surgery as it is based on a long chassis and bonnet (hood), cowl and doors are totally different (and of course the roof will be a lot longer). This will however have to wait. I feel I am not up to this task right now (experience wise) Edited January 13, 2017 by Pouln 1 Link to comment Share on other sites More sharing options...
kpnuts Posted January 13, 2017 Share Posted January 13, 2017 (edited) I think you could do anything you set your mind to, you have loads of talent, who needs experience. Edited January 15, 2017 by kpnuts Link to comment Share on other sites More sharing options...
Pouln Posted January 15, 2017 Author Share Posted January 15, 2017 On 14-1-2017 at 0:56 AM, kpnuts said: I think you could do anything you set your mind to, you have loads of talent who needs experience. Thanks for the compliment, my friend. Link to comment Share on other sites More sharing options...
silver911 Posted January 15, 2017 Share Posted January 15, 2017 I personally will never be able to afford a Pocher 'Classic' so....you have to do it..then at least I will get the pleasure of watching it come to life....and the pictures to remember it. Regards Ron Link to comment Share on other sites More sharing options...

Recommended Posts
Create an account or sign in to comment
You need to be a member in order to leave a comment
Create an account
Sign up for a new account in our community. It's easy!
Register a new accountSign in
Already have an account? Sign in here.
Sign In Now