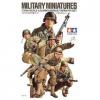
combat Posted May 9, 2016 Share Posted May 9, 2016 I wonder if most of you joined the forum for the same reasons I did? I guess I want someone to see my model, but more than that I wanted the encouragement to try a bit harder. And putting your work up for others to see is a good way of taking the temperature and receiving some encouragement. I have a little stash to dig into and was thinking of doing Matchbox 1/72 Humber, but have decided on the M113 Tamiya seem to be the jack of all trades among kit makers. They are good quality, build up to a good kit and usually have decent figures. Nothing ground breaking, but rarely disappointing. Aftermarket kits will make it better, usually for way more than the kit itself. There are offerings by Italeri, AFV club, JB Model, Airfix, Academy, Trumpeter. Aftermarket parts by Friul, Kasten, Verlinden and Edouard. Tamiya have 6 versions in 1/35 alone ! The rather nice Command Post version even has a folding chair, what's not to like Fact File This vehicule was the Ford Escort of the US army, known to Aussies as the 'Bush Taxi', but more frighteningly to the VC as 'Green Dragon'. With it's aluminium arnour and in its variants it accounts for half of all current US armoured vehicules. Used in over 50 countries it is one of the most widely used military vehicules of all time. I guess we are priveledged to be able to assemble these kits in the peace of our own clubs or homes ! 3 Link to comment Share on other sites More sharing options...
combat Posted May 9, 2016 Author Share Posted May 9, 2016 Here are the parts, I am going to start with the figures. How many kits give you soda and smokes, there are decals to make them come alive ! There are some nasty mould seems that are easy to miss sometimes A dry run with blue tack (albeit yellow) Link to comment Share on other sites More sharing options...
combat Posted May 9, 2016 Author Share Posted May 9, 2016 Airbrushed Tamiya for the clothes and skin and vallejo for the boots and rifle hope this is not too boring and I also hope that I'll be able to update enough to keep someone's interest up, if not my own oh yes, and I noticed a bit of a gap in the soldiers shoulder so some vallejo water based putty to the rescue (highly recommended as you just thin it down with aqua) 1 Link to comment Share on other sites More sharing options...
FrancisGL Posted May 9, 2016 Share Posted May 9, 2016 , cheers mate Link to comment Share on other sites More sharing options...
combat Posted May 9, 2016 Author Share Posted May 9, 2016 And this is it for this time round not sure if this cammo pic is right for me but I tried to copy this one, next time I will do the buff much thinner and lighter, always better second time round ! Enjoying the popcorn Francis Enamel wash balck for the uniform, burgundy for the flesh Finished adding base colour Webbing and pouches dry brushed with lime green oil camo, first buff then black (like I said above, I think skinnier, streakier buff would have been closer to Tamiya instructions) red oil to add texture to the face and arms (eyebrows added too) finger nails done in white 3 Link to comment Share on other sites More sharing options...
snapper_city Posted May 9, 2016 Share Posted May 9, 2016 (edited) Good work on the camo. Looking forward to this build. M113 is my favourite. The Tamiya kit is really showing its age now but builds up into a good looking M113. The interior colour used in early Vietnam was white before they swapped to their interior green sometime later on. The green in your 1st post reference picture is way too dark. Edited May 9, 2016 by snapper_city Link to comment Share on other sites More sharing options...
combat Posted May 9, 2016 Author Share Posted May 9, 2016 Cheers snapper I am no historian to say the least, so all the help I can get, yes early interior is white, as are the driver's seat, I went dyslexic on the cammo, I thought the buff was the main and the black the streak, so I had to black over the buff to thin it down - kind of annoyed me, but can be fixed I guess my first ever 113, it's almost as iconic as the Willy's Link to comment Share on other sites More sharing options...
DAG058 Posted May 9, 2016 Share Posted May 9, 2016 I built one of these in the recent Vietnam GB, here's a link to the build http://www.britmodeller.com/forums/index.php?/topic/234988935-m113-tamiya-135/ Link to comment Share on other sites More sharing options...
phildagreek Posted May 9, 2016 Share Posted May 9, 2016 Good kit, good start to it. Link to comment Share on other sites More sharing options...
combat Posted May 10, 2016 Author Share Posted May 10, 2016 (edited) One warrior up and sprayed in matt varnish, sticky tape strap for a bit of realism he still needs his buckles and poppers painting and he should be done, the others will be done in similar fashion Dag your airbrushing looks flawless, are you using Tamiya ? Edited May 10, 2016 by combat 1 Link to comment Share on other sites More sharing options...
FrancisGL Posted May 10, 2016 Share Posted May 10, 2016 I'll see if I can do something productive with your methods, cheers combat Link to comment Share on other sites More sharing options...
Nick C Posted May 10, 2016 Share Posted May 10, 2016 Looking good!! Link to comment Share on other sites More sharing options...
combat Posted May 11, 2016 Author Share Posted May 11, 2016 (edited) Francis glad it's good for someone, thanks again for the kind words gave the drive a mic and some wire for the headphones - body halves were a bad fit, so Vallejo putty to the rescue once again started on the motor, it's not glued to the hull plate so I can lift the whole assembly off for easier painting the real motor seems to have lots of pipes, wires and tubes, but I can make head or tail of pictures so it's a bit hard to add effective detail here (I made the phone wire from stretched sprue then wrapped it around a thin piece of wire to get the curly effect) Edited May 14, 2016 by combat 4 Link to comment Share on other sites More sharing options...
combat Posted May 14, 2016 Author Share Posted May 14, 2016 3 warriors on acid ! 2 Link to comment Share on other sites More sharing options...
FrancisGL Posted May 14, 2016 Share Posted May 14, 2016 Pretty figures!, cheers mate Link to comment Share on other sites More sharing options...
combat Posted May 15, 2016 Author Share Posted May 15, 2016 Hello there anyone have any info on the motor the Tamiya colour guide just says metallic grey, aluminium and white and I can't detail up 'cos I don't have anything source material starting to build up the inner hull which is fun btw Francis have you read The Modeller's Guide by A Pocuc, if not I highly recommend it to you, I think that book alone has given hope to my modelling 1 Link to comment Share on other sites More sharing options...
Badder Posted May 15, 2016 Share Posted May 15, 2016 Great thread and all looking good so far. Don't worry about the regularity of updates... there's no such thing as 'too many updates', and nor is it vital that you update every day, or even week. We don't mind so long as there are updates and that the thread doesn't die. I have several 'on hold', but they will all continue at some point. The biggest problem I have found is this: finding sites to host my hundreds of photos! I filled up my photobucket account and can't use it any more. I'm NOT paying for extra storage! I found a French one called HostingPics and now I use that. It's all in French, but I managed to work out what's what. I do hope your build ends up in a diorama. Following with interest, Badder Link to comment Share on other sites More sharing options...
Badder Posted May 15, 2016 Share Posted May 15, 2016 Great thread and all looking good so far. Don't worry about the regularity of updates... there's no such thing as 'too many updates', and nor is it vital that you update every day, or even week.%2 Link to comment Share on other sites More sharing options...
combat Posted May 17, 2016 Author Share Posted May 17, 2016 Badder glad you are enjoying if you need help with your French let me know here are some terrible pixs there are a lot of fiddly parts on the sub assemblies, one part was missing from my kit (or just lost itself) so I had to make it (not the hardest part to duplicate mind) the opening doors and hatches are really neat - I must say I am enjoying this kit like I said awful pix - will try harder next time 1 Link to comment Share on other sites More sharing options...
DAG058 Posted May 17, 2016 Share Posted May 17, 2016 Looking good so far, your photos remind me how much I enjoyed building this kit! Link to comment Share on other sites More sharing options...
spruecutter96 Posted May 17, 2016 Share Posted May 17, 2016 Your images look pretty good to me, my friend. I will be following this build with great interest. Cheers. Chris. Link to comment Share on other sites More sharing options...
combat Posted May 20, 2016 Author Share Posted May 20, 2016 (edited) Dag that's encouraging to hear and yep me too I am enjoying this kit a lot this time it's a bit of 'the good the bad and the ugly' the ugly was my hopeless attempt to patch all the injection mould indents and other holes inside the hull, it looks right awful but I shall disguise it with some chipping and whatnot - puttying up over defects is not my strong point I discovered the bad I broke the steering sticks twice ! I lost a part and made my own and then lost that ! So had to make it again, but the second attempt was better the good I put a little pin in the front hatch so that it opens and closes, all the sub assemblies are done, including the wheels, and the base coat of Tamiya xf62 is done, gotta do the black on the wheels next [/url] Edited May 20, 2016 by combat 1 Link to comment Share on other sites More sharing options...
combat Posted May 20, 2016 Author Share Posted May 20, 2016 Spruecutter cheers for the thumbs up but yeah some of my pix could be more interesting I think the top section is glued to itself but not to the hull so you can just lift it off to see the interior 2 Link to comment Share on other sites More sharing options...
FrancisGL Posted May 20, 2016 Share Posted May 20, 2016 Progress good, cheers combat Link to comment Share on other sites More sharing options...
combat Posted May 28, 2016 Author Share Posted May 28, 2016 Minor update and rubbishy pictures again As you can see my efforts to clean up the inner hull were hopeless, I added some straps here and there, some maps, a mirror, a pencil and a few rounds the cigarettes and coke cans will come soon 2 Link to comment Share on other sites More sharing options...

Recommended Posts
Create an account or sign in to comment
You need to be a member in order to leave a comment
Create an account
Sign up for a new account in our community. It's easy!
Register a new accountSign in
Already have an account? Sign in here.
Sign In Now