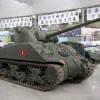
Firefly Posted April 11, 2016 Share Posted April 11, 2016 Hi everyone, This will be my 4 th build since returning to the hobby, and my first wip, so don't expect to much! But I hope it might be interesting as it has the full interior and engine, so it might be useful for me to pick your experienced brains as I go along. It's a pz.Abt.503 from the eastern front. The mottled green finish as depicted on the box is a bit beyond my ability, but I've found another scheme apparently used by pz.Abt503 as I've shown below, so that's the one I'm going to do. 1 Link to comment Share on other sites More sharing options...
Gremlin56 Posted April 11, 2016 Share Posted April 11, 2016 Impressive project, RFM is a new star in the sky for me. Looks interesting though I must admit Link to comment Share on other sites More sharing options...
FrancisGL Posted April 11, 2016 Share Posted April 11, 2016 Pops ready, pretty Project in sight, cheers Firefly Link to comment Share on other sites More sharing options...
Wogga Posted April 11, 2016 Share Posted April 11, 2016 Something I would follow to see progress and how complex it is. I remember as a child in Manchester (70's), Beatties in Spring Gardens used to display a Tamiya Tiger with a cutaway exterior to show the full interior... It was very nice, I think they did a cutaway kit once upon a time? I might be dreaming there. Good luck! 1 Link to comment Share on other sites More sharing options...
mick Posted April 11, 2016 Share Posted April 11, 2016 look forward to you build Link to comment Share on other sites More sharing options...
Firefly Posted April 11, 2016 Author Share Posted April 11, 2016 Something I would follow to see progress and how complex it is. I remember as a child in Manchester (70's), Beatties in Spring Gardens used to display a Tamiya Tiger with a cutaway exterior to show the full interior... It was very nice, I think they did a cutaway kit once upon a time? I might be dreaming there. Good luck! I have toyed with the idea of doing a cut away, but I think I will have as many hatches open as possible, and see if it's practical to have any panels that can be lifted off. Have you seen the 1/16 King tiger build on here, he's done a superb cutaway on that, would love to do the same, but the thing is massive. 1 Link to comment Share on other sites More sharing options...
Wogga Posted April 11, 2016 Share Posted April 11, 2016 I will look for that cheers. Link to comment Share on other sites More sharing options...
Firefly Posted April 11, 2016 Author Share Posted April 11, 2016 Hi Well this is the result of my afternoons work. It's quite nice to start with something other than the hull first. I'm impressed so far with the quality and fit of the mouldings, very little cleaning up required. Found this photo today, pz Abt503 tank no.331. The kit contains decals for this tank. As I'm sure you all know, looking at b/w war time photos it's difficult to work out exact camo schemes and colours. But the camo pattern that's visable in this shot does seem similar to the one I've found in my introduction, so I'm happy to go with this. Cheers all. 4 Link to comment Share on other sites More sharing options...
FrancisGL Posted April 12, 2016 Share Posted April 12, 2016 Superb detail on job do it, cheers Firefly Link to comment Share on other sites More sharing options...
beefy66 Posted April 12, 2016 Share Posted April 12, 2016 This could be interesting to find out what these kits are like Beefy Link to comment Share on other sites More sharing options...
Wogga Posted April 14, 2016 Share Posted April 14, 2016 Do RMF models have a website? Link to comment Share on other sites More sharing options...
Firefly Posted April 14, 2016 Author Share Posted April 14, 2016 Do RMF models have a website? All I found on their website was just a single page, but they do have a face book page. Spent all last night making and painting the co ax machine gun (mg34?). Unfortunately my I pad is not to good at close ups so I'm not going to be able to give very detailed photos of the smaller stuff. 2 Link to comment Share on other sites More sharing options...
Wogga Posted April 14, 2016 Share Posted April 14, 2016 Cheers for the info. Link to comment Share on other sites More sharing options...
mick Posted April 15, 2016 Share Posted April 15, 2016 good start Link to comment Share on other sites More sharing options...
Hamden Posted April 15, 2016 Share Posted April 15, 2016 Nice start - an interesting subject to boot Looking forward to watching this progress Roger Link to comment Share on other sites More sharing options...
Pawel Szczudlyk Posted April 15, 2016 Share Posted April 15, 2016 Its looking good so far. Keep it up i will be watching. cheers Link to comment Share on other sites More sharing options...
Firefly Posted April 16, 2016 Author Share Posted April 16, 2016 Hi all Working away next week so will update when I get back, Link to comment Share on other sites More sharing options...
FrancisGL Posted April 17, 2016 Share Posted April 17, 2016 NIce progress, cheers Firefly Link to comment Share on other sites More sharing options...
Firefly Posted April 24, 2016 Author Share Posted April 24, 2016 Hi Not had much chance to do anymore, but I thought I would make a start on the tracks. As you can see they are something to make in stages! At the bottom of second photo is the track assembly jig that comes with it, it will be quite satisfying when they are complete. 2 Link to comment Share on other sites More sharing options...
FrancisGL Posted April 24, 2016 Share Posted April 24, 2016 Seems to bring a support to adjust the links, is not it ?, and pae that are made in 4 pieces per time?, cheers Firefly Link to comment Share on other sites More sharing options...
Firefly Posted April 24, 2016 Author Share Posted April 24, 2016 Seems to bring a support to adjust the links, is not it ?, and pae that are made in 4 pieces per time?, cheers Firefly Hi Francis Yes it holds all the links in the correct position, which as you say are made in 4 link sections. You also have to glue each vertical tooth on, with 2 per link. Hate to think how many I will have dropped and lost by the time I'm finished. 1 Link to comment Share on other sites More sharing options...
FrancisGL Posted April 24, 2016 Share Posted April 24, 2016 (edited) Firefly, on 24 Apr 2016 - 9:29 PM, said:Firefly, on 24 Apr 2016 - 9:29 PM, said: Hi Francis Yes it holds all the links in the correct position, which as you say are made in 4 link sections. You also have to glue each vertical tooth on, with 2 per link. Hate to think how many I will have dropped and lost by the time I'm finished. I imagine ... lol, I also buy some tracks recently for the Sherman Bronco brand, and I would not recommend them. After finishing with the horizontal part, external teeth one by one, all very weak, and in the end ... Trash Something like what I see is the essential part with is adjusting. Cheers mate Edited April 24, 2016 by FrancisGL Link to comment Share on other sites More sharing options...
Firefly Posted April 26, 2016 Author Share Posted April 26, 2016 Hi Started the turret interior, have to say I'm really enjoying the build. It's nicely detailed (and fidlley) and also interesting to learn the layout of the real thing. Next step will be undercoat, so a quick dry fit to see how it will look. There's lots of items to be fitted to the turret interior sides, I was going to paint it and them first then attach them after, rather than paint them once fitted. Any thoughts which is the best way? Cheers for now. 3 Link to comment Share on other sites More sharing options...
Firefly Posted April 26, 2016 Author Share Posted April 26, 2016 its a bit frustrating not to be able to get sharp close ups with my I pad so you can see the detail properly, sorry about that. ( think I need to work in 1/16 scale!) Link to comment Share on other sites More sharing options...
Troy Smith Posted April 27, 2016 Share Posted April 27, 2016 its a bit frustrating not to be able to get sharp close ups with my I pad so you can see the detail properly, sorry about that. ( think I need to work in 1/16 scale!) you could try a magnifying glass in front of the ipad lens, I used one blu tacked on the front of a basic point and shoot camera, very small depth of field but it did work.... the cockpit is scratch built, so it's not super detailed, note the cutting mat squares are 1cm, but this was taken as described, it's not ideal, and you need to experiment, but easier on an ipad than a camera with a tiny view finder to see if you got the shot you want. alternately pick up a second hand camera, I got a couple off ebay cheap, about £20 for both, which were apparently from airport lost property, and they work fine. work looking good so far cheers T Link to comment Share on other sites More sharing options...

Recommended Posts
Create an account or sign in to comment
You need to be a member in order to leave a comment
Create an account
Sign up for a new account in our community. It's easy!
Register a new accountSign in
Already have an account? Sign in here.
Sign In Now