Devcon 1 Posted November 21, 2015 Share Posted November 21, 2015 Hi All, New member so please bear with me until I get the hang of things. I've garnered a load of hints and tips from this forum and have been inspired by many of the builds so I thought it appropriate to share progress of my current project. I finally took the plunge and got the HC3 and Eduard Big Ed pack, seeing as the interior is fully detailed and mostly hidden when built I've decided to create a cutaway version with a removeable side to show a pair of Airfix quads on board. Apologies for it not being absolutely accurate as I do get a bit carried away so I'll be building it with folded rotors and hinged tail. Photos to follow on progress so far. Kind Regards John 1 Link to comment Share on other sites More sharing options...
phildagreek Posted November 21, 2015 Share Posted November 21, 2015 Interesting sounding project, look forward to seeing more. Link to comment Share on other sites More sharing options...
Devcon 1 Posted November 21, 2015 Author Share Posted November 21, 2015 Getting frustrated, I've got my photos on Flickr with access set to public When I paste the link into this thread I get a broken link image and the message "You are not allowed to use that image extension on this community." I know I'm doing something wrong, just can't work it out. I've checked all the help topics but am still clueless. Has anybody had a similar issue? Thanks John Link to comment Share on other sites More sharing options...
Lightning88 Posted November 21, 2015 Share Posted November 21, 2015 I use Photobucket and copy the "Direct" link and then paste the link using the Image button above on the toolbar - hope this helps - looking forward to the cutaway 1 Link to comment Share on other sites More sharing options...
Devcon 1 Posted November 21, 2015 Author Share Posted November 21, 2015 A first photo to see if I've mastered it. So far so good. Many thanks to Lightning88 for the tip. 4 Link to comment Share on other sites More sharing options...
Devcon 1 Posted November 21, 2015 Author Share Posted November 21, 2015 Here's my progress so although only started on Thursday last week. Nosewheel. Before the cut.. And after. A test fit. Should get a decent internal view. The nearside sponson top will be removable together with the outer engine fairing to allow removal of the side. I plan on using magnets for retention but I'll see how things shape up. I'll also put some LED lights inside to illuminate the interior. Regards John 12 Link to comment Share on other sites More sharing options...
Martian Posted November 22, 2015 Share Posted November 22, 2015 This is going to be good! Martin Link to comment Share on other sites More sharing options...
exdraken Posted November 22, 2015 Share Posted November 22, 2015 very imaginative! top!!! Link to comment Share on other sites More sharing options...
phildagreek Posted November 22, 2015 Share Posted November 22, 2015 Congratulations on your very bold move! Hope it turns out how you envisaged, mine never do!!!!! Link to comment Share on other sites More sharing options...
mackem01 Posted November 22, 2015 Share Posted November 22, 2015 What a BIG project, I wouldn't dare attempt anything like this. It's going to be really good when it's done. Keep it going John. Link to comment Share on other sites More sharing options...
AntPhillips Posted November 22, 2015 Share Posted November 22, 2015 Ooh, I'm watching this one. Link to comment Share on other sites More sharing options...
justaspitcrazy! Posted November 23, 2015 Share Posted November 23, 2015 Having just today picked up this kit from Airfix for the princely sum of £19.99 (finally something good to come of black Friday!) I shall be watching this one with a great deal of interest. Keen to see how you tackle the lighting as it's something I've always fancied doing but it vexes me no end! Good luck and welcome to the forums! Ben. Link to comment Share on other sites More sharing options...
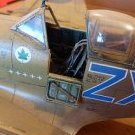
Devcon 1 Posted November 24, 2015 Author Share Posted November 24, 2015 Thanks for all the feedback... Wow £19.99, are there any more as I might need a second one when things go bad... Here's the pic that gave me the idea. I've been doing the interior and finalising the inner skin cut. Pics to follow tomorrow. One advantage of having the interior open means I can continue to either add detail or change the load. Kind Regards John 3 Link to comment Share on other sites More sharing options...
Nigel Heath Posted November 24, 2015 Share Posted November 24, 2015 Watching with interest. Link to comment Share on other sites More sharing options...
Leonl Posted November 24, 2015 Share Posted November 24, 2015 What a really good idea.... I'm looking forward to this one... Link to comment Share on other sites More sharing options...
Mutley Posted November 24, 2015 Share Posted November 24, 2015 Sounds like a great build. Bon Chance and am looking forward to seeing your progress Link to comment Share on other sites More sharing options...
Devcon 1 Posted November 24, 2015 Author Share Posted November 24, 2015 I paid £35.00 for my Merlin and I though that was a reasonable price, but £19.99 !!, just ordered another one for stock and a snatch Landrover set at £4.99... John Link to comment Share on other sites More sharing options...
Devcon 1 Posted November 25, 2015 Author Share Posted November 25, 2015 Progress to date. Not sure what's under the floor of a Merlin, hope it looks like this. Office nearly done. The quads look quite small in there so I'll try a snatch Landrover when it comes.. Thanks for looking. John 9 Link to comment Share on other sites More sharing options...
Paul Bradley Posted November 25, 2015 Share Posted November 25, 2015 Wow, nice work! Love the idea and it's coming together very well. Link to comment Share on other sites More sharing options...
Martian Posted November 26, 2015 Share Posted November 26, 2015 This would look good in a diorama with some chaps tying down part of the load with other stuff waiting to be loaded. Martin Link to comment Share on other sites More sharing options...
GMK Posted November 26, 2015 Share Posted November 26, 2015 Love the idea & the quads. If you do stick with the quads, maybe have them pointing down the tailgate? Link to comment Share on other sites More sharing options...
Leonl Posted November 26, 2015 Share Posted November 26, 2015 I like the internal weathering, very realistic. Link to comment Share on other sites More sharing options...
merlin101 Posted November 26, 2015 Share Posted November 26, 2015 Looking good so far. Two comments though, cockpit on MK3's are very dark grey/black and the seats in cargo area should be of a green colour! hope it's of help? Dave Link to comment Share on other sites More sharing options...
justaspitcrazy! Posted November 26, 2015 Share Posted November 26, 2015 Awesome work so far, Flory washes right? Or is it a home brewed sludge? 1 Link to comment Share on other sites More sharing options...
Devcon 1 Posted November 26, 2015 Author Share Posted November 26, 2015 I will get the quads and trailers to exit facing forwards. I've got some figures to go with them. I struggle with colour choices and tend to rush things and use what I have in stock. The rear seats did start green but I overdid the drybrushing with Tamiya Chrome Silver. I've just bought 2 more Merlin in the Airfix sale so I can apply what I learn from this one. The wash is from Flory but it is a procees I struggle with when it comes to the smaller structural areas. I'm in awe of some of the techniques I see used by you on this Forum. I think I'll try the Turps and Oil paint on the smaller bits. All observations and tips gratefully received. John 1 Link to comment Share on other sites More sharing options...

Recommended Posts
Create an account or sign in to comment
You need to be a member in order to leave a comment
Create an account
Sign up for a new account in our community. It's easy!
Register a new accountSign in
Already have an account? Sign in here.
Sign In Now