Lastvautour Posted August 13, 2015 Share Posted August 13, 2015 (edited) I have started the Testor Phantom to represent one I photographed from my office window circa early 1990s. I am unable to read the full serial number so the kit decals will have to do. Lou Edited October 1, 2015 by Lastvautour 4 Link to comment Share on other sites More sharing options...
Lastvautour Posted August 20, 2015 Author Share Posted August 20, 2015 The cockpit is stock from the box. The kits decals went on great. The seats require some belts and attachment of the ejection handles. Some pushing and prying had to used to align the fuselage sides but other than that things are going well. I used Gorilla/Tamiya glue and Model master/Tamiya paints. Reports are that this kit lacks a lot in detail and accuracy, but for an average modeler like me it makes a nice project. I have been looking for details on the paint scheme and have not been able to confirm if the kit direction are correct. I found a picture of 38-24 that carries the same scheme as the above picture so that may be the serial number of my subject. https://commons.wikimedia.org/wiki/File:McDonnell_Douglas_F-4F_Phantom_II,_Germany_-_Air_Force_AN1605615.jpg Lou 2 Link to comment Share on other sites More sharing options...
Arie Posted August 20, 2015 Share Posted August 20, 2015 I'm excited to see this one come together Lou! It's the one Luftwaffe Phantom scheme I've never built & the dayglo panels really make this particular one stand-out--great choice! Just curious where the photo was taken? I'd say it looks a bit like Eielson, but then again, every base that far north looks about that way! Cheers, A. C. Link to comment Share on other sites More sharing options...
Ghostbase Posted August 20, 2015 Share Posted August 20, 2015 Very interested to see how you get on with the Italeri / Testor 1/48th kit, I tried one a few years ago and it ended up being scrapped. I still have an F-4E, F-4S, and RF-4C in the stash and need that bit of motivation to try again. Looking good so far... Michael Link to comment Share on other sites More sharing options...
Lastvautour Posted August 21, 2015 Author Share Posted August 21, 2015 The photo was taken in Goose Bay, NL, Canada early 1990s. Lou I have the Revell GFR Mk 2 and a Monogram F-4J in my stash. 2 Link to comment Share on other sites More sharing options...
Lastvautour Posted August 28, 2015 Author Share Posted August 28, 2015 The major fuselage components are attached, puttied and primed with Krylon spray can. Wet tissues were placed in the intakes and nose gear well. The cockpit was stuffed with dry tissue to avoid problems with the instrument panel decals. Lou 3 Link to comment Share on other sites More sharing options...
Lastvautour Posted August 29, 2015 Author Share Posted August 29, 2015 The kit instructions indicate Sparrow missle to have white bodies, black radomes and gunmetal forward fins. My on line searches cannot find any black radomes and all modern bodies are grey with gunmetal fins. Clarification is sought! Lou Link to comment Share on other sites More sharing options...
Lastvautour Posted September 5, 2015 Author Share Posted September 5, 2015 Yellow has been applied to the tail. The photo shows the yellow a bit brighter than the naked eye. For the very first time I will try to get that scale effect I keep reading about by adding 20% white to the paint. A question arises. Should I add the white to light colours like gull gray and light ghost grey? Lou 2 Link to comment Share on other sites More sharing options...
Creepy Pete Posted September 5, 2015 Share Posted September 5, 2015 The kit instructions indicate Sparrow missle to have white bodies, black radomes and gunmetal forward fins. My on line searches cannot find any black radomes and all modern bodies are grey with gunmetal fins. Clarification is sought! Lou If you're doing a Luftwaffe Phantom, you can ignore the Sparrows. They were not in their inventory. Link to comment Share on other sites More sharing options...
Lastvautour Posted September 5, 2015 Author Share Posted September 5, 2015 Thank you. Sparrows to the spares box. Lou Link to comment Share on other sites More sharing options...
Lastvautour Posted September 22, 2015 Author Share Posted September 22, 2015 Following kit instructions for the paint did not give very good results as seen in the first photo. A second attempt using Mk I eyeball was somewhat better(personal opinion) Once the remaining paint is completed and decal added. it will fit nicely in a dark corner of my collection. 1 Link to comment Share on other sites More sharing options...
tonyot Posted September 22, 2015 Share Posted September 22, 2015 Looks great and the colours are much better,......I like German Phantoms in this scheme, Cheers Tony Link to comment Share on other sites More sharing options...
HOUSTON Posted September 22, 2015 Share Posted September 22, 2015 Lastvautour, EXEMPLARY workmanship and AWESOME start. Link to comment Share on other sites More sharing options...
HOUSTON Posted September 22, 2015 Share Posted September 22, 2015 thought you might like to see this lastvautour. https://www.youtube.com/watch?v=bNaIU8kjLY4 Link to comment Share on other sites More sharing options...
Lastvautour Posted September 22, 2015 Author Share Posted September 22, 2015 Nice video. Thanks. Lou Link to comment Share on other sites More sharing options...
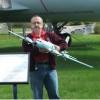
Lastvautour Posted October 1, 2015 Author Share Posted October 1, 2015 The project was completed with little difficulty. Parts match was fairly good and decals went on well. The most important feature of the model was the enjoyment of making it. Lou PS more photos at http://www.britmodeller.com/forums/index.php?/topic/234987234-mcdonnell-douglas-f-4-phantoms/ 1 Link to comment Share on other sites More sharing options...

Recommended Posts
Create an account or sign in to comment
You need to be a member in order to leave a comment
Create an account
Sign up for a new account in our community. It's easy!
Register a new accountSign in
Already have an account? Sign in here.
Sign In Now