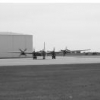
harrison90 Posted July 25, 2015 Share Posted July 25, 2015 This is just a warm up for my Sea Vixen. Just to share some of my work before I jump straight in with the Vixen. (Which will hopefully be posted later today) I am planning on doing the F-15E Demonstrator 71-0291. Cheers Harrison Okay, have the right ESCAPAC seats ready for priming. Next, on to the rest of the cockpit and changing the spine of the aircraft. Hope this is better than my last post. Feel free to speak your minds. That's the only way I can get better. Cheers Harrison 1 Link to comment Share on other sites More sharing options...
harrison90 Posted July 25, 2015 Author Share Posted July 25, 2015 Sorry for the slow progress guys. Been hectic lately with the loss of my dog and the introduction of two puppies along with preparations for school. Anyway, the pit is almost ready to fit into the fuselage. I am in the midst of remodelling the gear to help strengthen them and add detail, to gear, wheel wells and gear doors. Thanks for the all the comments. Hopefully I'll be able to pick up the pace in the coming weeks. Cheers Harrison 2 Link to comment Share on other sites More sharing options...
harrison90 Posted July 25, 2015 Author Share Posted July 25, 2015 Along with this small update. Just a bunch of little things really and the cockpit in its position. The gear doors had to be redone just to remove the large ejector pin marks. The exhausts were covered with aluminum tape and weathered with oils. I have since extended the exhausts and will be showing that later in this build. Cheers Harrison 2 Link to comment Share on other sites More sharing options...
S5 modeller Posted July 25, 2015 Share Posted July 25, 2015 Lovely work there. What scale is it? 1 Link to comment Share on other sites More sharing options...
harrison90 Posted July 25, 2015 Author Share Posted July 25, 2015 Lovely work there. What scale is it? 1/32 Link to comment Share on other sites More sharing options...
harrison90 Posted July 25, 2015 Author Share Posted July 25, 2015 The landing have been tweaked a bit adding some metal rode and tube to help strengthen the kit parts. They are about 95% done, just have some touch ups and some more weathering before I can call them done. Same with the gear doors. I added some placards that are not 100% truthful to the real thing but do add just a little bit to otherwise blank gear and doors. Cheers Harrison Link to comment Share on other sites More sharing options...
harrison90 Posted July 25, 2015 Author Share Posted July 25, 2015 (edited) Not sure exactly what these vents are for that come out from the side fuel tanks but I had to build my own and slap them on after noticing them on a picture I saw. Step one: making the attachment points for the ordnance starts with chopping some styrene. Step two: Shaping the pieces to a more or less correct looking shape and cutting each in half. Step three: Drill some holes and attach. I don't think they look too bad. Cheers Harrison Edited July 25, 2015 by harrison90 Link to comment Share on other sites More sharing options...
Alan P Posted July 25, 2015 Share Posted July 25, 2015 Fantastic work detailing this rather plain kit. Especially like the work you did in the cockpit and instrument panels. Al 1 Link to comment Share on other sites More sharing options...
harrison90 Posted July 25, 2015 Author Share Posted July 25, 2015 Fantastic work detailing this rather plain kit. Especially like the work you did in the cockpit and instrument panels. Al Thanks. Link to comment Share on other sites More sharing options...
harrison90 Posted July 25, 2015 Author Share Posted July 25, 2015 Bomb racks finished. Took longer than I thought but I am rather pleased with the result, especially as a lot of it will be difficult to see if possible to see at all. Plus, I got the wings on. Its coming together. Cheers Harrison Link to comment Share on other sites More sharing options...
harrison90 Posted July 25, 2015 Author Share Posted July 25, 2015 (edited) Not a great update here but there are a couple bombs to get through while I sand and fill and prime the rest of Eagle. And some really crummy news, while I was trying to remove the canopy seem line, the very old brittle plastic showed its true colours. Not sure how to fix this one, not without some sort of evidence of the crack. Cheers Harrison Edited July 25, 2015 by harrison90 Link to comment Share on other sites More sharing options...
harrison90 Posted July 25, 2015 Author Share Posted July 25, 2015 Just been filing and sanding and priming and filing and sanding, etc. Have managed to get some colour on this girl and a bit of fiddling with the canopies interior framing. Cheers Harrison Link to comment Share on other sites More sharing options...
harrison90 Posted July 25, 2015 Author Share Posted July 25, 2015 Continued... Cheers Harrison 1 Link to comment Share on other sites More sharing options...
Alan P Posted July 25, 2015 Share Posted July 25, 2015 Er...you haven't actually done all this today have you?! It's one of the best treatments of this kit I can remember. Nice work. 1 Link to comment Share on other sites More sharing options...
Spad Posted July 25, 2015 Share Posted July 25, 2015 Not a great update here but there are a couple bombs to get through while I sand and fill and prime the rest of Eagle. And some really crummy news, while I was trying to remove the canopy seem line, the very old brittle plastic showed its true colours. Not sure how to fix this one, not without some sort of evidence of the crack. Cheers Harrison How about clean it up nice and smooth and then vac-form a replacement from it? Great work, that cockpit looks the biz. I built the original kit in the pseudo T-Birds scheme that 71-0291 carried - had an excellent time with it - would love to give it another go tbh! 1 Link to comment Share on other sites More sharing options...
harrison90 Posted July 25, 2015 Author Share Posted July 25, 2015 How about clean it up nice and smooth and then vac-form a replacement from it? Great work, that cockpit looks the biz. I built the original kit in the pseudo T-Birds scheme that 71-0291 carried - had an excellent time with it - would love to give it another go tbh! I would but do not have the tools or skills to do this. Right now. I wish I did but at this point in time I just do not. I am also missing all of the black exterior placards thanks to the brittle original decals that just turned to mush when introduced to water. So right now I'm not sure what I am going to do exactly but have a mildly, unfinished / disappointing F-15. Also, I have enjoyed this build and kit as well. It's rather good in fact and a lot of fun to build. Wish I had another. Cheers Harrison Link to comment Share on other sites More sharing options...
harrison90 Posted July 25, 2015 Author Share Posted July 25, 2015 All painted up and clear coated ready for decals and then minor weathering to tone down the colours and start bringing it all together. However the natural metal at the rear has had weathering done to it. I painted these areas in Tamiya acrylics, a mix of flat aluminium, chrome silver and titanium silver. I then used heavily diluted clear yellow, clear orange and clear blue to bring a subtle hot metal look. I then used several oil paints to weather the area. After decals the final weathering should bring it all together. Enjoy. Before weathering: After weathering first stage weathering: And this is my new supervisor: He seemed more interested in sun bathing though: Cheers Harrison 1 Link to comment Share on other sites More sharing options...
harrison90 Posted July 25, 2015 Author Share Posted July 25, 2015 Cracked and basically disintegrated as soon as they hit the water. So I have been using the decals as masks and painting on the main markings and have Eduard F-15 stencil masks and will see what I can do about the exterior placards. I have tried the placards and same thing happened, poof into mush. Soo, anybody have F-15 placards in black? Cheers Harrison Link to comment Share on other sites More sharing options...
harrison90 Posted July 25, 2015 Author Share Posted July 25, 2015 To add to my troubles, I've heard back from Revell and they say that they no longer stock the canopies and that they have no more available. I am especially stuck because I do not have the skill or tools to really make my own canopy. I have tried a couple things and have failed, hard. Link to comment Share on other sites More sharing options...
harrison90 Posted July 25, 2015 Author Share Posted July 25, 2015 All problems aside, I'm actually quite pleased with this whole build. I have managed to get the big markings done. The decals ended up being great templates for making some masks. At least the were good for something. I am waiting on my masks to arrive and then I will get some of the smaller details painted hopefully this weekend. Any suggestions about what to do for all those, now missing, placards, or the canopy for that matter? Otherwise hope you guys like it so far. At this point this has been pin washed already. That brings you ups to speed to this point. Will have the latest news up later tonight. Cheers, Harrison Link to comment Share on other sites More sharing options...
harrison90 Posted July 25, 2015 Author Share Posted July 25, 2015 Er...you haven't actually done all this today have you?! It's one of the best treatments of this kit I can remember. Nice work. Haha, no. This has been up on LSP but I thought I might as well post here and stop being a lurker. Link to comment Share on other sites More sharing options...
Plastic Bonsai Posted July 25, 2015 Share Posted July 25, 2015 Good recovery on the decaling and sterling work on the extra detailing. I hope someone will volunteer a spare or surplus canopy for you. i am intrigued by your new supervisor though. We have one that looks identical and he's a weird mix originally from New Zealand, very affectionate and very fast. Link to comment Share on other sites More sharing options...
harrison90 Posted July 26, 2015 Author Share Posted July 26, 2015 Good recovery on the decaling and sterling work on the extra detailing. I hope someone will volunteer a spare or surplus canopy for you. i am intrigued by your new supervisor though. We have one that looks identical and he's a weird mix originally from New Zealand, very affectionate and very fast. AWESOME DOG! Mine is a boxer/retriever mix, named Batman. What type is yours? I have only sort of recovered with the decals. I still have none of the exterior placards. However with my post coming later today it will show what it looks like right now without it and I am still pretty pleased. Cheers Harrison Link to comment Share on other sites More sharing options...
harrison90 Posted July 26, 2015 Author Share Posted July 26, 2015 So here is where I'm at. Pretty much ready for final clear coat. Minus placards and a canopy yet I am still pretty pleased with this one. And the Eduard masks were awesome. Pain in the butt masking but a brilliant result: ... 1 Link to comment Share on other sites More sharing options...
harrison90 Posted July 26, 2015 Author Share Posted July 26, 2015 ... Hope you all enjoy. Cheers Harrison 1 Link to comment Share on other sites More sharing options...

Recommended Posts
Create an account or sign in to comment
You need to be a member in order to leave a comment
Create an account
Sign up for a new account in our community. It's easy!
Register a new accountSign in
Already have an account? Sign in here.
Sign In Now